Recommended
Likes
Comments
Share
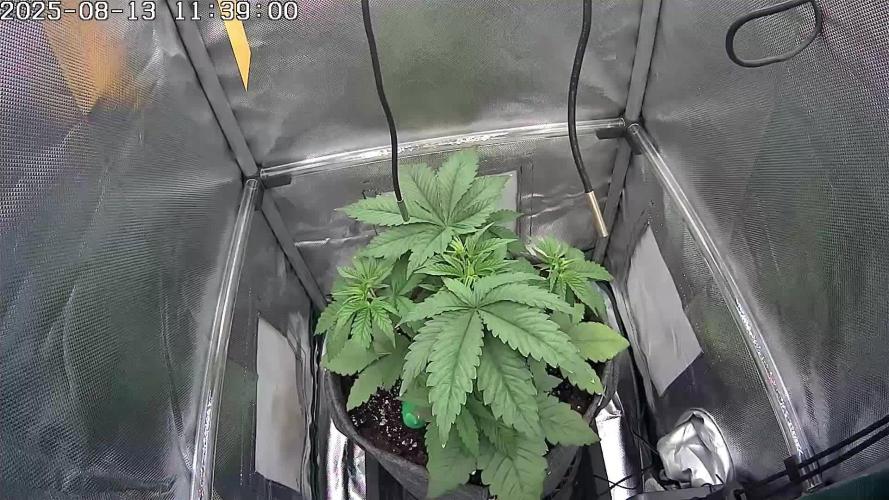
Week 2 and nice and green, we just gave some more organic nutrients like palm tree ash and some guanokalong powder, for the moment its seems to be all good, in 2 weeks I'll be adding some sugars and some more PK
Likes
3
Share
Everything went good. Had some issues with build up but first time in coco and autopots so was bound to be something! Haha but over all was easy !
Likes
2
Share
Its day 61 currently, i’ve given her the last feed and will start the flush now, even though she’s discarded most of her leaves already and is using up the remaining nutrients in the remaining leaves on her own. Most of the pisitls have started turning orangey-brown so harvest is right around the corner, and i dont have a loupe for looking at trichomes but i’ll be taking macro pictures using my phone’s camera and will harvest as soon as i start seeing a few turning amber. There isn’t enough detail in the pics to know if the trichomes are transparent or milky, but its easier to see the amber ones, so thats how i’ll proceed. This week’s song is Killing Me Softly by The Fugees, hope yall had a great week.
Likes
35
Share
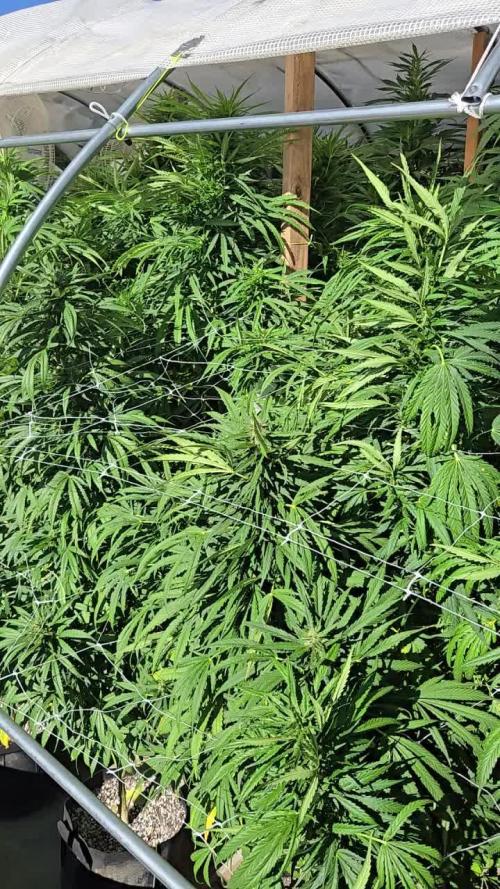
🍼Greenhouse Feeding BioGrow & Bio Bloom ⛺️MARSHYDRO The ⛺️ has a small door 🚪 on the sides which is useful for mid section groom room work. 🤩 ☀️ by VIPARSPECTRA (models: P2000 & XS 2000)
Likes
4
Share
Lemon Mandarin x2 week 5 I don't have a measurement cause I have lst clips bending branches I will measure when the branches straighten out from the lat clips
Likes
38
Share
Not going to call flower on this one yet, but it looks like she is starting to stretch and switching to flower. She has really strong branches and everything is running smooth. Tried to spread her branches out a little but she fights every bend. Probably just do some defoliation on her and let do her thing.
Likes
18
Share
F43 a bit of nutrient burn because of the high temps. SD2 smell : engine grease mixed with kerosine. Imagine spilling grease in a corner of a tire shop. SD2 isnt developing normal and wont probably yield much. SD3 smell : sweet engine grease.Very pleasant. Sour Diesel needs getting used to in terms of smell and aroma
Likes
2
Share
The plant grown on the outside terrace had to be moved to a larger pot and placed inside my kitchen because it was yellowish and the leaves burned. The weather was not stable and there were strong gusts of wind that ruined the factory. It is now improved.
Likes
5
Share
@TJHeadley
Follow
Tempature was getting to 60° at night and 67° during lights on. Bought foam board to put under the tents and an oil space heater to combat cold temps. Defoliated on 11-6-23. Top Dressed with BuildaSoil Craft blend ¼ Cup.
Likes
85
Share
@Grey_Wolf
Follow
How To Make and Use Organic Super Soil Seedsman Seeds Peyote Wifi Harvest Well here we are at the conclusion to many months of planning and preparation plus another 23 weeks of Growing. I Did a lot of reading and researching super soils and how they are made before I decided to actually make some . Then I thought to myself I should document the whole process from start to finish in diary form. This way any other growers who are interested can have a basic idea of where to start. and the likely conditions they may face. All of this began way back in August of 2019 when I first mixed the super soil mix (which can be found by looking at week one) aproximately Three months after that I started this grow and 23 weeks later Here we are at the end. Along the way I described the methods I was using to keep the soil fully active and productive at all times. Plus also some of my pre planning tips for flowering time. For example in week four.... I innoculated with the Mycorrhizal kit as instructed on the packaging next week I'll give the soil some help by feeding some seaweed solution mixed with mollasses and worm castings. This will provide a boost for both the plant via the roots and also benefit the millions of tiny microbes that live within the soil. Simply mixing and using the super soil as is will still work fine however by keeping the soil in perfect health as well as the Plant itself will pay dividends come harvest time. Week Six.... It can pay to plan ahead now for when the plant gets bigger and will need support. With this in mind I am going to use a premade wire Tomato type cage that is 1.5m high. This will hopefully provide enough support for the plants frame when it goes into Flower Next year. Planning ahead can sometimes help prevent potential issues from effecting your grow. Some things to think about and plan ahead for are as I mentioned Plant stability and support when it gets bigger. Week nine..... Planning ahead still I decided to dig a big hole aprox 1.5 meters by 80cm and to a depth of about 4 foot . Took a few hours of digging and shovelling but the end result with the plant lowered down into it makes it worth my effort and Back pain that will follow 😏 By doing this I have created a much cooler Root zone by having the pot well below surface level But Ive also knocked 4 feet off the overall plants profile which will aid me in my other concerns being Security. Week thirteen.... Diamotaceous Earth acts as a bug deterrent and can't hurt the plant in any way. I also mix some into the worm tea that I feed straight to the soil as Diatomaceous Earth is a fantastic source of Silica which we all know is extremely beneficial to your Plants Health. As Far as my super soil is concerned , so far I have not needed to feed the plants any fertilisers as the soil is providing everything the plant needs. All ive been adding is biodynamic food for the soil itself to keep everything under the surface happy and well nourished. Once flowering begins next month I will need to add an organic Booster to the soil that will replace any depleted resources. ***** But not everything went smoothly in fact I did the most damage to the plant in Week 17 I decided to be stupid and spray all my girls with potassium bicarbonate thinking it would "mold proof" my plants WRONG all did was burn the absolute shit out of the leaves. From then on it was a constant struggle to get this girl to produce anything because along with the foliar burning I also had to contend with next to no sunshine for many days at a time plus the constant leaf dropping no doubt reduced my potential yield. ****** Not everything was Doom and gloom either in fact by Week twenty one.... The Quality however is definately showing itself, with every single bud covered in visible frosty looking trichomes. The smell is really really Funky with undertones of spices. So even tho I'll probably only get around half of what I was hoping for ,the bud that I do get will be straight up fire. 👌 In the Final week before I chopped .... The Buds although very delicate and light, look very Frosty and Delectable. As for the super soil it is absolutely chock full of nutritional value so I will use it to Grow a fine crop of Broad beans this coming Winter. The growing of Legumes in the soil will actually benefit the soils health in many ways including making the nitrogen within the soil more readily available. **** On the 18th of March 2020 I chopped her down and hung the plant upside down in the greenhouse overnight. Next day I removed all the buds and stripped them off the branches. The buds then went into a hanging drying rack until adequately Dried for the trimming. After the first trim the buds went into paper bags for more drying time (aprox 3-5 days depending on temp rh weather etc) They then got a bit more of a trim and went into the Jars for Curing. I have had quite a few bongs of this already and I must say it is Really good hey!! So in Conclusion I hope that this Diary may help somebody who may be interested in growing organically with soil outdoors or indoors as well as provide an insight into how the use of all natural ingrediants can produce Good buds. Whilst this particular plant didn't get Big buds the Quality was outstanding and you only need to check out some of the other plants I have growing in the same soil mix as to the validity of of its Fertility. Now we come to the End of this Grow I'd like to thank a few growers who offered advice and/or support along the way @ROM101 @Med_in_Tropic @F4m0u5 @Shooey @MagicMan @Spinnnn Thanks guys I appreciate it Also thankyou you for reading this Diary and please leave a like at the end if you liked it Cheers Grey_Wolf Post harvest notes ; its now the 1st of May and the Broad beans and Peas that I planted in the super soil are doing very nicely this will not only provide me and my family quality organic food for our table but also the growing of legumes helps fix nitrogen to the soil and keeps it living and healthy for the next time I need it for canna 👍💪 Best way to be folks self sustainable and recycling your soil mixes will help reduce our footprint on the planet and save us money too 👍 So what are you waiting for Grab some basic organic ingrediants and make yourself some Organic super soil 👍👌 ##### Final update for this diary 31st May 2020 It's been just over 2 months since I harvested this Peyote Wifi plant and the buds have been curing for that time . Today I chose a bud to test and I am blown away by the perplexity of the high and taste profile , Bloody amazing 👍####### Thats it folks All over now after 3 months of making the soil then another 24 weeks of growing the plant and then another 2 months of curing to get to here 31st May 2020 It was a great fun grow and I hope I have inspired some of you to try making your own batch of Organic super soil 👍
Likes
15
Share
@K4TZ3
Follow
Diese Woche hab ich se umgelegt (LST) Die Woche war ok, bin soweit ganz zufrieden.
Processing
Likes
43
Share
START OF WEEK 4 FLOWERING. NUTRIENTS SAME 4 ML PER LITER RO WATER OF BOTH A & B. 2 ML PER LITER BIG BUD. MIXED UP 8 LITERS OF NUTRIENT SOLUTION --------------------------------------------------------------------------------------------------------- Day 64 April 18th - 2019 Both ladies had a little trim to get rid of thick interior. Day 64 April 18th - 2019 Both Jessica Rabbit & Elly May were fed 1.5 liters of nutrient mix. Day 64 April 18th - 2019 Temp in tent is @ 78.4° F. Day 64 April 18th - 2019 Humidity in tent is @ 51%. Day 64 April 18th - 2019 Jessica Rabbits Coco temp is @ 70.2° F. Day 64 April 18th - 2019 Elly Mays Coco temp is @ 70° F. --------------------------------------------------------------------------------------------------------- NOTE - Day 65 April 19th - 2019 The Lady in the coffee can is a clone from the Blue Cookies. The clone was 2 weeks old put in soil in the coffee can It was put in the tent straight to flower No Veg time at all the clump of leaves at the bottom was how tall it was. I have been feeding Her the same Nutrients I am using for Coco flowering with the Big Bud for Coco. --------------------------------------------------------------------------------------------------------- Day 65 April 19th - 2019 Both Ladies are looking good after their little trim. Day 65 April 19th - 2019 Temp in tent is @ 81.1° F. Day 65 April 19th - 2019 Humidity in tent is @ 55 %. Day 65 April 19th - 2019 Jessica Rabbits Coco temp is @ 71.8° F. Day 65 April 19th - 2019 Elly Mays Coco temp is @ 71.6° F. Day 66 April 20th - 2019 Ladies are looking good coming alone. Day 66 April 20th - 2019 Temp in tent is @ 79° F. Day 66 April 20th - 2019 Humidity in tent is @ 40 %. Day 66 April 20th - 2019 Jessica Rabbits Coco temp is @ 69.3° F. Day 66 April 20th - 2019 Elly Mays Coco temp is @ 69.4° F. --------------------------------------------------------------------------------------------------------- Day 67 April 21st - 2019 Both Ladies received 1 liter pre-mixed solution --------------------------------------------------------------------------------------------------------- Day 67 April 21st - 2019 The girls are looking fine. Day 67 April 21st - 2019 Temp in tent is @ 79° F. Day 67 April 21st - 2019 Humidity in tent is @ 47 %. Day 67 April 21st - 2019 Jessica Rabbits Coco temp is @ 70° F. Day 67 April 21st - 2019 Elly Mays Coco temp is @ 70° F. Day 68 April 22nd - 2019 Ladies are looking good no issues. Day 68 April 22nd - 2019 Temp in tent is @ 71.2° F. Day 68 April 22nd - 2019 Humidity in tent is @ 57 %. Day 68 April 22nd - 2019 Jessica Rabbits Coco temp is @ 67.6° F. Day 68 April 22nd - 2019 Elly Mays Coco temp is @ 66.6° F. Day 69 April 23rd - 2019 Both Ladies looking good. Day 69 April 23rd - 2019 Temp in tent is @ 69.4° F. Day 69 April 23rd - 2019 Humidity in tent is @ 61 %. Day 69 April 23rd - 2019 Jessica Rabbits Coco temp is @ 65.7° F. Day 69 April 23rd - 2019 Elly Mays Coco temp is @ 64.8° F. Day 70 April 24th - 2019 Both ladies are coming alone. Day 70 April 24th - 2019 Temp in tent is @ 67.1° F. Day 70 April 24th - 2019 Humidity in tent is @ 61 %. Day 70 April 24th - 2019 Jessica Rabbits Coco temp is @ 65.2° F Day 70 April 24th - 2019 Elly Mays Coco temp is @ 64.0° F.
Likes
3
Share
Week 2 under the TS1000, another week to go and the girls will start flowering 😁 excited about all these yummy fastbud strains! The next week i will add another TS1000 to this girls as my other grow will finish!
Likes
21
Share
2024-05-17 And they are in Turbo- Mode. ( explosive grow) They were growing around 30 cm, i did some training on them. but you dont see it anymore, just the topping is to see you can watch them grow, literally i think next week we will see some flowers. and they will go outdoors ( probably) just waiting for the best time reeders Info: Fatso GMO F1 Auto, a feminized hybrid strain, emerges from the crossbreeding of two autoflowering varieties: Fatso Auto and Cotton Candy Auto. This California-derived cultivar leans slightly towards sativa, offering growers a straightforward cultivation experience coupled with impressive yields, robust THC levels, and a delightful palate featuring sweet, candy, and fuel undertones. Thriving both indoors and outdoors, Fatso GMO F1 Auto exhibits above-average resistance to mold, while still benefiting from adequate ventilation, particularly in environments with higher humidity levels. Its exceptional resistance to pests and pathogens ensures hassle-free cultivation. While indoor plants maintain a compact stature of around 100cm or less, outdoor specimens can stretch a bit taller, reaching heights of up to 130cm when grown in open ground. Completing its entire lifecycle within a maximum of 75 days from germination to harvest, Fatso GMO F1 Auto delivers yields considered average yet impressive for an autoflowering strain. The combination of high resin production and elevated terpene levels renders it an excellent choice for cannabis extract production. Its terpene profile presents a sweet and funky aroma with savory hints of Skunk complemented by pine and floral notes. On the palate, it delights with flavors reminiscent of sweet candy underscored by subtle fuel undertones. With THC levels reaching a high of 24% and minimal CBD content, Fatso GMO F1 Auto delivers a balanced and uplifting effect, appealing to enthusiasts seeking a satisfying and harmonious experience.
Likes
6
Share
@Lazuli
Follow
Final 10 days shes on ripen now
Likes
5
Share
Coupe effectué sur les feuille déformé et sur la tête principale pour effectué une division. Toujours aucun signe de parasite ou de maladie.
Likes
5
Share
@most_dope
Follow
This is just for the gorilla zkittlez so far I will probably try to put all 5 on here but started 2 about 45 days apart from each other and the 5th seed about 3 weeks after the 2nd round. The 5th seed died from transplant shock (won’t be transplanting autos anymore) but the 2nd round of 2 plants just started flowering. I got 85 grams from the zkittlez and 60 grams from the afghan kush after drying. Not great but I’m happy it’s smokeable and smells/ tastes good. starting 2 bloody skunk today (5/11) because the gorilla cookies never germinated unfortunately :( . all out of seeds now so i will be maknig an order this week. still have 2 more strains to figure out when flowering kicks in more tho so that will be my fun for the next 1-2 months lol
Likes
45
Share
Info: Unfortunately, I had to find out that my account is used for fake pages in social media. I am only active here on growdiaries. I am not on facebook instagram twitter etc All accounts except this one are fake. Flowering day 4 since time change to 12/12 h. Hey everyone ☺️. 4 days ago she was placed in the flowering tent. Thanks to the training it has become very bushy :-). 1 g Enhancer Pro l cocos was added. As always, a cuttings were cut before moving 👍. Otherwise everything was cleaned and checked. Have fun and stay healthy 🙏🏻 You can buy this Strain and Nutrients at : https://greenhouseseeds.nl/ ☝️🏼☝️🏼☝️🏼☝️🏼☝️🏼☝️🏼☝️🏼☝️🏼☝️🏼☝️🏼☝️🏼☝️🏼 Green House Seeds Company Cup Clone 🏆 Type: Wonder Pie ☝️🏼 Genetics: Wedding Cake x OG Kush 👍😍 Vega lamp: 2 x Todogrow Led Quantum Board 100 W 💡 Flower Lamp : 2 x Todogrow Led Cxb 3590 COB 3500 K 205 W 💡💡☝️🏼 Earth: Canna Coco ☝️🏼 Fertilizer: Bio Grow Feeding ( GHSC ) , Enhancer ( GHSC ) , Bio Bloom ( GHSC) ☝️🏼🌱 Water: Osmosis water mixed with normal water (24 hours stale that the chlorine evaporates) to 0.2 EC. Add Cal / Mag to 0.4 Ec Ph with Organic Ph - to 5.8
Likes
2
Share
@Little
Follow
Empieza la semana 5. Un dia de estos, cuando tenga tiempo, pondre la malla para SCROG, espero no ir demasiado tarde. Todas las plantas se ven bastante bien excepto la más pequeña, que sufrió de quemaduras en los primeros días de vida. Aun así, voy a optar por dejarla crecer para ver que puede salir de ahi. Un saludo a todos y buenos humos!!
Likes
16
Share
@Mrg7667
Follow
Day 53 I dont know how i skipped a whole week? But it happens Plants are looking a little rough, i flushed 2-3 times with just greatwhite and water. Its weird because they got yellow so fast but the tips still look clawed im some spots so im scared to go back to full feed. Slowly added 1ml bioheaven and alga mic then 2ml/l bioheaven and alga mic. Tryingnto get back up to normal feeding