
Likes
Comments
Share


@KeemBboomin
Follow
This week is basically more LST my plant that split has repaired herself within four days and looking amazing and has the most growth out of the three Widows

Likes
26
Share


@Leonweed10
Follow
En su dia 14 desde el cambio 12/12....an tomado un buen tamaño,y ya todas sus flores principales tomando forma..

Likes
9
Share
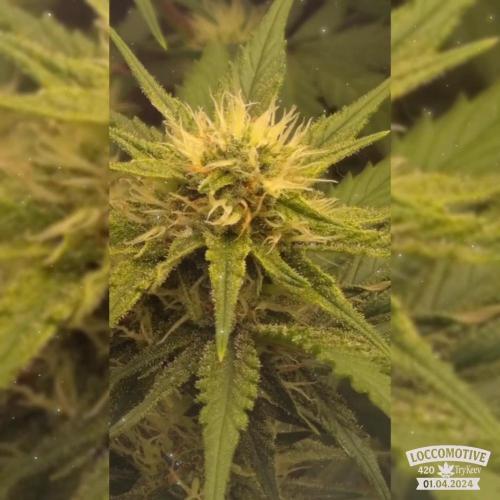

@LoccoMotive
Follow
🌿 Woche 6 – Eine entwicklungsreiche 3. Blütewoche
🌱 Wachstum
Auch wenn ich 2 gute Triebe verloren hab, ✂️bin ich super happy. 😄🍀
Beide Pflanzen sehen trotz allen Widrigkeiten super aus. 💪🌱
Es geht auf jeden Fall in Richtung Ernte. 🍂✂️
🌱 Living Soil
Da es mit diesem Run bald zu Ende geht, 📅 muss ich mir Gedanken machen,
den nächsten Grow gut vorzubereiten – gerade was das Bodenleben angeht. 🌏
Aber auch, was die verfügbaren Nährstoffe betrifft.
Eine Behandlung mit Wurmhumus und Gesteinsmehl + Komposttee-Dusche ☕💧
sollten ausreichen, um für den nächsten kompletten Run gerüstet zu sein. 🛡️🌱
💡 Licht & Schatten
PPFD wird langsam, Step by Step erhöht. 📈 Aktuell ca. 700 µmol/m²/s.
Je höher die Triebe wachsen, desto mehr Licht bekommen sie ohnehin. ☀️🌿
☀️ Wetter
Die Temperaturen sind und bleiben brutal: 25–31 °C 🌡️🔥
Die Lady´s schlagen sich tapfer unter diesen Bedingungen. 💪
💧 Gießen
🕒 Alle 2–3 Tage
🚿 Jeweils 2,2 l Wasser 💦
🎶 The Grow must go on! 🌱✨


Likes
10
Share


@DrJekyll_MrKush
Follow
Temperature is becoming a challenge, very hot outside and inside the house.
32 max and 26 min.
Plants are reacting well and are very very strong.
Smell is very earthy and fruity, it remind me some old kind of weed, like from 90’, sweet when watering them before night time and very spicy and earthy during the day.
Buds are getting fatter, I was a bit scared when I saw all little flowers getting red hair already.
Entering the 7th week, so normally 2 more weeks to go.
Changes from 6th to 7th week were amazing, I’ m curious to see how far they can get.
Ciao belli!
Processing
Likes
3
Share


@HeavensHarvest89
Follow
Great week a lot of new growth.. looks like this will be a rather large plants and its producing a lot of bud sites thanks to the training.. still no sign of flower but not worried hoping she will stretch some more.. but overall throughly impressed with the genetics
Likes
5
Share


@CannaIGrow
Follow
This plant seems to have grown much denser and better than my first plant. I just got the ac infinity ventilation setup with controller 69 for my 2x2, still trying to learn, hopefully grow #3 goes even better. Stay tuned


Processing
Likes
5
Share


@Laflare
Follow
Any feedback would be helpful this is my first grow and don't want to jack it up
Likes
23
Share


@TheOtherSide
Follow
This was my first photoperiod grow. It was a great experience. I kept the veg cycle short to keep it more manageable and so it wouldn't be as terrible if I screwed something up toward the end and needed to trash it. I'll grow MANY more photo plants in the future. Some of the autos have small yields. I doubt that's an issue with these babies! 💪 This girl got so big that even with added supplements to help keep her stem strong, almost all her branches bent. They were HUGE. The color got very light toward the end and the leaves got a little stress because I didn't manage the humidity well. *I think* It got down in the 20s a lot. It had a fairly strong aroma toward the end of the grow but nothing compared to it's tent partner. She looks like she started fox tailing a little toward the end. Also, most likely due to temp and humidity. Closets are hard to control. All in all, this was an enjoyable grow and I look forward to trying it again and hopefully growing an even better one!! 😁

Likes
7
Share


@Snooziecheesecake
Follow
So happy with the result of these gals. Harvested at around 15-20% amber on the tops of the colas, will be pressing the lower buds and trim with less amber into rosin :)
They really grew into massive hulking monsters with colas the size of my forearm :0 I am so impressed and proud to call this my first ever grow. I learned so much and I am so hyped to put all this knowledge into the next grow.

Likes
16
Share


@DaddyPrime2
Follow
Switched to flower nutes too early. Back to full strength terp tea grow 711. Atleast for the next 2 weeks, maybe less.
5/1/24
Plant is stretching now. FYI just to clarify, I switched lights to 12/12 on 4/20 but I am considering her being in veg still until I see more pistils. Probably the end of this week. After a 2 week transition period
5/3
2 days later and I need to get my damn camera in the tent! This stretch is starting to look like nursery explained. She’s supposed to triple in size. I thought I tied her down too much and she would stay short. I swear she’s grown an inch over night. Starting to dominate the tent. Literally 2 days ago, I said that I didn’t consider this week to be flower and still the transition phase. Now she looks like she’s fully in the flowering phase. She’s beautiful and I’ve been impressed since veg. Since I chose her as a clone I liked the way she was. Hoping she follows through🌱💚


Likes
5
Share


@Organic473
Follow
2 of the 6 survived...my bad! I am left with one male and one female which I would generate some seeds.

Likes
5
Share


@DRO420
Follow
They are about a month old and in vegetation stage . I am very happy to have these rare strains . The first is Purple Panty Dropper by Humboldt, at the moment I can not find for sale anywhere and actually be able to checkout but my friend that run a hydro shop got one and clones it , so I was blessed with one . Same goes for the Cheetah Piss which is a Cookies special strain . Let’s watch them ladies grow.

Likes
2
Share

@Barzenegger
Follow
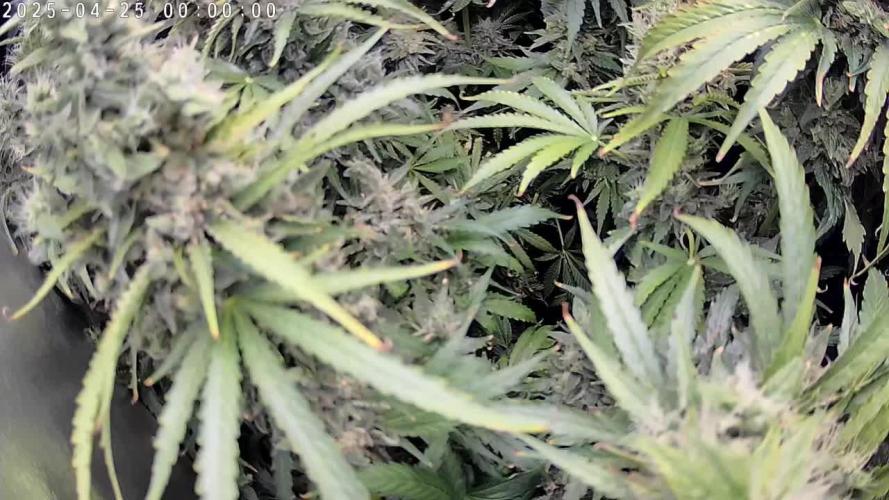
This is the last week, I've given them another tank filling, but the Chem Beyond Diesel CBD was chopped on day 69F, which was the second day of the week, SAD CBD, and NYC Diesel CBD followed on day 73F. I left the for a couple more days, but also chopped it on day 76F, which is already the next week, but I won't be creating another diary entry for that one as it was 3 days long and nothing happened.
The foxtailing makes it look like there are still a lot of white pistils, but most of the inner/lower ones are finished, the trichomes look ok, and I am growing impatient again.

Likes
4
Share


@knnabisgrower
Follow
En la segunda semana de vegetación fertilizamos con un estimulante de crecimiento, aplicando 1.5ml / litro con p.h regulado en 5.8.

Likes
101
Share


@Ferenc
Follow
Day 58, 11th of November 2020:
I set the lamp 15 minutes shorter to switch off earlier so they receive 11:45 of darkness. I would like to imitate the nature when longer nights come with time till the 4th week (when they will receive 13 hours darkness a day 15 minutes minus 4 times = 1hour) so every week 15 min longer darkness for 4 weeks and then back to 12/12 to have bigger buds from the 4th week....
Wao. Well, all good hopefully they will stop growing soon but the strech is not that much thanks for the trainings such as topping and LST....
Pistils are started appearing so they she the sex I think one more week to go and they will settle down concentrating on bud development.
What to say every 2nd day is fertilization with the mix and ratio above now we are waiting.
Anything else? Well just look atbthe pictures and decide what you think. I am pretty sure they look cool LOL.
This Gleato Zamnesia is very promising I really like the smell already she is nice but all of them I mean I am in love with all so. Kalinia Asia is nice and I am so excited for the Sweed Seeds ones the red girls OMG :)
