
Likes
Comments
Share


@bioaccessory
Follow
Hi!
On 23rd day I clean everything below the 3rd floor, and start Main-Lining. On 27th day I do the 2nd top, while everything is ok.
Glory to Ukraine! 🇺🇦

Likes
24
Share


@couplethatgrows420
Follow
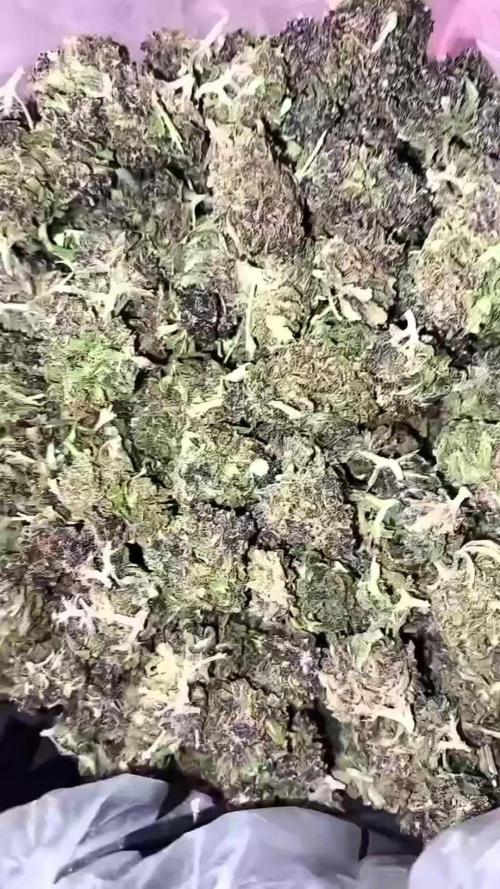
very nice harvest, can't wait to see the final weight one dried but they are really dense so don't expect them to shrink too much.
688.2 grams of wet flower (no big stems) and 100.6 grams of useable trim.

Likes
4
Share


Likes
5
Share


@TTerpz
Follow
Start of week 14 (hopefully the last)
Fed with water 5/15/25
Fed with nutrients: 5/17/25
Likes
36
Share


@Coopmc
Follow
First 2 transplanted I’ll do the other 3 or 4 soon
6 for 6 Go Fast Buds!!!
Strawberry Bannana for the win!!


Processing
Likes
11
Share


@Mickeymouse
Follow
Tento týden jsem kytky trochu přehnojil, jinak roustou moc hezky, těším se na přepnutí

Likes
21
Share


@FlavoursUk
Follow
Great grow from start to finish, very resilient plant and would of given her some more TLC if I was to grow her again.

Likes
36
Share


@TheGreenLeopard
Follow
had a bit of a nightmare. bit much on over water and may have had a nutrient lockout. took one sweet cherry pie out and replaced with seedsman northern lights auto. also added a few more of those in the tent 5th dec. was unfortunate as this week was for topping. went ahead and did it. will be very careful next week. Purple berry Kush came on strong this week. took the nutrients fine. less damage from over water.


Likes
6
Share


@Lowkeynotbad
Follow
At this point I’m not doing anything to the plant besides making sure it gets nutrients
Likes
16
Share


@OrganicPower
Follow
Week 5 flower going well. Nothing much to report. Increased the drip as she is taking in more water. Turned up the fans to 100% for maximum flow, and due to that, the tent got a bit warmer and a bit dryer, so the exhaust fan and humidifier are working a bit harder. 75-77 deg F, 50-60% RH. Not sure if the lights are to intense or if it’s purple coming through, but at the highest tops there seems to be a bit of discolouration on the newest growth, just at the tips of the new buds. But I’m looking really close and it may be purple, not brown. I’ll keep an eye on it and turn the lights down if symptoms worsen. This plant is growing strong and uniform. Average frost so far. Hopefully she keeps growing well until the end. Thanks for the views…keep calm and grow on!


Likes
12
Share


@FloKTC
Follow
This is my first Grow Report
at first i thought i messed up some seeds because 2 of them was for about 24 hours under SANlight so i have plant new seeds from Norden Seeds , Nordic Gorilla Glue, but only one died and maybe that was my bad too so at the moment i not sure which plant has which genetics but we will see more in the flowering stage , i hope this is my last time i flush seeds out of the soil 😅
Germination Method was 24H glass of water and then 24H Paper Towel
Germination start 16.7.2024
first leaves 19.7.2024 ( 2 out of 6 )
water i used : osmosis water with calmag ( proled )

Likes
6
Share

@LittleBigTrees
Follow
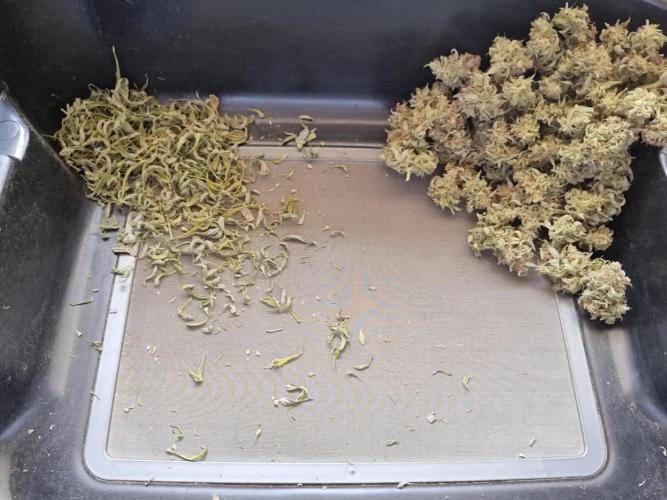
Just fed water for the last week, had to dry in a drying rack due to lack of space. Nice flowers. Both plants look very similar but both smell different to each other.
Both smell nice.
Will update.

Likes
10
Share


@Kinghaze
Follow
I put the autopot system on and put op a trellis net .
Unfortunately I did not have a scrog net with small compartments , but I will put a second trellis in week 2 of flower with the smaller ones

Likes
49
Share


@masterofsmeagol
Follow
6/23 Due To The Two 8 Day weeks this week will only consist of five days to get me back on track. SEE LAST WEEK FOR DETAILS. I DID ANOTHER EIGHT DAY WEEK. I'LL DO THIS WEEK AS SIX DAYS. THAT WAY IM BACK ON SCHEDULE. WATERED 6/22. WENT BACK AT NIGHTCAND WATERED ANOTHER GALLON WITH 1/3 TSP Armor Si. I mixed the solution with kelp you kelp me but I dumped it out. I've mixed silica with other nutes before but I had read something earlier about bioavailability issues and I didn't want to risk it. My plants are the healthiest I've ever grown. I'm considering transplanting the large 10th planet that I'm light depping. I also need to develop my ipm and my nute schedule. Still gonna have to keep an eye onvthe water situation. Luckily I have a buddy in my corner that's co tinualkt Bern a great help.
WENT BACK OVER AROUND NOON. BEAUTIFUL OUTSIDE AND THE PLANTS WERE LOVING THIS SUN. I DEFOLIATED SOME BURNED LEAVES AND MIXED A SOLUTION IF KELP ME KELP YOU THAT I PLAN TO FEED TO THE GARDEN TODAY. IM HAPPY WITH HOW THINGS ARE GOING. WE HAVE SOME RAIN AND THINDERSTORMS COMING. I NEED TO GET MY IPM UP AND RUNNING AND THE NUTES ONLINE. I ALSO NEED TO DECIDE IF IM GOING TO TRANSPLANT THE LIGHT DEP 10th PLANET. Went back over to put the girls to bed at six and if was still 90 degrees. The water from yesterday had dissipated. The tops were dust dry. I mixed two gallons of kelp you kelp me and fed it to the garden. Afterwards I pointed qbd found a couple plants that were more open to the wind were a little lighter. I know tomorrow will be very hot. Maybe quarter inch of rain. However after that it will rain (showers) off and on for days. I wanted to make sure the girls had what the needed to make it through tjis heat wave until they get that rain. I had another gallon mixed up and I'm thinking I should've given it to them. Oh well. I'd rather underwater than overwater any day. I did notice a burnt top on the plant furthest from the tarp that the sun JUST BARELY TOUCHES when the rest are in shade. I'll just raise the tarp a little. These are tiny problems. Can't upload video until tomorrow.
6/24 Good thing u gave the plants that water. I know it wasn't much but we didn't get any rain. Suppised to get a qtr in today and another qtr in tomorrow. Then rain a couple more days. It's working our really good for my watering schedule lol. Yesterday the girls got there first dose of a bottled nute. They got two gallons of kelp me kelp you (1/3 tsp per gallon) and another gallon of just phed water. I was going to do another gallon but held off due to the threat of syring rain. Didn't get it bur it looks like the plants loved the kelp. It had reached 90 yesterday. They look better today. It's 70 at 9 today. I LST the 10th planet in the 3 gallon. It's getting huge. I should start a separate diary for those three light dep plants. Its cool as hell watching this. One of the purple punches is flowering pretty good. I probably should start another diary for them. I'll be starting to feed my plants soon. Wondering if I should pinch plants again. TUCKED THE LITTLE GIRLS IN AT SIX AND SHOT A VIDEO AND TOOK SOME PUCTURES. PLANTS LOOKED PHENOMINAL! GOT HOME AND AROUND SEVEN IT JUST STARTED RORREBTIAL DOWNPOURS! THE TYPE OF RAIN THAT BREAKS STEMS. I SHOULDVE PUT MY OTHET TARP UP BUT I DIDNT. I WISH I HAD. IM A LITTLE NERVOUS. I KNOW THESE GIRLS ARE STRONG THOUGH! TOMORROW. ILL ROLL THE RARP UP AND SECURE THE BOTTOM FOR FAST ACCESS. IM ALSO GOING TO KOOK INTO FINDING A TOP FOR MY CAGE I CAN USE IN INCLIMENT WEATHER.
6/25 That little qtr in of rain we were supposed to get turned into torrential downpours and high winds. Luckily no REAL damage. If you watch the video you'll see what I mean. I'm going to havecto be cognizant moving forward. Noticed a few chunks from leaves butvplants are still healthy. I'm surprised how well these girls withstood this storm. They are certainly resilient. The 2 purple punch 1 10th planet that I'm light depping are flowering nicely now. They missed all the commotion from the storm as they were inside. It's smelling good. I'm happy.
6/26 It's what a friend would say is "maineing") out. That mistcthe plants love. I'm surprised the plants are doing as good as they have been considering the wind. Will be adding nutes soon. Need to add extra supports too. Light dep
6/27 Brief periods or torrential downpours. Light depped 3 gallon 0lants are under an overhanfcwhete the hatsxrain can't hurt them but they still get sun. They are really starting to flower now! I'm going to begin feeding with a base nute and a flower nute I think. I'm thinking about giving the light dep some open sesame or something similar. I need to set up a nute program soon but the plants ALL look so healthy! And it's been raining! I've only watered like once or twice since they've been in the big pots. I've seen zero pests aside from a chunk missing from a grasshopper. Usually by now I'd have battled half a dozen things and be battling another half dozen. However I was posing from clones. These are seeds and boy don't I see the difference!

Processing
Likes
17
Share


@greennug
Follow
they are all thriving, growing exactly as i want them to. sucking up everything i give them and they are on daily feeds. some of the autos are starting to flower, but im gonna stretch out veg for atleast another 4/5days for photoperiods. they are ranging in height between 45 and 75cm. west coast OG auto from fastbuds been the tallest at the mo. dinafem cookie strains showing preflowers now and everything going fine. no problems as of yet in the slightest. daily updates.


Likes
75
Share


@Kitties_and_Colas
Follow
~_~_~_~_~_~_~_~_~_~_~_~_~_~_~_~_~_~_~_~_~_~_~_~_~_~_~_~_~_~_~_~_~_~_~_~_~_~_~_~_~_~_~_~_~_~_~_~_~_~_~_~_~_~_~_~_~_~_~_~_~_~_~_~_~_~_~_~_~_~_~_~_~_~_~_~_~_~_~_~_~_~_~_
❤️💡🌱😽💨
We updated the diary to 3rd week of flower, we had our timeline a little messed up but back on track..
This plant has been eating a ton, we feed with every watering now and there's been no protest..if fact we may increase due to light shade. The FC-E6500 is an absolute beast of a light, I'm so happy my husband finally made the purchase for us..with lower power consumption and higher yields; this light will pay for itself shortly. We've been talking about also getting a 5x5 so we can utilize its full light footprint...
..You might notice a cheap "blurple" LED hanging from the scrog table,we hung it there to add some weight. If its not clear to tell from the photos, this plant is completely overgrown, we definitely let this go for far too long but I'm excited to see what kind of yield we'll get (this is our highest yielding strain by far).. I would be shocked by anything less than 1lb.. We've had the FC-E6500 at 50-75% for the first 2 weeks of flower, we're leery on distance still and didn't want to chance burning but with no signs of stress we decided to move it up to 100% today and we'll monitor colesly for a few days.. We run 3 tents but temps are awesome since dumping all the HID in that room, this is something we should have done years ago..things are going so smoothly and we couldn't be happier..Thanks as always for dropping by and happy harvests everyone!! ❤️❤️❤️
~_~_~_~_~_~_~_~_~_~_~_~_~_~_~_~_~_~_~_~_~_~_~_~_~_~_~_~_~_~_~_~_~_~_~_~_~_~_~_~_~_~_~_~_~_~_~_~_~_~_~_~_~_~_~_~_~_~_~_~_~_~_~_~_~_~_~_~_~_~_~_~_~_~_~_~_~
8/17
She is sooooo overgrown lmao 😹.. Josh gave her a haircut yesterday to thin her out some..we have no idea how she'll finish but I think a trellis net is in her future.. we have the FC-E6500 at 100% strength now and no signs of stress or burning to this point, this light is simply amazing..we may purchase a 5x5 so we can utilize its entire footprint..things are going awesome (albeit messy) but we'll update if anything changes..thanks Growmies, much love! ❤️❤️❤️
⚡Mars Hydro/FC-E6500⚡ Specifications ⚙️:
650 watt, full spectrum design, removable light bars and driver 🔌
Diodes: BridgeLux chips (3978 count!)
Veg Coverage: 6x6 ft 🌱
Flowering Coverage: 5x5 ft 🌼
High-Efficiency
PPFD: 1200umol/m²/s ☢️
-IP65 waterproof ratings, tolerant to high humidity grow environments 💦 ..
-Can be daisy-chained together and all controlled from a single light! 💡~💡~💡~💡~💡
~_~_~_~_~_~_~_~_~_~_~_~_~_~_~_~_~_~_~_~_~_~_~_~_~_~_~_~_~_~_~_~_~_~_~_~_~_~_~_~_~_~_~_~_~_~_~_~_~_~_~_~_~_~_~_~_~_~_~_~_~_~_~_~_~_~_~_~_~_~_~_~_~_~_~_~_~_~_~_~_~_~_~_

Likes
13
Share


@XanHalen
Follow
Apr 09:
Things are chuggin along, i think light may have been a factor in the brown spots, seeing similar symptoms on one of the other plants but very very minor in comparison....
I think it was too little calmag, i may have locked them out mid veg by using high concentration of nutes without watering till runoff (i now know, that is a no-go), and light stress. i have had them under 850-1050 ppfd when flipped to flower...
one of them is loving the light, one is big and bushy (had to defoliate later than i wanted), and one has good bud structure but pistils seem thin, and growth seems slower (the one with the brown polkadot party on its body) so thinking it may be stunted.
either way, im seeing denser buds, and im learning the ropes, thats enough for me :)
Apr 12:
Last feed day...
Trichomes look just about ready, will do 2 runoff waterings 48hrs apart, then 24-36 hr darkness...
Will try to post trichome pics....
Super excited to see the improvements from this run vs last run...!
