Likes
30
Share


@SubliminalSociety
Follow
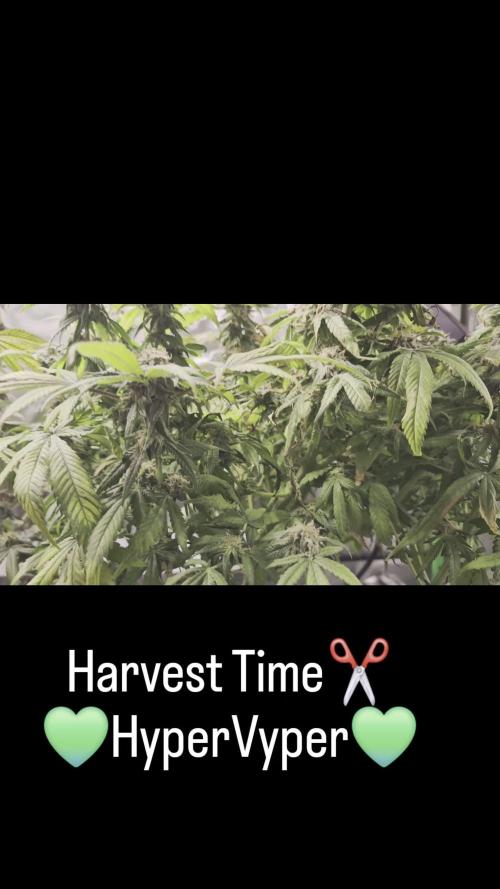
Week 4: Heartbreak and Hope 🍍💔
The sight that greeted me today was devastating. Snails. Everywhere. They'd turned my once vibrant pineapple into a skeleton of its former self. I could barely bring myself to take a single photo, the sight was just too painful.
Fueled by anger and determination, I launched Operation Snail Removal. Every half hour, armed with a flashlight and a bucket, I combed the raised bed and surrounding area. By the time darkness fell, I'd collected a horrifying 19 snails from her bed alone. Ugh.
The next night, thankfully, was snail-free. I can only hope that the damage is done and my pineapple warrior can rally from this. I believe in her strength, her resilience. She's got to pull through.

Likes
57
Share


@MadeInGermany
Follow
Hey everyone 😀.
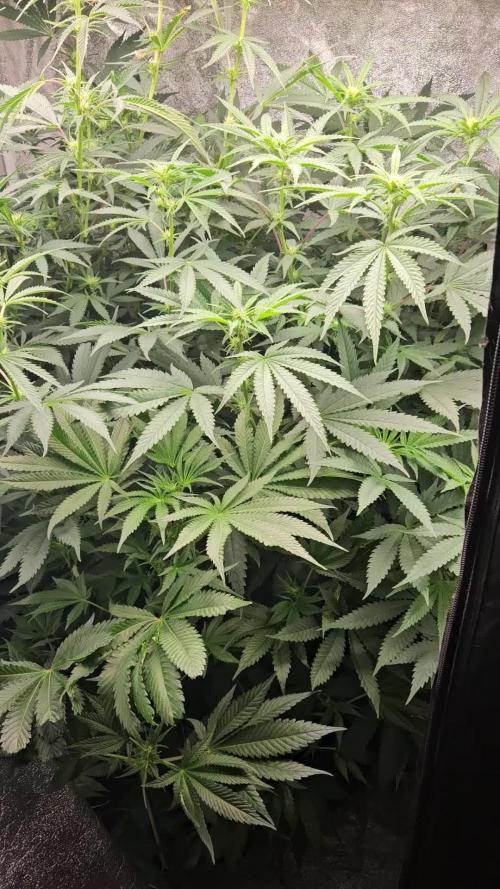
Another veggie week goes by and they are developing surprisingly well 😃.
Both phenotypes look very nice and have a perfect leaf green.
Both were topped again.
I wish you lots of fun with the update, and stay healthy 🙏🏻🍀
You can buy this Strain at :
https://sweetseeds.es/de/red-mandarine-f1-fast-version/
Type:
Red Mandarine F1 Fast Version
☝️🏼
Genetics:
Red Poison Auto®️ (SWS39)
X
Tangie (California Orange x Hybrid Skunk)
👍
Vega lamp:
2 x Todogrow Led
Quantum Board 100 W
💡
Bloom Lamp :
2 x Todogrow Led
Cxb 3590 COB 3500 K 205W
💡💡☝️🏼
Soil :
Canna Coco Professional +
☝️🏼
Fertilizer:
Green House Powder Feeding
☝️🏼🌱
Water:
Osmosis water mixed with normal water (24 hours stale that the chlorine evaporates) to 0.2 EC. Add Cal / Mag to 0.4 Ec Ph with Organic Ph - to 5.5 - 5.8 .


Likes
32
Share


@Fatnastyz
Follow
Week 8
10-14 Day 50
She looks, smells and grows well!
Little studdered on drinking.
What else but pics and videos!
10-16
Just water and pictures. Letting her do her thang!
Around 500-700ml water a day.
10-19
Some burn, so I ran some runoff, yep burn!
1200 ppm now 400.
😱 Well 2 weeks from here 🤣 or so.
10-20
Nothing changed.
.


Likes
6
Share


@WeedM8
Follow
So beautiful looks its going vey well apart of thats its too hot the heat from the lights if there is no air circulation it gtes very humid and i have to leave the tent open

Likes
10
Share


Likes
53
Share


@SativaSteve88
Follow
3 weeks into flower and all seem to be doing very well, getting a nice smell now when i open my tent, can not wait till these are ready to harvest, started to frost up now and all covered in trichomes, impressed with both the mimosa evo and tropicana banana upto now both seem to be forming nice dense flowers and the both strains have grew well from the start other than my wrong doing giving them a early shock and stunting them but theyve bounced back lovely and from how its looking its going to produce some nice smoke, cant wait thanks again barneys for suppyling me them to test out and create a diary on, see you next week for the latest update 👊

Likes
10
Share

@AestheticGenetix
Follow
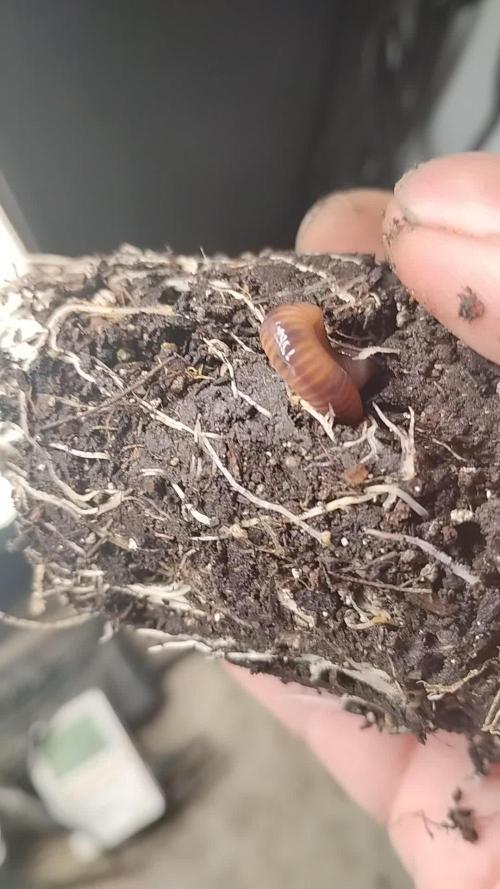
So they got really hungry this week. Could be the fact that I used super tiny solo cups. They're like 6-8 oz instead of like 16-18 oz. Ran out of food fast. Some of them had been turned into worm castings because of the large worms in such of a small pot/cup.
Transplanted them into 1 gallons. Amended with pretty much everything I have so they should be ready to rock and roll.
They're now under the real light. A mars hydro 3000 with 300 watts of power.
Fed them roots organics terp teas and a bunch of dr earths organic food. It's in the gardening section but it's a great organic nutrient for cheap.
They're on 12/12 and should start to show sex in the next couple of weeks


Likes
28
Share


@Felloffthegrid420
Follow
9 and half foot tall lil yellow low part look like red ants might be eating the bark was 4 or 5 there at the hole on the steam of the plant


Likes
19
Share


@Sato_Growing
Follow
Watering this week 0.6-0.7 L per plant
Did some more Lst to my plants and the seem to luv it. Also did some pruning to help the lower brunches to catch up
Some of the plants started to flower already. Running 20/4 day/night.
Likes
13
Share


Likes
2
Share


@Elguacho420
Follow
Buenas a tod@s... Otra semanita para estás nenas, como ya sabía a estás niñas lesva a faltar algo más de luz y sobre todo tiempo, para el tiempo q las tengo es verdad q ko crecieron mucho, ya q tengo bastante limitado el sol en la casa, pero ahora ya estuvieron y van a seguir algo más cerca de los focos, de momento salvarlas y ver q crezcan y no pretender tanto de ellas, serán lo q serán hasta q las vuelva a poner en indoor.. se las ve bien igual, van a su tiempo... Un saludo y buenos humos... 🏻🙌🏻💪🏻👍🏻
Likes
39
Share


@BudsBanditUK
Follow
She is plodding along nicely. A nice stocky plant. No smell just yet or any purple colours yet. On full feed with no issues. Hopefully even better than the last one.
Likes
13
Share


@Red_Rockst4r
Follow
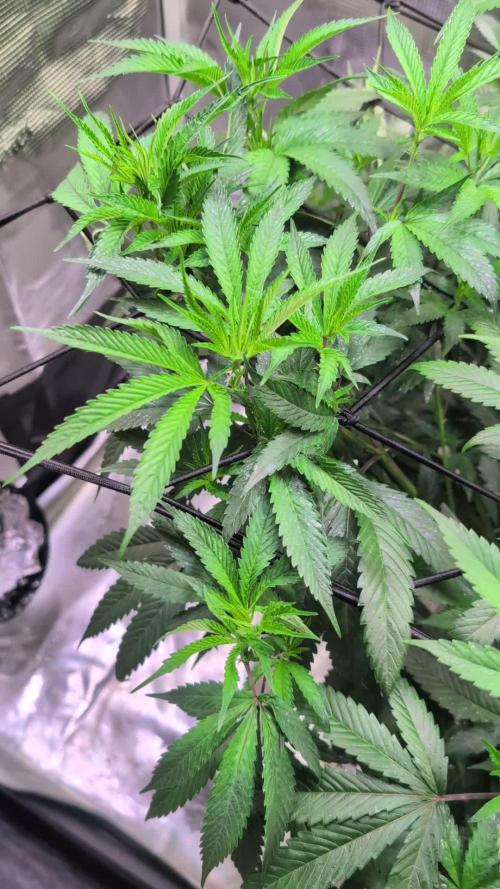
Week 9 marks a turning point for the grow. The main plants are deep into flower now, with dense buds that glisten under the HPS light. Their smell is intoxicating, filling the room with the rich, sweet aroma that hints at the potency to come.
Even the late bloomer has stepped up its game. While it’s still behind the others, it’s finally entering full flower, its smaller buds beginning to form. It’s got a unique charm, and I can’t help but root for it—sometimes the underdog ends up stealing the show.
The grow room feels like it’s nearing its peak. The plants are massive now, with thick branches bending under the weight of their buds. Every day brings new changes, and I can see the finish line getting closer. The hard work is paying off, and I can’t wait to see how these beauties turn out in the final weeks.
Likes
Comments
Share

@CanOli95
Follow
Auch hier gab es eine anstrengende Woche.
Ich will ehrlich sein. Ich habe nicht so oft den pH kontrolliert, wie ich es tun sollte. Es gab einen Drift, den ich nun wirklich engmaschiger kontrollieren muss. Thripse haben sich leider auch eingeschlichen, wahrscheinlich durch das Lüften und die Hitze. Hitze wirkt leider auch auf Insekten wie ein Boost. Ich habe die Pflanze etwas mehr durchlüftet und stärker befallene Blätter entfernt. Daraufhin habe ich Spruzid von Neudorff verabreicht. Es ist eher ein biologisches Mittel auf der Basis von Chrysanthemen, welches biologisch abbaubar ist. Weil die Pflanze sich noch in der vegetativen Phase befindet, ist die Anwendung auch noch bedenkenlos. Ich wollte es nur Mal erwähnt haben, falls sich jemand über den Schleier auf den Blättern wundert.
Gestern gab es eine eine NL mit EC 1,4. Heute habe ich nachgeschaut , da war sie bei 0,9. Hat mich etwas gewundert, Morgen wird nochmal kontrolliert , wie rapide der Abstieg tatsächlich ist .
Durch das entlauben ist mir erstmal aufgefallen, wie Dick der Stamm geworden ist. Das ist wirklich eine solide Basis für die Blüte. Wenn erstmal Raubmilben da sind und die Nähestoffe stabil sind, wird das denke ich ein sehr schönes Projekt.

Likes
7
Share