






Likes
4
Share


Likes
132
Share


@rhodes68
Follow
12/13
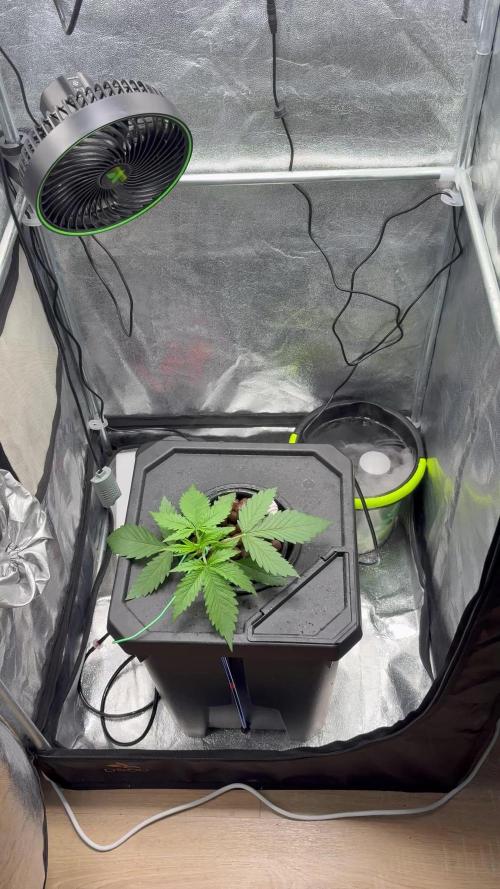
Continuing to leaf tuck and play with the sticks to bring out the tips
Love how its growing as it may be here longer than planned so nuets are now at half grow half bloom early in attempt to keep em in veg longer.
They had zero stress or deficiency in their little lives so far and that's showing in a longer veg period were it not for a new dry and grow coming up I might be tempted to let one finish under the LEDS, liking the new lights loving the coco and Coco-Tek (sole nuet atm)looking for ways to cut my work load 😁
See if I can buy the Stardawg another week or so
Feed set to 825-ish ppm 20% runoff at 2.0 quarts 5.9PH
Almost forgot, getting one of these reptile heat lamps for every tent they are loving the 24hr IR, an island paradise in the frozen north
12/14 Foliar feeding mainly just because I had it made up used as a preventative.
RO water, wetting agent, 1ml CalMag/quart, both plants at lights out.
12/15 Defoliation day - opened them up cleaned up lower end pics later maybe tons going on
12/16 Feed reduced 100ppm to 725ppm due to white tips on new growth, 30% runoff just to be sure.
12/17 Feed was good the white tips seem to be diminishing at least none on new stuff overnight
Removing Bloom nuets so all Grow , see if she flowers now, beginning to think there is something to this as never had an auto go this long in veg.
Foliar of Cal-Mag 1ml/qt +wetting solution as a preventative as seeing some "ghost" signs in some leaves, cant hurt as you really have to look close.
12/18 Guess who is going into flower 24 hrs after removing bloom nuets?
Not completely but its beginning fast, this last week of veg. Folded back in 2ml Bloom
Going to try that seriously on our next auto run but that's months away as two photo grows are on tap.
Likes
3
Share


@Organic473
Follow
It's been a crazy 10 days better late than never...i met this plant dug up. Must have been an animal sniffing the fish fertilizer regardless she bounced back after a few days...i am grateful i caught it a few hours after i reckon.
Road to 📈

Likes
8
Share

@Chubbs
Follow
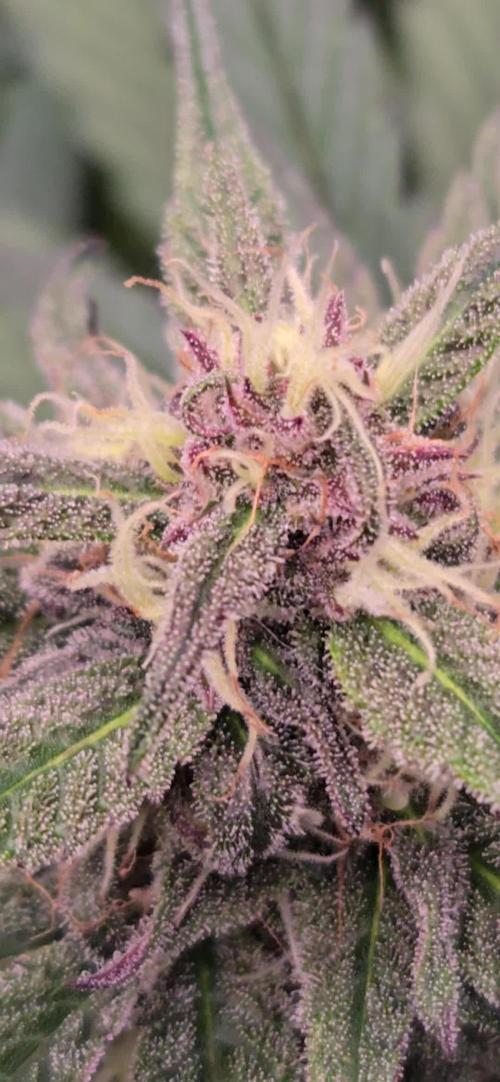
Weekly update on these lovely ladies. This week has been fun to watch the flowers form and swell. They definitely are starting to smell, as soon as you open the tent it hits you like a ton of bricks. I'll be doing my final dedoliation this week taking off some of the bigger fan leafs allowing more light to the lower flower sites. All in all Happy Growing
Likes
1
Share

@Bdog7878
Follow
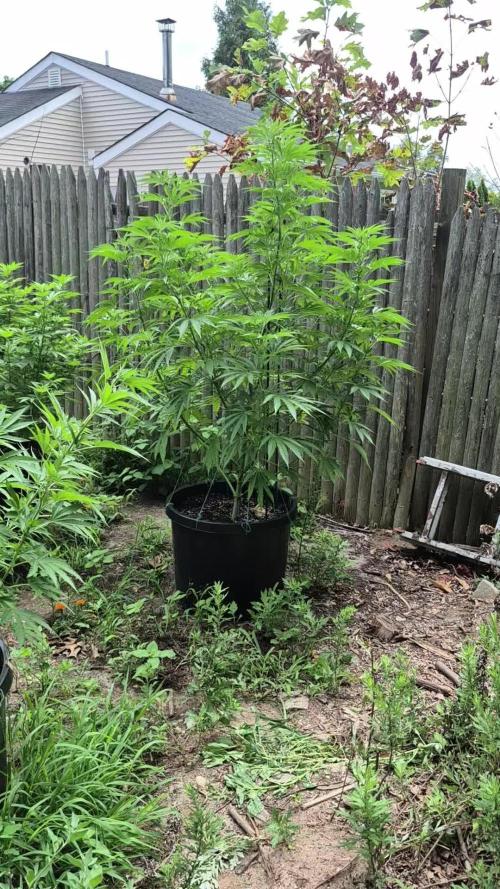
Flowering has started on the skunk and white widow and the end games are looking like any day now. All are healthy and doing well. They been needing water every two days so ive been feeding flora grow 3 part at 2 teaspoon grow 2 micro 2 bloom,than plain water than recharge at 1 teaspoon per gallon. The one end game is about 6 feet without the pot as of today and it just started the stretch. The other plants are about 3. 5 to 4.5 feet and bushy wider than a hula hoop for sure. I had some trouble at the beginning of the grow with low soil ph and some over watering on my part and from all the rain in the beginning but seems ive got it under control as they are looking and growing great. I did a little lst to open up the canopy and get some light down in there.


Likes
25
Share


@Grower_Of_Persia
Follow
week intel:
we reached the peak of flowering stage and need to cause a little more e.c stress from this week so e.c stress is twice a week
i reduced the amount of Nitrogen and calcium and stopped feeding silicate in other hand i raised the amount of base nutrient and booster
short story version: more K & P - less N
stresses :
a little E.C stress around 1.6 and 1.7 twice a week from this week
feeding:
i feed them 3 times this week with this order :
day 1 : i feed them high with base nutrients(calcium & micros (half dose) + Bloom) about 822 ppm - 1.6 e.c to cause a little stress.
day 3 : i feed them low dose of Top-Max + B-52 around 525 ppm - 1 e.c to let them recover a little but not fully recover still a little stress will caused.
day 5 : i feed them high dose of Feeding Booster around 850 ppm - 1.7 e.c to cause e.c stress again
guide of the week :
from this week we can cause more E.C stresses.
e.c stress if done correctly is one of the very few ways to increase quality in all aspects ( color , aroma , taste , bud structure , resin contents ) but if you over do it , listen carefully brother : it can reduce quality in every aspect so always look for signs and never reach the red line.

Likes
Comments
Share


@Hiraeth
Follow
The flowering stage lasted a total of 66 days, ending with harvest on April 11, 2024. Throughout this phase, we followed the most complete high nutrients program, ensuring consistent support for the plants.
While most strains responded well, an old Red Sour and one Shogun showed signs of overfertilization, likely due to their sensitivity. In contrast, the Monster Seeds genetics stood out, performing excellently from the beginning of flowering to harvest — healthy, stable, and vigorous until the end.
Likes
27
Share


@Smokepurple137
Follow
All doing perfect not alot to say, defoliated on 18/1/21 and tied a few branches where I could to make a little more room. Maybe 3weeks then ripen +flush Daily updates


Likes
4
Share

@XanHalenTGI
Follow
March 14 2026
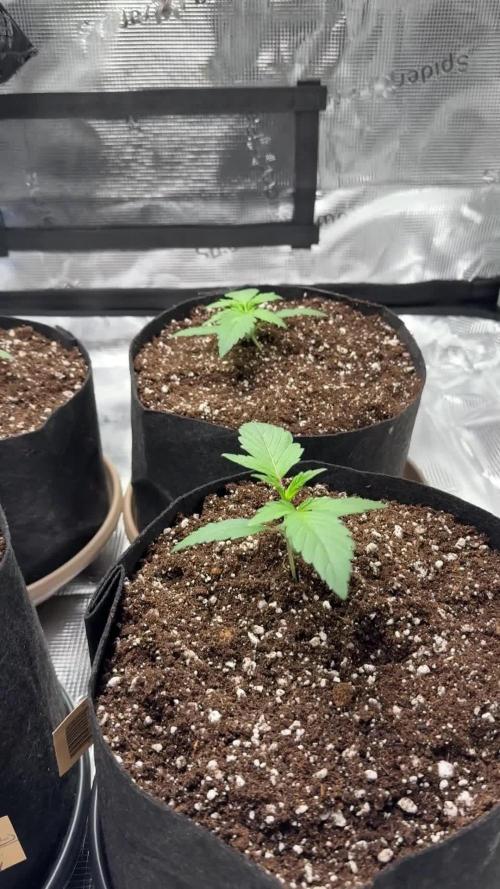
Gold glue are doing very well as expected, let's hope they start flowering a bit later than last round!
Today they were provided around 500mL of total input (250mL EWC slurry @ 1tbsp / cup, 250mL plain dechlorinated tap water @ pH 6.0).
175-210 Ppfd with Photone app on iPhone 16pro.
Likes
18
Share


@Diips
Follow
d.50 a few spots appeared on the leafs.
gave a 10 ml dose of bio p k and waiting a week before giving a dose of orgatrex and bactrex
edit: d.50 i also gave 0.5 ml of calmag from Biobizz
edit d.53 will i be giving her the orgatrex and bactrex treatment ✌️🌞
d.53 she got 20 ml orgatrex, 1g of bactrex and 0.5 ml of biobizz calmag
d.54 added scrog and did lst with clips to even out the height and space… still need to adjust it.
Likes
5
Share


@privateerjosh
Follow
OK so I nearly kill my plants and these were stunted and bonsai like.. Only got 30grams dry weight but were not all cbd and definitely contained thc.. Not so good for what the intended use..
But it's like opium...


Processing
Likes
5
Share


@FlowerBloom09
Follow
Plants are growing so fast , I would say pre flower , next week should be flowering , ran into mini bugs (maybe spiders) but I added more traps so stop them , also ran into mold this week but that may of been due to the humidity so I lowered humidity from 55 down to 45, excited with my first grows!

Likes
20
Share


@Bread_n_Buds
Follow
Here we are again ready to start again, always under the sign of Zamnesia, we make our fantastic plants and we show you what we are capable of. We have 5 autoflowering strains and 5 photoperiodic ones and now we present them to you.
The fourth autoflowering that we present to you is our version or rather of Zamnesia forgive me if I start to feel at home, it is the Northern Lights. Here we are talking about a classic of classics naturally in the Zamnesia version as I said above with the right ruderalis it really promises big harvests in a short time. There is great competition on this plant and I have grown some very good ones let's see what the home one is like.
To explain my germination method which is a combination of experiences acquired in the field and readings of the right advisors, I have chosen to divide it into phases so whoever wants can follow them and understand better step by step.
- Preparatory Phase ---- Check the average temperature in the room, humidity status to understand if it is the case to start or wait, I decided for the end of August because the temperatures start to drop towards the 22-25 degrees recommended for germination.
Then another thing more or less credible depending on the sensitivity is the control of the lunar phases. I believe in it a lot, it is a method that ancient farmers used to understand when it was best to plant depending on the attraction of the moon. To make my life easier I use a simple app that advises you on the right time to plant, harvest and put in the jar (depending on the lunar phases).
- Phase 1 --- Soaking in water. There are many authoritative friends who advise against this method due to the risk of drowning, but I have always been fine and I follow the rule if it opens in water the seed is almost certainly healthy and will come out of the ground 90% normally.
- Phase 2 --- Opening the seed in water. As soon as the seed opens and the root comes out a little, you have to be very very careful not to leave the seed in the water open for too long. This is why there is a risk of drowning. So as soon as the root comes out, it must be planted. Do not wait for it to stretch out a lot, you can wait a little longer in the absorbent paper, but not in water.
- Phase 3 --- In the meantime, while I soaked the seeds, I prepared my pots: I use small biodegradable pots (choose the ones with holes underneath for drainage). A few hours before working with the opened seeds, I moistened the soil with water adjusted to the right pH (5.8 - 6.2) and Plagron Power Roots. The small root is now open and we can make a little hole with a toothpick, widen it and insert the seed. Not too deep with the root facing downwards. From Serious Seeds we learned the dome technique: if you put a small dome of soil on the seed the water will settle on the sides avoiding overwatering problems.
- Phase 4 --- The plant emerges from the soil. So far I have not put the light, now I turn it on at minimum after half a day of soil to give direction to the seedlings. The first week the light will be gradually brought from 40% to 60% to go to 70% - 75% in the remaining weeks of veg. During the first week maximum, I keep the cycle of 24 hours to avoid stretching. Be careful not to exceed the first week at least with photoperiodic plants.
- Germination % --- In water 20/20 seeds have opened for good luck I'm waiting to talk when they come out of the ground but it seems that we are going towards an excellent percentage of germination..."Not too bad"...
- Soil and Food --- The soil used is entirely organic in its entirety and is the Plagron Promix that will be used with the 100% organic pack provided by Zamnesia complete with all the main fertilizers for your plant buy it at the link --
https://www.zamnesia.io/it/11457-plagron-easy-pack-natural.html
// Strain Description // Born from the rib of a classic, Northern Lights Automatic is a weed from the past, but with a futuristic update. This feminized version sees Northern Lights hybridized with a ruderalis to create an extra sweet variety, that all fans are sure to love. Growers can expect abundant results in just 9 weeks, from seed to harvest! -
- Get a seed of this fantastic strain --- https://www.zamnesia.io/it/3324-zamnesia-seeds-northern-lights-automatica-femminizzata.html
- Soil and Fertilizers entirely organic --- https://plagron.com/en
- Growbox --- https://www.secretjardin.com/
- Music and sound --- I made my girls listen to 432hz frequencies and music from www.radionula.com
- Z --- You can find these seeds, much more from the world of cannabis, mushrooms and an incredible series of accessories and gadgets on the reference site not only mine but of many growers ----
https://www.zamnesia.io

Likes
4
Share

@420DeepGrow
Follow
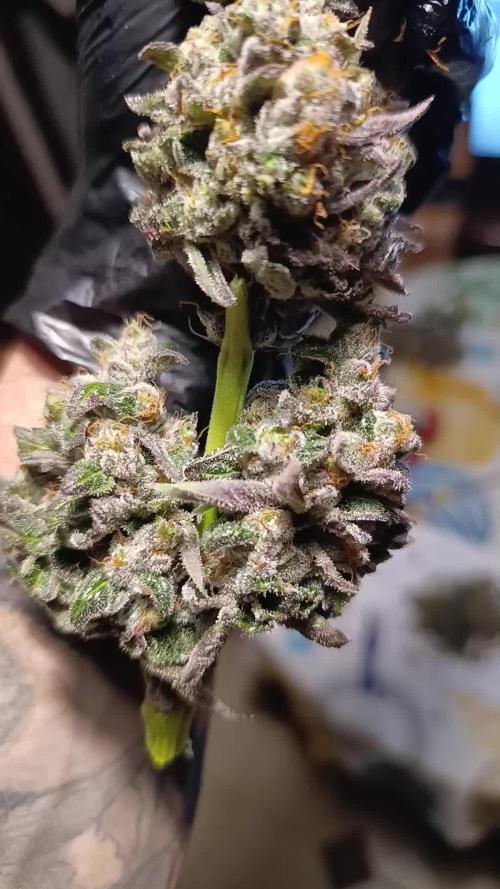
Semana de cosecha
La Papayton de 42 Fast Buds llega al final con una presencia brutal. Los cogollos, ya completamente formados, salen duros, pesados y bañados en una resina espesa que deja los dedos pegados al mínimo toque. Los tonos grisáceos y rojizos se han asentado del todo, dando ese aspecto maduro y uniforme tan característico de esta genética.
El aroma tropical se vuelve aún más profundo al cortar: dulce, afrutado y con ese golpe de papaya madura que confirma que estaba en su punto óptimo. La planta llevaba días sin crecer, enfocada solo en rematar tricomas y apretar cada flor.
Todo ha cerrado perfecto, tal y como esperaba.
¡Seguimos creciendo fuerte 💪!


Likes
5
Share


@K9bushman
Follow
Sun , water and nutrients(Ionic PK Boost) every 7-8 days, and she is happy


