Likes
Comments
Share


@cr0baron
Follow
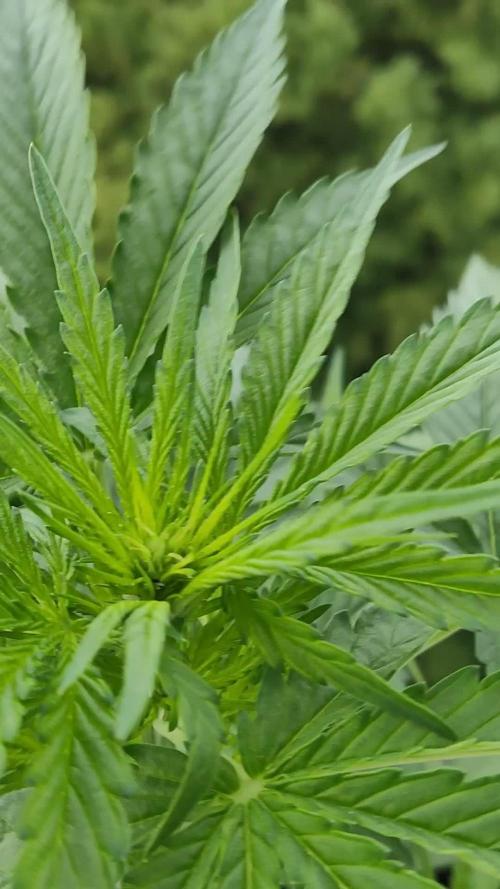
Buds getting super chunky now. This is probably my best grow to date.
Afghan Kush looks the most mature, I'll likely harvest this one first
Crack and The Beanstalk has a huuuge main cola.
Gushers colas are fucking phat at this point
Smell is louuuuud!
I've increased the airflow to try and reduce the relative humidity. The air in general is just quite humid so increasing airflow and circulation reduces humidity around the colas.
This is supposed to be the penultimate week. Next week is flush week. I'll likely harvest AK after about 3 days of flush, CATB will probably flush to close to 14 days simply because it needs more time to mature.



Likes
11
Share


@WhiteWidow
Follow
Perfectly healthy not a single sign of defficiency or burning / overfeeding.
First day of week 2 of flowering, next feeding i will add flowering nutes.


Likes
112
Share


@PEAKYPLANTERS
Follow
Hello, all grower brothers and sisters!
After a long wait, we are finally ready to show you all the finish of this harvest!
I shared a lot of content for you and I hope you enjoy it..
The growth of these plants has all in all been quite simple .... in comparison .... what they have been able to give me back .... is something extremely RARE
Between one phenotype and another they each took on a different color....but all extremely potent! Tight, solid buds that overflow with resin 😬😋 Just how I like them!!
my work combined with the scrog technique paid off and these fantastic lights meant that even the lower buds got the light they deserved ,But all this would not have been possible if I hadn't had good nutrients with me to enrich the soil at the right point! All without ever checking the EC of the ground 😉
Stay updated


Likes
36
Share


@Roberts
Follow
Gorilla Glue has done 1 week at a 12/12 light schedule. She should start stretching a lot this week. I did some training today. I trimmed up bottom more, along with defoliation in canopy. The trimmings have a strong smell. Good sign at this point. I have not increased the light strength since last week on the Spider Farmer G3000 light. It is running at 50 percent right now. Everything is looking good and I will upload my weekly video here once I get it done for you tube. Thank you Spider Farmer, and Amsterdam Marijuana Seeds. 🤜🏻🤛🏻🌱🌱🌱
Www.amsterdammarijuanaseeds.com
Thank you grow diaries community for the 👇likes👇, follows, comments, and subscriptions on my YouTube channel👇. ❄️🌱🍻
Happy Growing 🌱🌱🌱
https://youtube.com/channel/UCAhN7yRzWLpcaRHhMIQ7X4g
Spider Farmer G300w: https://amzn.to/3S2zvsd
Spider Farmer 10X20 Heat Mat Kit - https://amz.fun/lsa0J
Spider Farmer Amazon Store: https://www.amazon.com/spiderfarmer
Spider Farmer Official Site: https://spider-farmer.com
Discount code: saveurcash

Likes
14
Share


@Greenislandfr
Follow
Semaine de pluie plus des FIM faite au hasard et des taille apicale sur toute les secondaires pour réduire la taille de la plante. Elle grandit énormément et resiste a TOUT. trop d'engrais ? Aucun soucis , pas de soleil ? Oklm pour quoi faire ? Pas possible de mettre de l'engrais ?" Bof tu m'en a mis pour 3 semaine dans la geule"

Likes
Comments
Share


@SmokinTehHerbz
Follow
Developing into a nice little bush. just started pre-flower, should be a monster.

Likes
6
Share


@DrReginald
Follow
Она прекрасно растет и очень меня радует!))) мощный ствол, листья, боковые ветки практически догоняют центральную. Она буквально пожирает конкурентов в палатке занимая все место своими листьями и ветвями! Хорошо что скоро автоцветущие освободят палатку и все место, свет и внимание останется только для нее! Тогда и переведу на цветение.
(Начиная с этой недели буду выкладывать фото и видео роста в реальном времени.)

Likes
16
Share


@eldruida_lamota
Follow
Unos esquejes brutales pero las condiciones del cultivo no fueron óptimas tuvimos retrasos al principio con el crecimiento problemas de nitrogeno, algo de humedad alta al principio de la floración y aun así salió el producto muy bueno, tanto de sabor como de cómo con.
Sencillez es fácil de cultivar es rápida de cojones y además es resistente.

Likes
34
Share


@SalocinSpecial
Follow
D19 (10/12/2020): Beginning of week 3. I saw little yellow/brown spot on big leaves and new leaves, I need to check this closely. I fed with half of the recommended dose but 1.5-1.75L of water per plant. I was giving 1L max and I think it was not enough for the size of my pots. RH of the grow tent is now down at 60%.
- temps: 26C
- water: PH6.3, PPM: 410
- RH: 60%
D20 (11/12/2020): Today I saw thrips larva crawling on a leaf (see video above). That confirm my problem is not a nutrients deficiency. I know how I got them and it's a rookie mistake from me. At the beginning of my grows, I placed a plant in my tent that was originally outdoor during fall. I did not think that it would be infested with bugs. I removed it when I saw a little bugs fly in my tent but the damage was probably already done. I read about thrips and you can get rid of them if you act fast and soon in the infestation. I will go to my local horticulture store today and ask advices and ways to exterminated them. I'm a newbie in growing cannabis (plants in general) and I want the best for my plants. I'm learning from my mistake and that's what I like! Overall, both plants are growing fast and they react really well to LST. I readjust the tie 2-3x a day because the small leaves are growing so fast!
- temp: 26C
- no water
- RH: 60%
D21 (12/12/2020): I bought insecticidal soap and gave a treatment. RH is now at 55% and that increases air flow.
-temp: 26C
- no water
- RH: 55%
D22 (13/12/2020): The lamp is now 100% and at 28inch form the plants. They received 430 PPFD (33 000 lux). Temperature is under control around 26C with a new oscillating fan place on the floor. This air flow will help against bugs. LST continue every day to expose new leaves. I gave water with only Max Minerals.
- temp: 26.5C
- water: PH6.4, PPM: 275, approx.: 1,75L per plant
- RH: 55%
D23 (14/12/2020): LST continue, I try to bend one branch every day and readjust the other ones. I did not see more bugs but some of the new leaves are affected so I know they are still there. I ordered nematodes to help me prevent new larvae. They are suppose to arrive in two days.
- temp: 26C
- no water
- RH: 55%
D24 (15/12/2020): I removed leaves at the bottom of the pants last night. Probably 3-4 leaves per plant that were not receiving light. This morning I can see that it gave a good boost on the new leaves! Continuing LST as usual. The nematodes arrived earlier then expected. I will apply them tonight as soon as the lights turn on!
- temp: 26C
- no water
- RH: 54%
D25 (16/12/2020): I did a lot today! First, I sprayed another treatment of insecticidal soap on all my plants. Second, I removed one inch of soil in each pot and replaced it with new soil (same soil). I saw sign of what I think is phosphate deficiency. I was really shy on nutrients since beginning of the grow. Third, I fed full recommended dose for week 3 of veg. I gave 1.5L of water with nutrients and approx. 0.5L of tap water when I placed the nematodes. Fourth, I placed one tea pouch of nematodes in each pot as recommended. I also opened 2 tea pouch of nematodes and sprinkled them over the soil of all plants. Finally, I continued LST. It was a big week of up and down. Both plants grew like crazy and I discover an infestation. I think Banana Kush is in pre flower but I'm not sure. It's a bit early but they got so much stressed this week.
-temp: 26C
-water: PH6.5, PPM: 725
-RH: 55%


Likes
2
Share

@Sativa1444
Follow
HAZIRLIK
Dolabı yapmak bir aydan fazla ileri sürdü; aydınlatma, havalandırması, iç kaplaması, montajı, elektrik kabloları, fişleri, soketleri, prizleri vb. Tüm bunların ardından, sonunda bitirmem ve kotiledonların görünenlerin görünmediğini gördüm. Burada yaşadığım mücadeleyi okuduğunuzda, heyecanımı ve mutluluğumu paylaştığınızı düşünüyorum… =)
//LED'LER//
Torch LED'leri kullanıyorum ve bu LED'ler fiziksel olarak oldukça büyük olduğu için, dolapta ciddi miktarda dikey alan kaplıyorlar. Toplam 70 cm'lik aralıklardan 50 cm'ye düşüyorlardı ve toprak birleştirmeyle yaklaşık 40 cm'ye düştü, bu da başlangıç büyümesi için neredeyse hiç yer bırakmadı. Bunu çözmek için Torch LED'lerini plastik yuvalarından çıkardım ve bunları ayrı ayrı boyutlandırılmış ahşap plakaya düz bir şekilde monte ettim. Bunu yaparak yaklaşık 15 cm'lik alandan tasarruf sağladınız. Ancak dolap yapısı ve Torch LED'lerinin kendisi nedeniyle ciddi ısınma sorunlarının belirtileri.
//KABİN//
LED'leri açtığımda, 26,5°C'lik iç havayı alıp 37–38°C'de dışarıya atıyorlardı. Her lamba bana yaklaşık +4°C'lik bir ısı artışı sağlıyordu.
Durum böyle dönemde fan kapsamını artırdım; bu sıcaklıkta yardımcı oldu, ancak daha sonra içerideki nem 35–30'a, hatta %25'e düştü.
Ne yeteneğimi düşünürken, 12V çift taraflı bir Peltier modül kullanmayı planladım: soğuklukta bakır borular sararak bunu fan destekli bir sıcaklığa dönüştürdüm. Aslında işe yarayabilirdi, ancak sıcak ortamdan ısıyı uzaklaştırmak için ihtiyacım olan sistem çok hantal hale geldi. O yerde, "Büyüme hayali bitti" dedim ve vazgeçtim.
Birkaç gün sonra "Neden olmasın?" diye düşündüm ve dolabı balkona taşımaya karar verdim. Sonuçta, gizliydi - kimse içinde ne olduğunu bilmeyecekti - ve balkon uydu yoluyla mükemmeldi.
Dolap balkonunda olacağından, iç kısım ısıdan, yağmurdan, bölgelerden ve diğer zararlılardan tamamen yalıtılması gerekiyordu. Tüm delikleri ve ortamları sıcak silikonla kapatırım. Daha sonra ısıl işlem köpüğü yerleştirdim ve her şeyi bölme filmle kapladım.
Tüm bunları yaparken termostat, ısıtıcı, nemlendirme ve vantilatör için hiçbir şey görünmemesi için tüm kablo bağlantılarını da gizledim. LED aydınlatma için tek tek veya hepsi birlikte kontrol edilebilen ayrı lamba yuvaları ekledim. Ayrıca dolap kapağı açıldığında tüm ana LED'lerin otomatik olarak söndüğü ve yalnızca küçük bir 5W LED'in açık kaldığı bir sistemim oluştu.
Vantilatörü dolabın sağ üst arka köşesine monte ederek egzozu diğer noktalara yönlendirdim. Vantilatörün gücünde, negatif basınç o kadar güçlüydü ki hava yalnızca girişten katılıyordu - başka hiçbir yerde 0,001 m³ bile hava kaçağı yoktu. (Bunu hava verileri için değil, zararlıları uzak tutmak için yaptım.)
//SICAKLIK VE NEM//
Dolabı balkona taşındıktan sonra bu sefer ciddi bir soğukluk sorunuyla karşılaştım. Geceleri sıcaklık 8-9°C'ye düşüyor, gündüzleri ise 24-27°C'ye kadar çıkıyor.
Elektrikli fanlı ısıtıcılar kullanmak istemedim çünkü havayı çok kurutuyorlar ve tehlikeliler.
Peltier fikrinden ilham alarak tekrar düşünürken çözümümü bir PTC ısıtıcı kullanarak buldum. Hava bağlantıları olan iki alüminyum bloktan oluşan bir PTC ısıtma elemanı yerleştirdim ve gelen tüm havayı bu kanallardan mülkler.
Sistemi 24,5°C'de açılıp 24,6°C'de kapanacak şekilde ayarladım. Bu şekilde sıcaklık sadece 1,5° tolerans içinde -24,5 ile 26,5°C arasında dalgalandı ve LED sayıları azaldıkça daha stabil hale geldi. PTC'yi termostata bağlayarak ısıtma sistemini tamamladım.
Gündüz sıcaklık sorunlarının çözülmesi için, elektrikler 11:45'te kapanıp 17:45'te tekrar açılacak şekilde programladım; böylece 6 saatlik bir kesinti süresini elde ettim. Bu süre boyunca kabin yaklaşık 24°C'lik dış havayı çekiyor, maksimum 27°C'ye ulaşıyor ve ardından tekrar soğumaya başlıyor; tam da bu noktada PTC devreye giriyor. Böylece
daha önceki büyük yangının sorunu tamamen çözülmüş olmuştu.
Ayrıca nemlendirmeyi termostata bağlayıp %70'e ayarlayarak nem sorunu da çözülürm.
Tüm bu süreci 1,5 ayımı aldı ama değdi.
1-2-3. güne kadar tek led 3. günde 10. güne kadar 3 ledide açtım ama bitkide büyüme problemi olduğunu gördüğüm için ışıkları söndürüp tek ışık 40cmden devam ettim.
Likes
18
Share


@Onlygrow99
Follow
Empecé la germinación el 23/01/23 en un vaso de agua durante 12 horas, después al taper con servilleta húmeda 24 horas más.
Radícula de 2cm y las planto en maceta de 1L
Actualización estado de germinación 03/02/23:
Meto fotos ya con las macetas rellenas al 10º día y fotos del 7º día comparando las macetas y los tallos.
En cuanto el 2º par de hojas sea mas que evidente empezamos las semanas de crecimiento. Dentro de 2 o 3 semanas quizás, trasplantamos a maceta definitiva de 7Litros. Lo veremos.
Actualización 06/02/23:
Meto unas fotos de las plantas mas grandes, 3 días después para que se vea la diferencia de crecimiento.
Además un video mostrando el cultivo entero, la luminaria y la extracción. Llevamos 13 días desde la germinación.
Actualización 08/02/23:
A partir de aquí voy a empezara a contar ya las semanas de crecimiento. Hemos tenido 15 días desde la germinación.
Venga va, día 10/02/23 meto unas fotos mas, llevamos 17 días desde la germinación


Likes
2
Share


@zeux_dar
Follow
This are slowly but the color and the leaves seen to be sativa and nice size of the leave. This time i put some top crop veg to estimulate the growing, i hope you enjoy the little videos.

Processing
Likes
43
Share


@Pisstank85
Follow
In all honesty I'm not sure if I got the nutrients dialed in . I tested runoff and it was all within range of soiless mixes , calibrated my ph meter every watering as I thought maybe that's why I was getting yellowing leaves . They are still growing and budding rapidly and seemingly on par with what I've seen with others in like mediums so I'm trying not to worry too much . My carbon filter shit the bed already so my Mrs isnt happy with me today as my whole basement wreaks . The plants went from not too bad to wicked bad smelling within a couple days . I've been defoliating but do you think I should do more ?
Likes
128
Share


@Tropicannibis_Todd
Follow
So this was my first ever Tiny Pot 👈 wasn't sure if I could even do it 🤔 But instead it was a blast , she grew even better then expected , so much so I may do another 👍
She was a hungry plant the hole cycle, figuring out her feeding became a great learning tool , I gained alot of experience growing this one 😀
I used rain water the hole grow , to which she required feeding daily , some day twice 👈
👉I added 4 straws in week 4 to help with air flow to the roots and it worked 💪 So check week 4 to see what I did 😀
👉 Big thanks to all my Growmies out there in GD land 👈 Much appreciated 🙏
Thanks To MarsHydro for the TS1000
👉I used NutriNPK for nutrients for my grows and welcome anyone to give them a try .👈
👉 www.nutrinpk.com 👈
NutriNPK Cal MAG 14-0-14👉 Every Week
NutriNPK Grow 28-14-14👉 Weeks 2 & 3
NutriNPK Bloom 8-20-30👉 Weeks 4 to 8
NutriNPK Bloom Booster 0-52-34👉 Weeks 4 & 9