
Likes
Comments
Share


@Terrell_Growens
Follow
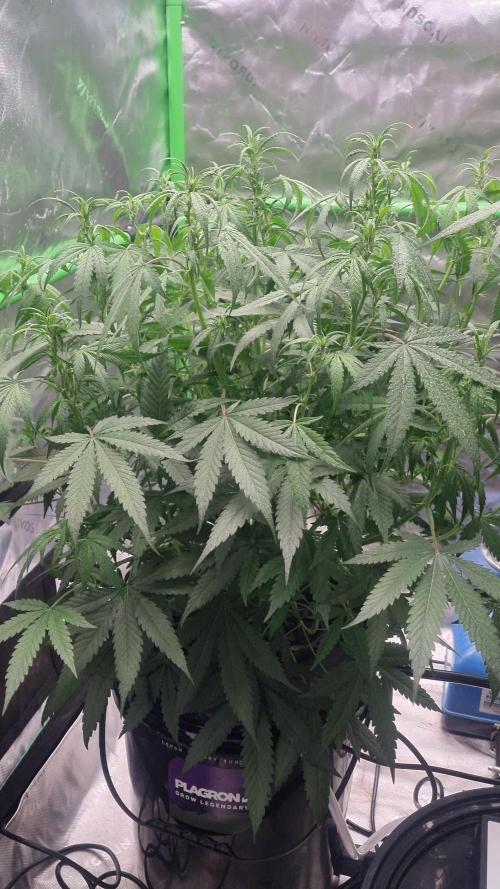
Nothing too exciting to report. Kind of stretched more than I'd like so I'm propping it up. I'll let it grow for another week or 2 before putting it in a bigger pot.

Likes
22
Share


@Ieiogrow94
Follow
Eccoci alla fine!!!!
Pianta dedicata al maestro Franco ❤️
Ottima resina, ottima forma, ottima genrtica!!!
Super consigliata a tutti, odore molto forte di limone sembra il sapone per lavare i piatti “lava”
Ora giù con le prossime!!!
Grazie a tutti per il supporto ❤️🔥🌲

Likes
3
Share


@123Grow
Follow
This is for the RQS autumn cup.
I also use SST’s: Corn and Lentils
LABS ( lactic acid bacteria serum)
Looks like I have 137 days to harvest these 4. So that means 2 full months of veg and 65 day of flower.
Happy growing to everyone

Likes
20
Share


@TeamQuality420
Follow
The notes will follow just trying to get all caught up !
Stay tuned 😉

Likes
10
Share

@Ieiogrow94
Follow
Eccoci qui!!!
Tutto procede per il meglio, i pistilli sono usciti e ora si va dritti dritti alla maturazione, NE VEDREMO DELLE BELLE!!!
Che dire se non WOW, due bimbe in salute e dalle quali mi aspetto molto!!
Reagiscono molto bene alle fertilizzate e già emanano un odore veramente incredibile, OTTIMA GENETICA!!
Grazie a tutti per il supporto ❤️🔥🌲

Processing
Likes
17
Share


@greennug
Follow
they are all thriving, growing exactly as i want them to. sucking up everything i give them and they are on daily feeds. some of the autos are starting to flower, but im gonna stretch out veg for atleast another 4/5days for photoperiods. they are ranging in height between 45 and 75cm. west coast OG auto from fastbuds been the tallest at the mo. dinafem cookie strains showing preflowers now and everything going fine. no problems as of yet in the slightest. daily updates.


Likes
10
Share


@extraterrestrial1
Follow
-------------------------------------------------
Day 22
Water: N/A
Humidifier: 45% (LOW-MIST)
Fan Speed: High
Light on @ 19:00 (26.4° celsius @ 48% RH)
Light off @ 13:00 (22.8° celsius @ 56% RH)
-------------------------------------------------
Day 23
Water: N/A
Humidifier: 45% (LOW-MIST)
Dehumidifier: On
Fan Speed: High
Light on @ 19:00 (27.6° celsius @ 46% RH)
Light off @ 13:00 (27.1° celsius @ 51% RH)
-------------------------------------------------
Day 24
Water: N/A
Humidifier: 45% (LOW-MIST)
Dehumidifier: On
Fan Speed: High
Light on @ 19:00 (26.2° celsius @ 51% RH)
Light off @ 13:00 (22.7° celsius @ 40% RH)
-------------------------------------------------
Day 25 (Feed day: 15 tbsp Worm castings + 5 tbsp 2-8-4 Gaia Green Power Bloom)
Water: 0.5 Gallon RO water + 5ml Remo VeloKelp
Humidifier: 50% (LOW-MIST)
Dehumidifier: On
Fan Speed: High
Light on @ 19:00 (27.1° celsius @ 48% RH)
Light off @ 13:00 (23.0° celsius @ 50% RH)
-------------------------------------------------
Day 26
**LST**
Water: N/A
Humidifier: 50% (LOW-MIST)
Dehumidifier: On
Fan Speed: High
Light on @ 19:00 (26.8° celsius @ 48% RH)
Light off @ 13:00 (23.5° celsius @ 50% RH)
-------------------------------------------------
Day 27
Water: N/A
Humidifier: 50% (LOW-MIST)
Dehumidifier: On
Fan Speed: High
Light on @ 19:00 (27.7° celsius @ 48% RH)
Light off @ 13:00 (23.4° celsius @ 50% RH)
-------------------------------------------------
Day 28
Water: N/A
Humidifier: 50% (LOW-MIST)
Dehumidifier: On
Fan Speed: High
Light on @ 19:00 (26.7° celsius @ 50% RH)
Light off @ 13:00 (23.2° celsius @ 50% RH)
-------------------------------------------------
Likes
61
Share


@Verlido
Follow
Week 11 - Day 1 : Pinched branches from subject 1 and 2. As seen in the videos uploaded.
Week 11 - Day 2 : Changed water schedule to water-water-feed, watering my plants with 4 Liters per plant every 3th day. Pinched branches recovered successfully.
Week 11 - Day 3 : Pinched lower branches of subject 1, take a good look and tell me what you think!
Week 11 - Day 4 : Pinches branches of subjects 2 and 3, take a good look and tell me what you think!
Week 11 - Day 5 : Pinches branches of subject 1, take a good look and tell me what you think, had my first harvest of ladybugs in the garden and released them on my plants, noticed that I have very little spider mites on my plants. Posted week 1 to 9 on my diary.
Week 11 - Day 6 : Woke up to subject 5 being damaged, What could have caused this? Too heavy branches? Maybe an animal that accidentally broke the branch and took off.
Week 11 - Day 7 : Pinches branches of subject 3, take a good look and tell me what you think!

Likes
22
Share


@Marquise_ao_Sul
Follow
For me growdiaries its very good because help to manage my weeks and get schedulle!
I can compare and talk to another growers its nice!000000
Likes
8
Share


@dreamLife
Follow
Se ha estirado bastante poco en esta prefloración, al final de esta semana se hace una poda de ramas y las hojas que tapaban algunas flores.
Likes
11
Share


@Napo89
Follow
Effettuato il lavaggio delle radici. Direi al massimo ancora 2 settimane per raccogliere. I fiori sono belli profumati, resinosi e compatti :)

Likes
7
Share


@Tio_Shuni
Follow
Como pasan de rápido las semanas!
Las señoritas bien.
Ya en la semana 6 de crecimiento, pensaba en dejarlas hasta la semana 8 vegetando, pero la sharkshock de la parte superior izquierda me tiene algo indeciso, siento que me quedará corto el espacio de 1.80 en la carpa, espero no sea el caso. Es la que más toma agua 🤭
Veremos hasta la semana 7 que tal y viendo eso veo si las pongo en flora, hasta ahora con el riego de 6.2 esta todo super, abonando con productos orgánicos, esperando a tener una buena cosecha.
Pronto les seguiré contando que tal :D

Likes
4
Share

@MrWeeedWorld
Follow
Kompakt, kräftig und voller Versprechen
Während andere Pflanzen noch damit beschäftigt sind, in die Höhe zu wachsen, verfolgt die Lemon Cherry Sundae ihren ganz eigenen Plan. Sie konzentriert sich nicht auf Größe, sondern auf Struktur – und genau das macht sie so interessant.
In dieser Woche hat sich die Pflanze zu einem dichten, kräftigen Busch entwickelt. Die Internodien bleiben angenehm kurz, wodurch bereits jetzt ein sehr gleichmäßiges Blätterdach entstanden ist. Zwischen den zahlreichen Seitentrieben bilden sich überall frische Blütenansätze, sodass man schon jetzt erkennen kann, wie viele zukünftige Colas entstehen werden.
Besonders gefällt mir die Vitalität der Pflanze. Das Laub zeigt ein sattes Grün, die Blätter wirken gesund und die gesamte Pflanze vermittelt den Eindruck, als würde sie sich im RDWC-System rundum wohlfühlen. Jeder neue Austrieb entwickelt sich kräftig und gleichmäßig.
Der Stretch fällt im Vergleich zur Mango Cherry Runtz deutlich kompakter aus, dafür investiert die Lemon Cherry Sundae ihre Energie sichtbar früher in die eigentliche Blütenentwicklung. Genau diese Wuchsform könnte später für besonders dichte und gleichmäßig aufgebaute Buds sorgen.
Von Woche zu Woche wird deutlicher, welches Potenzial diese Genetik besitzt. Die Basis für eine ertragreiche Blüte ist gelegt, und jetzt beginnt langsam die Phase, in der sich aus den vielen kleinen Blütenständen nach und nach kräftige Colas entwickeln werden.
Ich bin gespannt, wie sie sich in den nächsten Wochen entfaltet. Bis jetzt macht sie einen hervorragenden Eindruck und entwickelt sich genau in die Richtung, die ich mir erhofft habe.
--------------------------------------------------------------------------------------------------------------------------------------------------------------------
Compact, Vigorous and Full of Promise
While some plants are still focused on stretching upward, the Lemon Cherry Sundae follows a completely different strategy. Instead of chasing height, she invests her energy into building a compact, well-balanced structure—and that's exactly what makes her so exciting.
This week she developed into a dense, vigorous bush with short internodal spacing, creating a very even canopy. Fresh flower sites are now forming throughout the entire plant, making it easy to imagine how many future colas she is preparing.
One thing that really stands out is her overall vitality. The foliage remains a rich, healthy green, every new shoot develops evenly, and the entire plant looks perfectly comfortable in the RDWC system.
Compared to the Mango Cherry Runtz, her stretch is much more controlled and compact. Instead, she appears to shift her energy into flower production much earlier, which could ultimately result in dense, uniform buds across the whole canopy.
With every passing week, this genetic continues to reveal more of its potential. The foundation has now been built, and the exciting stage begins where all those individual flower sites will gradually merge into thick, resin-covered colas.
I'm really looking forward to the coming weeks. So far, she is developing exactly the way I had hoped and continues to impress with her compact yet incredibly productive growth habit.
Likes
10
Share


@Yolka
Follow
As for the ground - worked for 99%. Water+organic stimulants = great set-up. Saw a bit of an excess of nutrients, I will take that into account next time.
120 grams of flowers not including trimmings, yes, there are some sugar leaves - and I'll keep those :))


Likes
21
Share


@gr3g4l
Follow
la semana empieza con la poda de hojas abanico.
y termina con doblado de ramas.
La nº1 que sacó tres ramas por nudo va por libre, le cuesta más crecer y tengo que ir podando y doblando a medida que va creciendo.
La nº2 y la nº3 ambas terminan la semana listas para despegar.
Likes
12
Share


@Earthling37
Follow
Week 10 Harvest, will update with dry results soon
Use code GROWITGD for a 20% discount over at www.Zamnesia.com
They have a wide variety of smart shop and headshop products, such as cannabis seeds, dried plants and herbs, vaporizers, magic truffles, and mushroom grow kits.

Likes
24
Share


@Firepharmer
Follow
Update the to a 4x8 this week and added a HLG 300 V2 RSpec with the futur vert FM8 flora max 660watts pumping 960 watts now ..
Every thing is stacking up an fattening up beautiful in week 4 , The frost is coming out like a snow storm now in to week 5 flower ... I’m very impressed with the bud size on the slurricane ix this early on !!


Processing
Likes
11
Share


@BlumenBot
Follow
1/4 - fed 1gal distilled water, 6.0pH. Starting RAW nutes next feeding.
1/6 - first RAW feeding. Came out rather low ppm so I may double my feeding chart for flower. Everything else is looking good.
72.7*F
5.8pH
818 ppm
4g BLOOM
0.7g Phosphorus
0.75g Kelp
0.55g Cal/Mag
0.5g ominA
2g Microbes Bloom Stage
1.25g Amino Acids
0.25g Enzymes
1/7 - dropped the AC Infinity controller to level 2 as an experiment overnight to see how temps will rise in both compartments. Light is at about 900ppfd a few inches below the lowest tops
1/9 - no issues with fan speed at 2! RAW feeding tonight.
70.5*F
6.1pH
1390 ppm
8g BLOOM
0.96 Potassium
1.5g Kelp
0.25g Cal/Mag
4.2g Microbes Bloom Stage
1.25g Amino Acids
0.25g Enzymes
Also found a new way to mix my RAW nutrients without having them stick to the bottom...small landscaping pond pump! It gets the water moving nicely and I just drop the dry nutes in, mixes it for me and I can easily fine tune PH and test PPM without having to shake and take samples! Huge win.
1/10 - She's getting fatttttt!!! Long time to go but just sayin...my lady in veg needs at least 3 weeks so hopefully I'm not stepping on myself here soon!

Likes
14
Share


@LokalGrenz
Follow
Still just water and some fish shit
Jan. 1 Happy New Year welp to start new year off drop my very cheap PH meter in the bucket water and now the readings are off and I probably watered them today with wrong pH water Sour diesel looks cool didn’t water today soil was still moist but the amnesia haze be


