
Likes
Comments
Share


Likes
49
Share


@Reyden
Follow
Ringrazio Seeds Mafia per avermi mandato questi semi sono veramente curioso di vedere come cresceranno! Gli ho tenuti tutti e tre per 2 ore a bagno in una soluzione di ormoni radicanti e acidi umici che poi ho messo diretto nel substrato…terriccio Biobizz light mix 🎥🌱💡

Likes
20
Share


@Tracie67
Follow
It's been a pretty easy week. Enjoying watching the buds get thicker! Just going to coast to the end at this point....hoping to harvest within the next 2 weeks. Already getting excited for my next grow...thinking Ethos Planet of the Grapes or Ethos Crescendo.
Likes
9
Share


@Gruenerfinger85
Follow
Ab jetzt werde ich meine 3 hübsche WW spülen, ich hoffe das die letzten 2 Wochen Blüte noch ausreichen das die Buds noch an Größe gewinnen, die Trichom Bildung ist reichlich vorhanden, und der Duft lässt ein schon ungeduldig werden. Das ist mein erster grow mit White Widow automatic, und mein erster grow überhaupt mit automatics.
Ich konnte einiges an Erfahrung bei diesem grow sammeln. Ich habe Fehler gemacht die ich beim nächsten mal zu verhindern weiß.
Ich werde euch auf dem laufenden halten bis dann wünsche euch dicke Knospen.👍🏻


Likes
10
Share


@Yolka
Follow
This week is just water, no stimulants.
For the rest of the week, just water. It looks already ripe, although the passport says another 1-2 weeks.
The smell is very strong - my old filter can not cope.
What do you say, when Harvest?.

Likes
43
Share


@420DeepGrow
Follow
Gracias al equipo de Kannabia Seed y XpertNutrients, sin ellos esta magia no seria posible.
🍁💐 Runtz (Auto):
Si esta cepa se ha ganado su popularidad a pulso, esta versión autofloreciente es digna heredera de sus atributos. No es de extrañar que nuestros criadores hayan acertado con su programa de reproducción, al combinar dos de las cepas más fascinantes de la actualidad: Zkittlez y Gelato.
planta resistente y robusta, de cuerpo esbelto y fuerte ramificación lateral, que se puede cultivar prácticamente en cualquier entorno; pero prefiere los veranos largos y cálidos, tal y como quiere la madre naturaleza, donde bañada por el sol se eleva hasta los 120 cm. para producir unos rendimientos muy gratificantes de 100-150 gramos por planta.
En interior, y tras solo 70 días desde la semilla, también recompensará con cosechas abundantes de hasta 500 gr./m²
Inmediatamente después de encontrarte con ella, lo primero que notarás es su aroma descaradamente afrutado, con un toque tropical cortado con reminiscencias terrosas y amaderadas, que se entremezclan de forma agradable para ofrecer un combo que hace salivar las papilas gustativas.
Ofrece un sabor confitado, refrescante y similar a sumergirse en una piscina de frutas cítricas y flores de fragancia intensa. Al inhalar, obtienes la bondad de la dulzura; al exhalar, el humo se convierte en suave y cremoso, dejando suficiente profundidad en cada bocanada para satisfacer a aquellos que buscan los matices más complejos.
⛽ XpertNutrients: es una empresa especializada en la producción y comercialización de fertilizantes líquidos 🍶y sustratos🐛, que garantizan los mejores resultados y cosechas de la más alta calidad. A través de una cuidadosa selección de materias primas y un proceso de producción avanzado, sus productos son sinónimo de resultados confiables.
🛒 Consigue aqui tus fertilizantes:
https://xpertnutrients.com/es/sobre-nosotros/#:~:text=Xpert%20Nutrients%20es%20una%20empresa,de%20la%20m%C3%A1s%20alta%20calidad.
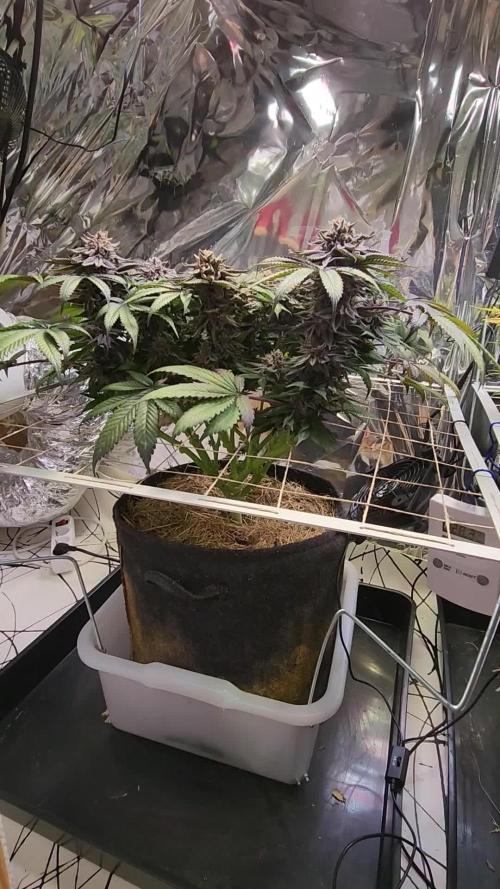
📆 Semana 9:
Gran semana, la planta parece que ha terminado de crecer y centra toda su energía en desarrollar los futuros cogollos, los erizos 🦔 son apreciables.
@xpertnutrients está haciendo un buen trabajo, ella consume algo de sus recursos lentamente como a mi me gusta .
Vienen lluvias 😡


Likes
8
Share


@Dmon013
Follow
The last week before cutting, I still fertilized for the last week, I focused on the expressway sugar and the loading of carbohydrates well.
Still No-till
Living soil
Microorganisms 💚
Likes
19
Share

@Oldwied
Follow
The last week under the sun. Now there will be three days of darkness. Then it’s time to harvest.
The flowers give off a sweet, fruity, berry-like scent with a hint of skunk.
This plant has grown into a beautiful purple blossom. It would have needed another 1–2 weeks to reach perfection. However, since I’ll be away for two weeks and the plant also produced 2–3 male flowers, I’m harvesting it now to get the most out of it.
Light Power: 92%
Day 114
Flower #63
Photoshooting

Likes
1
Share


@BiggaB
Follow
Plant freshly cropped smells very gassy, big trichomes
I will post the harvest once dried✌️
Likes
3
Share


@LX1977
Follow
Rinçage des racines pendant 2 semaines puis c'est la récolte 2 semaines trop tôt. Plantes hermaphrodites.😞😞😞

Likes
19
Share


@EmeraldLakeCannabis
Follow
It's been an alright week, I guess. I'm very concerned about the area around the stem split on UKBS 2, as there is a tan-brown area appearing near it. I'd be incredibly disappointed if I were to lose UKBS 2 as it's one of my most vigorous plants currently.
In other news, the tent will be flipped to flower in a couple days after I water UKBS 1 and ensure there are no ongoing nutrient issues. Looking forward to seeing Carl's bud structure.
5/3/2021 - The split in UKBS 2 still has ambiguous effects. There seems to be issues appearing at the bases of other nodes. I have started spraying with 2% vinegar solution in case it's white mold, I'm not a fan of losing this one.
In other news, the tent has been flipped; waiting on flowers.
Likes
13
Share


@FlavoursUk
Follow
Started off by setting up the growing environment and dialling everything in such as;
RO Water for the RDWC hydroponic system.
Water Heater being set at 20 degrees C.
Water chiller being set at 21 degrees C.
pH being set at 5.7/5.8
Room Temp and humidity 20/23 Degrees C / 60%/80%RH.
Instead of using rockwool cubes to place my seeds, I put them directly into the clay pebbles. I then used a DIY humidity dome to place over the seeds until they make an appearance.
I have been top feeding RO water every 6 hours.
Foil was used to cover the net pot to ensure no light leaks were going into the system. Highly important in DWC.
Will add some light nutrients once seeds are more established.
Until the next one!

Likes
48
Share


@gottagrowsometime
Follow
Welcome to my Sour Strawberry scrog diary, sponsored by SPIDER-FARMER & Barneysfarm.
Days 22-35 weeks 3-4 off veg Veg Days 12&13 25&26(seedling stage was done in germination week)
Both plants had difficult with a bad PH imbalance that hit my plants across the board. All suffered from 2x Terpinator & Pure Zym PH 4.5 feeds. Lessons learnt you get no 2nd chances growing co2. A light def can be a serious looking one a few hrs later even though fix was applied. Growth can't keep up with uptake. So Foliar sprays I've been using a lot in these grows. It helps with the fixes much quicker. I've started training the plant and moving things to spread it out. I reckon if I flipped her after the stretch I'd fill 60-70% of the net. So, it needs a few more weeks in veg. I have done a lot of fresh toppings. So, they'll need a few weeks of growth and training and fixing to the net. All nodes are in the strip process so it'll help fatten up the stems as if there's too much growth below the main tops and if left late (stripping them late) you'll end up with weak stems, so the stripping needs to be done, and then you need to train your nodes/shoots you want to focus on growing your colas.
Any input is welcome this is my 1st scrog. I used 2 seeds 2 different phenos, 1 is a lot taller, big mistake. Itll take time, lots of training and she's gonna look awful for the next few weeks but, their will be a method to the madness. I'll flip when I see 60/70% of the net filled either by attached to the net or trained so that'll it sit under where the stretch will go when flipped. Giving me 85-95% of coverage. Again, this is my 1st scrog so any input is welcome..
SCROG / DEFOLIATION / LST / NODE STRIPPING
Only started in the 2 week of this update. Through a pro scrog frame over her. As this will be the easiest way to deal with it in my 1m2 tent. It will take up a lot of space for just 2 plants. But, I'm planning on doing a long one, or at least until I get it right so it'll be a proper scrog with an even canopy. I stripped the nodes to premote them to grow some mass i did semi removal of shoots that are deep into the canopy. Didn't wanna do to much stress that and she'll still need a lot of that growth to get her to grow out. Next wk I'll readjust and start pulling her in areas needed. 1 pheno is much shorter. So, I'm thinking I'll just train her so she at least gets right underneath the net, and then when i flip it'll help reach the net. But, them areas will need lots of growth, and I'll have to weave the bugger one abs pull her nodes down and maybe lollipop her a lil more so there'll be an even canopy.
Thanks to my sponsors Bella from Spider-Farmer for the 2023 upgraded SE5000 and to the rep from Barneysfarm for their 22/23 pick of 5 off their new Releases.
Much appreciation to all who stop by to view. And leave their thoughts feedback or whatever. Either way, thanks for stopping by. And look forward to seen your diaries.
Likes
13
Share
@420DeepGrow
Follow
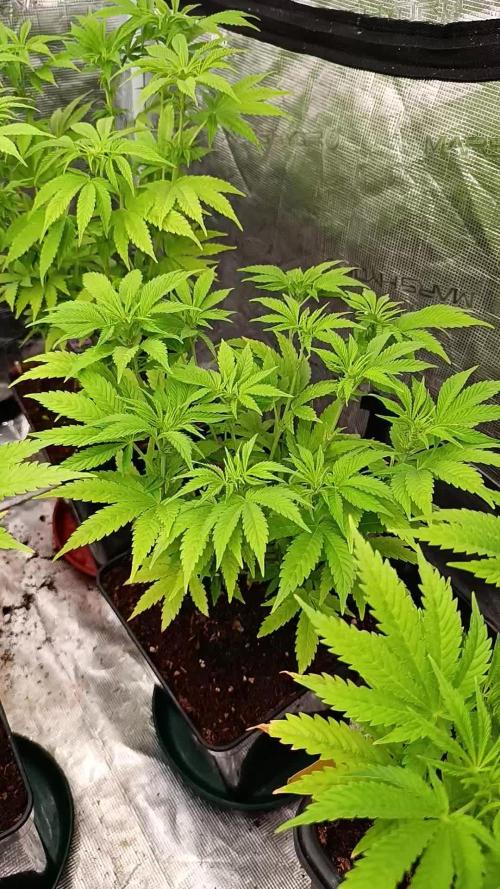
📆 Semana 3
El estiramiento alcanza su punto más alto y comienza a desacelerarse progresivamente. La planta ya define mejor su arquitectura final, con los brotes laterales alcanzando altura similar a la punta principal y formando una estructura más homogénea.
Empiezan a diferenciarse con claridad los sitios de flor, apareciendo los primeros “erizos” bien visibles. La energía deja de centrarse únicamente en el crecimiento vertical y empieza a repartirse hacia la formación floral.
El color se mantiene estable, aunque las hojas más grandes pueden mostrar un ligero desgaste propio del esfuerzo de esta fase. La turgencia es correcta y la respuesta general sigue siendo positiva, señal de que raíces y entorno trabajan en equilibrio.
Se consolida el paso de expansión a producción.
Seguimos creciendo fuerte 💪!


Likes
33
Share


@NuggetPawn
Follow
So officially 11 weeks and 5 days into the grow so a little early to post week 12 but have got a busy week next week.
Still having to cut off the odd bud here and there that gets too close to the lights. Unfortunate but hopefully the fact it’s so tall means I’ll still get a fair bit from the buds around the sides and just under the canopy.
TDS @ 0.5 is riding around 950 - 1050
Usually alternating days between adding fertiliser and nutrients. She’s drinking about 12 litres or 4.5 gallons every two full days.
Once she’s harvested and weighed in, I’m going to post a long list of points and tips I have learned along the way for any other noobs out there.
Already bought another tent for the next grow which is 240cm tall x 110cm x 180cm vs the 180cm tall x 60cm x 120cm one I’m using at the moment. Hopefully that means no more burnt buds!
Hope the video and pics are interesting!
Likes
10
Share


@Organic473
Follow
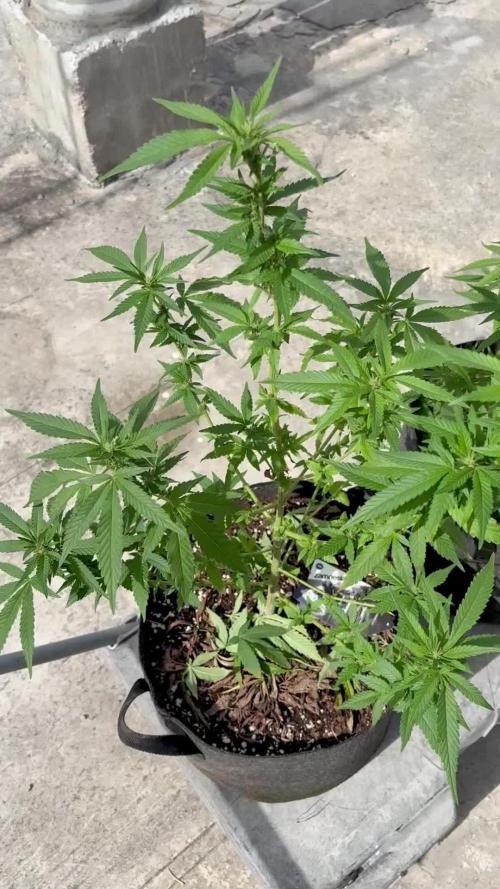
The weather is really bad for her flowering stage. All these rains may push me to an esrly harvest. I will have to clear up the land and setup a greenhouse with solar-powered fans for the humidity.
