


Likes
43
Share


@Sabac
Follow
Última semana de mis plantitas
Hoy corto 12 de 16
Fue un cultivo sin problemas.
Y creo que viene buena producción
Recomiendo 100% los fertilizantes hesi buenísimos.
5 cultivos con ellos y 0 problemas.
El sustrato Biobizz light mix excelente
Las semillas de barneys farm uff pura crema. Eva seeds recomendables y las sweed seeds buenisimas semillas para seguir cultivando. Los Led yxo para ser de un perfil bajo qué no a toda la gente les gusta cumplen la. Función 480w de pura potencia en un espacio de 120x120 los recomiendo para gente que tenga un presupuesto bajo.
Ahora voy por unos sobre 600w aunque los reforzaría estos con unos led de 100w
.
Bueno feliz con los resultados.
Esta semana mostraré los resultados de las plantas cortadas.
Se vienen más cultivos
Salu2


Likes
58
Share


@Kmikaz420
Follow
La fin se rapproche pour la bannana x purple punch (je vien de lui donné sont premier rincage;)
C est une plante vraiment facile à faire pousser elle peut encaisser de gros EC
Et elle n à pas trop de feuille (facile à trimer ;) je pense donc que même un débutant peut avoir de très bon résultats avec cette souche il faudra juste la nourrir correctement (pas besoin de lst ou autre technique, juste lui laisser assez de place pour grandir (en hauteur comme pour les racines = big roots = big fruits ;)
Pour la WEST COAST OG c est pareil on dirais elle sont en pilot automatique (tellement je n ai rien a faire a part arroser )
J ai au début mis 2 anneaux (technique que j aime bien quand j fais pousser une plante la première fois, au cas où il faudrait écarté les branches etc) mais la on en aurait presque pas besoin pareil que pour ka bannana il faut juste lui laisser assez de place pour les racines et lui laisser assez de place (largeur hauteur ) et des bon nutriment à bonne dose et normalement vous devriez avoir le même résultat que moi ;)
Je doit dire que la west coast a une odeur magnifique et les photos pour toutes seul pour se qui est de la cristallisation :)
Voilà les amis je m arrêt ici pour cette semaine on se retrouve pour la recolte de la bannana (la west coast à besoin de bien 10 jours encore avant le rincage)

Likes
144
Share


@roro_204
Follow
The plants are drinking more
Still trying to find the best nutrient feeding schedule.
I noticed the leaves were turning light green after i took the nitrogen level down so i put it back up a little.
I defoliated this week only removing the leaves in the middle and top that are blocking other bud sites.
took only a few off each plant so the plant doesn't stress out.
I left the bottom larger leaves on the plant so it takes the nutrients from the bottom first before the rest of the plant when its deficient,
That way only the bottoms will turn color instead of my whole plant.
Thats just the way i like to do the defoliation but i know everyone has their own ways :)
Next week I will defoliate once again.
Processing
Likes
9
Share


@Kushizlez
Follow
Day 60F
The PM on the cheese has gotten significantly worse in the last few days. I think it may have something to do with the constant humidity spikes every time I water. I haven’t been running my humidifier at all in flower so maybe it’s having trouble keeping the RH up during lights on. Just another reason to follow a daily watering schedule. The cheese and slurricane look fucking disgusting and I’m starting to doubt that a peroxide wash can totally fix it. It worked well for my outdoor crop so it should be fine but this time there is probably 3x the amount. I’ll make sure to really soak the buds and rinse them off good.
Bbb#1 is flopping over like crazy from the weight. Too late to stake it up now so hopefully it holds until next week. Starting to foxtail a bit but nothing too bad. It is now 100% done and ready for chop.
Bbb#2 is just getting frostier and frostier by the day. The purple fade is really coming along nicely too. Might reveg. It is now 100% done and ready for harvest.
Black garlic #1 is finally filling out! I can’t believe it. Never heard of a plant packing weight on like that in week 8. The breeder did mention that it packs on weight later but I’m stunned. Taking her to 9.5 weeks.
Black garlic #2 is looking very average. Average color, average size buds, average frost, average smell, probably an average yield. And it’s starting to get a bit of PM. Overall not happy. Will be taking her to 9.5 weeks.
Zkittlez #1 has pleasantly surprised me. It was a bushy runt in veg but came through. It’s the third frostiest in the tent, super dense, stacked tight, smells great and looks great. It’s already got a nice amount of amber so it’s 100% ready for chop.
Slurricane #4 looks insanely frosty even under all that PM. If I can’t wash it off it’s going in the trash. I want to chop this asap but have to cut everything at once unfortunately. It’s 100% ready for harvest.
Badazz OG cheese is looking like a decent yielder but doesn’t have much else going for it. I think it still has some filling out to do. I can’t even smell the final profile change yet. The leaves are rotting off very quickly. Taking her 9.5 weeks.
I don’t mind harvesting a bit later rather than early. From my outdoor experience, when a plant is picked early it smells like hay and wet grass clippings until it’s been curing for 3 weeks. When I harvest late or at 30-50% amber trichomes it smells like same scent profile it had when growing. Just my experience.
I’ve read that the tobacco industry adds calcium and potassium carbonate to their crops to help promote fire holding capacity and to increase the whiteness of ash. Turns out some of the organic amendments I bought last week contain exactly that. I’m going to give each plant a light top dress to see if the tobacco industry is onto something.


Likes
10
Share


@SkunkyDog420
Follow
Hallo zusammen 🤙.
Sie wächst sehr schön und macht keine Probleme.
Rabattcode für den BIOTABS-Webshop https://biotabs.nl/en/shop/ GDBT420, damit erhalten Sie 15 Prozent

Likes
1
Share

@Aleks555
Follow
Amaretto Tarmac Auto by SEEDSTOCKERS
Week 11 – Final Stage
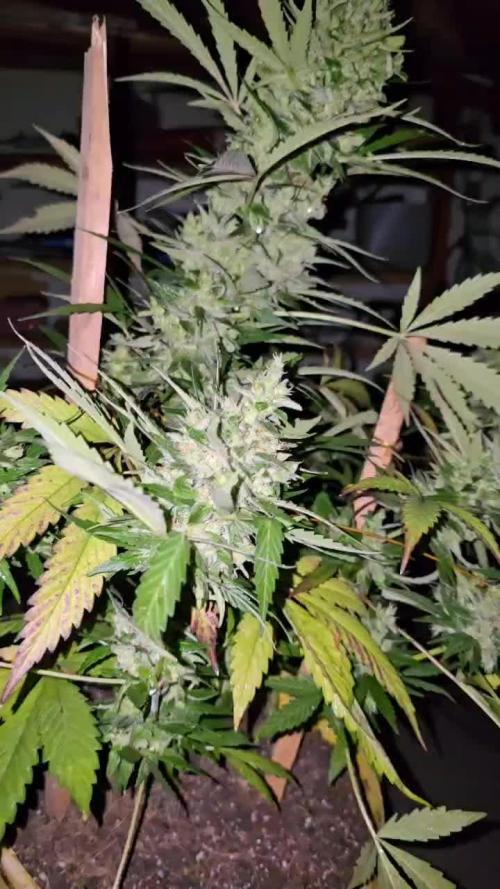
This beauty is now in her 11th week, and she’s entering the final stage of flowering. The buds are dense, sticky, and absolutely covered in trichomes — a true resin factory! 😍 The aroma is simply delicious, and the flavor matches it perfectly.
We’ve already sampled a few buds from the lower branches, and wow… the taste is amazing, and the effect is strong and satisfying — just pure fire! 🔥💨
We’re planning to let her go for about 2 more weeks before harvest to reach peak ripeness. So far, this strain has been a real pleasure to grow.
Big thanks to SEEDSTOCKERS for providing such top-tier genetics. Highly recommended to all growers out there! 🙌🌱💚

Likes
11
Share


@Coughy
Follow
Day 1 FLOWER
First day flower!!!!
Already showing two pistols in some junctions after only first 12 hours of darkness. First grow did that, second grow did not. Not sure what’s different.
New reservoir change;
40 grams Calcium Nitrate
33 grams Jack’s Hydro
30 grams Magnesium Sulphate
100mL growth enhancer
100mL Fulvic
50 mL Humic
100mL H2O2
EC 1300
PH was 6.2 and headed higher, added PH down.
I made a little mistake with the res change, I forgot to chill my 100 liters of fresh RO to 63F before introducing it... it came in contact with roots at about 75F. Hope I didn’t shock the plant with that move and everything is fine.
Ive added 8 16w LED T8’s wired in parallel for some inside canopy illumination. I don’t expect it to do much but just wanted something with zero heat output. Might figure something better out or even move them up to next scrog net due to expectation of massive stretching.
Side note! I want to purchase a third HLG light to fit nicely between the 550V’s... a 2 panel 300 watt version of the same R2 type for a total of 1270 true watts. (Just waiting for a discount code). New light will be up this grow for sure, stay tuned for that!
The right plant is yet again much taller than it should be. I was pretty busy with work lately so they have sat in bloom tent on veg hours for 2 weeks...
Hopefully they don’t stretch tooooo much.
Day 2
Added 21 Liters RO and pH down
pH 6.5 to 5.8
PPM 1180
Day 3
Added pH up
pH 5.2 to 5.8
Day 4
Added 23 liters of RO
30 gram calcium nitrate
22 gram Jacks
12 mag sulph
150 mL H2O2
ph 5.7
PPM 1380
Day 5
Added 40 liters of water
30 cal nit
20 jacks
10 mag sulph
pH 6.2
PPM 1340
Day 6
Likes
11
Share


Likes
57
Share


@ThrashedTV_BakedByGlaze
Follow
Week 4 - 01/22 to 01/28 2021
Pictures from Days 25 + 26
TRANSPLANTED! Might have waited too long but hopefully the transplant and LST stress might slow the plant down since i think it's already flipping to flower like the Red Poison & Purple Lemonade in my other diaries 😱
Ended up more 50/50 ratio of Destiny Organic's Dark Matter Living Soil + ProMixHP since I had to make the Destiny last. Apparently they went out of business just after I decided it was my favourite/new soil :( Would rather stay away from Ocean Floor since I haven't had the best experiences with it (bugs/rust fungus etc) Feel free to drop some recommendations other than Fox Farms below 👍
The Dark Devil Auto is otherwise healthy and starting show hints of colour in the stems 😈
I raised the @ViparSpectraLED P1500 another eight inches after transplant and started basic LST. I really wanted to get these four under a ScrOG but if 3/4 are already flipping and the LSD is still runty I might have to wait it out again.
It already has a solid skunky/hash plant smell on the fingers after adjusting them and it looks like it might actually be a tripod mute with three flower sites per node. Hopefully I can stretch it out and take advantage of the extra bud potential 🙏
I have the @MarsHydroLED TSL2000 set up and ready to go once the girls settle into their new pots. Have the new surge protector/heavy duty power cords/power tool grade timers as mentioned in Week 3. Some of it shown in the pictures.
Threw some videos in this week as well with some Queen's Radio GaGa, Beastie Boys' Brass Monkey, and a little hint of Arkells ....COME TO LIGHT on the short @ViparSpectraLED ..GET IT.. 😓
--
Thanks for checking in! Throw down a like and/or follow so I can return the favour 🙌
Check out my Diary of the Year 2020 Entry for my Original Auto Sour Diesel: https://growdiaries.com/diaries/54258-fastbuds-original-auto-sour-diesel-grow-journal-by-glazedgrow
IG: @GlazedGrow
CannaBuzz: @GlazedGrow
Likes
15
Share


@SweetheartOG
Follow
The girls started to pre-flower on the 6th of June. They all have a slight smell when you rub the leaves. Kosher cake, Strawberry banana and the Forbidden runtz have a sweet smell to them. The Forbidden runtz reminds me of the smell of skywalker OG which is totally LUSH..!! The blackberry has more of an deep earthy smell with a slight bit of fruitiness. Super excited for the next few weeks with these ladies. Happy toking my peeps 😁


Likes
22
Share


@CenturionGrower
Follow
Plants came back out of their 36 hours of darkness and were a little droopy, so I made the decision to put them outside for the first day of light. Unfortunately they suffered from wind burn so I brought them back to the tent. Foliar fed the plants daily at 400PPM.
Likes
3
Share


@Encuentra
Follow
20/11 : F+10
22.11 : 1 L of water
24.11: ras
26.11 : 0.75L of fertilizer. No more insects, humidifier + water spray worked :D
27.11 : nothing, ras
Likes
13
Share


@NAG420
Follow
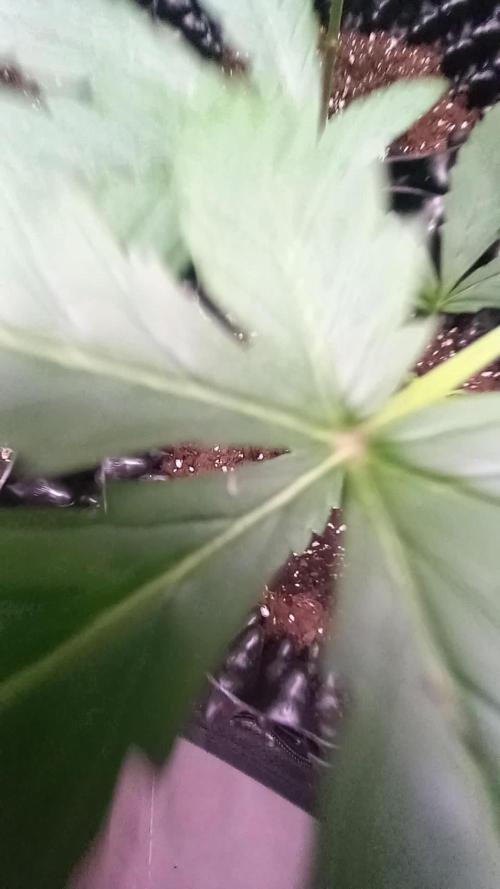
She strong little thing this the 2nd seed I planted of this strain the 1st one didn't pop for me idk why. Only spray and bottle watering her for right now she is in a 5 gallon pot don’t want to over water the pot and cause nat or mold issues. Today is the 1st day of the 2nd week. Dome came off the past few days also.

Likes
22
Share


@Slobasian
Follow
You walk into the back yard and it’s a straight face punch of smells. Looking like some indoor rn moved all plants to safer place in case storm hits so now I atleast have a wind break

