Likes
3
Share
Weeks 6 & 7 💚 Lack of photos were taken so I have decided to consolidate these two weeks together, The 8th - 15th as well the following week of 16th - 23rd of March
Likes
14
Share
No training yet whatsoever, and probably will not based on how she's growing- very vertically, no wayward side branches or stems. This is my preference for this plant as it has considerably less root growth space and I have no experience with micro grows! Have watered with pH between 6-7 (7, 6, 6.5 usually- allowing a range over the week). Watered with molasses and epsom one water, then plain, then a light feed with Cronk bloom nutrients (an auto-specific nutrient blend) when it started preflower. The plant beside it in the tent is exactly the same cultivar (Seedsman Critical +2.0), which was growing identically until about 1.5 weeks ago, when the difference in their environments became clear. Obviously the Monster is less monstrous :P Thanks for looking and happy growing everyone!
Processing
Likes
27
Share
I caught up on some reading and decided to defoliate before chasing the second half of this flower. I'm pretty confident that after being in the Nature's Living Soil for a few weeks that she is strong enough to handle the defoliation, but hell, whadda I know?? 9.19 - The DumpsterQueen didn't even flinch at the defoliation. Yay! 9.21 - Just enjoying the show :) 9.22 - Figure I better learn how to best take and edit photos. Probs need some auxiliary non-grow light 😝
Likes
9
Share
@Medgrow93
Follow
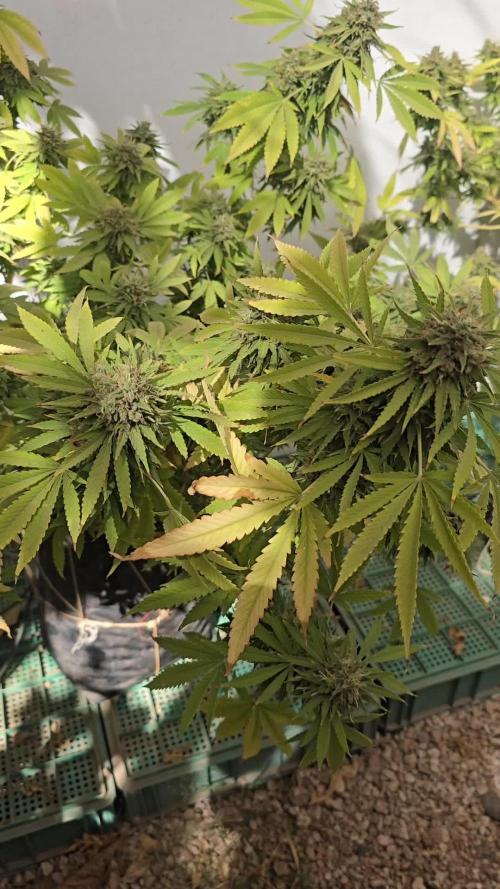
Haven't had much time to take care of the plants, just fed once with 2ml/l of Bachumus Evolution Floración and that's it. The leaves continue to yellow. They're starting to smell a lot now, will probably have to use the filter in the next couple of weeks.
Likes
31
Share
How's it growing guys, this is my new Diary that I would like to share with the Grow Gang! 2 short videos just explaining the setup and showing the germination rate. My other 2 diaries were my 1st which I'm not doing a good job of filling it out properly but I will do a better job with this strain on keeping you guys updated. Also I have another diary coming up for my Auto Pineapple Crack which I will be putting up in a week. Any questions just ask guys. Happy Growing 👍🏾👊🏾🌱🌴💯
Likes
81
Share
I was finally able to sex them all. 1 Male/Hermie, and the rest have beautiful white pistles forming. They are starting to go through a stretch now as well. I also ordered some more grow lights 3 Mars Hydo TS1000's. I can't wait for those to arrive.)
Likes
15
Share
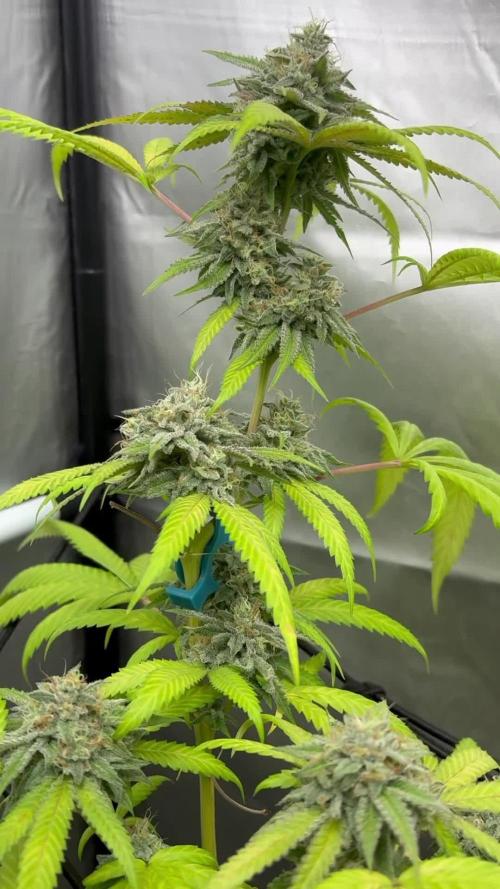
day 14 flower and those buds are just starting to peak out! the plant is happy and healthy :)
Likes
4
Share
Que pasa familia, vamos con la tercera semana de floración de estas F.U.H. feminizadas de Seedstockers. Vamos al lío, las plantas se trasplantaron a macetas de 7 litros. El ph se controla en 6.5, la temperatura la tenemos entre 24/21 grados y la humedad ronda el 50%. El ciclo de crecimiento puse 12h de luz, el foco está al 70% de potencia. Me gustaría estar más encima este cultivo pero la salud me está impidiendo un poco estar 100% con el proyecto. - os dejo por aquí un CÓDIGO: Eldruida Descuento para la tienda de MARS HYDRO. https://www.mars-hydro.com Hasta aquí todo, Buenos humos 💨💨💨
Processing
Likes
13
Share
Day 13 I’ve decided to transplant to a bigger pot
Likes
13
Share
@Rlhjr413
Follow
Mid week as always due to flip day and my schedule. One reddi whip on track other 11 taken there time. 1 of 10 dantes wrath just will not keep color its burning or draining nutrients rapidly. Wish reddi whip whole catch up with dantes wrath so they atleast can be pulled on same day.
Likes
57
Share
Weiter geht’s :) und nun so richtig .. den ab heute heißt es .. „ab in die Blüte“ 12/12 Umstellung wurde vollzogen .. Die Pflanzen sind super stabil und sehr gesund ..wurden nochmal mit ner erhöhten Growmenge auf ein Gesundes Stickstoff lvl gebracht .. und sind fit genug für die Umstellung. Alle 3 Pflanzen legen ein eigenes Verhalten an den Tag aber sind aller super gekommen .. P1 schiesst sehr in die Höhe .. während P2 den perfekten Wuch an den Tag legt .. Mittel bis kompakt .. gute Breite und Form .. gefällt mir sehr .. P3 is da so ein zwischen Ding zwischen 1 und 2 .. Für die letzten Veggie Bilder kamen sie heute nochmal raus .. Fotoshoot und letzte Reinigung des Zeltes.Die Pflanzen lasse ich nun eine Woche Stretchen und dann werden sie gescroggt ..und es sind nurnoch Detail Aufnahmen möglich. Fazit .. sehr stabile Veggie Phase ..2 etwas klein für 7 Wochen .. normal mache ich 5 .. aber ein zusätzlicher Gast musste erst in Gang kommen .. wobei auch hier aus Pheno 2 mehr rauszukitzeln wäre denke ich in Sachen Wuchs Nun kommt die heiße Phase .. mal sehen was gezaubert wird aus dem Hasenstall.
Likes
7
Share
@Smokwiri
Follow
Welcome to week 5 of my Smoothie by Fastbuds diary Growth looks good, stem is still very flexible? but growth looks satisfying. I'm impressed with the growth, almost just as big as my white cheese, which is in 15L soil. Happy and strong plant, smell is low/normal
Likes
5
Share
@dalemac
Follow
Boy I really feel I butchered my attempt at topping this plant, it left behind a few feeble looking fan leaves that I had to remove because I didn't like the way they were looking at me. 😒 I suspect I really waited too long, but I'm unaccustomed to how fast autoflowers start flowering. Beyond that, she's the most spindly of the girls out on the patio, which are mostly bushed out now - but she's the only real sativa in this group.
Likes
10
Share
01/11 - Week 6 flower - continued micro-dose feeds - added supps (Light brown Sugar) dropped light intensity to 45% with temps at 71 (F) humidity (62%) 01/19 - Week 7 flower (Cut down) - Prepping for cut down - 80% amber on trichomes - Drying in the same tent - running temps and humidity at 60-60
Likes
28
Share
There I was. Talking on another forum to what I consider to be a true aficionado and master green thumb. Explaining that I had a staggered set in my tent. He told me to ease into the beastie bloomz 0-50-30 with 1/8 tsp per gallon in my reservoir. Keep in mind I’m hydro NOT soil. The first watering I did so with these little ladies that are 46” tall. Somehow I was in a rush and not thinking clearly the second watering which was two days later and added a full tablespoon into 4 gallons and the plants were already being fed before I did the math in my head. Much to my surprise they BLEW UP. When I went back and test the PPM on my reservoir the following day it was at a staggering 3400ppm. I should have had zombies. I cleaned it and reset with 1500 ppm and have slowly been adding water and watching it creep again into higher numbers. 3 different strains and they are all stoked on these numbers. So you know what. I’m literally going to test the uncharted waters and see exactly how much they can take. Like I always so, don’t do what I do. Do what your plants tell you to do. Party on wayne!
Likes
38
Share
Utopia Haze is a rare heavily sativa dominant hybrid (90% sativa/10% indica) strain created through back crossing Brazilian Sativa strains. This tasty little bud took home 1st Place for Best Sativa in the 2008 High Times’ Cannabis Cup and for good reason – with its potent 18-22% average THC level and long lasting cerebral effects, Utopia Haze is one powerhouse smoke. The Utopia Haze high comes on soon after you finish your first toke, hitting you with a strong cerebral lift that infuses you with a sense of hazy relaxation. Type: Feminised/Photoperiod Cultivation: Indoor/Outdoor Flowering Time (days): 70-75 Indoor Yield (g): Up to 650 Feminised Outdoor Harvest Month: October Feminised Outdoor Harvest Month Week: 3rd-4th week Aroma: Citrus, Woody, Pungent, Mint Effect: Cerebral Lift, Hazy Relaxation, Sleepy Welcome Everyone to the Final Entry of my Utopia Haze Grow ! There is so much to discuss ! I have been extremely busy as of late trying to get this Harvest together, but i am happy to have it here for you now ! I Seriously under estimated the amount of time, help from others, and my own necessary skills to pull this off.. and i still kind of screwed it up lol ! But its worth noting i have never actually done this before and trying to document it during....was extremely hard. It is next to impossible to work an iPhone with rubber gloves on ! First I want to discuss everything step by step so before you jump straight into the comments on how the end product is so small in "quantity" Rest assured i am happy with its"quality"...and thats all that matters to me because Life is a journey not a destination! and i have learned so much from this grow that I couldn't be any happy even if i messed some things up :) But at the very least I hope you read through this entry in its entirety with an open mind and focus more on the process, rather than just the outcome! I ran out of Ice & i was only able to wash three times..(normally I've heard you should go sometimes 5-6 washes) Preparation is Key & things will be much better next round :) Photos 1-22 These are pretty self explanatory but for those of you just tuning in now.. this is what happens to a very happy plant when you don't have the necessary tools to monitor key components of growing cannabis.. Ph, as well as EC levels play a very key role in the outcome of your grow lol that being said I was just able to save this plant by purchasing both tools but that doesn't mean the plant didn't suffer because of the prior events.. This was a Huge reason behind me choosing to turn this harvest into what i would consider "Solventless Hash Rosin" from "Ice water extracted Bubble hash". Pictures 23 The idea here is the process of using "fresh Frozen Cannabis" this has been discussed many a time online on such sites as instagram and here on grow diaries as well.. I personally have Never tried the process so i decided to try it out and make a judgement for myself.. Video 24 The Cannabis has now been in the freezer for 72 hours making it very well frozen.. as you can tell i struggled getting it all into the 25u Screen Wash Bag. One thing of note i would do differently is i will de-stem my next batch as i also believe this played a part in the amount of plant matter that escaped through the sieves. Photo/Video's 25-28 The idea here is "ice water Seiving" & especially with the bags that I am using here that are only have screen material on the bottom portion of the bag it is very important to have spaces in-between the screens to allow the water to pass directly through the screens into the bottom bucket with the least amount of resistance.. because the hash is so extremely temperature dependant if it gets warm on the side of the bag.. it will stick there and not make it to the bottom to become use able product.. 29 You do not need to use as much Ice as i used here lol... the idea is to keep everything very cold..i certainly achieved that but at the sacrifice of using so much that i ended up grinding product and producing "contaminants" but in the end they are just plant matter that i would be smoking when i rolled up my joint either way so.. I'm not super disappointed.. But it should be noted that what you want to achieve here is a Layering effect where you have the wash bag between two small layers of ice while the "water current" washes the Trichomes away allowing them to be separated by the screens setup below :) Before Starting the machine you should allow some time (i.e.;10-12minutes pre soak to allow the product to become saturated) before the first cycle. By video 32 I have just ran out of ice lol.. Video 33-34 Here I have a tip for you.. to separate the screens that you sieve through.. cut 5 gallon buckets to stretch them across nice and tight.. it'll make scooping your Bubble that much easier ! i learned this from the many "Frenchy" videos I have watched :) Picture 35 Here in lays the problem for most people.. drying your hash without loosing vast amounts of "Terpenes" whilst also stay ever vigilant against mold ! Thanks to all those videos I've watched on youtube.. id like to think this was one of my most successful parts of this process.. Things to Note; Terpenes start to seriously evaporate at temperatures 68F or 20C you need to stay as cold as possible whilst bringing the Relative Humidity in the space down into the 40-30% to stay away from that nasty mold ! I used my cold storage room in the basement.. with a dehumidifier running to keep the space at 45% RH & staying at a constant 15c. All while spreading the hash as thin as possible across parchment paper, on top of the white screens with a fan moving air across both sides of the paper. Pictures 36-38 These are some macros i took in the middle of my drying session I fell in love with the colour. Yes i know the black spots are plant material but they will get caught when i bag the hash & squish the oil out. Thing to Note; at this stage it is important to ensure you 'micro plane" the hash down as fine as you can whilst staying weary of the temperature... any "chunks" will hold pockets of moisture.. that lead to potential problems..ie; mold ... Picture/Video 39-41 Successfully planed bubble hash ready to be bagged and Squished ! Picture 42 Ive decided to follow Pedro.. from Pedros Grow Room and double bag to be on the safe side so i don't have any blow outs. So thats One 25u bag inside one 160u bag ! :) Pictures 43 This is almost 3 grams of the bubble hash from above, already melting in the bag.. this is where i ran into trouble again lol things started getting to warm in the house and i was only able to get one of the three squish's i did on video :( things started getting sticky. Picture 44 This is basically just a photo of the equipment I'm using; 3x5 LowTemp Cage in the frame I built myself, with a 20Ton bottle jack. Something to note here is this is an older Lowtemp model with only a single heating zone which is which i have it closed here heating Both sides of the press :) As well as the importance of having adequate pressure on your plates.. my rig is very overkill for the size of hash bags..lol Video 45 Here is the lovely press video.. its didn't quite work the way i wanted either lol my directional folding wasn't quite tight enough for a big "drip" :) &the Press was set to 65°c Photo's 46-50 are pretty self explanatory :) I had a blow out.. but still managed to pull an 80% return from the hash once squished...& yes it tasted amazing :) Was it worth it in the end... that could be debated.. for some..i understand..its not your thing, but for those of us that are interested in making our own concentrates.. free from Solvents... I wouldn't make it any other way :) If even ONE of you reading this diary finds it helpful to reference for ANYTHING.....even if its "what not to do" ill consider it a success ! Thanks again for tagging along on this garden adventure.. its been one heck of a journey ! Much Love from B.C. Canada, Until Next time, Cariboo
Likes
2
Share
I am feeding with tps one and CalMag oac one time, then it’s back to regular tap water (well water) that comes at 8.5 pH with 156ppm of tds. The feed was approx a pH of 6.5. More importantly is the consistent soil pH which appears fixed at 6.8 I know it’s lazy! However…. I have noticed doing this to reveal to me that the soil pH is very stubborn and not easily changed by the pH of the water alone. Stuff in the water can definitely have an impact. But still, most feed waters I use don’t change the soil ph. I do make sure the pH is within a healthy range for soil, something between 6 and 7 I figure is ideal. I’ve found if there is enough lime in the mix, and as long as I don’t over feed soluble nutes, then the soil pH appears stable and fixed. With enough lime in the mix, I can ultimately arrest the soil pH at 7. It’s really cool. I thought adding too much lime would give me something potentially alkaline, and maybe it will. But I’ve added lots of lime before and still haven’t gotten past 7 pH. Maybe I didn’t add enough to go further? Nevertheless I’m not interested in going past 7. I haven’t seen any issues with the speed of growth watering with 8.5 tap water, surprisingly. As I’ve said the soil pH would read 6.8 before and immediately after watering with the 8.5 tap. So….. I’m thinking the stability of the soil pH is a positive indication that the microbes are not being subjected to pH shifts, or at least nothing substantial. I mean, at the end of the day when things are looking good, I feel like I must have something right.
Likes
13
Share
@Farmerskr
Follow
germinaron 23 de las 24, en general todo bien, las radículas pidiendo a gritos ser trasplantadas… veremos como evolucionan!
Likes
13
Share
@NSABND
Follow
Day 66 ... the weather get´s more worst too cloudy and cold at night 😱😫😵... so i decide to harvest today 😃👍 Now "Hilde 2.0" is hanging in the dark in the basement and can dry... I'm curious to see how the harvest turns out 😃🙌🙏
Likes
3
Share
Hey, 2 weeks late but almost ending flowering stage, they gave good buds and they growed very nice despiste de stretching I had, I had to put some rope so the branches didn’t fall to the side, it’s going well, a nice smell and very sticky buds.