
Likes
Comments
Share


@Roberts
Follow
I struggled with this plant the whole grow cycle. She still came out alright in my opinion. She did foxtail due to heat. For a first photoperiod grow in DWC I did good in my opinion. Learned a lot more, and been applying those techniques now. She grew under a Spider Farmer SE5000 light in a New Level Hydro bucket. I used hygrozyme during grow. Thank you Spider Farmer, New Level Hydro, and Amsterdam Marijuana Seeds. 🤜🤛🌱🌱🌱
Thank you grow diaries community for the 👇likes👇, follows, comments, and subscriptions on my YouTube channel👇. ❄️🌱🍻 Happy Growing 🌱🌱🌱
https://youtube.com/channel/UCAhN7yRzWLpcaRHhMIQ7X4g
Www.amsterdammarijuanaseeds.com
SE5000
https://amzn.to/3qFpAML
Spider Farmer Official Website Links:
US&Worldwide: https://www.spider-farmer.com
UK: https://spiderfarmer.co.uk
CA: https://spiderfarmer.ca
EU: https://spiderfarmer.eu
AU: https://spiderfarmer.com.au
Coupon Code: saveurcash (is stackable in most cases)
Www.newlevelhydro.com
Www.hygrozyme.com


Likes
3
Share


@Ganajalane
Follow
Nothing to crazy didn’t really want to run Athena. But i popped little to soon! Should order other stuff soon. But here goes a run of Athena hoping to have as little hypocritical acid as I can

Likes
7
Share


@Mr_nugs_lover_David
Follow
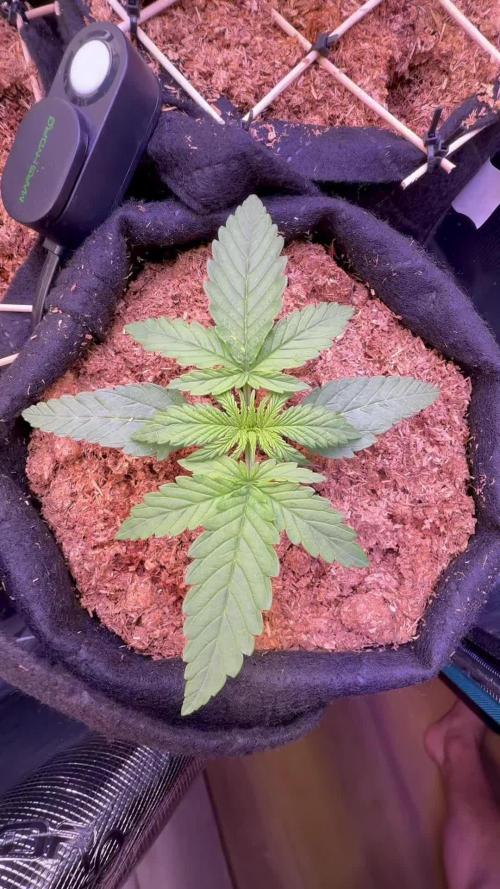
Beautiful looking seedling, very healthy and developing at a fair pace, let's see what awaits us in this diary!! She's developing super fast each day just like her sisters in this run, let's see how she keeps developing! I only use pure water and watch them grow thanks to the amazing living soil blend that I'm working with called FLO Living soil blend, very recomended to all the organic gardeners out there!! I have Transplanted this big girl after just 17 days since she was planted, she is very well developed and so ai took the decision to transplant her and all her sisters in this run, let's see how she performs! 💚❤️💛👨🌾🔝

Likes
2
Share

@hassehujasse
Follow
Topped at 14 days. Waiting to be transplanted to bigger pot and another topping ahead
she missed three-leaf clover. first topping ahead. end of second week with higher expectation
Likes
20
Share


@WeEdandGrowLover
Follow
The little is growing really really good,so much that i had to defoliate on day 30,earlier than i anticipated.
Hope she will like🤞🤞
On day 33 she's Still really growing well,getting more thirsty day by day.
Will do another defoliation on week 6,hoping to be last before harvest

Likes
37
Share

@Hologram
Follow
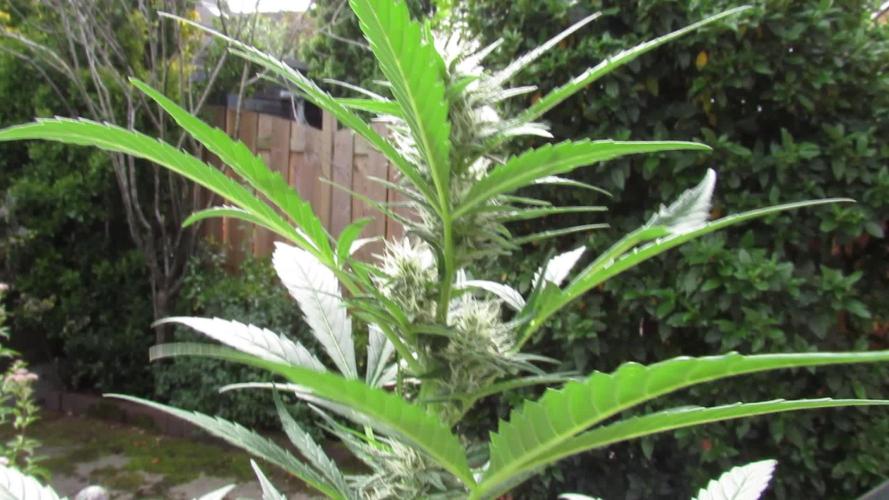
..week 8 of BlackOpium.. and she is still flowering strong💪
she has a weak,peppery smell.. love it..reminds me of the 90's..dont know why..mayb i am just being nostalgic (in 90's i smoked my first...😎👊)
She has been in safehouse all week bc of wet and cold weather but thats no problem 4 her.. she is tough!💪
Now some sunny days have arrived 🙌 so she can stand in garden again👍
..am waiting for the sun to hit her..😸 so i can make some nice pix...😍 (i hope..am having a bad'days"..its hard for me to get it nice and sharp, my hands are shaking..*MS* and have no energy😒.. doesnt matter, am used 2 it..i will get it done,no matter what!✊)
Happy growing 4 all✊
**KISS! growingtechnique: keepItSimple, Stupid!
PS i think i may have 'jinxed 'it.. it was almost impossible to make a nice pic..nothing was sharp.. so i just made a small video clip😉

Likes
20
Share


@MrWolfe
Follow
Smells are getting prettt strong tbh, PKB is very grapey and gassy, washing machine is pure black licorice, BCS doesn’t have much nose and blue dream is creamy blueberry pastry.
Spotted some stamen on the top of the blue dream, I’ll see how she finishes out. I love the smell and bud size and next round is being topped properly instead of just supercropping.


Likes
4
Share

@PhinolaGreen
Follow
9. Woche
Sie sieht wirklich gut aus, hatte während dem Switch auf Bloom harte Mg Probleme, wie bei allen anderen auch und habe sie aber gut stabilisieren können. Tatsächlich wird sie nur gefeeded hihi und das zeigt sie auch, bin sehr zufrieden 😀 😉
Processing
Likes
3
Share


@clara
Follow
Orange Dragon Rider = Nimbus2000 f1 x Amber Dragon f1
both from Dragons Flame Genetics

Likes
18
Share


@Hempface86
Follow
Here we are guys starting week 2 of flower and this beauty is starting to pick up pace! Zamnesia Seeds again with strong genetics.. 💪 i haven't been exactly fragile with this young lady .. there has been some domestic disputes going on getting her ready for her pageant .. i'm just glad plants don't talk because if they did mine would call the cops lol .. I'm looking forward in the next week or two to introduce the plant to her new Plagron nutrients!!!!hope everyone is having fun in the contest and their plants are growing, according to their plans.. to everyone else, happy growing, and to all God bless 🙌 ✌️.
Day 42: so today, I uploaded a quick video showing just how wide this girl is along with the picture to show that she is at least a couple weeks in flower.. i fed today silica, cal mag and for the very last time Maxibloom... from here on out, we will be using Plagron nutrients and I am very excited to see how my lady reacts to her new feeding... as you can tell, i've been training this girl to be wider than tall.. i have been using trainers to keep the canopy even versus super cropping, which essentially would do the same thing.
But I don't want the plant to have to recover, especially when weeks 3 to 5 are the most important for bud building.. next update we'll be using Plagron for the rest of the grow.. good luck to have one new tournament. Everyone else happy growing ✌️

Likes
6
Share


@TheFoxFarmer
Follow
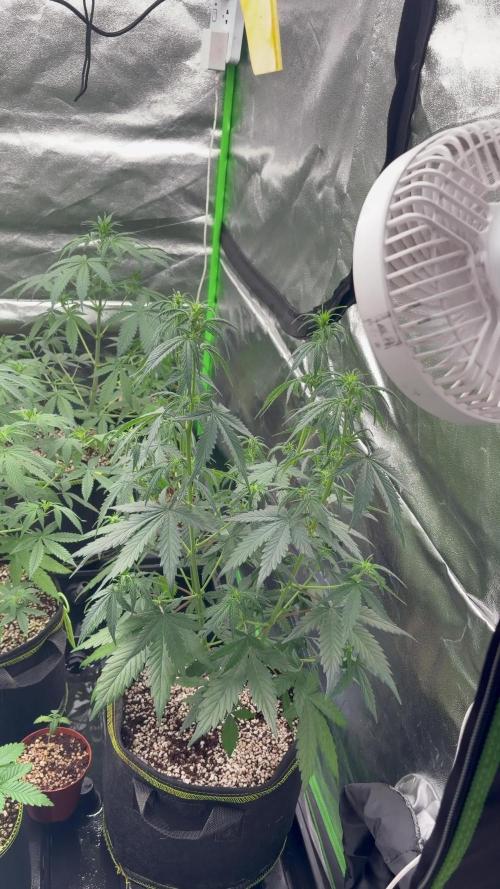
Flowers coming along well, with frost now developing. Nutrient strength increased now they're gonna be eating a lot more. Remo grow reduced slightly now they're slowing their growth, but Bloom and AstroFlower have been increased to favour PK for flower development. Day 28 will be the last day feeding Growth Tech Liquid Silicone as it takes the longest to completely flush out of the plant. I never feed silicone later than this in flower otherwise you risk hard, black ash with a horrible burn in the end..
More leaves have been stripped here and there to slow growth and to allow the light to penetrate deeper, uncovering flower sites. Leaf stripping is a great technique to stunt the growth of selected branches, allowing the others around to catch up and meet the top of the canopy more evenly 🦊

Likes
11
Share


@Fullmeltalchemist
Follow
D71/F23 - 11.29 - Maybe didn't love the defoliation, but looking ok. No discoloration or anything, just a little slower to start chunking up than its neighbors. <3
D73/F26 - 12.1 - The 3x3 9lb seems to have done better with the defoliation, but after I fed with a bit of molasses, found some fungus gnats flying around. Have traps and diatomaceous earth down, so we should nip this pretty quickly.
D74/F27 - 12.2 - A little concerned about this one cola whose top pistils seem curled compared to the other on the plant. Take a look and let me know if this is normal or not. All my mature fungus gnats have been trapped, not seeing anymore buzzing around. I suppose the larva could still do a little damage for now?
D76/F29 - 12.4 - Doing fine in the 4x5 tent :)

Likes
5
Share


@Granddaddy_Terp
Follow
Midnight is a seriously beautiful cultivar and unlike many other purple strains I’ve seen, grown and smoked, this one’s terps are actually rather impressive. Her aroma is a pungent mix of berries, citrus and gas. I love it.
She certainly isn’t the fastest auto. We’re at day 77 since sprout and it’s clear she still needs another 2-2.5 weeks. I expect her to be ready for harvest somewhere in the 90-95 day range.

Likes
2
Share

@Fyno_TH
Follow
Some strains are hitting their limit—slight nute burn detected. Dialing back the ppm.
Likes
77
Share


@Basementganja
Follow
I love the sativa shaped nug-towers! When my plants grow big, I like to grow them until the very end of their cycle! That's why the extended flower period.
Video of Measurement of yield: T=Tops(92grams), M=Mids(59.1 grams), L=Lowers(58.6grams)
Total: 209.7 grams (1-2 grams worth, was taste-tested prior to scaling.)
Likes
3
Share

@Mr_nugs_lover_David
Follow
Beautiful strain to grow, she ended up. With a smaller size compared to her sisters but she's a big quality lady very frosty and sweet, the aroma of this sticky flowers are super sweet and floral, just so wonderful, I love this strain and I'm glad I have black cherry punch in my garden the 5 of them with the same aroma 🔝 can't wait to croptober

Processing
Likes
Comments
Share


@MG2009
Follow
06/01/2020
Time to make the seeds!
First my Cookie Cake F1 plant is a 7 star cookies male
(Top dawg seeds) X a female Captains cake clone
(Captains connection) and will be growing TLO Style.
7 Stars Cookies Strain | Marijuana Strain Reviews
50% Sativa /50% Indica
THC: 22% - 27%
7 Stars Cookies is an evenly balanced hybrid strain (50% indica/50% sativa) created through a potent cross of the classic F1 Durban X Girl Scout Cookies strains. This potent bud is infamous among cannabis users for its super high potency and long lasting effects that are perfect for any hybrid lover. The 7 Stars Cookies high starts with a rush of cerebral effects that rush though your mind, lifting your spirits and leaving you blissfully happy and unfocused. As your mind flies higher and higher, your body will begin to slip away into a state of deep relaxation that leaves you totally stoned and out of it. A sharp pang of hunger comes next, leaving you with a ravenous case of the munchies as your mind slips in and out of calming sedation. Thanks to these effects and its super high 22-28% THC level, 7 Star Cookies is often chosen to treat those suffering from conditions such as chronic pain, insomnia, stress, depression, and migraines or headaches. This bud has a sweet citrusy flavor with hints of spicy earthy grape upon exhale. The aroma follows the same profile although with a light pungency to it. 7 Star Cookies buds have fluffy dense popcorn-shaped olive green nugs with bright orange hairs and golden crystal trichomes.
Captain's Cake Marijuana Strain Information
About Captain's Cake
Hailing from the beautiful land of Maine, Captain’s Cake is brought to us by The Captain’s Connection. This indica-dominant strain boasts two pretty incredible parents, Girl Scout Cookies and White Fire Alien OG, making her a bud that offers great effects for both recreational and medical patients. While Captain’s Cake typically acts as a true hybrid, user sensitivity may dictate that your experience comes with the roll of the dice.
A fairly potent strain in her own right, Captain’s Cake averages around 21% THC. Rumor has it that CBD levels can vary dramatically, with some reports showing a range between 1% and 15%. While that data remains to be confirmed, you can instead relish in beautiful buds that are bright green, featuring orange pistils and lovely amber trichomes. Oddly enough, flavors and scents do vary a bit with this strain, and you’ll notice it smells much worse than it tastes. A sour and earthy fragrance that includes lemon, nuts, and berries will hit you right away while your mouth enjoys a nutty vanilla cookie experience that’s slightly citrus-like.
Captain’s Cake is awesome for those times when you need a boost of energy to get through a particularly trying task. Whether you’re experiencing the three o’clock workday slump or you simply have to clean the house before it gets any worse, this strain is here to help. Users note a euphoric boost that helps you to focus on your tasks while having a huge smile on your face, but keep in mind that this joyful experience can only last so long. Soon the munchies will hit, and after you’ve had your fill of snacks, you’ll be ready to settle in during a sedating comedown.
Even if Captain’s Cake doesn’t have an astounding amount of CBD, medical patients still note that she’s a strain that is practically magical. Users find that mental woes are easily dissolved after taking a few hits, making stress and depression a thing of the past. Bodily aches and pains are also treated with a slight feeling of physical sedation, and those who struggle with their appetite will likely turn to this bud time and time again.
This plant is an ideal choice for new and experienced growers, and the ability to cultivate inside or out makes her pretty versatile. Said to be a quick flowering strain, you’ll be gifted with a nicely sized yield after 8 to 9 weeks. Plants tend to grow fairly large, so make sure you have enough space dedicated to your crop before you begin.
Depending on how you handle marijuana, Captain’s Cake may knock you out for an amazing nap or in some cases may fire you up with tons of energy. Others will experience a nice set of hybrid effects, so it’s best to know yourself before lighting this one up.
Red Sky is
Description
The (paternal P1) father is the legendary Cherry Hemmingway male. A hybrid of a landrace Bhutan, and Rez Dog’s Firecracker (Williams Wonder x NYC Diesel).
The female KOS’s own Skyanchor (Bogglegum x PSI) a cross using a prime selected male of BOG’s Bogglegum. A bad ass old-school hybrid made using a Northern Lights #5 (real deal) crossed to a Bubblegum (real deal). The female used to make the Skyanchor was my clone only PSI (Purple Salem Indica) that I was given by my good friend Keith, in Salem, OR, USA. Some kind of crazy old Purple Kush variant; potency is not only severe with this baby, but supernaturally intense.
The Cherry Hemmy is well known by me to relate large yields and incredible vigor along with increased resin production, and also usually relates cream soda, vanilla, or cherry-ish terpenes, making exotic and addictive combinations when used as part of any hybrid. So, the Red Sky yields well—very well.
Some truly legendary strains involved in this Small Batch Seed run.
Great genetics equals great end results.
I put video of Red Sky #3's brothers #2, and #4.
Likes
17
Share


@Leonardo_DaGrower
Follow
Week 10 is probably my last nutrient feeding.
One of these plants looks like she is less than two weeks away.


Likes
21
Share


@TriangleBotanistProject
Follow
Top Dressed with my dry amendments and topped 3 nodes down with of all branches. Trying to really bush it out under a scrog. The nutrients kicked in within the week on the Acapulco Gold.
- Changed the light from about 15% to about 35% at the same height on the ES180
- By using the mixture of Bio Tone and Earth dust I am introducing symbiotic microorganisms into the soil, mostly fungus. From what I understand these mycelium help the plant uptake the food grow healthier roots.
- My goal is to use the increased nutrient availability to help the plants handle more light intensity and meet it vigorous growth.
-Turned both fans on for stem strength
-

