
Likes
Comments
Share


@TheFattyMcCoy
Follow
Hey yall! Another week down. A lot has happened.
To start, we up-potted from the red solos into my living soil blend that I have been working on for almost a year. It's so full on living creatures and beneficials. I used to have fungus gnats a lot when working with living soil, it's almost impossible to avoid. .. Then enters beneficials; we have black soldier Flys, persimillis predatory mites, definitely earth worms, most likely a mix of night crawlers.
No more fungus gnats, I highly recommend using beneficial nematodes, cucumeris and persimillis predatory mites are excellent (swirski predatory mites are expensive). Just look at the Soil Food Web and identify what pest you have, then purchase their predators from a trusted insectary.
Anyways I added another 200watt LED and spread out the plants in a 2' X 4' tent. It's extremely dry in my location and having the heat on makes the air even drier. So getting my VPD stable has been an immense challenge. Right now
Also we need to be able to add VPD or at least GD needs a built in calculator to help folks with VPD, Vapor Pressure Deficite.
As of right now I am sitting at 0.85 VPD, so pretty good for today. I have 4 humidifiers and have had to hang moistened towels on the doors of the room I am growing in. It literally has been a huge challenge to keep the humidity high enough for my VPD to be in range for the young plants I have now.
Good thing is my current humidity without running any humidifiers is perfect for the flowering stage, so I can't wait to move this along.
As for topping and training; like I said I really want to move these ladies into flowering sooner than later. I have several reasons to do limited training so I can limit my veg time, also getting this crop done as fast as possible is best for my set up. Until I can get a larger house 🏠 😩 because we got a baby on the way 👶 so need to make space.
I have made compost tea twice this past week, wetting the soil and also spraying the leaves. My sprayer broke so I ended up pouring the tea on the plants gently, I got worm castings on the leaves lol. Gently rubbing that off once they dried. Also I applied the tea at night.
My tea recipe:
Reverse Osmosis water, 2 to 4 gallons
I bubble that with added minerals for a day
Add 2-3 cups of Activated worm castings (To activate the castings I added about 3 gallons of high quality castings with what I consider to be nutrient amendments, SO I add = kelp meal, neem cake, organic coconut flour, organic corn meal, organic wheat flour, and organic cold milled flax seeds and let that sit for a week then add about 2 to 3 cups of that mix to the tea)
I also add biology from about a cup of 2 different soil mixes I have around my compost bin, just trying to get a more diverse biology by adding those two different soil sources. And mind you the grow beds I took the soil from has been organic for many years and has a large amount of beneficials and tons of excellent biology.
Other than that I bubble that for 12 to 24 hours, with as much air as I can get. I use air stones but you really need to clean them off once you are done brewing. I also have an Air Lift with a large air pump that really works great, K.I.S. Organics sells one that works great or you can build one easily with with PVC pipe and a few adapters from any Home Depot or Lowes.
Also I do add DynoMyco to my roots when up-potting. They are an amazing brand that has backed up research, I think they have more propagules per gram of two strains they identified to work great with cannabis. Now having said that, each individual phenotype out of each individual and specific strain/cultivar is going to have different bacteria/fungal strains that it prefers and by growing the same strain, hopefully the same exact cut, and grow 3 to 4 cycles before you truly have the mycelium networks built and fully functional.
What I am saying is stop throwing out "used" soil and go over 7 gallons, bigger the better for biodiversity. Stop buying "new" soil, amend your previous beds and pots. You will see a huge difference. Hopefully I can show you all of this with my Grow.
Anyways please feel free to ask away any questions! This grow is about saving money 💰 🤑 and growing the best clean medicine as possible.

Likes
4
Share

@Cukito
Follow
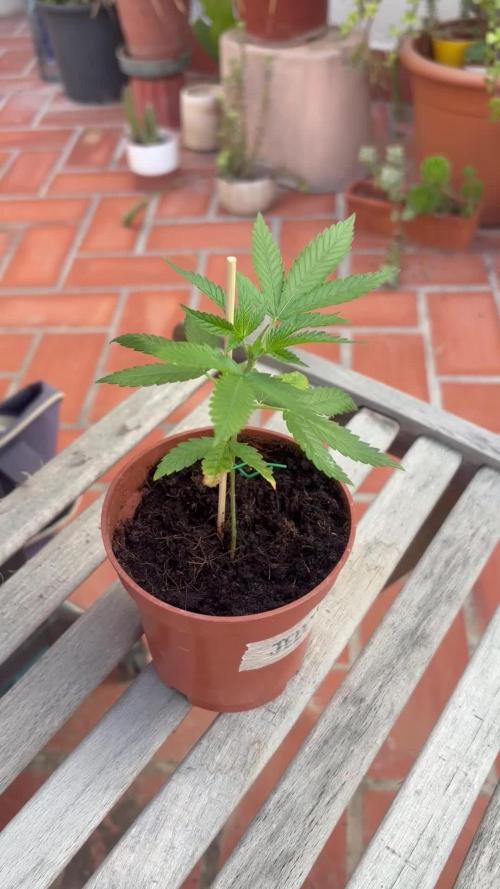
The tomatoe is doing great!! As you can see Ive been away for a week but my dad kept watering the plant nicely. Its growing fast but the base is not getting big :(


Likes
5
Share


@Saintgrower
Follow
Was away for most of the week so was left to my mate. So not really much say this week. Seeing some frosting on the bud sights but not currently as big as I’d like at this stage.
Likes
47
Share


@blazin_skywalker
Follow
Day 22 - Rolling into week 4 looking mean and green! 💪
I need to make a decision on what kind of training I want to dish out to this lady. She's growing a bit faster than her tent mates.
Day 23 - Always experimenting - today I begin my first mainline! I've already built the foundation by allowing the plant to grow to 6 nodes, as recommended by the tutorial I followed by the brilliant Miss Nebula Haze @growweedeasy.
My next step is documented here in a video, as I take my lush, happy, healthy plant, and give her the kind of haircut that makes you want to storm out of the salon without leaving a tip. 😂
I even managed to get in my signature branch snap early in the game - being held together now with duct tape. 🤦♀️
In all seriousness though, I'm thrilled to be trying this out, despite the agony of cutting down my plant to nothing but a stump and antennae. I've seen some great growers create some serious masterpieces using this method, and damn it my curiosity is taking control!
Here's to learning something new!
Day 27 - Came home from vacation to find that my plant had hulked through the duct tape that held her snapped branch together... I guess she's doing well. ☺️ Over the course of the past few days her branches have gotten notably thicker! 💪
Day 28 - Now that each new main stem has grown out, I removed all the growth tips from below the 3rd node on each side. I left the fan leaves in tact to give plant access to extra energy as she pushes through this intense training.
I softened the branches with my fingers, very slowly, to tie down my new main stems horizontally across the net basket.
I took a sterilized x-acto knife to then top each of my two main stems at the 3rd node on each side, leaving me with a beautifully symmetrical base to my masterpiece.

Likes
37
Share


@MG2009
Follow
08/29/2018
Been a hot week but the girls don't seem to mind,90s in the day 82° at night and sticky,muggy weather. Their leaves all pointing ☝️,lets me know they are happy ☺️ .watered with plain water they were pretty dry pots weight was very light. Will feed and water in in morning sleep well and medicated😎
08/31/2018
Just a note today #1 is very green compared to the other 4 plants, could be potted plants running low on nitrogen? My soil has plenty according to soil test. I know last year's crop in soil was pale like other 4 plants, maybe biochar is helping soil retain it's nutes better? Year 2 for biochar, first year could have tied up some nutes....hmmm?
Ps
Last feeding today Fox farms big bloom at heavy feeder dose 1/2 cup per gallon, should see nice gains this week! 🙏🙏🙏.
Pss.
G GTH #4 loosing her smells, #3 smells of Skunk and coffee ☕,#2 minty chlorophyll orange,#1 menthal,skunky but very lite scent.
Should I pollinate a branch of each? Oh my God the pressure! Do I have enough pollen? Oh sorry for rambling on just smoked lemon sour diesel and thoughts very racy😀
Got to garden see you next week
😎😎😎😎😎😎😎😎😎😎😎😎😎
Likes
11
Share


@NidoR420
Follow
Last week of Ozz! I’m getting some nice trichromes. Surprisingly, she doesn’t smell much, but she’s still beautiful. She also has the best ratio of buds to leaves out of the three plants of the same strain. I’ll start trimming Dorel by Friday and #4 this weekend to free some space. Then it’ll be Ozz’s turn on Sunday or Monday. The relative humidity levels are getting dangerously high, but the temperatures are still fine until next week. Since she’s covered, I have good hopes she’ll hold. No additional bud has rotted since two weeks ago :))
Likes
21
Share


@Hempy_The_Kid
Follow
10/05/22 watered.
10/09/22 mid-week found WPM on plant. Bathed in sodium bicarbonate. Also plant is now in bud cycle.

Likes
29
Share


@Ukfarmer420
Follow
Hi guys
So here is my 10 plant auto run from fastbuds 420 genetics. I will update weekly on this one. So I'm going to be using 3 gal fabric pots filled with biobizz lightmix soil.
I will be putting into solo cups after the 18 hour soak then transferring them to there for ever pots. Im looking forward to this run and trying to get 20oz + dry and cured out of this 4x4 tent grow.
Part 2 of germination in operation in solo cups with root juice. Hopefully 10 out of 10 pop.

Likes
2
Share


Likes
16
Share


@Naujas
Follow
107 days!! Here is another great experience :) The girl has matured, 330 grams of wet, full of sticky, resinous shiny, pleasantly smelling flowers :) I think it will be about 90 dry :) although the girl is definitely not the biggest, but she looks great, the smell is also amazing :) I also got some sugar leaves from which I will make bubble hash, For me personally it is really beautiful and good growth, which I think will definitely be confirmed by the dried and cured flowers :) there will be a smoke review, as well as the total dry weight. good luck to everyone :).

Likes
33
Share


@FlavoursUk
Follow
Had great results, especially when i upgraded to RO water.. if theres one thing i could of changed it would of been using the reverse Osmosis water sooner.
The rest of the grow was pretty easy, didn't even plant train as this was suppose to be a hassle free run. It was just that. Some good genetics from seedstockers too.
Good stuff!

Likes
17
Share


@All_our_small_plants
Follow
Bewässerung: 500 ml jeden 3 Tag in der Dritten Woche
pH-Wert: 5,8
EC-Wert: 0,7 mS/cm
Temperatur: 22ºC
Luftfeuchtigkeit: 50%
Schädlingsbekämpfung: im Moment haben wir keine Anzeichen das es was zu bekämpfen gibt, sobald die ersten Anzeichen da sind werden wir handeln :)
PPFD: 200 µmol/m²/s
DLI: 15 mol/m²/Tag
Düngemittel: COMPO GROW ORGANIC WACHSTUM DÜNGER, Sie bekommen auch ab jetzt immer etwas CalMag von BioBizz zu Prävention. Ab Tag 18 haben wir angefangen sie mit einem Mineralischen NPK Dünger (NPK 7-3-5) zu Gießen .
Besonderheiten: Die Linsen wurden entfernt und wir haben mir dem LST begonnen
-Tag 15 Heute haben wir mit dem LST Begonnen und sie hat sich sehr gut vom Toppen erholt.
-Tag 16 heute wurde sie Entlaubt.
-Tag 17 heute wurde sie Entlaubt damit die Triebe mehr kraft bekommen und schön im Licht stehen.
-Tag 18 heute wurden wieder die LST Sticks angepasst damit sie in form bleibt.
-Tag 21 heute wurde sie entlaubt und wurde wieder nachunten gebunden, sie wächst wie beim letzten mal extrem gut, das wird sicher wieder ein Monster 💪💪💪

Likes
16
Share


@Baron_Codelli
Follow
Hi growers. It's end of week 5 of flowering.
So far, all girls looks quite well, only OG is showing that he is missing some zink.. Hope to heal her...
Red mandarine is showing her true color as well.. Live that purple!!
Stay stoned and keep growing!
One love!

Likes
2
Share


@billycardine0420king
Follow
7/27/25- Week 7. I see flowers starting on the plants but they are probably just pre flowers but actual flowering is close now. I just fertilized them again with the above nutrients in a 5 gallon bucket. We went from a heat wave and drought to plenty of rain at the end of July so they are approaching 6 feet tall now and just big bushes.


Likes
17
Share


@Grindlife219
Follow
Topped last week plants are growing vigorous
Day 58 is today 06/01/21 today I topped dressed with 4-4-4 and earthworm castings and continue to lst plants


Likes
2
Share


@sanchelos
Follow
шишка с новой причёской!
появился хороший запах,и так как системный блок дует на шишку,а завехрения воздуха направлены на монитор-запах просто потресающий,обожаю как пахнет растишка)
Likes
14
Share


@RakonGrow
Follow
+
Tag 72:
starting 30-70% watering rule
2.25L bottle water EC 0.35 + 0.3ml/L CalMag + Terra Flores 4.5ml/L Final PH 6.23
Tag 71:
starting 30-70% watering rule
2.0L bottle water EC 0.35 + 0.4ml/L CalMag + Terra Flores 5.25ml/L Final PH 6.17
Tag 70:
starting 30-70% watering rule
2.0L bottle water EC 0.35 + 0.4ml/L CalMag + Terra Flores 5.25ml/L Final PH 6.20
Tag 69:
starting 30-70% watering rule
2.0L bottle water EC 0.35 + 0.4ml/L CalMag + Terra Flores 5.25ml/L Final PH 6.17
Tag 68:
starting 30-70% watering rule
2.0L bottle water EC 0.35 + 0.4ml/L CalMag + Terra Flores 5.25ml/L Final PH 6.20
Tag 67:
starting 30-70% watering rule
2.0L bottle water EC 0.35 + 0.4ml/L CalMag + Terra Flores 5.25ml/L Final PH 6.20
Tag 66:
starting 30-70% watering rule
2.0L bottle water EC 0.35 + 0.4ml/L CalMag + Terra Flores 5.25ml/L Final PH 6.20
---------------------- all values are weight in grams ( assumption : 1000g = 1000ml.) -------------
Day......State...Date Time..................Seed......measure..change...watering.....surplus.....DayLight.....Night.....within 24h
...66...bloom...22.11.2025 06:00.....Runtz...........5782.......-349.......................................................................-349.............-2060
...66...bloom...22.11.2025 07:00.....Runtz...........7787.......2005...........2005.............-55
...66...bloom...22.11.2025 23:45.....Runtz...........6185.....-1602.................................................-1602
...67...bloom...23.11.2025 06:00.....Runtz...........5837.......-348.......................................................................-348.............-1950
...67...bloom...23.11.2025 07:00.....Runtz...........7994.......2157...........2157.............207
...67...bloom...23.11.2025 23:45.....Runtz...........6315.....-1679.................................................-1679
...68...bloom...24.11.2025 06:00.....Runtz...........5956.......-359.......................................................................-359.............-2038
...68...bloom...24.11.2025 07:00.....Runtz...........7991.......2035...........2035...............-3
...68...bloom...24.11.2025 23:45.....Runtz...........6315.....-1676.................................................-1676
...69...bloom...25.11.2025 06:00.....Runtz...........5975.......-340.......................................................................-340.............-2016
...69...bloom...25.11.2025 07:00.....Runtz...........8050.......2075...........2075..............59
...69...bloom...25.11.2025 23:45.....Runtz...........6319.....-1713.................................................-1713
...70...bloom...26.11.2025 06:00.....Runtz...........6036.......-283.......................................................................-283.............-2014
...70...bloom...26.11.2025 07:00.....Runtz...........8137.......2101...........2101..............87
...70...bloom...26.11.2025 23:45.....Runtz...........6369.....-1768.................................................-1768
...71...bloom...27.11.2025 06:00.....Runtz...........6047.......-322.......................................................................-322.............-2090
...71...bloom...27.11.2025 07:00.....Runtz...........7992.......1945...........1945..........-145
...71...bloom...27.11.2025 23:45.....Runtz...........6190.....-1802.................................................-1802
...72...bloom...28.11.2025 06:00.....Runtz...........5886.......-304.......................................................................-304.............-2106
...72...bloom...28.11.2025 07:00.....Runtz...........8104.......2218...........2218............112
...72...bloom...28.11.2025 23:45.....Runtz...........6292.....-1812.................................................-1812
+

Likes
6
Share


@artems
Follow
Bad Guy is thriving, but some lower leaves are yellowing. I've boosted feeding and will keep a close eye. Despite that, its upward growth is impressive, and I'm excited to see how it progresses. 😊🌿

Likes
10
Share


@wheedtobeus420
Follow
Stoked on her. She turned out wonderful. Smells like rotting strawberries and gas. I’m so glad I could grow her out normally. No purple colors but she has a pink hue to her. I’m pleased. Into the cure closet she goes. She will cure for a couple weeks and I can’t wait to press her into some rosin 🍓
