


Likes
Comments
Share


@Roberts
Follow
The little Potter AMS Gorilla Glue has had a ph issue this week. I got it mostly stable when I seen it. The nutrition was a little too strong causing it to spike down as it got less moisture in the substrate. She has still grown well under the Spider Farmer G3000 light with issue. I just switched her to flowering today. She should be good to go at this point. Nothing else to report. Thank you Spider Farmer, and Amsterdam Marijuana Seeds. 🌱🤜🏻🤛🏻🌱
Www.amsterdammarijuanaseeds.com
Thank you grow diaries community for the 👇likes👇, follows, comments, and subscriptions on my YouTube channel👇. ❄️🌱🍻
Happy Growing 🌱🌱🌱
https://youtube.com/channel/UCAhN7yRzWLpcaRHhMIQ7X4g
Spider Farmer G300w: https://amzn.to/3S2zvsd
Spider Farmer 10X20 Heat Mat Kit - https://amz.fun/lsa0J
Spider Farmer Amazon Store: https://www.amazon.com/spiderfarmer
Spider Farmer Official Site: https://spider-farmer.com
Discount code: saveurcash

Likes
23
Share


@SkunkyDog420
Follow
Hallo zusammen 🤙.
Habe sie heute geerntet. Sie riecht phantastisch 🤤
Wir hören uns in 3 Wochen mit dem Erntebericht

Likes
9
Share


@newenglandgrowers
Follow
Cut the plants down on the 24th of April, drying room levels are 72°F and around 60%RH, I'm currently on Day #14 of drying and the buds don't feel fully dry yet, the main tops feel crunchy and dry but the lower smaller buds are still quite moist and smell like chlorophyll, I think I may harvest the main tops so I don't overdry and leave the rest in the tent for another few days, either that or put the rest of the buds in a brown paper bag to finish drying. Finished dry trimming the plant ended up with 200 grams dry weight not including trim there's another 2 ounces of trim which if you want to include that would bring the total weight from this 250W LED to 256 grams. I'm super happy with the result of this especially for my first grow and from one autoflower, it can only get better from here on out. FYI Not sure why I can't edit the lights I used but the bloomgro 600W LED is PULLING AN ACTUAL 250W FROM THE WALL so the gram/watt should be .8g/W

Likes
20
Share


@BABS_Babies
Follow
Starting to keep a close eye on the Trichomes. Still clear some cloudy. Stopped feeding, Starting to flush. It’s starting to smell amazing in here.

Likes
37
Share


@The_Bearded_Grower
Follow
Welcome to Day 43 29/1/2021 she is coming along great but I wish she would stop stretching lol not much else to say really . Happy growing and keep your stick on the ice


Likes
20
Share

@India_Calcoen
Follow
5-10-2025
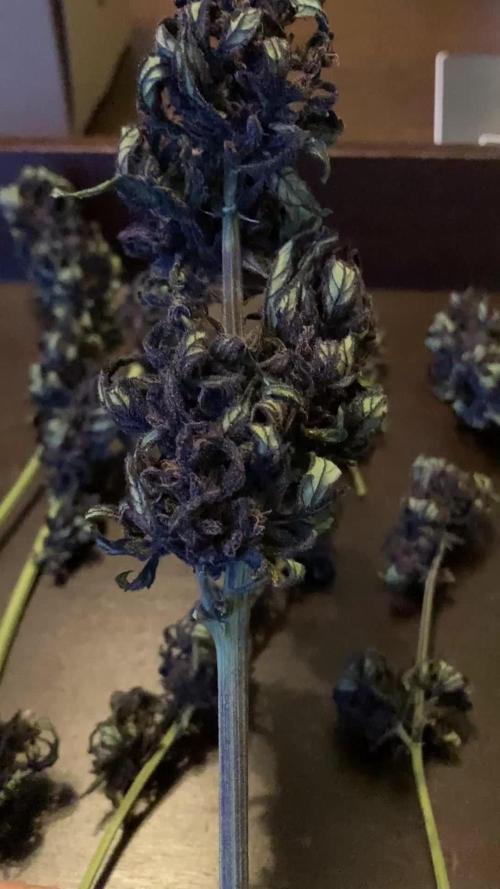
I harvested my Purplematic CBD and washed the buds with a mixture of baking soda and lemon juice. Some caterpillars 🐛 came out of the buds 😱!! I hung the branches up to dry in a spare dark room with a ventilator. After 10 days of drying the branches still wouldn’t snip. I think the room was too cold and too humid. Next time I’m using a dehumidifier.

Likes
9
Share


@Xabii
Follow
Starting this week I will also add Oxygen granulate (KMPS, CAS-70693-62-8, 2KHSO₅ * KHSO₄ * K₂SO₄) I use this once a day to reach ~250 mV on my ORP meter, it is not calibrated so it more of a good guess, adding this helps to keep the reservoir stable even with higher nutrient temperatures in summer and it also adds a little Kalium/Potassium for the plants.
The ORP probe is not calibrated and values are to be taken with a grain of salt.
Values are average of the day.
DATE - °C - RH% (Tent Temp/RH)
20240725 25.2 52.4
20240726 25.7 61.0
20240727 25.1 63.6
20240728 24.4 57.2
20240729 25.5 55.2
20240730 27.2 54.4
20240731 27.2 61.7
DATE - PH
20240725 6.16
20240726 6.05
20240727 5.88
20240728 5.90
20240729 5.92
20240730 5.94
20240731 5.95
DATE - ORP (mV)
20240725 20
20240726 23
20240727 23
20240728 19
20240729 18
20240730 18
20240731 15
DATE - EC(us/cm)
20240725 1990
20240726 2060
20240727 2137
20240728 2119
20240729 2152
20240730 2186
20240731 2211
DATE - CF
20240725 19.90
20240726 20.60
20240727 21.37
20240728 21.19
20240729 21.52
20240730 21.86
20240731 22.11
DATE - °C (Reservoir)
20240725 21.6
20240726 22.0
20240727 22.4
20240728 21.4
20240729 21.6
20240730 22.4
20240731 22.5
Likes
13
Share


@DaisyNabis
Follow
hice trasplante a maceta definitiva dentro de unos días esperando que se establezcan de su stress hare cambio fotoperiodico, el humificador lo saque 5 días antes de trasplante
Likes
Comments
Share


@StickyFingah420
Follow
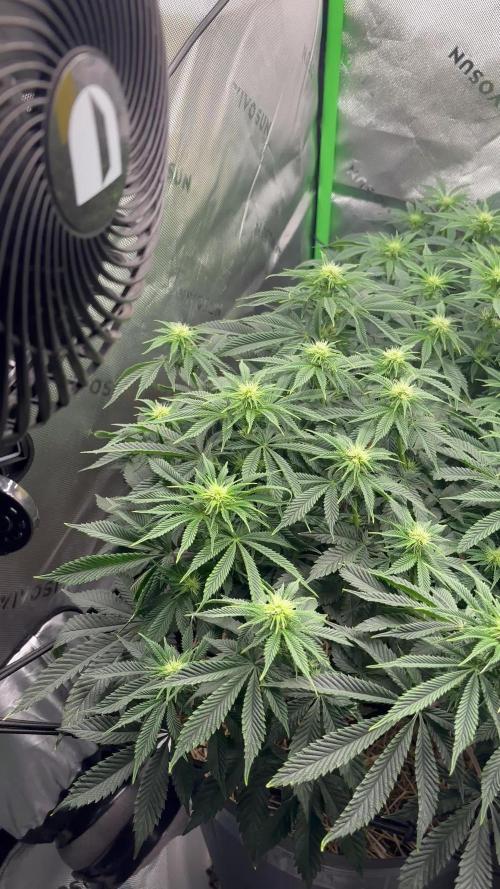
Esto tiene un olor tropical/dulce que alucinas! 🍊🍍
Ya en el día 70 y se aproxima a la etapa final.
Desde hace un par de días inicié el lavado (todos los riegos que restan solo con agua neutra y aumentando el volumen) en esta instancia ya ha logrado aumentar un poco más el volumen de sus flores y la cantidad de tricomas es bastante generosa.
Ahora solo a esperar que esta hermosa termine de amarillear sus hojas, se seque el sustrato y tocará cosecharla ??


Likes
3
Share


@BenandLippisfinest
Follow
Heute ist Tag 20 nach Keimung, bis jetzt sind wir sehr zufrieden, die Ladys entwickeln sich gut und sehen gesund aus. Ist das erste Mal mit Green House Feeding. Auch das erste Mal Autos und die Fastbuds Genetiken, scheinen gut zu gehen. Sie haben heute ihren ersten Tag im Garten verbracht, wir sind gespannt was da am Ende raus kommt unter der deutschen ☀️
Likes
17
Share

@DogDoctorOfficial
Follow
Animal Mints — Legends of the Frozen North
Part 2 — Drying, Trimming & Preserving the Harvest
Before we begin, once again, we want to apologize for dividing this harvest into multiple reports. We know it can feel like a long journey to follow week after week, but honestly, this is the only way we can properly document everything in the level of detail that these plants deserve.
Harvesting, drying, trimming, curing, resin collection, storage methods, smoke reviews… all of these stages are part of the final medicine. And instead of rushing through it in one giant post, we prefer to slow down and share every step in the most educational and transparent way possible.
So welcome back to the frozen north.
This is Part 2.
⸻
Ten days later, the room had completely changed.
The giant living plants we harvested in the previous report had now transformed into hanging medicine. Slowly drying in darkness, at around 18–20°C and roughly 60% humidity, allowing the moisture to leave the flowers gradually instead of forcing them dry too quickly.
For the first couple of days, humidity was brought slightly lower to help remove excess external moisture, but after that, conditions stabilized again for the slow dry we love so much.
And then came that moment every grower knows.
That little click.
That beautiful snap in the branches that tells you the plant is finally ready.
Not too wet.
Not too dry.
Just right.
And honestly… after seeing these girls hanging there for days, fully intact, massive branches swinging slowly in the dark, it was finally time to begin the next ritual.
Trimming day.
⸻
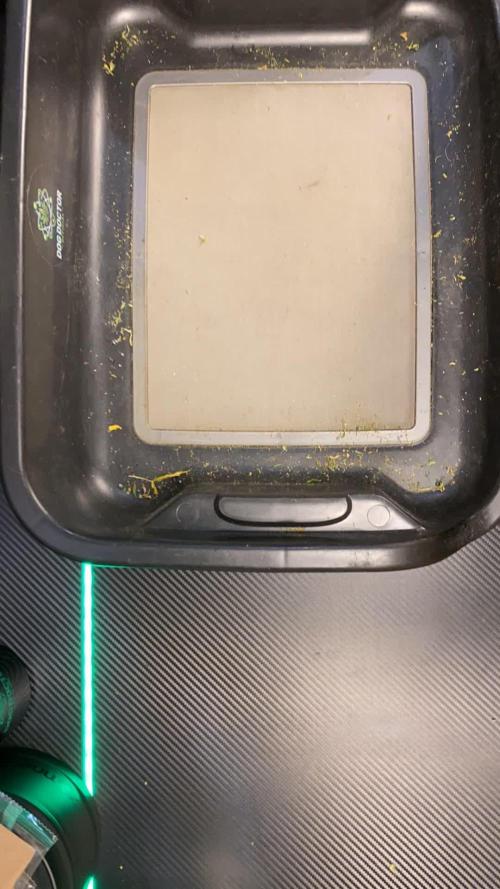
Gloves on.
Scissors ready.
Trim bin prepared.
Medicine beside us.
Mr. Baggy supervising operations as always.
One branch at a time, we carefully broke the plants down by hand, slowly removing each flower from the stems before shaping every nug individually.
No rush.
No machine trimming.
No shortcuts.
Just patience, resin, and respect for the plant.
And these Animal Mints girls absolutely covered everything in trichomes.
The moment trimming started, the gloves became sticky almost immediately. Thick resin building layer after layer until eventually it rolled naturally into small dark hash balls directly from the fingers and gloves themselves.
This is one of those little moments we genuinely love about harvest season.
That sticky resin coating the gloves is essentially concentrated trichome resin — cannabinoids, terpenes, waxes, oils, and all the aromatic compounds that make the plant what it is. With a little warmth from the hands and gentle pressure, it naturally rolls together into traditional finger hash.
Simple. Ancient. Beautiful.
And of course… we also continued our little Moroccan-style “drums” with the trim.
By gently agitating the dried trim across the screens, we collected an absolutely beautiful amount of dry sift. Bright golden-yellow resin, soft and sandy, full of aroma and life. No exact scale numbers this time — this was more about enjoying the process than chasing statistics — but the quality spoke for itself immediately.
Honestly, this type of hash is one of our favorite ways to enjoy the plant.
A little inside a joint, slowly melting together with the flower, enhancing both flavor and depth without overpowering the experience.
Pure magic.
⸻
Now let’s talk numbers.
And honestly… these girls performed beautifully.
Plant A gave us:
127g
Plant B gave us:
247.8g
Plant C gave us:
287.9g
For dense, compact, heavily resinous flowers grown 12/12 from seed, this is an outstanding result in our eyes.
Especially considering the morphology of these plants.
This style of growing continues to impress us more and more every single run. The plants remain relatively compact vertically, but the flower production becomes incredibly efficient. Tight node spacing. Massive bud stacking. Heavy trichome production. Strong support structure. Dense flowers without absurd plant height.
The frozen north delivered once again.
And standing there in the studio holding entire branches in both hands… honestly, it was impossible not to smile.
Happy grower moment.
⸻
Once trimming was complete, the next mission began:
Preserving the terpenes.
Because harvest means nothing if the cure is bad.
So this time we decided to test multiple storage methods side by side.
Some flowers went into traditional glass jars — still one of our absolute favorite methods for long-term curing. Stable, simple, reliable, and something we continue to trust deeply.
Some flowers went into vacuum-style Zamnesia metal containers, where air can be partially removed while maintaining stable conditions inside.
Others went into vacuum plastic containers with pressure-sealed lids.
And finally, part of the harvest also went into Grove Bags, since the yield was simply too large not to use multiple preservation systems.
Inside several containers we also added 62% humidity control packs.
These packs are not “magic terpene creators” or anything like that — they simply help stabilize relative humidity inside the container, preventing flowers from becoming either too dry or too moist during curing.
The flowers themselves were already dried correctly before storage. That part is important.
Humidity packs are not there to fix bad drying.
They are there to help maintain stability afterward.
And honestly, one of the most exciting things now will be revisiting these exact same flowers months later to compare how each storage method affected aroma, texture, smoothness, and terpene expression over time.
Because curing is alive.
Medicine changes.
Terpenes evolve.
And that journey is part of the magic too.
⸻
One thing we also want to mention is how much easier trimming became with the curved point Zamnesia scissors.
It might sound like a tiny detail, but those curved tips genuinely help reach deep into dense flowers without damaging structure, allowing cleaner trimming while preserving the natural shape of the buds.
Small tools. Big difference.
⸻
By the end of this session, trays were full, jars were packed, hash was collected, gloves were destroyed by resin, and the studio smelled absolutely unreal.
pine, diesel and earthy.
Animal Mints is looking amazing.
And honestly… looking at those giant trimmed branches in the studio lights, it was one of those moments where you simply stop for a second and appreciate the entire journey from seed to harvest.
Because this is more than growing plants.
This is preservation of flavor.
Preservation of resin.
Preservation of time, patience, and intention.
⸻
But we are still not done.
Not even close.
The next report will be the final chapter of this frozen journey:
the smoke review, terpene breakdown, curing evolution, flavor analysis, effects, and our complete final thoughts on Animal Mints from seed to harvest.
And trust us…
This girl still has a lot to say.
⸻
Huge thanks once again to everyone following this journey:
Zamnesia for the genetics, Plagron,FOG Lighting, the gear sponsors, the community, GrowDiaries, the growers supporting from day one, the silent followers, the commenters, the critics, the legends, the OGs…
And of course, thank you to everyone taking the time to read these reports week after week.
The frozen north continues.
📡 DELETED @ 1K Please stay tuned.we never quit https://www.youtube.com/@TheDogDoctorOfficial NEW 🙏 Thank you for your patience and continued support.
FOR DISCOUNT CODES AND MORE JUST FOLLOW THE LINK https://website.beacons.ai/dogdoctorofficial
📲 Don’t forget to Subscribe and follow me on Instagram and YouTube @DogDoctorOfficial for exclusive content, real-time updates, and behind-the-scenes magic. We’ve got so much more coming, including transplanting and all the amazing techniques that go along with it. You won’t want to miss it.
GrowDiaries Journal: https://growdiaries.com/grower/dogdoctorofficial
Instagram: https://www.instagram.com/dogdoctorofficial/
YouTube: https://www.youtube.com/@dogdoctorofficial Deleted by Youtube - https://www.youtube.com/@TheDogDoctorOfficial NEW
Vimeo : https://vimeo.com/dogdoctorofficial Under construction stay tuned ⸻
Explore the Gear that Powers My Grow
If you’re curious about the tech I’m using, check out these links:
🔆 Lighting & Environmental Control
• Future of Grow — Advanced LED lighting technology
https://www.futureofgrow.com/
DISCOUNT CODE: DOG20
• Lumiflora — Under-canopy LED lighting
https://lumiflorade.com/
• TrollMaster — Environmental controllers and automation gear (past collaboration)
⸻
Genetics
• Zamnesia Seeds — Genetics used in this project
https://www.zamnesia.com/
⸻
🌱 Soil, Substrates, Boosters & Root Support
• Plagron — Substrates, bio mixes, and supportive products
https://plagron.com/en/
⸻
🎒 Storage, Curing & Preservation
• Grove Bags — Curing and storage solutions
https://grovebags.com/
⸻
📸 Photography Equipment & Tools
(Not sponsors, but part of my creative toolkit)
• Sony A6700
• Sony full-frame macro lens + few more
• Stacking photography workflow - learning
• iPhone (for behind-the-scenes shots)
As always, this is shared for educational purposes, aiming to spread understanding and appreciation for this plant. Let’s celebrate it responsibly and continue to learn and grow together.
With true love comes happiness. Always believe in yourself, and always do things expecting nothing and with an open heart. Be a giver, and the universe will give back in ways you could never imagine.
💚 Growers love to all 💚
📸 P.S. – The Eye Behind the Lens
All photos in this diary (for now — except for the ones showing the camera, which I took with an iPhone) are taken with a Sony A6700 paired with a Sony full-frame macro lens and a few more.
Photography is part of the story — it’s how we share the fine textures, the glow, and the quiet details that words can’t always capture.
I’ve also started experimenting with photo stacking — a technique where multiple images, each taken at a slightly different focus point, are layered together to create one perfectly sharp image from front to back.
It’s not digital enhancement or AI; it’s pure photography — a way to reveal the plant’s beauty in microscopic depth, from trichome to petal.
You’ll even see a few shots of "ghost me" capturing the shots — camera, lens, setup — because every grow deserves not just to be cultivated, but documented like art.
FOR DISCOUNT CODES AND MORE JUST FOLLOW THE LINK https://website.beacons.ai/dogdoctorofficial
NEW DISCORD - Official Server Invite Link : https://discord.gg/ksjAkA5T74

Likes
1
Share


Likes
15
Share


@gottagrowsometime
Follow
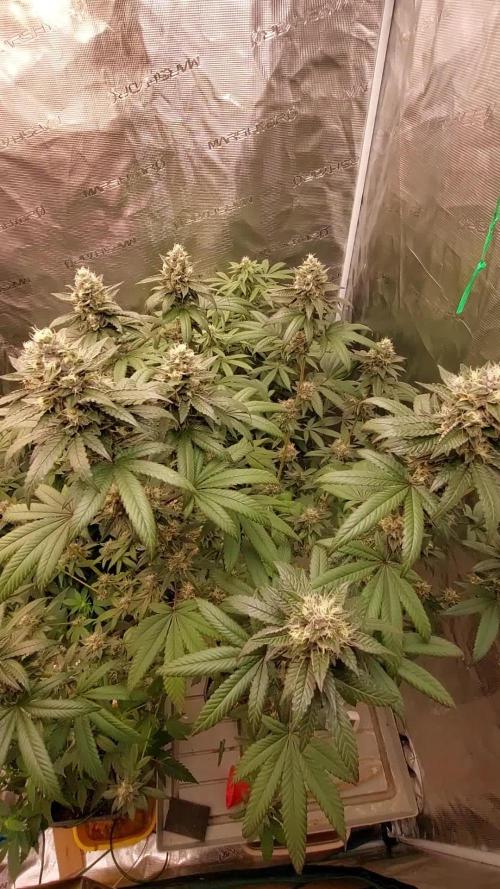
Welcome to my Epic Buzz Diary sponsored my Anesia Seeds.
Bit of lag in a few of my diaries. Apologise to the followers. Swapped atm.
Veg Days 4-23 Days 8-28 3 weeks
Plant grew really well. Really fast out the gate. Done a repeat of the hard Defoliation method used in my Ztrawberry to see can I replicate that even strong node growth. This was the 1st of very high stress defoliations that will be done. Y, well I wanna see how hardy these genes are. And how they respond to various stress factors. So, my 1st hard defol was done at the end of wk 3. I removed all the fan leafs and left the small nodes to fend for themselves in the hopes it would actually push an even node growth, instead of older bigger fan leafs drawing in more energy and therefore making bigger nodes. You may think she is small. But, look at it from the point of them just been nodes and no big ass fan leafs that make your plant look twice the size it really is. So, stripped her bare. And let her run, and oh boy she did. Lovely node growth. Very well defined.
Explosive growth from about 5 days into the hard defol she took off like a bat outta hell. Really took off coming into wk 4.
Sadly, this is where the good times kinda stop.. Next wk, its all down kill, hit with a serve Sulphur issue. That came on with hrs and looked like a wk old issue. The response time from growing in co2 is so quick. The plant is finding it hard to show symptoms like a normal grow, where you'd see a gradual illness occur. But, this way. You really have to be on the ball. Its definitely not something I'd recommend doing until you get a few grows under you. The slightest oversight will throw her into a tail spin. Feel free to message me if you're interested in using co2. I'm by far no expert but, I know a fair about of head knowledge and hopefully soon experiences in it also and fixes etc.
Methods
Will be using my hard defoliation techniques to push this girl to making nice strong nodes, hopefully, that's the idea. Thus far. Its been going to plan. I've achieved a really good solid base, to build heavy buds on. Soon I'll start to tackle some sort of shape. I had to do a repair to a snapped node. Was literally hanging on by a very thin bit. Recovered strong and has set. I might now HST the otherside to counter the energy that this side will have more of now. As when you HST break a stem and it repairs the stem itself hardens up, storing more energy/fluids and helps direct it better up through the full filled nodes, so they're not like straws. So, the broken side will act like it's been HST'ed now. So, only makes sense to do the other side to keep a somewhat even energy distribution
Thanks to my followers and sponsors from Anesia Seeds & Spider-Farmer. Without you (my followers/viewers I couldn't do any of this, nor would I be or have all I do without my sponsors. So, a big thank you from GGST. Look forward to seen your work. Either way, thanks for stopping by.

Likes
6
Share


@PflanzElfe
Follow
Da ich nicht bedacht habe, dass die Lampe doch so viel Wärme abgibt, hat die kleine Dame kurzzeitig etwas viel Hitze abbekommen.
Zum Glück ist es am nächsten Tag aufgefallen und ich konnte etwas gegensteuern, indem ich Die Lampen Leistung etwas runtergeschraubt und den Luftbefeuchter kontrolliert habe.
Processing
Likes
11
Share


@Blacksheep
Follow
Looking good. 2-3 weeks to go. PH is great. Starting to really make resin glands. Smells great

Likes
20
Share


@CanadianFillmore
Follow
Start of flowering, week 1, day 29 for plants 2 & 3. Plant 1 will stay in veg, following same feed schedule as previous week's, but she will no longer be included in this diary.
Plants 2 and 3 look very healthy and I trimmed several lower branches as they were getting minimal light.

Likes
2
Share


@Fyko12
Follow
Anfang vierte Blüte Woche Pflanzen sehen gut aus
Habe sie generell wenig gedüngt
Likes
45
Share


@GrowOnTheLeft
Follow
W6 - GRETA 🌱is doing well.
I defoliate some leaves from top brunches (compare with week 5) just to make the top canopy slightly less dense.
That will allow more sunlight receive by lower brunches a specially when they in the flowering period.
Slowly buds get covered with trichomes 🎍
Happy times 🙂
Likes
3
Share


@Jointjourney
Follow
The Morello Cherries Auto has developed well in the last 10 days. My humidity was a little too low, but the plant is slowly starting to develop an aroma. It’s not very strong yet, but quite interesting—I’ll go into it further as the plant progresses. It shows initial signs of phosphorus deficiency. I might look for some organic phosphorus fertiliser. I still have some Biobizz Biobloom, which I could use sparingly, but I’d prefer to avoid adding too much nitrogen. Let’s see how it continues to develop.
