


Processing
Likes
6
Share


@ganjaman24
Follow
She grows nice and quick if you Treat her well! I transplanted and made a couple mistakes so she didn’t reach 100% imo but it’s still a nice turn out! Hadn’t she not gotten pollinated I think the yield would’ve been more! Oh well still not a bad turnout will compare her to my other cut of this strain I have finishing up! Check it out, thanks for reading


Likes
10
Share


@Stacy_smokez
Follow
Everything is moving smooth with all of the plant except lots o bear by fox genetics it popped and just never grew so I’m planting the 3rd seed and if it doesn’t work I’m going to sub for purple punch auto


Likes
1
Share


@Tryhard1988
Follow
The colours have come out and she smells like sherbert it's crazy
We have three weeks left I'm not going to flush try another method I'm just going to feed water from now until there ready

Likes
17
Share


@igloo57
Follow
1/1/22 - just looked
1/2 - watered
1/3 - just looked
1/4 - just looked
1/5 - Just looked
1/6 - Cut

Likes
3
Share


@RainerWinklerGrow
Follow
Harvested Around 220 Grams from 3 Plants, terps were there slightly, smoked fine, its alright, went with a differnent breeder after.

Likes
35
Share


@eldruida_lamota
Follow
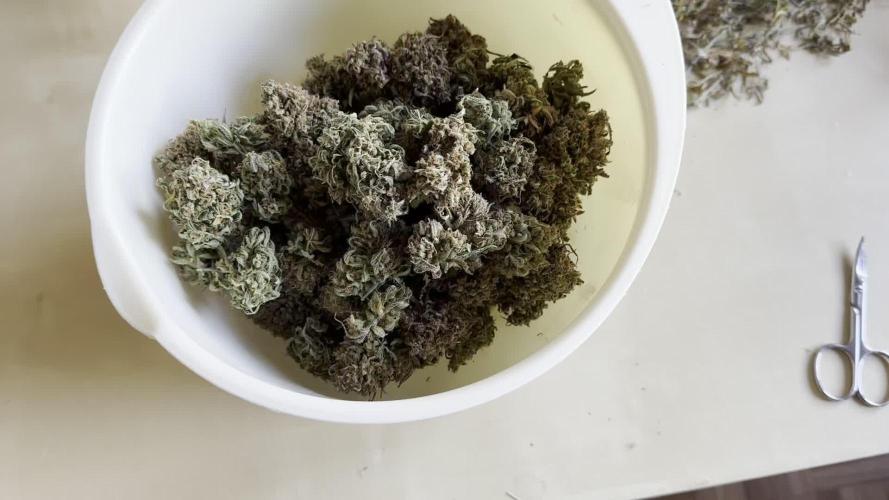
Bueno familia ya finalizamos, estas red hot cookies son una cepa bestial.
La verdad que el secado muy bien 7 días en Malla y a los botes, 45% humedad y 23 grados es la temperatura ambiental que han tenido en el secado.
4 plantas que se cultivaron en un armario de 1.20 pero estos ejemplares solo ocuparon 80x80.
Así que ya está cultivada esta gran variedad que es novedad este 2020, americana de la familia Cookies, la Tropicanna Cookies (Girl Scout Cookies x Tangie) con un porcentaje de thc entre los 17/25%, una bomba.
Que decir de Agrobeta, lo peta 💪 en cuanto a nutrientes. Un saludo y buenos humos.

Likes
65
Share


@biggreens420
Follow
She's getting on well nice bud production a bit behind the zombie but has been from start nodes a stacking well she seems more bushy than the zombie not quite at the net yet will raise her on something if she doesn't make it removed a few leaves every now and then keep a nice air flow and light penetration she's stinking up the place really nice sweet smell looking forward to tasting her lol thanks for reading happy growing guys

Likes
15
Share


@chupacabra80
Follow
привет ребята,вот срезал мой куст, вроде не плохо вышло?! посмотрим сколько будет весить когда высохнут )))) амнезия мой любимый сорт,как только высохнут отпишусь какой будет результат )))
30,06,2021
вот и результат почти 90 грамм,на весах 40 грамм но это моя доля урожая ,я выращиваю в месте с другом так что моя половина 40 грамм сухих шишек и мы еще и покурили пока шишки подсохли, так что приблизительно у меня получилось 85-90 грамм сухих шишек,шишки выросли толстыми но они не плотные,потому и такой результат, посмотрите мой апельсин у него хорошие плотные шишки , он начал цвести в 60 дней , растение без проблем,кто не любит ждать этот сорт не для него )))
09,07,2021 мой урожай пересох, +35,3 с было очень жарко и я не мог контролировать температуру (( я ожидал результат лучше но не вышло, надеюсь дальше все нормализуется
Likes
28
Share


@MarcXL
Follow
Last days are coming, got only water now. Harvest is near, the smell is strong but sweet with hints of diesel.

Likes
27
Share


@GrammaGriller
Follow
Делали маникюр 5 часов в 6 рук, все липкое
Вкусно пахнет, много фиолетовых оттенков
Много листвы сахарной и вторичного продукта

Likes
2
Share


@KeemBboomin
Follow
This was the week I decided to take a look at my trichomes with about 2-3 weeks left why not see what’s in store for me. And what I saw was some pretty milky stuff with surprisingly some amber to me that just means I’m going to get some good thc levels I’m shooting for at least 22-25% thc wish me luck we are almost there final stretch
Likes
10
Share

@Thirsty_Grower
Follow
Die Wurzeln hatten das gesamte Volumen des Topfes durchwachsen. Die Hauptwurzel war allerdings nur etwa 15–20 cm lang; der restliche Wurzelballen bestand überwiegend aus sehr feinen, stark verzweigten Wurzeln. Wahrscheinlich lag das an der unzureichenden Belüftung des Wurzelbereichs. In einem Stofftopf wäre das Wurzelsystem vermutlich besser entwickelt gewesen.
Die Trocknung erfolgte in einem Textilschrank auf dem Dachboden. Die Temperatur lag nachts bei etwa 5–10 °C und tagsüber bei ungefähr 10–15 °C.
Das Gesamtgewicht nach der Trocknung betrug 117,55 g. Der durchschnittliche Gewichtsverlust während des Curings lag durchschnittlich bei etwa 2,61 % (siehe Tabelle). An der Messung des Gewichtsverlustes während des Curings nahm nicht die gesamte Ernte teil, sondern lediglich ein Teil davon. Die untersuchte Menge war jedoch ausreichend, um den durchschnittlichen Gewichtsverlust zu bestimmen.
Das über 49,9 g hinausgehende Gewicht wurde ordnungsgemäß entsorgt.
Likes
2
Share


@WeedNerd_DWC
Follow
on week 6-7 nute recipe since w5, 950w main and undercanopy lights + 192w of lil sidelights. smelling nice now
Likes
6
Share


@Mr_nugs_lover_David
Follow
Everything seems to be going great! She's developing very fast and looks very good,no problems at the moment,let's see how big she gets before flowering starts we're not very far away from that,I'm enjoying a lot growing her,she's an excellent genetic she's being fed just like every single plant that I grow full organically with mycorrizae by florians living organics bat guano by guanokalong,seaweed powder,lactobacillus microorganisms and love,peace guys ❤️💛💚🌱


Likes
8
Share


@cangrowz
Follow
frosted guava ❄️
🌱 Anfang Woche 7/10 🌱
Die drei Frosted Guava entwickeln sich weiterhin richtig gut. Die Buds werden von Tag zu Tag dicker und haben mittlerweile schon ordentlich an Volumen zugelegt. Ich bin gespannt, was in den letzten drei Wochen noch passiert, denn ich denke, da wird nochmal einiges an Gewicht und Harz dazukommen.
Beim Düngen gibt es aktuell Advanced Nutrients pH Perfect Bloom A + B mit jeweils 2,0 ml pro Liter sowie Cal Mag mit 1,2 bis 1,5 ml pro Liter. Anfangs war ich bei dem Dünger eher etwas skeptisch und dachte, weniger ist vielleicht besser. Mittlerweile muss ich aber sagen, dass er mich auf ganzer Linie überzeugt. Die Pflanzen sehen gesund aus, wachsen super und reagieren sehr positiv darauf. Jetzt bin ich natürlich gespannt, wie das Endergebnis am Ende aussehen wird.
Außerdem habe ich wieder ein paar große Fächerblätter entfernt, damit mehr Licht an die unteren Budsites kommt. Gegen Ende der Woche sind auch endlich die Temperaturen gesunken. Nach mehreren Tagen mit dauerhaft 30 bis 32 °C liegen wir jetzt bei angenehmen 27 °C. Ich denke, das wird den Pflanzen ebenfalls guttun. Die Luftfeuchtigkeit bewegt sich je nach Gießen zwischen 50 und 65 % und liegt damit ebenfalls in einem guten Bereich.
Da jetzt die letzten drei Wochen anstehen, mache ich mir langsam Gedanken über die Ernte und das anschließende Trocknen. Wahrscheinlich werde ich wieder die DryFerm Bags verwenden, da ich damit bisher nur gute Erfahrungen gemacht habe und vom Ergebnis wirklich überzeugt bin.
Ein großes Lob geht auch an Green House Seeds. Vor diesem Grow hatte ich noch nie Berührungspunkte mit ihren Genetiken und dass der erste Run direkt so überzeugt, hätte ich ehrlich gesagt nicht erwartet. Vielen Dank an Green House Seeds für die gesponserten Seeds und das entgegengebrachte Vertrauen.
Zum Schluss natürlich auch ein riesiges Dankeschön an alle aus der Community, die jeden Eintrag verfolgen, Fragen stellen oder einfach mitfiebern. Das motiviert jedes Mal aufs Neue.
Happy Growing Growmies 🌱💚

Likes
17
Share


@Ashbash
Follow
A week of fattening up here. The smell from this one is divine :) Really sweet. I am flushing this one with just water as i see a lot of amber on the trichomes and think its very close to the end.
Likes
6
Share


@gottagrowsometime
Follow
Was an easy week. More to come as i only huge it a few hours ago
. Updates incoming.


