


Likes
7
Share


@OutlawzExotics
Follow
Hello everyone.
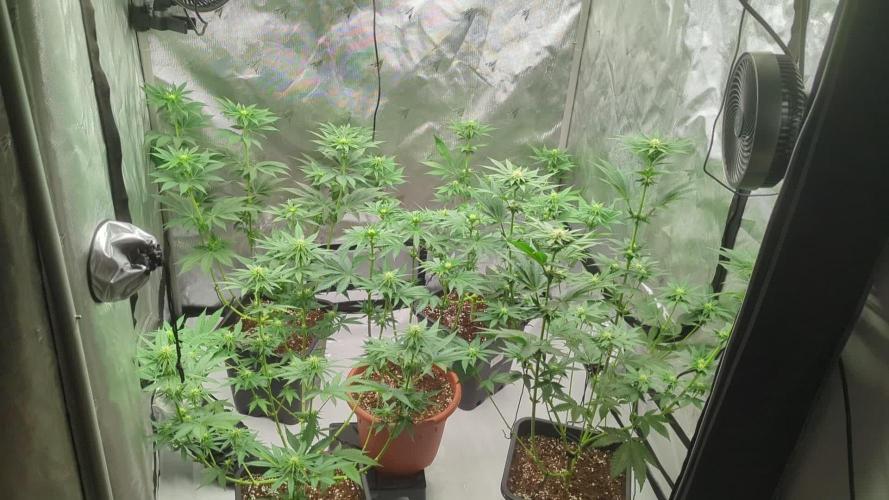
It has been an exciting week for the Outlawz Grow. We've added a new light (MARS HYDRO TS600) to the setup.
What have we made this week?
Well, nothing at all, only gave them 1L of water every 48hours (NO FEED) and added the scrog once again so it has more airflow.
Different phenos which has made this grow a funny and knowledgeable journey, loved to grow this ones and I am looking forward to taste them 😎.
I'll harvest both of them in the beginning of the next week.
More info soon, stay tuned!!
Thank you everyone,
OutlawzExotics.

Likes
6
Share

@k0nz1
Follow
The tent ist getting really full rn. Big defoliation and lollipopping in the coming days .
The Lemon Orange stretching crazy. The Blueberry Pancakes are Bushmonsters with lots of Side branches. One of the BBP has little Nitrogen deficiency. Nothing serious.
All in all very healthy plants. Waiting for the first trichomes and aroma in the tent.
~55- 60 % rh
~ 21-26 celsius


Likes
9
Share


@Johnblaze420
Follow
Only 2 week left on this beauty smells gorgeous and as usual can not wait hasn't let me down all the way through she responds to everything that I done to her great genetics from original sensible seeds couldn't ask for more thanks and come back next week hopefully start seeing some colour peace growmies 💪👍💯

Likes
13
Share


@DudeGrowsWeed
Follow
Bent her a little too hard (or too late) and snapped the main stalk, but taped it up and she seems fine now. Also gave her some defoliation. Fed Recharge for the first time too, seemed to like that, I think it helped with the fast healing of the snapped stalk. Bud sites starting to develop. AVT is front-right in the group shots.

Likes
11
Share


@CanadianFillmore
Follow
Week 5! GG4 finished week 4 on a rough note, she drooped hard overnight from 07/15 into 07/16, I'll will feed her an extra 1 liter of water + nutes this week, to prevent this from happening again. Aside from the early drying out, bud sites continue to develop nicely and she's got a good smell to her now as well as stickyness starting to appear.


Likes
13
Share


@cookingwithninja
Follow
Day 14, some supercropping
Day 15 .. it’s under control 😂🤣
Day 19 lights almost maxed to tent height unless I zip tie led to the top ceiling frame, last bit of monster cropping. Lost 2 top nugs to physical led burn but it’s ok. Everything is fine. Still going very hard on soluble N, and Pk along with b+, fishsh!t, microbial mass, humic acid. Carbs every day with organic booster
Likes
1
Share


@Pestitel
Follow
Amazing experience with the Mix Pack, I will try it again next summer for sure. Love the variety.


Processing
Likes
10
Share


@UrbanFog
Follow
Plants continued to mature this week and all the buds are getting fat they will have there last nutrient feed this week in prep for flushing and harvest next week.
The Lemon Zkittles looks and smells amazing looks amazing. Nearly all the plants look and smell the small, good genetics and breading.
The Cxx is again a very stable genetics and flowered and smells exactly as the last grow did. Good genetics.
The Peyote Cookies and Shishkaberry also grew well and similar, good genetics.
Afghan Kush amazing buds and very earthy smell.classic
The gorilla cookies had a rather large variation in pheno types but all look amazing and each will be a pleasure to smoke.


Processing
Likes
5
Share


@Christmas
Follow
The branching beast is doing well, but it's time again to bring her in a good shape.
Also I'll set the LST new cause of the fast growing one of the branches started splitting up.
So see ya next week when I maybe repot her in a bigger pot and cleaned her up!

Processing
Likes
77
Share


@BipolarHellas
Follow
Hello everyone,
🇬🇷
so,the first week passed,I have 3 seedlings which are very small but growing slowly and steadily...I expected more growth but I can't do anything so I just wait...
WEEK 2: "ENGINES STARTED..."
☠️Day 7...the second set of leaves has popped out...The contest didn't start well for me with such slow growth...but what can i say... I like it,its part of the journey...
☠️Day 10...my little ones are growing still very slowly...I can see their third set of true leaves...had to go down on water because they showed some signs of overwatering...I water every 3 days now...just misting the soil
☠️Day 12...💧I watered with GHF Enhancer, 1 g/L...it's got a lot of goodies in there...the only thing I had to do is drop the ph of the water to 5,cause the Enhancer has a pretty high ph of 9,3...
☠️Day 13...they are growing their 3rd and 4th set of leaves...I top fed them with GHF BioGrow and I have placed them under a 50W Led...
☠️Day 14...my babies are doing just fine,no signs of a negative reaction to something...some of the new growth is a bit strange in shape,but it will be fixed in time...the week is over,the engines are on and here we go...see u next week and thanx for watching
Likes
12
Share


@QueenBZA
Follow
This is a flush week, next week we shall be introducing EHG Ripener for the very first time in our grows,does it work? Does it not? We'll find out soon enough boys and girls.


Likes
12
Share


@HAN_GROWER17
Follow
#PSICODELICIA®️ 12/12 DESDE SEMILLA
Ha sido una excelente planta, se ve una excelente producción a pesar de las condiciones a las que sea enfrentado la planta.
Parece que ya no seguirá engordando, ya que si lo hace lo mas probable es que se rompan sus ramas por el alto peso que tienen las flores.
Hoy vi sus tricomas y se ven ya en su punto.
Likes
3
Share


@Unculti_responsable
Follow
Esta semana la dejamos más tranquila a la Jack solo le hicimos un trasplante a 5 litros quedo bien , la dejamos recuperar unos días y después le hacemos las últimas podas y ya va a estar lista para florecer

Likes
43
Share


@GODSGIFT_2005_JM
Follow
🍼Greenhouse Feeding BioGrow & Bio Enhancer
⛺️MARSHYDRO
The ⛺️ has a small door 🚪 on the sides which is useful for mid section groom room work. 🤩
☀️ MARSHYDRO FC 3000 LED 300W
☀️Also special thanks to VIPERSPECTRA P2000 (200W) & XS2000(240w) LED growlights
🌱 FastBuds 420
Likes
8
Share


@Herbangardener671
Follow
Plants are still thriving well. Watered after topping w/ proper rate for week for according to schedule PH water to 6.2 and soak pots. Temp stays high above 75 degrees humidy same until tent is opened led at 50 percent about 20 inches away

Likes
18
Share


@Dragosani666
Follow
Day22, Tuesday Week 3
Both are growing quick now.
Might have to clip some of the big fan leaves blocking light to the lower bud sites.
Day27, Sunday, End of the week
both getting bigger an bushier and drinking a lot more.
Hulkberry started going into flower, so I expect it to stretch during next week.


