Likes
Comments
Share
Lo mismo que Haribo, tuve retrasos en el crecimiento ,carencias de nitrógeno, la humedad estaba relativamente alta las primeras semanas de floración … un desastre y aun así la calidad de las flores no defrauda. Lastima lo del Foco a ver si conseguimos solucionarlo ya, porque así la producción es mínima.
Likes
33
Share
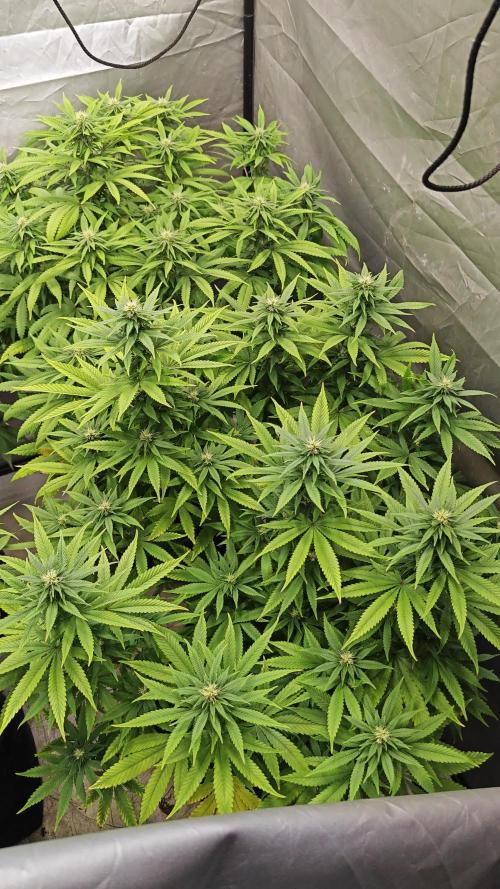
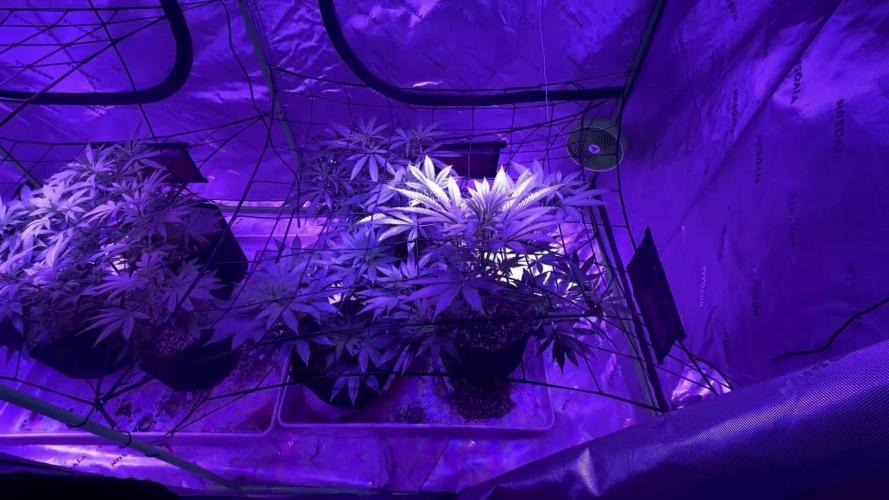
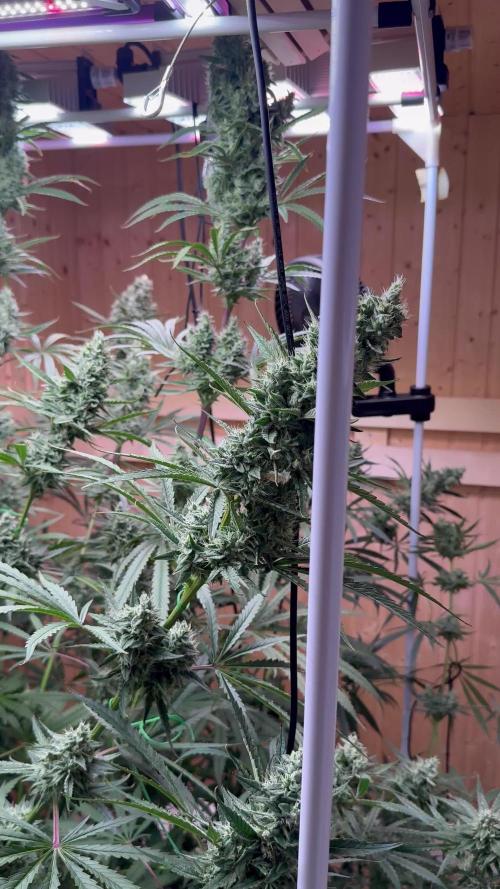
Cream Auto Summary Wk 1: Germination, game plan, equipment, and prepping the room. Wk 2: Germination progress, fertigation, and a new light. Wk 3: Two phenotypes. Wk 4: Woe and wonder, nutrients, and water source. Wk 5: Growing like a weed, and max power. Wk 6: Soaking up rays and consuming the nutrients. Algae remediation and proactive pest control. Wk 7: Will the size difference begin to fall in line with the predictions, and rearranging the wind. Wk 8: Time slows down, as buds build and plants are thirsty. Wk 9: A cone shaped bush, and trichome hunting season begins. Wk10: Playing the guessing game and learning is doing. Wk11: Escaping from Distancing. Wk12:Trichome Hunting and Changes in diet. Wk13:Lessons Wk14:When will it be the ‘right’ time? Wk15: This is the right time. Wk16: Harvest time and Summary. Final Weights: Cream 1gallon 157g (5.5oz); Cream 3gallon 299g (10.5oz); Combined 456g (16oz) ((Individual plant weight logs in pix)) New names for the Jars, 1 Cream for the 1 gallon plants buds and 2 Cream for the 3 gallon plants buds. 👉The 1 gallon plant was harvested the 3rd day of the week, It had only a couple of white pistols on each bud and wasn’t producing anymore fresh calixs. There was still very few amber trichomes, but the majority were definitely milky. Very frosty sugar leaves, and overall the buds are mega frosty and remind me of the Gorilla Glue I grew. However the buds are more airy. I started trimming from the top, and worked my way down. I recorded the wet weight for each bud and placed it on a clip with a number that corresponded to the order it was removed. I do this to monitor the % of weight loss due to moisture loss and aim for 20-25%. I did a partial dry trim and left all the frosty sugar leaves to be dry trimmed before going into jars. It had minimal actually larfy buds. I trimmed those not part of the main cola group for each branch and placed them on the rack for drying. The process went fairly easy and I might have spent 3hrs total. The sweet smell of sweet creamy citrus and the overwhelming funky stank was very fun. 👉After 2 1/2 days I placed the buds in paper bags, each cola in its own bag. The main cola was too long so reluctantly I cut it down so it would fit. After another 2 days I placed in jars, some with hygrometers and moisture packs. The overnight humidity in the jars was on average 52%. I added some damp paper towels hung off the lids to restore a bit of the humidity. This worked well and the humidity is now average 62%. I added moisture packs to some of the jars. The jar aroma is sweet cream orange zest and funky stank. 👉I had expected to harvest the one gallon plant during week 16. Given the way the 3 gallon was going, I figured the 3 gallon had another week or so. I assumed that because it had been so slow to develop in all of its phases. After I had harvested the 1 gallon I finally had a chance to really inspect the 3 gallon really closely. I couldn’t inspect it as closely as I had been the 1 gallon because it was further back in the tent and the 1 gallon hindered access. I didn’t think it was a big deal. I hadn’t rotated the 3gallon for two weeks I think. So during my close inspection, I was rotating the plant and it actually took me a while to notice…a dried up tip of a cola. This cola had been sitting on the far side. It hadn’t been against the tent wall. As soon as I saw it it was like a slap in the face…its what I feared would happen to this plant since the buds were so fat and dense….botrytis. Budrot. Nasty, grey fuzziness. My heart sunk as my fears were realized. How many more buds would be affected? Will it be like my Critical Purple and all the best big buds have this hidden scourge? I immediately inspected a few of the bigger buds. I didn’t see any. But there are over 20 colas. The only way to know for sure is to harvest. I didn’t have time to harvest the whole plant right then, so I had to wait for the next evening after work. 👉I took off work a little early to get a head start. The buds were full of sugar leaves still a lot of fan leaves so lots of trimming to do. It took a total of 6 hours from start to finish. I started doing a partial wet trim leaving the smaller frosty sugar leaves to be trimmed dry. I experimented with full wet trim on some of the smaller buds that ended up on the drying net and not left on the branch. I needed the buds to dry slow enough not to taste like hay, and fast enough the botrytis gremlin wouldn’t pay a visit. A close thorough wet trim seemed to look like it could be optimum for these buds. On the 7th branch I started giving the buds a meticulous wet trim. I took the liberty to enjoy some of my Tangerine Dream from a year ago. I listened to Physical Graffiti, Animals, Frank Marino Live, Foxtrot, and some dead air when the album ended and I needed to pick another one. I scrutinized each bud closely for any signs of the evil spores. But I saw none, such a relief after each buds inspection to see nothing but happiness. 👉I had 28 total branch end colas. Most were chunky pine cones. I recorded each branch in the order it was removed. I started at the bottom and labeled them alphabetically. 4 of the branches were smaller near the top in the middle of the canopy and one branch had the bud-rot. I trimmed the buds off the branches but left the bud group forming the cola intact. I put small larfy buds on a separate rack from the good buds trimmed of the branches, I didn’t weigh the larf, and had 72g of good chunky branch buds. The colas when dried to approx 22% weighed in at 227g. The total in the jars is 299g. Very happy! The chunky colas were slow to dry on the interior. I took special care to monitor the buds, not let them get too dry and would spread the buds open a bit to prevent wet spots that could turn into botrytis. When they got a little dry to the touch I would place them in paper bags. That slowed the drying down and allowed the moisture to equalize on the bud. I would weigh the buds and calculate the % of weigh left to help determine how dry they were. When they were below 25% of its wet weight I placed them in jars with many of them getting a hygrometer to monitor the humidity in the jars. I had to take them back out of the jars after one day and back into paper bags because the humidity climbed as high as 80% in some fo the jars. This meant the interiors were still moist. The bigger the buds the longer they needed to stay in the paper bags. The final weights on the buds were after they were dry enough to be at 62% or lower humidity in the jars wish was still around 20% of the wet weight. The jar aroma is not very strong. The aroma is a light sweet orange zest. It should improve over time. The buds are dense and sticky. Not all the colas got their own jars unless they were big enough. Some of the colas I separated from the branches and placed in smaller jars, even combining some of them. The intact colas got the large jars and some were combined in those as well. 👉I have one of those Trim-trays with the screen in the bottom with a tray underneath to catch keif. I trimmed off fans leaves and leaves with no fuzziness on them. I trim the fuzzy leaves over the tray. I did this for both plants. When doing the 3 gallon plants trimming I also snipped up some of the larf and small buds into small pieces to add to the pile. I let the trim sit in the tray till it was crispy dry. I then used my hands to grind the trim into smaller bits. I used a plastic card to scrape the pile back and forth across the screen. I continued to grind up the trim with my hands and alternately scrape the screen and sift the pile. It was hard to tell how much I had got till I used the plastic card to scrap the catch tray. I was pleasantly surprised to see a nice pile form. I made 4 pucks. 👉The bud is cured and stable humidity in jars. I’m doing the typical jar burping and inspection daily for another few days. I have tested both plants and am extremely pleased! Both have a sweet creamy orange zest like aroma (but not like an orange creamsicle). The 1gallon, now called 1Cream, is the strongest jar aroma. When hit on the bong both have a sweet creamy smooth after taste, and again the 1Cream is the strongest flavor. Both are very sticky when pinching off a bit for the bong, and the 1 gallon is the stickiest. Both pass the one hit test with flying colors! Hard to tell the difference between the two as far as the high goes, creeper buzz, with a nice uplifting energy, settling into couch lock and sleep-inducing trail-off. Perfect for night time use. I’m surprised at how nice it is already. The typical 6 week cure review will be updated in the review. If its anything like the other plants Ive grown so far 6 months is when it really hits its stride and is at its best flavor and effect. 👉Methodology Summation: I am really happy with the fruits of my labor. Its not perfect, and I believe I have learned a lot of knowledge and insight. All my grows so far have been in 3 gallon cloth pots with coco coir mixed with 30% total volume of expanded clay pebbles for hydro. The one gallon plant got bigger than I expected it could. I believe that’s due to frequent fertigation I the coco/cloth pot. The problems of being in an undersized pot were somewhat mitigated but not eliminated. The 3 gallon was also showing some of the issues of an undersized container but not as severe as the one gallon. Knowing this will help if I choose to grow in a smaller pot again. Obviously the draw backs to the under sized pots is the issues show up during flower when the plant is at its biggest. Maybe next time I wont exacerbate the issues by chasing my tail. But the drawbacks are not enough to say its bad news to grow good big buds in undersized pots. There is a drawback to frequent fertigation method, the amount of time spent tending to the plant. Two times a day, every day. That is actually the minimum recommended. If I could have automated it I would have done 3 times a day. I am curious what my results might be if I was able to fertigate 3xs a day. I chose this method so I would be spending a lot of time tending my plants anyway, and with coco I avoid the pitfalls of over watering soil when you’re an overzealous gardener. 👉Growing Summary: The 3gallon was actually the second seed to germinate. The first seed petered out, and the 1 gallon was put in four days after the 3gallon had germinated. The 3 gallon was slow to straighten and open its cotyledons up. The cotyledons had a yellow tinge to part of them. It was slow grow for the rest of the grow when compared to the 1 gallon plant which started flowering 12 days before the 3 gallon and seemingly was always almost 2 weeks ahead of the 3 gallon. The trunks of both plants became very stout. I was wondering if somehow I had been given mismatched seed pack, but in the end I think they are the same strain due to the similarities such as aroma and high. The leaves were identical. Both had fat stout trunks, and both had super sturdy branches. I didn’t use one support for the 3 gallon plant, a first for me, and the buds were very dense and heavy. I put some on the 1 gallon plant but that was for its protection from me since it was at the front of the tent. Both plants also smelled similar, sweet caramel cream when sniffed up close. But different in the natural canopy both made around its queen cola, and in the structure of the flowers. Its been very fun and interesting watching these plants grow and seeing two phenotypes of the same strain!😻
Likes
5
Share
We are pleased to report another great week has been had by all and there are not any issues to mention. The top dress along with Bokashi was applied and they enjoyed a rain barrel treat mixed with Hygrozyme along with Hyshield once this week. A good spray of NForce helped with the aphids along with the stink bugs that were threatening to take over the gardens and Optic foliar spray was applied once a few days later, so far we are happily growing! We have been watering daily to keep things moist, on the hotter days it has both morning and night. This beauty had a good clean up two days ago, a storm feels like it’s brewing now and she seems to be enjoying the wind!
Likes
14
Share
All good this week too. The strawberry lemonade turning purple!:)) gg#4 it’s a hermy… the other plants are good! White widow xxl it’s the first to harvest…In 3 weeks…. Fxxk
Processing
Likes
3
Share
Week 5 with Fastbuds Zkittlez, Barneys Farm Purple Punch Auto, Seedsman Pink Kush Auto, Ethos OG Kush Auto R5. All are in pre flower and looking good, LST and defoliation only. No nutes. Foxfarm ocean forest soil and 6.5 ph water. 18/6 light cycle.
Processing
Likes
2
Share
@Belivitez
Follow
Im very happy with those plants so far. This week i made 8th plant rotation in tent.
Likes
37
Share
La segunda semana fue bien, a las plantas que estiraban más les causé Low Stress para mantener una altura igualada. De las 3 variedades que tengo, es la que antes ha mostrado las preflores. Un error vuelvo a repetir ha sido no tener medidor de EC-PH y otro ha sido el haberme excedido con los s riegos. Conecto pronto el CO2 a 630ppm par ver si así logro obtener un buen estiramiento esta semana. 📅 Día 15: 🔹 Cambio de lugar al haber quitado algún macho de otra variedad. 📅 Día 16: 🔹 Riego según la tabla de nutrientes. Conecto CO2 a 700ppm. 📅 Día 17 : 🔹 Low Stress para que dé más luz a las ramas bajas y tengan más espacio para desarrollar. No quito hojas ya que creo que les quitas los paneles que las alimenta. El riego de ayer las sentó muy bien y están bebiendo el agua rápido por fin. 📅 Día 18:🔹 Descanso, puntualizar que he activado el CO2 a 730ppm y decir que se han bebido todo el agua, mañana toca riego. 📅 Día 19: 🔹Riego según la tabla de nutrientes. La EC me dio 2000 y el pH 6.3
Likes
3
Share
@AustinRon
Follow
Week 15 - Flower Week 11 Lemon Jeffrey by IRIE Genetics (14 Starts for 8 Finishers) 63-70 Days Flower (9 - 10 Weeks) Weeks Observations: - Our light leak on July 6th through July 31 ‘cost’ us ~ 21 Days. Extending Harvest to account for 21 day light leak. New Harvest Date 12 Sep 2023, Plant Day 121, Flower Day 86 Seeds Wet: Monday 14 May 2023 Harvest Date Range: [ 2023-08-11, 2024-08-21] Start of week: - Dates: [2023-08-27: LJ2Q 106:F:11:1, 
 2023-09-03: LJ2Q 112:F:11:7 ] End of Week: - Plant Height Range: [46, in] - Water/Day/Plant: [935, ml] EnvironmentalCurrent: - Scotoperiod: [ 11, hrs] # 1900 - 0600 + 24 - LightIntensityPeak: [ 1000, µMol/m2/s ] - DailyLightIntegral: [ 42.1, Mol/m2] # Target: < [ 40, Mol/m2/day] - LightDistance: [ 6, in] # 3.5” LESS than Optimal for SP3000 - TempAvg: [79.1 , °F] - RH: [ 68, %] - VPD: [ 1.10, kPa] - 230*4*11/8 - FeedwaterPerPlantPerDay: [ 1265, ml] - Feedwater: [ 10.12, l] - EC: [ 2.0, mS] Environment NOTES: - RULE - CLOSE Room Airflow during LOW TEMP periods(2030 - 0700) - OPEN during HIGH TEMP Period (0700 - 2030) SOP: - WEAR CLEAN GLOVES FOR ALL SEED OPERATIONS - CLEAN All Instruments before use - Light Strengthvegetation := 100 + (#nodes * 100) - Light Strengthflower := [ 1000, 600, µMol/m2/s] - Scotoperiodvegetation := [ 1300, 1900, 6, hr] - Scotoperiodflower := [ 0600-1900, 13, hr] Environment - Late Flower (Week 10-14) (F5-F10) - Temp: 78-80°F - VPD: 1.2 ± 0.2 - Photoperiod: 11/13 - Light Strength: [930, 850, µMol/m2/s] - EC: 2.3 # Week F5-F8 - EC: 1.8 # Week F9 - EC: 1.1 # Week F10 - Finish (Week 14) ( F10) - Temp: 78°F - VPD: 1.3 ± 0.2 PPFD: 750 peak - Resin Bloom ONLY - EC: 0.8 _______________________ Base Application for 10 Gal: - [x] Primer A: [ 100, ml] - [x] Primer B: [ 100, ml] - [x] Silica Skin: [ 35, mll] # Reduce to reduce/eliminate Sediment - [x] SLF-100 (Enzymatic Root Cleaner): [ 50, ml] - [x] King Crab (Biology): [ 5, ml] __________________________________________ - @ EC: 1.7 Supplement: [ Application Rate], [ Total Delivery for 2 Gal Solution] - [ ] Primer A: [ 10, ml, gal], [ 12.5, ml] - [ ] Primer B: [ 10, ml, gal], [ 12.5, ml] - [ ] Silica Skin: [ 4, ml, gal], [ 5, ml] - [ ] CalMag Fuel: [ 4, ml, gal], [ 5, ml] - [ ] Peak Bloom: [ 4, ml, gal], [ 5, ml] - [ ] Resin Bloom: [ 4, ml, gal], [ 5, ml] - [ ] SLF-100: [ 5, ml, gal], [ 10, ml] - [ ] King Crab: [ 0.5, ml, gal], [ 1, ml] - [ ] EC: [ 1.7, mS] 85 ml/plant X 11, : 935 ml/plant/day, 2.4x of field capacity Meaning ALL Fertigation through pot is Refreshed 2.4 times per day with this schedule. ____________________________________ Mon 28 Aug 2023 # End of Harvest ORIGINAL Window , before discovering light leak LJ2Q 106:F:11:1 - [x] Will scope trichomes by hand, and set a chop date today. - Some are ready today, Some look to need 10 - 14 days. This has been an interesting grow - the extra stretch munged the SOG Strategy - with severe Chiropractics I still have >±12” of height per plant. We should be harvesting today . . . - We could conceivably take the grow as far as Day 139, if we calculate a 4 week light leak forward. That would make LATEST DATE 24 SEPTEMBER - - IF We go more than this week - Week 15 Nutes (Mixed Daily) - Mon - Wed: ONE SHOT, EC: 1.7 - Thus - Sun: ONE SHOT, EC: 1.4 - NEXT WEEK - Mon: Resin Bloom: EC: 1.1 - Tuesday - Harvest: Resin Bloom: EC: 0.8 - ELSE if we take them down next Sunday: - [ ] Been feeding The Rooted Leaf Hydro schedule, Base Nutes plus Silicon. Need to move to harvest nutes, potassium (+Resin Bloom/+Peak Bloom) at - [ ] Monday:+Resin Bloom/+Peak Bloom: EC: 1.7 - [ ] Tuesday: EC: 1.4, (+Resin Bloom) - [ ] Wednesday: EC: 1.1, (+Resin Bloom) - [ ] Thursday EC: 0.8 (Resin Bloom Only) - [ ] Friday EC: 0.8 (Resin Bloom Only) - [ ] Saturday EC: 0.8 (Resin Bloom Only) - [ ] Sunday - Harvest Growtek Mod - 170 ml/event per emitter -> 2 Gallons Input - ___ EC: [ 2.0, mS] Tue 29 Aug 2023 LJ2Q 107:F:11:2 EC 1.6+ - Defoliated (final) blocking and unviable fans. Looks better - clearer airflow Wed 30 Aug 2023 LJ2Q 108:F:11:3 EC: 1.6 For 2 Gal (ml’s) RLA Minerals 14.0 Primer A 14.0 Primer B 7.0 Silica Skin 10.5 Peak Bloom South Cascade Organics - [x] SLF-100: [ 5, ml, gal], [ 10, ml] ___ Plant Success (Beneficial Bacteria, Crab ‘Frass’) - [ ] Sunday - Harvest? - [x] King Crab: [ 0.5, ml, gal], [ 1, ml] Thu 31 Aug 2023 LJ2Q 109:F:11:4 EC 1.4 For 2 Gal (ml’s) RLA Minerals 12.3 Primer A 12.3 Primer B 9.2 Peak Bloom Required 1 qt to bring down from 1.6 to 1.4 Friday 01 Sep Jul 2023 LJ2Q 110:F:11:5 EC 1.1 For 2 Gal (ml’s) RLA Minerals 7.6 Primer A 7.6 Primer B 5.7 Peak Bloom Sat 02 Sep 2023 LJ2Q 111:F:11:6 EC: 1.4 Peak Bloom as Needed for Dilution - [ ] Scope Trichomes Last Time With a 21 day light leak, we’ll extend harvest to Day 118, Flower Day 90 - or 69 Unleaked Light Days . . . Through End of Harvest, Daily Daily Feed through Harvest Day -2 Per TWO Gallons: EC 1.4 - [x] Primer A: [ 12, ml, gal] - [x] Primer B: [ 12, ml, gal] - [x] CalMag Fuel: [ 4, ml, gal] - [x] Silica Skin: [ 4, ml, gal] - [x] Peak Bloom: [ 4, ml, gal] - [x] Resin Bloom: [ 8, ml, gal] - [x] King Crab: [ 0.5, ml, gal] - [ ] SLF-100: [ 5, ml, gal] - [ ] Reduce to EC 1.1 on Harvest Day -2 - [ ] Reduce to Resin Bloom Only, EC: 0.8 Pre Harvest Day DECISION - We’ll take the girls down Flower Day 83, Nominal Day 62 assuming 21 Day push for light leak. It’s not in practice3 that long - we should be good, if not - latest day 90 (Nominal 69) ____ Sun 03 Sep 2023 # Flower Day 77 LJ2Q 112:F:11:7 EC 1.4 - [x] Dismantle And Clean Res, Pump, Chiller, Lines - [x] Clean Res - [x] Clean Pump - [x] Load Res with a a gallon of HOT tap water, a cup of 30% Vinegar - [x] Run Pump for :30 - [x] After 30: Reverse Lines - [x] Run Pump for :30 - [x] Stop pump - [x] remove tubing from pump and chiller - [x] Remove pump, reclean - [x] Clean Chiller Tubes - [x] Rinse with 30% Vinegar - [x] When Dry: Reassemble & Replace
Likes
23
Share
Been a nice grow and lots of knowledge gained 🙂 The 4 girls are looking frosty now. I'm going to start flush from next feed which is tomorrow. Hopefully they swell up nicely and get frosty. Will tune over the next few. Take care guys and be good 👍 Stanton
Likes
3
Share
This tall gal flipped to flower over past few weeks, 3rd week. Started new nutrients to bulk her up and get those terps popping. Shes over 6ft now and about 1.5ft from top of green house so hope growth upward slows a bit.
Likes
26
Share
They were good phenos. Very similar and nice buds. Super dense and dripping in resin. Lovely aromatic smell have been developed and was a great addition to my VERY LARGE crop this time. Both phenos grew great. P1 was just under 10 weeks. Pheno 2 was just touching into wk 7. Amazing smells from both. Dense buds. Big yields. Really happy to have ran this strain. Very fruity, exceptional quality & taste. Averaged about 70-90 grams for Pheno1 & Pheno 2. (Both plants cured 2 + months now. Really happy with my MSNL strains I ran this crop. Will be looking to add more in a few weeks for round 2 of my planned amount. Thanks to my sponsors from MSNL & XPERT NUTRIENTS. AMAZING DUO. Appreciate all who stop by. I thank you and look forward to seen your diaries. Either way thanks for dropping by. DISCOUNT CODE FOR XPERT NUTRIENTS 20% OFF CODE:
Likes
5
Share
Captain's log w.7 Hey Hey Hey fellas!!🙌 She got some compost tea, then plain water and some Kelp rest of the week it was a boring week, ass you see in w.7 time lapse video; some small growth, some weight for buds noothing much in there but then suddenly at the end of the week deficiency has started. boom 👻 hope i find out which deficiency is this 😅 till next week peace!
Likes
15
Share
@Siriuz
Follow
Alright guys, this girl was stunned and stressed at the beginning because it didnt have the right nutrients in the soil mix due to lack of money and couldn't get any for the time being, thank god we did some hustle and ya know!... So for the next time we will grow another amnesia way better than what we could do with this one. Anyways... at first we didnt think she was going to make it but since amnesia is super fast and strong she did so. We could have waited a little longer for harvest and probably get better yield but we really didnt think it was going to make much difference at that time.... Of course, every single seed is a new experience for me every time, which is good because i keep learning In the other hand, sucks because you waited this long and didnt get what you expected, just keep trying until u get better right!? xD! haha... well here we go again, we love it tho so forever we will keep trying and with all the support and help from all the community at the grow diaries it makes me feel even better! So yeah we gonna keep growing and someday hopefully We will be showing you a great great amnesia akdlsakdlaksd xD! Yo im high its 2 am whats up? Anywaysss have fun guys enjoy happy growing
Likes
39
Share
Todo bien, entrando de lleno en la segunda semana. Hasta el momento solo seguimos con micorrizas del colectivo científico y agua semana por medio
Likes
38
Share
Utopia Haze is a rare heavily sativa dominant hybrid (90% sativa/10% indica) strain created through back crossing Brazilian Sativa strains. This tasty little bud took home 1st Place for Best Sativa in the 2008 High Times’ Cannabis Cup and for good reason – with its potent 18-22% average THC level and long lasting cerebral effects, Utopia Haze is one powerhouse smoke. The Utopia Haze high comes on soon after you finish your first toke, hitting you with a strong cerebral lift that infuses you with a sense of hazy relaxation. Type: Feminised/Photoperiod Cultivation: Indoor/Outdoor Flowering Time (days): 70-75 Indoor Yield (g): Up to 650 Feminised Outdoor Harvest Month: October Feminised Outdoor Harvest Month Week: 3rd-4th week Aroma: Citrus, Woody, Pungent, Mint Effect: Cerebral Lift, Hazy Relaxation, Sleepy Welcome Everyone to the Final Entry of my Utopia Haze Grow ! There is so much to discuss ! I have been extremely busy as of late trying to get this Harvest together, but i am happy to have it here for you now ! I Seriously under estimated the amount of time, help from others, and my own necessary skills to pull this off.. and i still kind of screwed it up lol ! But its worth noting i have never actually done this before and trying to document it during....was extremely hard. It is next to impossible to work an iPhone with rubber gloves on ! First I want to discuss everything step by step so before you jump straight into the comments on how the end product is so small in "quantity" Rest assured i am happy with its"quality"...and thats all that matters to me because Life is a journey not a destination! and i have learned so much from this grow that I couldn't be any happy even if i messed some things up :) But at the very least I hope you read through this entry in its entirety with an open mind and focus more on the process, rather than just the outcome! I ran out of Ice & i was only able to wash three times..(normally I've heard you should go sometimes 5-6 washes) Preparation is Key & things will be much better next round :) Photos 1-22 These are pretty self explanatory but for those of you just tuning in now.. this is what happens to a very happy plant when you don't have the necessary tools to monitor key components of growing cannabis.. Ph, as well as EC levels play a very key role in the outcome of your grow lol that being said I was just able to save this plant by purchasing both tools but that doesn't mean the plant didn't suffer because of the prior events.. This was a Huge reason behind me choosing to turn this harvest into what i would consider "Solventless Hash Rosin" from "Ice water extracted Bubble hash". Pictures 23 The idea here is the process of using "fresh Frozen Cannabis" this has been discussed many a time online on such sites as instagram and here on grow diaries as well.. I personally have Never tried the process so i decided to try it out and make a judgement for myself.. Video 24 The Cannabis has now been in the freezer for 72 hours making it very well frozen.. as you can tell i struggled getting it all into the 25u Screen Wash Bag. One thing of note i would do differently is i will de-stem my next batch as i also believe this played a part in the amount of plant matter that escaped through the sieves. Photo/Video's 25-28 The idea here is "ice water Seiving" & especially with the bags that I am using here that are only have screen material on the bottom portion of the bag it is very important to have spaces in-between the screens to allow the water to pass directly through the screens into the bottom bucket with the least amount of resistance.. because the hash is so extremely temperature dependant if it gets warm on the side of the bag.. it will stick there and not make it to the bottom to become use able product.. 29 You do not need to use as much Ice as i used here lol... the idea is to keep everything very cold..i certainly achieved that but at the sacrifice of using so much that i ended up grinding product and producing "contaminants" but in the end they are just plant matter that i would be smoking when i rolled up my joint either way so.. I'm not super disappointed.. But it should be noted that what you want to achieve here is a Layering effect where you have the wash bag between two small layers of ice while the "water current" washes the Trichomes away allowing them to be separated by the screens setup below :) Before Starting the machine you should allow some time (i.e.;10-12minutes pre soak to allow the product to become saturated) before the first cycle. By video 32 I have just ran out of ice lol.. Video 33-34 Here I have a tip for you.. to separate the screens that you sieve through.. cut 5 gallon buckets to stretch them across nice and tight.. it'll make scooping your Bubble that much easier ! i learned this from the many "Frenchy" videos I have watched :) Picture 35 Here in lays the problem for most people.. drying your hash without loosing vast amounts of "Terpenes" whilst also stay ever vigilant against mold ! Thanks to all those videos I've watched on youtube.. id like to think this was one of my most successful parts of this process.. Things to Note; Terpenes start to seriously evaporate at temperatures 68F or 20C you need to stay as cold as possible whilst bringing the Relative Humidity in the space down into the 40-30% to stay away from that nasty mold ! I used my cold storage room in the basement.. with a dehumidifier running to keep the space at 45% RH & staying at a constant 15c. All while spreading the hash as thin as possible across parchment paper, on top of the white screens with a fan moving air across both sides of the paper. Pictures 36-38 These are some macros i took in the middle of my drying session I fell in love with the colour. Yes i know the black spots are plant material but they will get caught when i bag the hash & squish the oil out. Thing to Note; at this stage it is important to ensure you 'micro plane" the hash down as fine as you can whilst staying weary of the temperature... any "chunks" will hold pockets of moisture.. that lead to potential problems..ie; mold ... Picture/Video 39-41 Successfully planed bubble hash ready to be bagged and Squished ! Picture 42 Ive decided to follow Pedro.. from Pedros Grow Room and double bag to be on the safe side so i don't have any blow outs. So thats One 25u bag inside one 160u bag ! :) Pictures 43 This is almost 3 grams of the bubble hash from above, already melting in the bag.. this is where i ran into trouble again lol things started getting to warm in the house and i was only able to get one of the three squish's i did on video :( things started getting sticky. Picture 44 This is basically just a photo of the equipment I'm using; 3x5 LowTemp Cage in the frame I built myself, with a 20Ton bottle jack. Something to note here is this is an older Lowtemp model with only a single heating zone which is which i have it closed here heating Both sides of the press :) As well as the importance of having adequate pressure on your plates.. my rig is very overkill for the size of hash bags..lol Video 45 Here is the lovely press video.. its didn't quite work the way i wanted either lol my directional folding wasn't quite tight enough for a big "drip" :) &the Press was set to 65°c Photo's 46-50 are pretty self explanatory :) I had a blow out.. but still managed to pull an 80% return from the hash once squished...& yes it tasted amazing :) Was it worth it in the end... that could be debated.. for some..i understand..its not your thing, but for those of us that are interested in making our own concentrates.. free from Solvents... I wouldn't make it any other way :) If even ONE of you reading this diary finds it helpful to reference for ANYTHING.....even if its "what not to do" ill consider it a success ! Thanks again for tagging along on this garden adventure.. its been one heck of a journey ! Much Love from B.C. Canada, Until Next time, Cariboo
Likes
Comments
Share
@gr3g4l
Follow
Esta semana notamos que los Led estaban demasiado cerca de las copas cuando los apicales mostraron un inicio de albinismo así que tocó alejarlos un poco, a 40 ctms áprox. igual poco menos. Las dos Amarettotarmac muestran una diferencia notable en la morfología de los cogollos pero de olor ambas afrutadas, cereza, fresa, algo muy rico y notable a larga distancia, que huelen mucho. xd
Likes
9
Share
The Holidays caused a little headache this past week. Was a few hours late on water schedule due to holiday commitments. Found the middle plant had sucked all the water out and went into underwater stage. A few of the giant fan leaves took a hit, but not too bad. Didn't change anything other than water schedule to every day now and the leaves had no further damage/discoloration. All leaves still praying and doing good. Trichromes starting to pick up on all the plants now. Had a situation in my other tent with a plant that shouldn't have been saved, that i saved, and seems to have slightly hermied and I didn't catch it. Not terrible, as out of a 6 oz plant, I found 42 seeds. Hoping that tent doesn't effect this room, but it's possible it has. Just gonna ride it out now and see how it goes.
Likes
38
Share
@kijani
Follow
she is still branching, so i realized she needed ore space and put her out in a larger 4x4 tent as compare to the orignal 2'x2'. the tent has more cmlights then the single one in the smaller tent - this made the girl start to uptake nutrients such that there is very little drained to waste. i also put a screen to start scroging over her. the screen has large holes, so i think it may require high stress training to move the stems to the next section without breaking them. the data from grow rooms sensors etc gets overwhelming quickly and i can't really keep up. so i created a graphical animation visualizing for the composite garden data from the live garden sensor data. this is fun as things on the dashboard change colors and shape based on the sensor status. it is also interactive as i can also send commands to say control the lights, pump by clicking on them on the animation. . i am still using my doser to mix nutrients and then refill this garden manually. besides the plant response to the increased lighting , all other conditions i can adjust are still similar.