
Likes
Comments
Share


@Xpie77
Follow
Seeds Genetics provided me this Strain to make a Growers Diary. This is the first time I'm growing a Durban sativa strain.
Got 9 seeds from the 10. Can happen.
Will germinate the seeds in a paper towel. This always works for me.
💸💸💸💸💸💸 Buy seeds from Seeds Genetics Co. Copie the link doen below!
https://seedsgenetics.nl/product/durban-poison-gefeminiseerd/

Likes
6
Share


@Daniel_Tri95
Follow
Theses beautiful ladies are flowering now too and are big and tall while the other did not veg as long. I cannot wait to see these big frosty buds on them 🔥

Likes
16
Share


@Brotanical
Follow
Es wurde zuerst mit drähten gebunden und später wie zu sehen einmal mit den grünen lst clips die verstellbar im winkel sind jedoch etwas zu lang finde ich🤨 aber solide Verarbeitung und die roten sind starr aber es lässt sich super damit arbeiten
Zurzeit fahre ich noch 50% Wizard of Bloom💪
Durch den bruch im ast aka Bahlsen technik weil das Ding gebrochen ist wie ein 🍪 👀lasse ich sie nun noch etwas länger in der vegi🤦♂️ und bei blütebeginn bzw letzte Woche Vegi wird die @ViparSpectraLED XS1500pro zugeschaltet☀️🌱 Die Runtz sind bisher robust und erholen sich schnell @SensiSeeds 👍

Likes
2
Share

@GreenEldritchGardens
Follow
After defoliation I started her finishing week or so begin. Right now she's burned a bit because of high light (she never liked high light anyways) so I lowered her down.
Since my personal stash is critically low I'll harvest her in a week no more.
Smells like ripe fruits, not really papaya I would say but something sweeter
Likes
3
Share


@BLAZED
Follow
Week 11 (26-8 to 1-9)
26-8
Temps: 20.5 to 26.1 degrees
Humidity: 50% to 56%
27-8
Temps: 20.7 to 27.3 degrees
Humidity: 50% to 56%
Watering: Both 1500 ml. (Only Calcium) EC: 0.4 PH: 5.6
Dry Weight: Both 2.7 kg.
28-8
Temps: 21.5 to 28 degrees
Humidity: 51% to 56%
29-8
Temps: 23.3 to 27.4 degrees
Humidity: 55% to 62%
30-8
Temps: 19.9 to 27.7 degrees
Humidity: 50% to 60%
31-8
Temps: 20.2 to 26.6 degrees
Humidity: 50% to 55%
1-9
Temps: 21.1 to 29.1 degrees
Humidity: 49% to 55%
Watering: Both 1000 ml. EC: 1.4 PH: 5.6
Dry Weight: Both 2.4 kg.
Recalibrated my PH pen and it was only 0.1 off, so i dont think the leaf problems are PH related.

Likes
5
Share


@GREENPHOENIX6262
Follow
* Week 8 ( Week 3 flower ) - 12/3 - 14.5 Inches*
She has about 2 weeks left so I weaned her off the flower nutes and began flushing with Lotus Carbofulsh. Harvesting next week ( 12/9 or 12/10) switched to 12/12.

Likes
10
Share


@I_roll_my_own_420
Follow
Hey growers! Another week finished today. I used cannaflush this week and will use just ph correct clean water next week before harvest. Hulkberry is a sticky beast! Tonnes of crystals on them! Amazing smell. Orange sherbert shows its indica dominance and smells like orange tic-tac 😁. Cant wait to cut them down. Lights will turn off in 6 days and plants will stay in dark last 48h before cutting them down. Cheers!


Likes
9
Share


@Naujas
Follow
thank you to the divine seeds team for the chance :) the girl is growing little by little:) I will keep her at home for another week, and then she will travel to nature :).

Likes
15
Share


@Shizzlemanizzle
Follow
Day 36
Done nothing just let them grow and trimmed a few leaves
Day 37 - watered them with feeding. Decreased the amount by 25% except the base nutes. Added 12ml CalMag on 4L water by request of the community.
If leaves curl down more, I will consider a flush.
Day 38
No feed. Color changed from the middleone overnight, I think that’s a good sign. Maybe someone can comment on that 💪🏽. For me it looks very good, I know a few leaves show signs of nutrient burn but I decreased already and no new signs appeared
Day 39
No feed until tomorrow.
Day 40
Fed them with very low amount of fertilizer. I aimed for a ppm of 1000 but I went a bit higher until I have osmosis water . Runoff ppm was 2000, but I have to say I am measuring ppm since this week and will fix this problem
Day 42
No feed


Likes
89
Share


@BioBuds
Follow
Wow wow wow... Apollo what have you guys made at SweetSeeds... My dear this strain is a monster and a keeper. Do you want regular-sized plants and buds in 8 weeks? No problem!
Do you want plants that can handle any condition even as a noob? Check! This beast of a strain is out of this world and I'm over the moon with the results.
I can't believe it. Normally I've seen auto's do 30 cms and some buds on top... This is simply alien tech...
I think I have never seen any plant grow that fast... This is something to try if you haven't already...
Completely amazed... And this is while making all sorts of mistakes: too hot, soil also too hot in nutes and temp, hotspots in tent by lacking fans, less PH buffer.
Stuff I learned:
- In my climate: at least 20 liter grow pots, maybe bigger.
- Add hydro corn, I forgot this
- Less bloodmeal and bonemeal
- More perma tea since mine is now too old to use, it will rot the earth.
- More often more water, in smaller pots
- Better ventilation and routing of fresh air.
- Light a little higher also during flower.
- No training is needed, a little defoliation is enough.
Thanks again for visiting and don't forget, these results wouldn't have been possible without my trusty SP-3000, consider to try it and see what this light does!
Hug bud
-

Likes
2
Share


@eldruida_lamota
Follow
Que pasa familia, vamos con la cuarts semana de floración de estas Gorilla Cookies Fast Flowering, de FastBuds.
Agradezco a Agrobeta todos los kits obtenidos de ellos 🙏.
Hasta aquí veis que llevan buen progreso y el color que se marcan es espectacular.
Vamos al lío, el ph se controla en 6.2 , la temperatura la tenemos entre 22/24 grados y la humedad ronda el 50%. El fotoperiodo a 12-12. Estás próximas semanas veremos cómo avanzan.
Agrobeta:
https://www.agrobeta.com/agrobetatiendaonline/36-abonos-canamo
Hasta aquí todo, Buenos humos 💨💨💨
Likes
Comments
Share

@PicoDeGallo
Follow
They’re all doing well. Seems like the #4 bag is using less water than the others.
I added the Spider Farmer Drip irrigation system. It’s set to trigger when the average is 25% water content.
Likes
43
Share


@Pearl
Follow
Mixing a ratio of
4ml start
5ml Katana
/ 1 litre water at PH of 6.2
Mix well and spray onto paper towels to soak,
Fold paper towel in half & place seed inside & fold to cover so the seed is in darkness,
Place damp paper towels with the seed inside a zip lock sandwich bag.
I only had to wait 28 Hours and the seed had split
She was planted into her 1st pot last night.
Happy days, looks like a very good start 🏆
😵💫🤘🏼

Likes
25
Share


@Kakui
Follow
Estuve un tiempo sin actualizar el diario porque me contagie de COVID, ahora un poco mejor vuelvo a actualizar.
Flower58, las plantas están listas para la cosecha, en uno o 2 días empezaré a cortar y colgar para su secado.
Drying, secando con parámetros de humedad de 60% a 16°c por aproximadamente 2 semanas, están a 2 o 4 días de estar listas para pasarlas a frascos y ver cuánta cantidad final se logró.

Likes
11
Share


@Chuckwaggon420
Follow
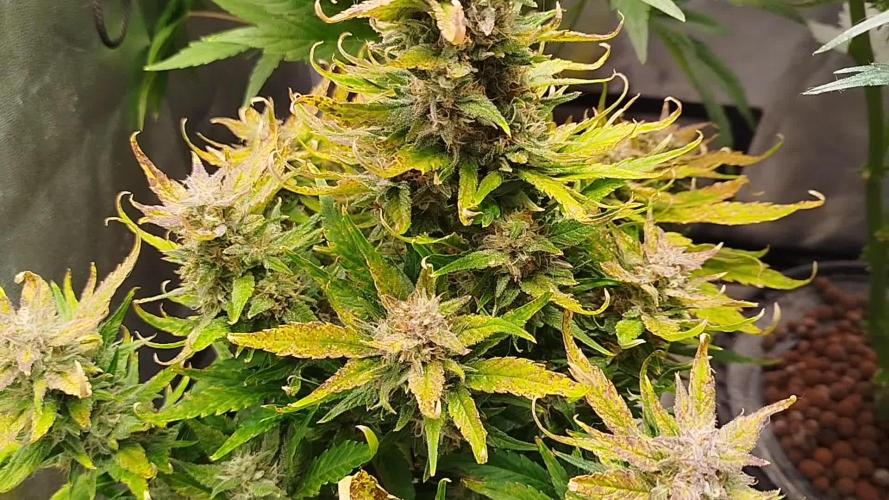
This is the last week. These girls getting chopped they are all sooo fat so dense sk heavy it's insane. Going to be a large harvest I bet! Has a way loud gas sweet smell and are just so sticky they almost stick to ur fingers!!!
These girls have been fading Out all nice on their own just let the soil do its thing. Will chop these girls and give them a quick trim all the big leafs and let it sit and hang for 14 days in the cold. Got around 15% amber so it's time woop woop.


Processing
Likes
5
Share


@Bombtofu
Follow
I need to get my l.s.t. done. Plan to this weekend. Have been alternating waterings between regular water and water with 2.5ml of fox farm grow big. Have watered all times with 200ml of water and the solution water mix. Been keeping the humidity at about 45% temp around 68. Can tell a huge difference in sizes of the plants and their container sizes. Will be going with at least 3gal pots next grow. Still using a 25w light as well. Will be upgrading that asap. Thanks for the view. And as always, stay safe.


Likes
1
Share

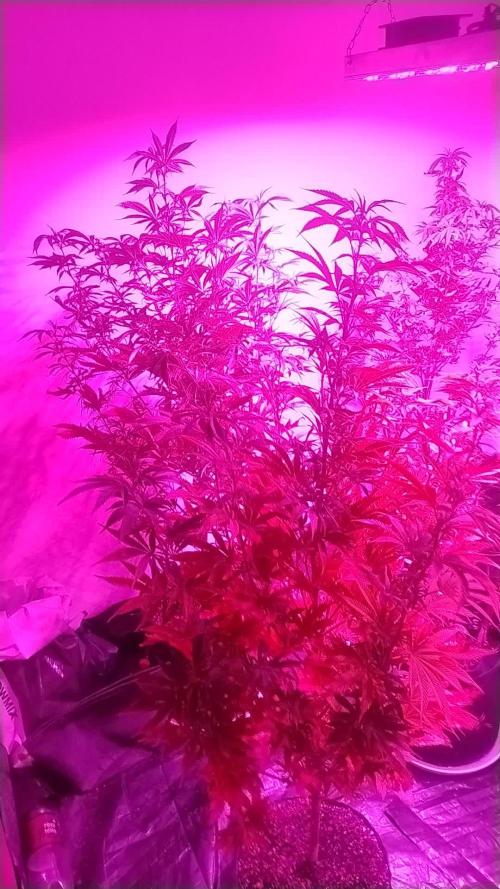
@psychonaut420
Follow
Stretching like crazy and enjoying the followed foxfarm nutrient sched