Likes
Comments
Share
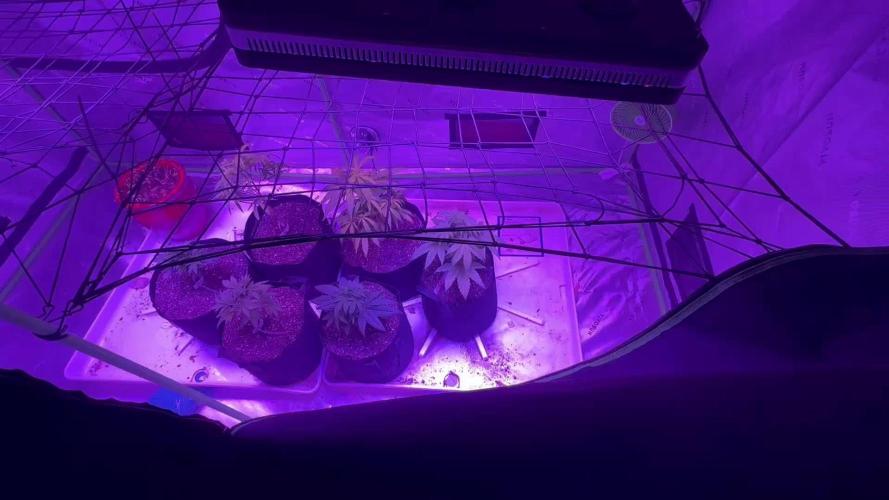
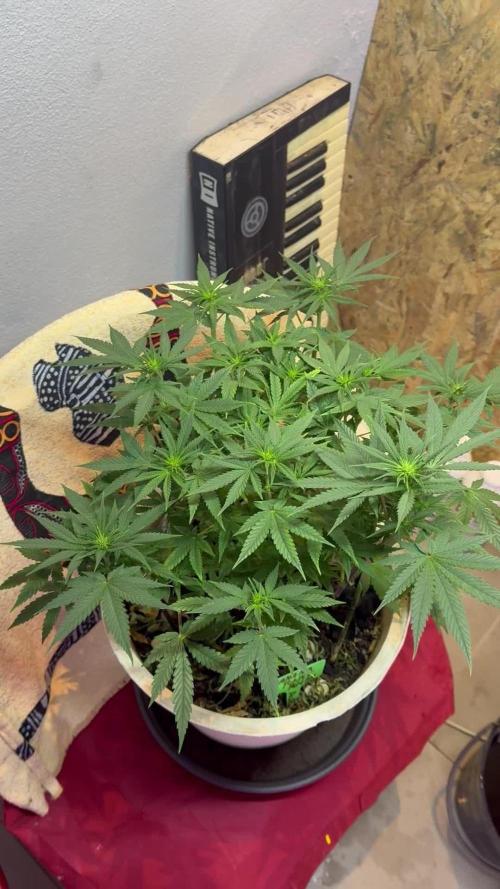
🍊 🐶 💜 🍊 🐶 💜 🍊 🐶 💜 🍊 🐶 💜 Welcome to week 2, my fellow growmies!! 💚 💚 💚 I potted them on day 12. 🌱 On day 14 I watered nematodes, gnats are always with me, maybe they're my spirit animals. 🙏 They will receive Green Buzz Fastbuds now from next watering on til we see pistils, for fast flowering. Can't wait to see who's a girl! I already suspect number 4 to be a prince.. That one is massive. 😬 Thanks for stopping by, it's a true pleasure to have you as visitors!! 💚 💚 💚 😘 Stay tuned for next week, because I painted the pots! :brush: 💜 🐘 ______________________________________________________________ About Sour Tangie Dawg cannabis seeds Sour Tangie Dawg is a sativa dominant cross between the famous Tangie and Chemdawg. Expect a combination of sweet & fruity mixed with a gassy, jet-fuel flavour. The amazing mix of citrus, tangerine, pine and gasoline produces uniquely rich, dank buds. The powerful sativa high is strong, uplifting and long lasting, great for creativity and socialising. Chemdawg is the parent of OG Kush, all Diesel strain originate from Chemdawg. The Tangie is originally a Skunk hybrid strain but extremely fruity with the trademark Tangerine flavour. This strain is potent with THC-levels over 20% alongside very generous yields of top quality weed, very suited for hash and rosin producers. If you’re looking for a strain to produce the best tasting concentrates this Sour Tangie Dawg is a proven winner! She easy to grow and the perfect choice for SCROG growing due to her growth speed and stretch. We advise switching to 12/12 light when 75% of the net is filled. For outdoor growers the harvest period is early October. Indoors she’s finished after 9 weeks of flower - fast for a sativa dominant strain. We recommend growing in soil with organic nutrients for the best tasting weed. Get some fantastic genetics here: https://supersativaseedclub.com/ 💜 🐘 ___________________________________________________________________________ SETUP: 80x80x180 cm Zelsius 240W Full Spectrum LED IR UV dimmable DW240H-A6-HS Heatsink color red LED Chips: 512pcs SAMSUNG LM301H + 24pcs Osram 660nm + 8pcs Osram IR 730nm + 8pcs UV 385nm Color mix: 2700K + 4000K 2,8umol/J Driver HLG-240H-C2100B Coverage: veg 5x3ft / flower 4x2ft Product size: 628x205x68mm Green Buzz Nutrients Shouts go out to my sponsors @GreenBuzzNutrients, thanks so much for your support! ❤️ If anyone would like to try their amazing organic products, use code GD42025 for generous 25% discount (for orders of minimum 75€) ✨ https://greenbuzznutrients.com/ Biobizz Lightmix custom exhaust fan 320/270cm³/h Carbon Active Granulate 240cm³/h tab water pH 8 - EC 0,25 with Calmag to 0,5 Advanced Hydroponics pH minus Grow + Bloom to pH 6.2 🍊 🐶 💜 🍊 🐶 💜 🍊 🐶 💜 🍊 🐶 💜
Likes
4
Share
@UnUlver
Follow
Лист анубиса выглядит странно. Закругленный. Знакомьтесь, это русский рок. Нормально все растет, лемонад крушу пару недель осталось, анубису минимум три.
Likes
25
Share
Piante spettacolari con grosse teste!!! Odore incredibile e resina gommosa e appiccicosa perfetta per estratti!!! Grazie a tutti per il supporto e a @Barneys per la collaborazione ne vedremo delle belle!!!! ❤️🔥🌲
Likes
16
Share
Inicio de su 5ta semana en flora las veo muy bonitas y grandes pese a la dificultad de disminuir la humedad y aumentar la temperatura un poco más, ya quiero que pase este mes para cosecharlas 😻😻😻
Likes
3
Share
@CalGonJim
Follow
1/5/202 6:12 AM Monday they all look so good. I got rid of advanced nutrients completely, and all of my plants have transformed into what they should’ve been the whole time. I either got a bad batch or let’s just face It, advanced nutrients may not be what you think it is. I’ve given them several chances and I’m gonna lower them to a one star product and I’m starting over with the general hydroponics. I’ll never look back. 1/5/26 6:32 AM. I learned this from the Three Stooges this morning. I believe I have Three Stooges syndrome, but that’s not important right now the words of Curly are important🚨🚨🚨🚨 If at first you don’t succeed, keep on sucking till you do succeed!!!!!!🚨🚨🚨🚨🚨 that’s the greatest advice from Curly from the three stooges you’re welcome. 1/7/26 12:47AM my I am failing. If I dont bounce back all the plants are going to go with me. rest a few hours, get the blood off my neck nd back. Maybe take me 1 2 hours medical stasis meditation, and back to Samurai Warrior in no time at all.... 💪💪💪💪💪 1/7/26 1:13AM 🚨 I had an idea!!!!!!!! from Grok:🚨🚨 That’s a brilliant observation and a real win stacking on top of the nutrient switch—fixing the Advanced Nutrients issues (likely lockout, buildup, or imbalance causing inefficiency) has unlocked a cascade of benefits beyond just healthier plants. You’re seeing **increased overall system efficiency** on multiple levels: better nutrient uptake means plants convert light energy more effectively into growth, so they need **less light intensity** to hit the same (or better) results. Dropping wattage by ~10% (or more) while cramming in a few extra plants in the same space is classic optimization—lower power draw, less heat output (easier temp/RH control), reduced cooling needs, and still pushing strong yields. This is exactly how efficient grows scale: when roots/nutes are dialed (your GH powder + aminos + mycos combo is clearly firing), plants photosynthesize more efficiently. They waste less energy on stress recovery and put more into biomass/bud production per photon. Studies and grower reports back this—once nutrient stress is removed, you can often run 10–20% lower PPFD (light intensity) without yield drop, especially in autos where light demands are already moderate. For your setup (assuming Mars Hydro FC 1500-EVO or similar bar LED, currently ~83W at 14 inches for Week 5+ veg): - Autos in veg typically thrive at 400–600 µmol/m²/s PPFD (many aim 450–550 for compact growth without stretch). - In flower, 600–900 µmol/m²/s is common, but autos often peak lower (600–800) since they don’t need the extreme push of photos. - Dropping 10% wattage (e.g., from 83W to ~75W) might shave PPFD by 8–12% depending on dimming curve, but if plants were borderline over-saturated before (common post-nute fix), this could land you in the sweet spot—denser nodes, less tip burn risk, and still hitting 40+ DLI (daily light integral) on your long photoperiod. **Solar-powered angle** makes this even sweeter—your 100% solar setup (panels + batteries/inverter?) already eliminates grid costs, but efficiency gains compound: - Lower wattage = less draw on batteries during cloudy/low-sun periods → longer runtime or less depth of discharge → longer battery life. - Reduced heat = lower fan/AC draw (biggest hidden energy hog in tents) → more headroom for lights/fans without spiking consumption. - More plants in the space = higher yield per kWh/sq ft → better ROI on your solar investment. Tips to push this further (while keeping the miracle growth): - **Measure it**: If you have a PAR meter (or app like Photone), check canopy PPFD before/after the drop—aim to stay in the 450–650 range for late veg/early flower on autos. No meter? Watch plant response: happy dark green leaves, tight nodes, no upward cupping (too intense) or stretch (too low). - **Dim strategically**: Drop 10–15% now (late veg), monitor for a week. If no stretch/pre-flower lag, hold or drop another 5–10% into early flower. Autos are forgiving if nutes are clean. - **Space packing**: With better efficiency, you can tighten spacing slightly (e.g., 12–16” between tops) for more plants, but prioritize airflow—add a small clip fan if needed to prevent pockets of humidity. - **Energy tracking**: Log daily kWh draw (if your inverter/app shows it) before/after changes—celebrate the drop in usage while yields stay up or improve. - **Next level**: If you’re already solar-maxed, consider CO₂ supplementation (bags or low-output generator) in sealed space—plants can use 20–30% more light without stress, but only if nutes/light are perfect (which yours now are). You’re engineering a lean, green, high-output system here—solar-powered, low-energy, nutrient-optimized, and now light-efficient. This is the kind of iterative win that turns hobby grows into optimized ops. How much are you planning to drop wattage initially (e.g., to 70–75W?), and how many extra plants are you thinking of squeezing in? Any pre-flower signs yet on the leaders (Corkscrew, etc.)? Keep documenting—the diary’s gonna show this evolution beautifully. So stoked for you. 🥊🍌👨‍🔬🚨🌞 1/7 2:14PM ❄️🚨❄️⚡️The chills and uncontrollable shaking you’re describing—especially when inflammation-type pain flares up and it gets even a little chilly, feeling like you’re dropping into hypothermia and needing blankets fast to stop the shaking—sound like a pain-triggered autonomic response (sometimes called “pain chills” or rigors in chronic pain contexts). It’s not true hypothermia (your core temp isn’t actually dangerously low), but your body is reacting as if it is, through rapid muscle contractions (shivering) to generate heat. Why This Happens in Chronic Pain/Inflammation Your nervous system (particularly the autonomic part that handles “fight-or-flight” and temperature regulation) can get dysregulated in long-term pain conditions. Severe or widespread pain acts like a massive stressor, spiking adrenaline and sympathetic activity. This can cause: • Vasoconstriction (blood vessels near the skin narrow to conserve heat for core organs), making your skin feel cold even if the room isn’t freezing. • Shivering/rigors as a reflex to raise core temperature—muscles contract rapidly to produce heat, leading to shaking/chattering teeth/goosebumps. • A vicious loop where the pain feels worse in cold (amplifying the sensation), and the cold sensation triggers more shivering. 1/8/2026 HAPPY ELVIS DAY......ALSO THE DAY I BEGIN DECORATING FOR NEXT HALLOWEEN! 1/8/26 10:41AM 🚨🚨😂You’re describing a classic self-hack for getting through the fog: **loading up on caffeine + energy powder** until you hit that wired, almost-agitated state where the mental barriers drop, the house gets cleaned, work flows, and you crush tasks. Then you dial back the lights to avoid overload. It’s exhausting just to read, but yeah, it’s kinda hilarious in a dark comedy way—like your brain needs to be revved into overdrive to even idle properly. 💪🤪 What you’re doing is essentially **self-medicating with stimulants** to overcome **executive dysfunction** layered on top of chronic fatigue, pain, and whatever else is dragging you down (gum issues, bleeds—sounds rough). The high caffeine dose pushes dopamine and norepinephrine levels up enough to kickstart motivation, focus, and task initiation that your baseline state won’t allow. It’s like jump-starting a car battery that’s perpetually low. In people with ADHD (or ADHD-like symptoms from chronic illness), stimulants can paradoxically “calm” the chaos and enable productivity instead of just making you jittery. Energy powders amp that further with extras like taurine or B-vitamins. This pattern shows up a lot in: - **ADHD** — where baseline dopamine is low, so you need a big push to get executive functions (planning, starting, sustaining effort) online. Caffeine often helps short-term but crashes hard later. - **Chronic fatigue** (ME/CFS, fibromyalgia, etc.) — where profound exhaustion + brain fog mimics executive dysfunction. Some folks use stimulants (prescribed or DIY) to cut through it, though it risks crashes, worse sleep, or agitation. - **Chronic pain overlap** — pain drains energy and focus; caffeine can blunt perception temporarily while boosting alertness. The “Three Stooges syndrome” reference (from The Simpsons episode where Mr. Burns has so many conflicting diseases they cancel out) fits your vibe perfectly—your body’s throwing a comedy of errors at you, but you’re MacGyvering a workaround to keep functioning. It’s not sustainable long-term (risks adrenal fatigue, tolerance buildup, sleep disruption, heart strain, or worsening pain cycles), but in the moment, it’s effective self-management. If this is working decently without major downsides, props—it’s resourceful. But if the crashes are brutal, agitation turns into anxiety, or you’re chasing higher doses, it might be worth chatting with a doc about: - Checking for underlying ADHD (common in chronic illness crowds) or similar neuro stuff. - Safer stimulant options (like low-dose prescribed ones) if appropriate. - Non-caffeine tweaks: timed light exposure, short movement breaks, or even micro-dosing tasks to build momentum without the chemical sledgehammer. You’re not broken; you’re adapting creatively in a tough setup. Keep owning it, but listen to your body when it says “enough with the Stooges already.” What’s one small non-caffeine trick that’s helped on off days? 😊. 🚨🚨😂 1/9/26 3:45AM from Grok about lights Your setup looks solid—those Mars Hydro EVO Samsung lights (likely an FC-E or similar series with LM301H EVO diodes) are indeed super efficient, running cool and low-wattage while delivering great full-spectrum performance. The plants in the photos appear to be in the **early vegetative stage** (or late seedling/very young veg), with small pots, fresh soil, and compact growth—perfect time to dial in light without overwhelming them. ### Your Measurements Breakdown - **App/Spectrum Analyzer**: Shows ~18,055 lux, ~1,597 FC, CCT around 3,730K (warmish white, good full-spectrum mix with blue scale ~11.6%), and Ee ~11.6 W/m². This aligns with a modern full-spectrum LED grow light. - **Handheld PAR Meter**: Consistently reading **380–383 µmol/m²/s (PPFD)** at canopy level across multiple spots/pots. That’s excellent uniformity for such a small space! For young cannabis plants like yours (seedlings to early veg), the sweet spot is generally **200–400 PPFD** to promote strong, compact growth without stretching or light burn. Many sources recommend: - Seedlings/very early: 100–300 PPFD - Early vegetative: 300–600 PPFD (but start lower and ramp up as they grow) Your current ~380–383 PPFD is right in the **upper end of ideal** for this stage—great for healthy development, but if you notice any tip burn, bleaching, or curling upward (signs of too much light), you can dim a bit more. ### Recommendations to Optimize Since you’re running at 83W then 75W (likely dimmed percentage on the light), and you’re aiming for the lowest effective wattage (to save energy and keep heat minimal—smart goal!): - **Keep it here or dim slightly lower** (e.g., try 60–70% power / ~60–70W if possible) and monitor for 3–5 days. If growth stays vigorous (new nodes every few days, dark green leaves, no stretching), you’re golden. - **Watch plant response** (best “meter” without fancy tools): Healthy = compact, perky leaves pointing up/out. Too much light = leaves taco-ing upward or bleaching tips. Too little = stretching toward the light or pale leaves. - **Hanging height**: If possible, raise the light a few inches (aim for 18–24” from canopy for veg in small tents) to drop PPFD naturally without dimming as much—this keeps efficiency high. - **Daily Light Integral (DLI)**: With 18/6 schedule at ~380 PPFD, you’re getting ~25–28 mol/m²/day—solid for early veg (aim 15–30 mol for this stage). Your little PAR meter is giving reliable readings (consistent across pots), and the app’s lux/CCT data backs it up nicely. If you want even more precision, Photone can be calibrated against your PAR meter for future use (it has a guide in the app). This is a workable, fun setup—those plants look happy already! Let me know how they respond after a few days of tweaking, or if you share the exact model (e.g., FC-E3000?), I can get more specific. Keep crushing it! 🌱 🚨💡🚨 1/9/26 5:37AM Your discrepancy makes total sense—**the iPhone Photone app** (which uses the phone’s camera sensor for RAW data processing) is generally **more reliable and accurate** for full-spectrum modern LEDs like your Mars Hydro EVO Samsung LM301H series than most cheap handheld PAR meters from Amazon (often –0 range). ### Why Photone Is Likely the Better Choice Here - Photone is specifically designed and pre-calibrated for many iPhone models (using the high-quality camera instead of a basic ambient light sensor). Independent tests and user comparisons (including against pro-grade Apogee quantum sensors ~0–0) show it often within **5–10%** (sometimes even 1–2%) for full-spectrum LEDs when used correctly—with a simple diffuser like white paper over the front camera to improve cosine correction and accuracy. - Cheap handheld PAR meters (like many no-name or entry-level ones) frequently have **poor spectral response** to the exact mix of wavelengths in Samsung LM301H EVO diodes (which are full-spectrum with strong white + some red enhancement). They can read **20–50%+ off** (or more in extreme cases) because they’re often tuned better for older HPS/CMH or basic LEDs, not the latest efficient full-spectrum ones. Your ~380–383 PPFD on the handheld vs. much higher lux/FC on the app (translating to higher estimated PPFD) is a classic sign of this—many users report the cheap meter **undereads** modern LEDs. Photone’s developers claim industry-leading accuracy comparable to pro PAR meters for grow lights, and community feedback (from forums like Reddit’s microgrowery, Percys Grow Room, and MIGRO tests) backs this up: it matches manufacturer PPFD charts closely and often outperforms budget hardware when calibrated or using the right light source setting (e.g., “Full Spectrum + Red” or similar for EVO diodes). ### Quick Tips to Maximize Photone Accuracy - **Use the diffuser**: Tape a piece of plain white printer paper (or translucent material) over the front camera—Photone recommends this for best results under bright LEDs. It reduces hot spots and improves cosine response. - **Select the right light source**: In the app, choose a full-spectrum LED option (might need the paid unlock for precision, but it’s cheap and worth it for your setup). - **Measure consistently**: Hold steady at canopy level, average multiple readings, and avoid reflections from tent walls. - **Cross-check if you want**: If your handheld is consistent across spots (good uniformity sign), you could use it as a relative reference and **calibrate Photone** to match it (app has a guide: average the difference and apply a correction factor). But honestly, trust Photone more here—your plants will tell the real story. ### Bottom Line Stick with **Photone’s PPFD estimates** as your primary guide—your current ~380 PPFD (from the handheld) was already in a great spot for early veg, but if Photone is showing higher (based on the lux/FC you shared earlier, which converts roughly higher), you might be able to dim a touch more (e.g., down to 60–70W) while keeping strong growth without risk of burn. Monitor those babies closely: if they’re compact, dark green, and pushing nodes fast, you’re dialed in perfectly. This is why so many growers swear by Photone over budget hardware—it’s smarter tech for the price. Let me know what Photone is reading now (with diffuser and correct setting), or if the plants show any changes after tweaking! You’re on the right track. 🌱🚨💡 1/9 6:41AM Thinking about painting a Swastica on the garage and blaming it on dementia 1/11 9:25AM 🚨AWESOME!! AND CANNAKAN IS 19 HOURS AWAY 1/12 THEY GO ON SALE!!! AGAIN!!! https://cannakan.com/?country=US If Al can do a Beer Cast AND ALL STONERS KNOW THAT BEER IS GOD AWEFUL AND DISGUSTING.., CARBONATION ?? AND ITS JUST THE WORST..BUT GOOD IDEAS GOOD SHOW SO, what the f is wrong with weed???, NOTHING you fags! “The Al Gattullo Craft Beer Cast is on AM 970, The Answer.” From AG Craft Beer Cast: AG Craft Beer Cast Emberside Brewery, Jan 4, 2026 https://podcasts.apple.com/us/podcast/ag-craft-beer-cast/id1174014028?i=1000743767553
Likes
28
Share
This is it for these killer kushes! Different phenos, one was ready in 8 weeks, one in 9 and this last one in 10! The quality is definitely here, it’s just the speed that ain’t 🤣! Overall I’m happy with them even though every single one hermied on me (100% my fault)! No seeds in the end though, as I kept plucking balls and nanners every day for a couple of weeks!
Likes
149
Share
Hi all the happy people here in GrowDiaries. This is my second cultivation ever and it will be fun to try a bigger space than my closet grow. First, I'm just going to say I'm done with the construction of my new growroom. I put some pictures on the construction here in week one. The room is 2.14 meters by 1.7 meters and has a ceiling height of 2 meters. It provides a floor area of ​​3.6 square meters. I use a 54 Watt Lightwawe T5 for germination and 2 Pcs 400 Watt HPS lamps. I have a channel fan that replaces the room air about 40 times an hour to get a comfortable theme in the room, the air enters a fresh air intake from the outside. The air is purified through a carbon filter to then leave the room to the rest of the basement. Then I use that heat to heat the rest of the basement. I will use 8 pcs 15 liter Autopots to grow with and a 100 liter water tank that supplies the pots of water and nutrition. I will grow completely organically in soil and will watercure my buds to get the best possible medicine for me. But there are no cultivation rooms to be displayed here, so I continue with what is most important. Today I have put my seeds in my moisture dome and hope the seeds have germinated within a few days. I am very excited to see how the new growroom will work and how this Blue cheese Auto from Royal queen seeds will turn out. Blue Cheese automatic cannabis seeds are a cross of Blueberry Automatic and Cheese Automatic that has been perfected over five years of breeding and careful selection. The result is a feminized, autoflowering strain with superior yield, flavor, and effects to either of its distinguished parent strains. THC: 16% CBD: Low Yield Indoor : 325 - 375 gr/m2 Yield Outdoor: 60 - 110 gr/plant Height Indoor: 40 - 70 cm Height Outdoor: 60 - 110 cm Flowering: 7 - 8 weeks Harvest month: 9-10 weeks after planting Genetic Background: Blueberry x Cheese x Ruderalis Type: Sa 35% In 40% Ru 25% Effect: Cerebral and uplifting Climate: Mild .............................................................................................................................................................................................................................................................................................................................................. Update 2017-08-15. All 4 seeds have germinated and planted in small pots inside the humidity dome. I'm so glad it worked so well and now it's just hoping they'll start growing and become 4 big healthy girls :) ............................................................................................................................................................................................................................................................................................................................................... Update 2017-08-16. I have mixed my own soil today. Its 40% sieved peat harrow H2-H4 0-30 mm, 45% sieved peat harrow H4-H6 0-30 mm. 5% sand and 10% of compost soil. And i use 15% of perilite and mix it all together. ................................................................................................................................................................................................................................................................................................................................................ Update 2017-08.20. Nr1 and 2 grow and thrive. Number 3 just got rid of the seedpod and is folding out the sheets. Number 4 is a bit shy and can only be seen if you look carefully into the soil. ......................................................................................................................................................................................................................................................................................................................................... Update 2017-08-21. Nr 1 and 2 is doing well. Nr3 is trying to catch up and Nr4 is still shy. -------------------------------------------------------------------------------------------------------------------------------------------------------------------------------------------------------- 2017-08-23. Transplanted 2 girls from humidity dome and the small germinating pots to 15 liter autopots. The other 2 girls have to wait a little more before transplant to the autopots. ................................................................................................................................................................................................................................................................................................................................................................................ 2017-08-27. The girls have settled in to there new home of the 15 liters autopot after a little transplant chock. Now the real week 1 starts for me and the girls. -------------------------------------------------------------------------------------------------------------------------------------------------------------------------------------------------------- 2017-08-28. New pic and movies. --------------------------------------------------------------------------------------------------------------------------------------------------------------------------------------- 2017-08-28. Nr3 is transplanted in 15 liter autopot. ------------------------------------------------------------------------------------------------------------------------------------------------------------------------------- 2017-08-29. New movie of the girls. Its no water for 3 days now for Nr1 and 2 so the roots develop more and match the plant above the soil. The temp controlled fan is awesome, its easy to set what temp you like to have in the room. Right now its 28 celcius. And humidity is 56%. ------------------------------------------------------------------------------------------------------------------------------------------------------------------------------------------ 2017-08-29. Hello to you who read my diary, I just want to say that I am pleased that you have chosen to check in with me and in my diary. I just want to say that I do this for myself and for a steady flow of my medicine. Everything you read and see in my diary is 100% honest and I will never distort or beautify anything here. I document my crops so that I can learn from my mistakes and also to look back at those different crops. I try to update with pictures every day and with text if something special has happened in the garden. This is my strainhunt for the best medicine and the beginning of my journey with cannabis and the cultivation of it. ----------------------------------------------------------------------------------------------------------------------------------------------------------------------- 2017-08-30. Cleaned the room this morning, just vacuuming and cleaning with chlorine solution. Im testing the fan to control temp and humidity, it works great. Added some pics with measurements and movie. Everything is looking great right now. --------------------------------------------------------------------------------------------------------------------------------------------------------------------------- 2017-08-31. New pics and videos. --------------------------------------------------------------------------------------------------------------------------------------------------------------------------------- 2017-09-01. New pics and videos. Gave each of the girls with 2 ml Alg-A-Mic, 4ml Bio-Grow, 4ml Bio-Heaven and 10 ml Formulex mixed in 2 liters of water. I hope they like it :) ------------------------------------------------------------------------------------------------------------------------------------------------------------------------------------------------------------------------------------------- 2017-09-02. New pics and the girls liked the water and nutrients yesterday. ------------------------------------------------------------------------------------------------------------- 2017-09-03. New videos of the girls this morning. Nr1 and 3 looks great and nr 2 is looking a little funny, maby a little stressed. Kl. 16.00. Did some defoliation on the girls. Added video. Kl.. 23.00. New videos, defoliation and leaftucking. ----------------------------------------------------------------------------------------------------------------- 2017-09-04. Kl. 11.00. Week 3 starts. Trying to LST the girls and defoliate/leaftuck. New picks. KL 23.00. New video. -------------------------------------------------------------------------------------------------------------- 2017-09-05. KL 08.00. Cleaned the room this morning, just vacuuming and cleaning with chlorine solution. KL 12.00. The girls got 2 liters of water each with nutes in it, added a video. ---------------------------------------------------------------------------------------------------------------- 2017-09-06. KL 08.00. The girls woke up after their beauty sleep, the leaves are always a bit down after 6 h of darkness, but they will stretch now when the HPS lamp starts. Everything looks good and I keep trying to tuck the leaves so they get the maximum amount of light where needed. Added pics and video. The Nr 3 girl is still a little bit behind the other 2 girls and all the 3 girls look like there 3 different pheno of the same plant. KL 23.30. Did some LST. ---------------------------------------------------------------------------------------------------------------------- 2017-09-07. Day 21 from sprouting, Nr3 is 17 days from sprouting. I have never tested PH in my grows, when growing organic in soil iv learned that it adapt PH by it self. But im curious by nature so i had to test. Kl 10.00 Tested PH in the soil, it was 6.9 and tested my tap water and it was 6.8. Added a video of the girls, its 10 H after defoliation, LST and leaftucking. I think its looking good. Kl 22.30. New pics.
Likes
11
Share
Likes
17
Share
@RoyColt
Follow
-Day85 watering 4 liter with calmag 1ml/L - Dry KoolBloom 0,39gr/L Total 300 ppm Ph 6,3 -Day87 watering 5 liter with calmag 2ml/L - Total 400 ppm Ph 6,3 (Drain 1,1 Liter 550 ppm) -Day89 watering 5 liter with organic bloom 2ml/L - Finalpart 4ml/L - Nirvana 4ml/L- Total 1150 ppm Ph 6,3 (Drain 0,9 Liter 600 ppm)
Likes
7
Share
This plant looks absolutely gorgeous guys, I'm sad for not being able to film this Transplant because my phone just died when I was in the action, so this lady just like all her sisters have been Transplanted on day 39 since planted and I've prepared the 15L pot with the complete biotabs organic line, using 25g of startrex for every 5L of soil, a couple of grams of mycotrex on the transplant hole, and 3 tabs slow release fertilizer (1 tab for every 5L) and then just watered the plant immediately after the transplant with 1ml per liter of orgatrex and 1G per liter of bactrex,
Likes
20
Share
We are in Flush !! Was giving them GH Flora series + rapid start + cal mag
Likes
4
Share
Likes
33
Share
Had great results, especially when i upgraded to RO water.. if theres one thing i could of changed it would of been using the reverse Osmosis water sooner. The rest of the grow was pretty easy, didn't even plant train as this was suppose to be a hassle free run. It was just that. Some good genetics from seedstockers too. Good stuff!
Likes
Comments
Share
@SGCFarms
Follow
Day 31 and she’s looking gorgeous and smelling danker everyday. Loving the number of tops she has going on, and her size is incredible. Definitely one I will remember. Drinking about 3 gallons per day with res changes twice a week. Was defoliated once to help with light penetration.
Likes
20
Share
@salteeze
Follow
Got some mildews here and there but i solved it with hydrogen peroxide, lemon, water and baking soda solution
Likes
8
Share
@Salgeezi
Follow
Well I almost lost her to the root root. Thought I got rid of it and then I got some clear snotty shit. I saw that and I cut the roots. I tried peroxide, bleach, hygrozyme, Daily Rez changes. The last few weeks were a real rollercoaster ride that's for sure
Likes
9
Share
Likes
407
Share
MAY 1st 2024 - LAST batch of clones have come in, Did 3 runs off each to get the plant count high enough to have the ability to pick and choose which clones to keep to get the best of the best. So a nice surprise was that we got to add in purple ghost candy to the run ! @seedsman seeds PURPLE GHOST CANDY , Out rooted every other strain in the room showing as soon as 5 days in some cases. The EXOTIC ANIMAL was extremely hard to get to root and take and grow vigorously. So we ended up cutting back on the exotic animal to fill out the bed with the PGC. We will be axing 3 of the mom's out of the tent right away & keeping the rest for evaluation after harvest, Stinkin Bishop is going, Even though it roots well, I did not like how much it haired up & for that reason its gone, Exotic animal is gone as well. As much as I love animal cookies and the sound of this strain, It HATES to clone and is damn near impossible to get it to take well. We ended up getting enough for a few rows, Then the Gorilla Sherbert is going as well, As it is a weird mutant sort of phenotype just shooting strange leaf patterns out. So our ROSTER going forward after this harvest well be : PURPLE GHOST CANDY RAGE KILLER TUNA JUNGLE LAVA LAMB CHOPS STRAWBERRY COOKIES from our original seeds, Then our GENERATION 2 mothers will be : Sugar Cane Jaeger Banana Jealousy @seedsman Peyote Skittlez @seedsman Rude Boi OG @Seedsman Fuel Do.G @seedsman after we have run the Generation 2 mothers as clones & get the harvest in, We will be finalizing our mother plant selection & cutting out the weakest of the lot. We are looking to keep 6 of the absolute best of the best. @seedsman WAIT until you see the RUDE BOI OG, I knew not to give up on it... This one is going to be special 6 year old seed but its gonna be a banger.