
Likes
Comments
Share


@bioaccessory
Follow
Hey!
This week went smoothly, thanks to ZSU! 💪
Humidity dropped, and the pot began to dry noticeably faster. Otherwise, everything is according to plan, we continue to gain weight. The substrate is slightly acidic, but the view seems to be ok.
Glory to Ukraine! 🇺🇦

Likes
16
Share


@hydro78
Follow
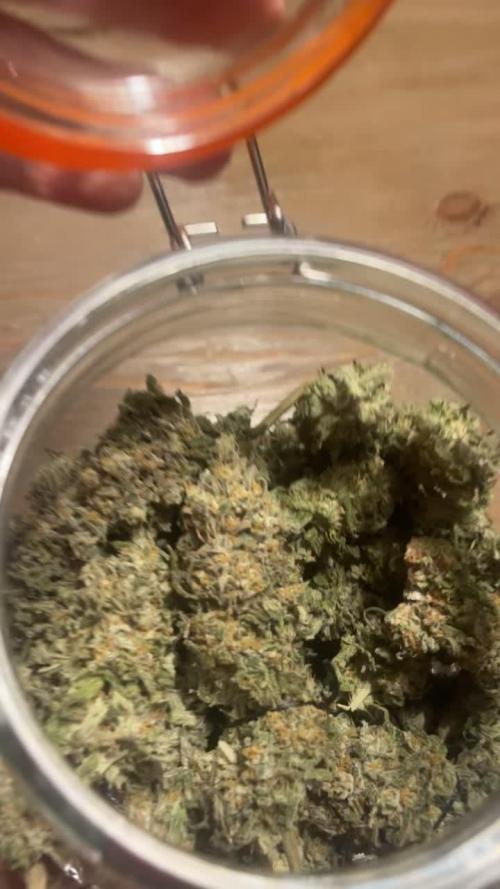
starting week 10. flushing week
i will flush twice ., with 15 liter of water each time. -
3 liter×3 with flawless finish, and 2×3 liter only water with 6.2 ph.
day 67, a few days left, leaves turning colors, 1 more flushing left and harvest in 5 days.


Likes
5
Share

@GingerGarageGrow420
Follow
Strain: Chill Out OG F4
Harvest Day 64 Flower
Day: 113 from sprout
Medium: Fox Farm Ocean Forest
Light: Vivosun VS2000 at 100%
VPD: 1.5 kPa
Light Distance: 12 inches
Watering: By hand, ~oz daily
Nutrients: pH Perfect Advanced Nutrition Grow, Bloom, Micro 2 ml / L, 1 ml / L big bud
30 inches
YIELD: 54 grams dry and trimmed.
Pretty sticky. Piney and floral smell (girlfriend said smelt a little like Christmas)
Likes
79
Share


@Roberts
Follow
Alien OG Autoflower grew great, and finished beautifully. Strong smell, frosty, and sticky. She grew great under the Mars Hydro FC4800 light. It was my first time using the Gen 1:11 nutrients. I really like them, and will use again till I run out or get more. She will hang dry 24 hours then be put into the cannatrol for a 8 day cycle. I got a great grow to try it out the first time. 🤞. Thank you Aeque Genetics, Gen1:11, and Mars Hydro. 🤜🤛🌱🌱🌱
Thank you grow diaries community for the 👇likes👇, follows, comments, and subscriptions on my YouTube channel👇. ❄️🌱🍻
Happy Growing 🌱🌱🌱
https://youtube.com/channel/UCAhN7yRzWLpcaRHhMIQ7X4g


Likes
5
Share


@Rizza78
Follow
Sorry busy week. They are getting close. Just turned the lights down 20% to simulate fall for last couple weeks. Will add ice in 6 days to flush.

Likes
3
Share


@Canadian_Bud
Follow
3-11-2019
This Northern is slowly bouncing back but the damage has been done, she is producing but not how I would like it. Hopefully she will produce some tight buds.
5-11-2019
Pump Quit- Not much I can do at this point other than go it as Deep Water Culture. Root mass is to well established to attempt a removal.


Likes
21
Share


@XG_Jack
Follow
Harvest day - I save my harvest post for the yield results so I have one more to follow.
Beautiful grow though and really impressed with the yield and results. I typically only grow indoors, this is my first full outdoor grow with a photo actually. It definitely changed how I view growing seeing the plants react outdoors.
Also I’m in newly legal NY state and we would not be here today if it wasn’t for people like Jack Herer fighting for us at the most difficult times to do it. Jack was born in Buffalo, NY so this grow was a grow to pay homage to a man that led the way. This strain has also won the 2nd most cannabis cups behind only Skunk #1 a strain well deserving of the Jack Herer name.

Likes
4
Share


@CannaIGrow
Follow
This plant plus one more started to wilt earlier on in the week, I figured it was probably time to transplant seeing as they had been in the solo cups for 2 weeks. After transplant plants seemed to be happy again. I introduced amino acids this week as well. They are getting the grease spray and drench program
Likes
20
Share


Likes
31
Share


@The_Bearded_Grower
Follow
I would just like to so thanks to Sweet Seeds for this grow as it is sponsored, love you guys. Just germinating now and getting the tent set up for the new grow will update when i got to plant. thanks for popping by and keep your stick on the ice 😀
Update the little girl is just starting to pop above the coco
Processing
Likes
5
Share


@DodgyOG
Follow
Growing tall. Kuchi is growing half day indoor and half day outdoor. check out the micro-topping slowmo!😵

Likes
3
Share

@HeizraumGrower
Follow
The grow is going exactly as planned so far, and the plant was topped on day 16. To minimize stress from the procedure and boost recovery, I bumped up the relative humidity, dropping the VPD for 24 hours. At the same time, I slightly dialed back the light intensity for this short recovery phase.
I watered twice this week with one liter of nutrient solution each time. The first feed was at an EC of 1.8, and for the second one, I lowered it a little to an EC of 1.4.
Right after the short recovery phase, I applied some LST to pull the final 4 main shoots outwards. By the end of the week, the light intensity was increased again and is now sitting at 75% (around 450–500 PPFD). The plant is now ready for a very early flip to the 12/12 light schedule.
Likes
12
Share


@CannaDiaries420
Follow
22-01
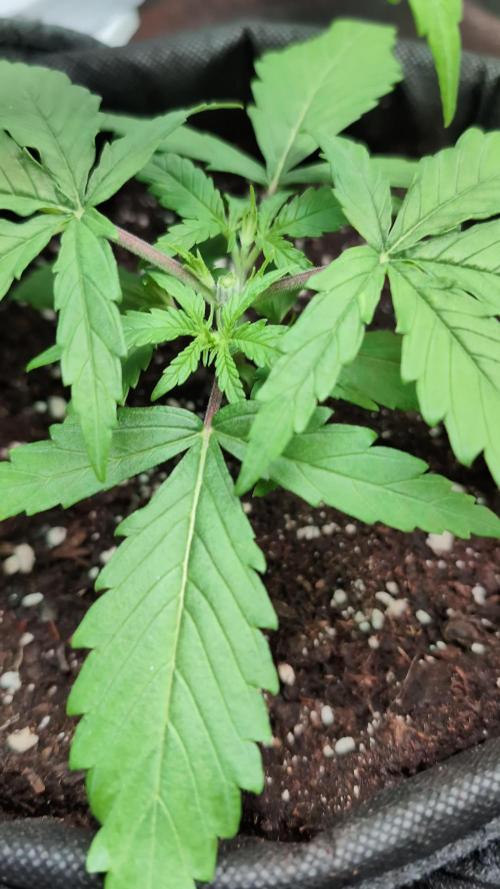
Already in week 5 and the topping is taking off its results.
*I ended the grow of nr: 3, just bad genes.
but more light for the other 3 plants.
24-01:
Applied another round of LST today. This time to create 4 main coala's and a wide and full deck of leafs.
When the plants start to get more busy i will add an scrogg technique and do a little defoliation at the bottom of them
to take even more profit of the LST.
26-01
I added Mega worm from plagron to the soil to give the plants a big boost so that they are ready for a strong flowering phase.

Likes
Comments
Share


@Odins_Farmer
Follow
Overall happy with the outcome, really aesthetically pleasing plant but I've never been a big fan of cookie based strains and probably wouldn't do it again. It did produce some male flowers late into flowering. It's a nice plant to grow though from the always dependable Sensi.

Processing
Likes
18
Share


@rhodes68
Follow
9/8 D65 Seems our "good" weather is ending and if the forecast is correct for the next three days, only three of the last ten were sunny.
That aint good folks not sure what can be done about it outside of artificial light and that would go on the ATF if any were available.
Ah well learning is fun
She looks good just needs some blasted sun
Zombie is thriving, go figure
Full feed yesterday
9/10 Sunless days continue, maybe two hours sun today then the rain moved in and the temp dropped... global warming my arse
The forecasts were correct now I can only hope that continues as it is forecast for much better the next 2 days and then right back to this mess.
9/11 Yep today was a big improvement glad to have it
9/13 Day 70
New vids, top dressing seems to have triggered a new run of bud building on both Gloria and zombie Quasimodo (cant kill some of these Mex Air plants). The moster crop growth pattern is interesting as hell just letting it grow. Gloria looks to be building a basketball bud on top :)
Weather degrading harvest in a couple weeks max trics say same
Likes
13
Share


@TheMightyHermit
Follow
Honey Cream is starting to smell wonderfully, a Sweet almost candy/bubblegum smell, incredible !

Processing
Likes
21
Share


@Siriuz
Follow
Starting week 10
Day 77
Ladie is getting some nutes plus water
Day 78
Whoa she's growing a lot
Day 79
Gonna start scrog soon
Day 80
Root its thriving like crazy, uploaded new video, check it out!
Day 81
Time to feed the lady again plus added more ffof soil with perlite and clay peebles
Day 82
All good, no nutrient burnt @ 1810ppm
Day 83
Had to expand the net, added scrog plus some other features, she's a monster it's Giving me a lot of work to do but I'm really happy with this huge lady growing up!!
End of week 10 with some videos to show progress!