


Likes
26
Share


@Growbody
Follow
I am very pleased to be the first to describe the cultivation of the “Kitsune Kush Automatik First Edition” variety from Zamnesia Seeds.
The URL of the strain is https://www.zamnesia.com/uk/11404-zamnesia-seeds-kitsune-kush-auto.html?tab=use-points
The Kitsune Kush Auto First Edition from Zamnesia Seeds comes in a very beautiful, elaborate packaging. The seeds are in a small glass bottle with a cork stopper. The kitsune cannot be purchased yet, you can only select them in the Zamnesia Tribe program. This makes the Kitsune very exclusive.
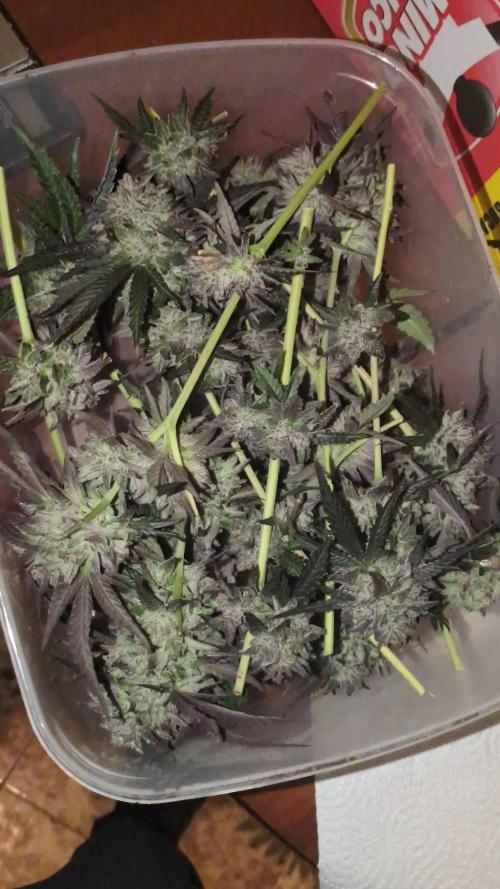
Day 98: The Kitsune Kush Automatic First Edition from Zamnesia Seeds is entering its final week. She's become a real beauty. The flowers are thick, sticky, and firm, and they smell very sweet. I read somewhere that organically fertilized plants don't need to be flushed, so I'll try it right away. All plants in the apartment received SF nematodes today to combat fungus gnats, and the lacewing larvae to combat tripe and various aphids are hanging exclusively in the cannabis.
Day 100: Here are the promised trichome pictures. As expected, there are hardly any clear trichomes left. The day after tomorrow is harvest day.
Now I'll tell you where I get my knowledge about the optimal activities for my plants. It's from "Aussaattage from Maria Thun 2025," ISBN number 978-3-928636-80-3, now in issue 63, which is now published by Maria Thun's son Matthias. You can also order it directly from thun minus verlag dot com, it's inexpensive, and it's even available as an app (I don't have it). Unfortunately I don't know if there is an English edition right now. You can ask me, if you have questions about the calender. The Aussaattage are based on the actual planetary events that everything on Earth is exposed to. So if you want to do something good for yourself and your plants, make sure your weed receives the right care at the right time.
With the code ZAMMIGROW2024 you get 20% discount on your order of Zamnesia seeds. 👍
Thank you for being interested in my progress. Check back if you want to see how things are going. 🙏😎
++++++++++++++++++++++++++++++++++++++++++++++++++++++++++++++++
Ich freue mich sehr, der Erste zu sein, der den Anbau der Sorte „Kitsune Kush Automatik First Edition“ von Zamnesia Seeds auf Growdiaries dot com beschreibt.
Die URL der Sorte lautet https://www.zamnesia.com/uk/11404-zamnesia-seeds-kitsune-kush-auto.html?tab=use-points
Die Kitsune Kush Auto First Edition von Zamnesia Seeds kommt in einer sehr schönen, aufwendigen Verpackung. Die Samen befinden sich in einer kleinen Glasflasche mit Korkstopfen. Die Kitsune können noch nicht gekauft werden, Sie können sie nur im Zamnesia Tribe-Programm auswählen. Das macht die Kitsune sehr exklusiv.
Tag 98: Die Kitsune Kush Automatic First Edition von Zamnesia Seeds geht in die letzte Woche. Sie ist eine richtige Schönheit geworden. Die Blüten sind dick, klebrig, fest und sie riechen sehr Süß. Hab wo gelesen, dass organisch gedüngte Pflanzen nicht gespült werden müssen, wird gleich ausprobiert. Alle Pflanzen in der Wohnung haben heute wieder SF-Nematoden gegen Trauermücken erhalten, und die Florfliegenlarven gegen Tripse und diverse Läuse hängen exclusiv im Cannabis.
Tag 100: Hier sind die versprochenen Trichomebilder. Wie vermutet sind kaum noch klare Trichome zu dehen. Übermorgen ist Erntetag.
Jetzt sag ich Euch mal, woher ich mein Wissen über die jeweils optimalen Tätigkeiten bei meinen Pflanzen beziehe. Es sind die "Aussaattage von Maria Thun 2025", ISBN-Nummer 978-3-928636-80-3, mittlerweile Ausgabe 63, die jetzt von Maria Thun's Sohn Matthias herausgegeben werden. Kann man auch direkt bestellen auf thun minus verlag dot com, kostet nicht die Welt und gibt's sogar als App (hab ich nicht). Die Aussaattage richten sich nach den tatsächlich vorliegenden planetaren Ereignissen, denen alles auf der Erde ausgesetzt ist. Wenn Ihr also Euch und Euren Pflanzen etwas Gutes antun wollt, schaut, dass Euer Weed zur richtigen Zeit, die richtige Zuwendung erhält.
Mit dem Code ZAMMIGROW2024 erhälst du 20% Rabatt auf deine Bestellung von Zamnesia Samen 👍
Vielen Dank, dass du dich für meine Fortschritte interessiert hast. Schau mal wieder rein, wenn du lust hast hier zu sehen, wie es weitergeht. 🙏😎


Likes
14
Share


@Drgreenthumb627
Follow
it seems to have taken the topping i did on day 4 of flower really well! loving the sativa phenotypes im seeing from this girl, hopefully its an energetic smoke

Likes
24
Share


@Ganjaman19
Follow
Week 1 of flower over going great plants are a nice size the tent is full up now I've moved a runtz muffin plant the 2 mac 1 and the mimosa to a small veg room so they can veg for longer and be ready for the next diary.
It's quite hot round here atm and tent is hitting 27 degree not ideal but that's typical English weather sometimes good most of the time shitty happy growing team 🙂 any advice and help would be much appreciated send me a message any time
I love the feed by Future harvest highly recommended see yous next week for my week 2 flower update
thanks for all the help from my sponsors
@Hydroprowashington
@Anesiaseeds
@divineseeds
@monkeynutrients


Likes
12
Share


@Staffedition
Follow
Привет друзья. Моей растихе сегодня 137 дней
Всё утеплил. Отопление сделал. Девочек своих отогрел)
20.10 перевёл свет в режим 12/12
Начал применять LST технику на 19 дне, а 18 августа добавил ДЕФОЛИЗАЦИЮ
С 20.08 ДЕФОЛИЗАЦИЮ
С 20.08 LST технику
На сегодняшний день влажность 54%
5.09.2023 заметил высокий Ph 7.9
С 48 дня Ph не ниже 5.8
На сегодняшний день Ph 6.0
Начал кормить с 60 дня Canna Terra Vega
PPM 870
Всем мира и добра!
Не забудь поставить лайк❤️, если понравилась как прошла неделя
И читайте наш TELEGRAM: https://t.me/smail_seeds
#Smail_Seeds 😀


Processing
Likes
12
Share


@Marijuanaisland
Follow
Está semana as cores estão mais vivas e o cheiro está forte ualll Red Hot com cheiro floral bastante tricômas, a sweet zkitllez cheiro de frutas tropicais intenso e doce adoro sweet seeds está de parabéns lol

Likes
31
Share


@Twojoint
Follow
I first started with a single 26W light for the seedlings but this wasn't enough so the seedlings started to stretch. Thankfully, i could borrow 2 x 39W Sunblaster T5HO lights from a friend.
Once i got room in the tent, the seedlings could move over there so they can enjoy the Mars Hydro TS-600 light. 😊
I also started this grow with a new bug-scan card. I wanted to keep track if this Cellmax soil has gnats but i already can see this soil is free of gnats.
(In the past, i had other brands of soil that were infested.)
For now, i'm only adding rootbooster to the water. Next grow i will also use rootbooster when i prepare my soil for the seeds but for this time i forgot.
The seedlings are growing good, looks like there is 1 smaller one. Also there is 1 bigger one, this one really wants to grow because she's also leaving more internodal space compared to the others.


Processing
Likes
58
Share


@Dahoola
Follow
---------------
Start week 3
--------------
We started week 3 as we ended week 2, which is great. She continues strongly at the beginning of this week and seems almost unstoppable. She clearly enjoys her surroundings and looks very healthy. She has started preflowering and seems to be gearing up for another explosion in growth. She is very good at leaftucking and has already developed a good number of shoots. On to more! A new update at the end of this week.
-----------------
Update Week 3:
-----------------
End of another fantastic week for MBAP. This week was all about pre-flowering and you can see that she is preparing for an explosive bloom. She has benefited enormously from the LST that I applied and has a good number of shoots ready to explode during flowering. In addition to leaftucking, have also removed the lower shoots so that she can concentrate her energy on the upper shoots. I also did the biotabs in the ground in the middle of the week. We have opted for 3 biotabs in 20-25l soil. Have waited several weeks before putting the tabs in the ground because we work here with aitoflowers. And they prefer a light feeding regiment for the first few weeks. We are going to gradually lower the humidity and get ready for flowering and week 4! Until next update

Likes
6
Share


@GrowerGaz
Follow
Day 58
Video shows Cheesy Auto from Philosopher Seeds first then the Blackberry Gum from Seedstockers and the back two are Sweet and Sour from Mephisto genetics.
The short SnS smells very sour grape and the taller one has a much sweeter aroma. The blackberry gum smells quite sweet , the Cheesy one is starting to get cheesy , resin production started , she is on day 48 ish.
The largest SnS has just had water as looks to be finishing fast, the shorter SnS and Blackberry Gum have had Iguana Bloom and BAC Organic PK boost , the Cheesy auto had just Iguana Bloom only. That will get PK boost this week.


Likes
7
Share


@Pjm70
Follow
9/2 8 tablespoons of Foxfarm Big Bloom 15 MLS Foxfarm Tiger Bloom 1/2 teaspoon Foxfarm Open sesame per 2 gallons.
9/4 32 MLS of each PH Perfect micro, grow and bloom. Per 2 gallons. She needs to be fed more often.
9/7 Two tablespoons of liquid kelp. 1 teaspoon Foxfarm Open sesame. Fed 1 gallon.
I have to give her water daily. If I don't the water will not soak into the entire fabric pot.
9/2 is the end of her first full week in flower. She seems to be doing well. Some lower leaves are turning yellow. Not sure if the yellowing is from the leaves not getting sun or not enough food. I pulled some off and fed
Keep pulling off little growth spots here and there. Been leaving 3 bud sites per branch.
Every once in a while I hit her up with some PH Perfect. Just to make sure everything is in check. I need to get a ph meter. The PH strips have been getting me by. I think I have been able to stay in the ballpark with them.
The feedings need to pick up. So what I am going to do is feed every other day. That will be 3xs a week. Then 1 day off to dry out.
9/6 two days of solid rain. 9/7 Another cloudy day. She was covered for the rain, but her fabric pot soaked up a bit of rain. So on 9/7 I'm feeding Foxfarm Open Sesame 1 teaspoon in one gallon of water. The pot is soaked, but that will not last in the sun.
She needs more food than I been giving. After the gallon, I will let her dry a bit. Then give another solid feeding with a good amount of run off.
For a moment I was wondering, if I was going to need to support for her in flower. Most of her branches are being pulled down. There is steady tension on them. If I were to cut the ropes, the branches would wip up, like a catapult. Her branches are way to strong to need support.
I thought this plant was big last month. Her canopy is so large, I could use her as a big umbrella.
Likes
18
Share


Likes
2
Share


Likes
2
Share


@Cysolja
Follow
She has really busted out this week! Especially since she was topped. The new budsites have reached the ScrOG net and they all on the same level so should flower nice and evenly! Loving the new grow sack! Super excited to see her starting to bud!

Likes
20
Share


@SensimillaP
Follow
I'm not a big fan of gelato strech, she's a tall girl, had to supercrop a few more tops.


Likes
14
Share


@Pleasant_Internet
Follow
Showing signs of flower. Checking for stress seeds or hermie plants every time I water. So far so good though. Feeding schedule seems to be working great. I'm gonna really hit em hard with the florabloom next week.
