
Likes
Comments
Share


@Naujas
Follow
Well, I managed to do something that I really didn't expect :) the yield is small, just like the pot :) it was a wonderful trip ;) but from now on I will only grow it in big pots :) good luck to everyone :) I will add weight when it is ready :)

Likes
38
Share


@Wicked_Stix
Follow
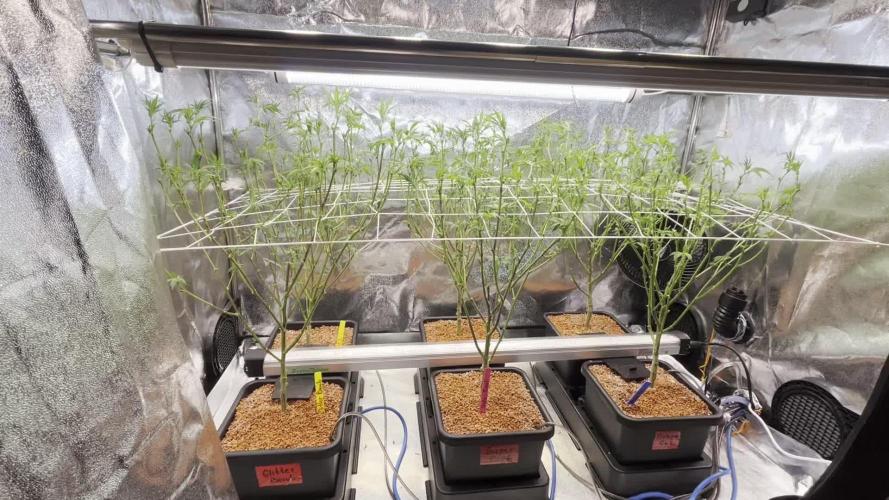
We are at day 21 on this gorilla cookies. I think she would be quite a bit bigger if I didn't break one of the mains on week 2 but she is still chugging along and growing well. I upped the maxigro to .5 tsp per gallon and started them on a little armor si so they can build some strong branches. Still running them on 24 hour light and 24 hour irrigation. They are going to stay under the blurple lights for a few more weeks until I can get them in the big room under the quantum boards. I'm hoping they will flower around 4 weeks but my autos seem to enjoy staying in veg so we will see what happens.

Likes
32
Share


@Juschiln420
Follow
She is still hungry for extra calcium, so trying to keep that at bay. And she is starting to show pistils
6/18 didn't make it in tent today
6/19
Added 1L am and 3/4L pm
Added 3ml cal mag
6/20 added water ph
6/21 added water ph
6/22 added water, added 3ml cal mag
6/23 added water, added 2ml cal mag
6/24
Added water 1.5L
Bloom(1/2 Strength)
Micro 0.75/L x 11.3=8.5ml
Gro 1.0/L x 11.3=11.3ml
Bloom 0.75/L x 11.3=8.5ml
Cal mag 1/L x11.3= 11.3ml
Bud candy 1/L × 11.3= 11.3ml
Hydroguard 1/gal x3.5 = 7ml
3 gal = 11.3L
Lst
Light intensity up 10% to 90%
Turned oscillating fan up and made it stay on
Record kept here
https://1drv.ms/x/s!AmTQ-7u9iyH6kFWgDNVqoDB1_CY1
Likes
10
Share


@Fonzo412
Follow
So far this week has been Good but not Great . My blue dream plant didn’t make it.😢) So now i am going to focus on my other 2 ladies.
This week is the official start of my <Vegetative stage> Now I will be dropping the lights to 14” and giving them both nutrients. Also I’m watering both plants with about 300-500ml of water for each.
Strawberry banana plant 🌱 has been coming along but and Power plant 🌱 the growth has overall been amazing 🤩 .
Follow me on my journey…. Let’s gooo!!!


Likes
15
Share


@Ctsbestsmoke
Follow
So these girls have gone wild after some lst and one being topped they are just surprising me more and more! The topped one has taking flight to the moon 🚀🚀🚀!! The runt is growing and show her self off as well. The stacking on the topped on is pretty insane much props to fastbuds for these genetics!! Also shout out to growace for the system and it’s been doing it’s job can’t complain about anything major a few little things they can fix which will be said in my final review of the product! Well that’s it for now growmies much love and hope all is blessed


Likes
5
Share


@Aleks555
Follow
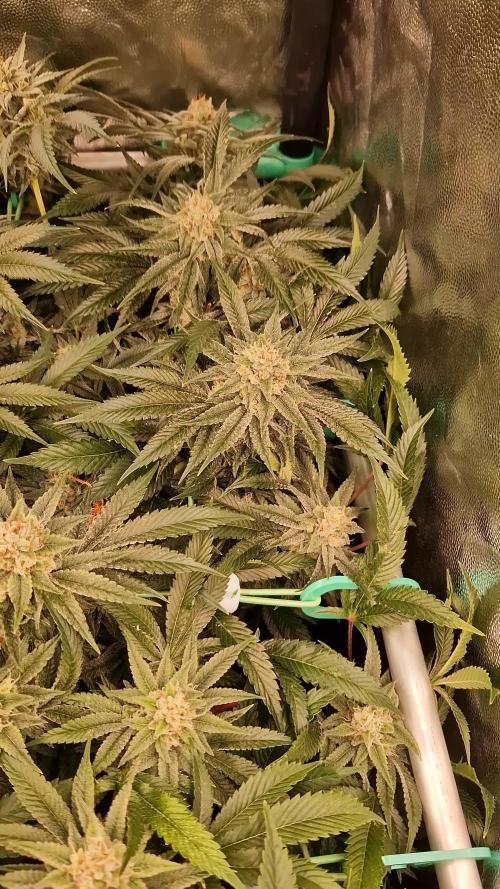
Day 130 – Harvest Day | Sweet Seeds – Gorilla Girl
Today marks the official harvest of our Gorilla Girl by Sweet Seeds – exactly 130 days from seed.
The plant finished strong, with dense, resin-covered buds and a very intense aroma that exploded in the final days. Based on her structure and the weight of the colas, we’re expecting a solid yield.
Final Techniques:
Last 2 weeks: Only clean, purified water (flush stage)
Last 3 days: Complete darkness
Twice during the dark period: Placed 2 kg of ice directly on the soil
The effect was noticeable — right after the ice melted, the smell intensified dramatically, and the trichomes looked even more frosty and swollen.
Throughout the entire grow, she was fed with the Xpert Nutrients line, and the results speak for themselves — healthy growth, strong structure, and top-quality flowers.
Big thanks to Sweet Seeds for the outstanding genetics and to Xpert Nutrients for reliable support all the way from seed to harvest.
Now we move on to drying and curing — can’t wait to share the final weight and smoke report soon!

Likes
15
Share


@ExterminatorX
Follow
I was out of the tent and forgot to update the HARVEST.
M.1- 14g
M.2- 14g
M.3- 20g
M.4- 16g
M.1.2- GREEN AND SWEET, VALUED AS ONE MY BEST CURED.
M.3.4- FROSTY, SWEET, NOT MUCH THC.
Done


Likes
22
Share

@TrickzGrowz
Follow
Ein absolutes Trichomen-Monster! Ich hab selten so viel Frost an einer Blüte gesehen. Die Buds entwickeln sich langsam auch final.
Likes
8
Share


Likes
5
Share


@PhatRobs
Follow
She looks good. 2 gallon pot is 100% rooted completely out! No real smell just smells green!

Likes
12
Share

@Aleks555
Follow
🏆Eternity Grow Cup 2025 Plagron and Zamnesia🏆 Runtz Zamnesia Seeds - 37 days in, and our girl has spread wide, reaching 60 cm in width with plenty of branches. We gave her a little trim, and now we're considering cutting some branches, but I can't decide yet if it's the right move. Feel free to comment below on whether I should or shouldn't, and what benefits it might bring. Other than that, she's doing great, happily feeding on Plagron nutrients.
Thanks again to everyone for the likes and comments. Special thanks to Zamnesia and Plagron!
Likes
20
Share


Likes
21
Share


@Purplemed
Follow
D1.
Three of them make it to 2cm in three days, the fourth one already rooted but taking it easy, I watered them a bit and covered the lazy one to blackout and see if she can do it 💪
Lighting at 8.5 DLI (100 PPFD@24h) with the lamp dimmed at 57cm from the soil.
D2.
The lazy seed still struggling to sprout but seems she's so close to make it since she's already out the soil.
The three strong ones already grew to 4 cm in 24 hours, +2 cm, a growing rate of 0,83mm per hour.
Following the seedling schedule lighting now will be at 12 DLI the whole first week.
D3.
The seedlings are growing strong except the little lazy one,
I had to help her sprouting this morning using tweezers since both leaves were trapped inside the seed not being able to open by itself, unlike the other ones that did it by themselves three days ago.
Will she gonna make it? Let's give her time 💪
D5.
The red worms look very active but the leaf tips are curling up so I moved from 24h lighting to 20h and let em rest a bit keeping 12 DLI and 80% humidity while lowering temp at night from 25°C to 23°C.
The lazy seedling still so small and definitely don't match their sisters growth rate, let's see if there is any progress next days.
Also I already installed the Blumat, the parcel arrived missing the final drippers and the 3mm tube but they already send it.
I adjusted the system following Michael Box top tip on this Growcast podcast,
https://youtu.be/g5YFcxW3kXI?si=tkm6F1fF65CaNruq
It consist on adjust the holding drip at atmospheric pressure without the ceramic cone/tube part, then from there screwed the regulator one more carrot (on gravity systems), mark it and put on the locking cap, this way it should provide 80mbar of water tension so there is no need to keep readjusting and you can leave it that way between runs.
I use the Tropf max version expecting to keep the bottom of the 25L pots not so moist since 8 days later of the only watering done the moisture is still at 56mbar, looks like it will take some time to start dripping on.
Meanwhile I'll keep an eye on the top moisture and if needed just hand water few mililiters a couple inches from the stems.
D7.
Today I received the missing parts from Blumat and this is the last day of the first week!
I think they are looking good despite the little curled up tips from fifth day at 24h but lighting schedule is already changed down to 20h since fifth day midnight.
Now they are 6 cm tall and look like they want to start vegging, tomorrow I'll start to daily increase DLI progressively until achieve 16 DLI by the end of the week.
The lazy one seems to be doing it, very lazy but growing a little bit every day 💪


Likes
4
Share


@Growedbypepper
Follow
Esta semana he tenido un poco de problemas con la planta debido al cambio de clima para la floración de mi planta cambio a un lugar selo exterior el clima está algo frío y con poco sol pero igual se ha desarrollado muy bien esta semana 🙏🙏🙏🙏
Likes
5
Share


@pzwags420
Follow
Start of week 3 blueberry is flowering and the stretch is almost over. The seedlings are growing nicely.the box got up to 100f this week during mini heat wave had to put ice blocks in rez to lower temp down from 80f. I look forward to the 3 other new strains I’m running. My GSC seedling is looking a little pale I should have waited longer to change rez over to bloom nutes. I have top dressed some organic fertilizer near drip line of nutes 4-6-4 one month release. I applied to all seedlings except blueberry. I reduced blumat on gsc, ww, and ch until surface dried a little bit as my gsc was showing signs of overwatering. Gsc is starting to green back up. My bb had to nanners i plucked them I hope these are all. It could be from the high temps or the one night I had a light leak. BB larger plant receving 1000 ppfd.i turn light back down a notch Gsc leaves started cupping now she’s getting just 550 along with other seedlings.will continue to monitor for improvement and ramp lights up a little later if needed as plants should grow into light.


