
Likes
Comments
Share


@love_2_grow
Follow
D8.
We're at the start of the second week, and there isn't much to report.
The girls are slowly getting taller and wider. The leaves of both plants show interveinal chlorosis, and the first one also has a tiny bit of a burn and twisted leaves. I suspect that is due to the girls growing right into the topdressing, and I'm hoping that it will correct itself as the girls get bigger with more substantial root systems.
I prepared some foliar spray with fulvic acid and horticultural soap as a wetting agent for my other tent, so I also gave these girls a very light foliar spray. I might as well when I have extra :)
------------------------------
D9.
The chlorosis is decreasing, but we have squatters in the tent! I've started germinating this year's chilis: Fidalgo Roxa, Jalapeño Early, Serrano, and Mushroom Yellow. I'll keep them in the tent as long as possible since it saves me some electricity.
------------------------------
D11.
The second girl had a later and slower start, so she is lagging. Let's see if she catches up eventually.
Soil is slowly losing moisture but still far from needing a watering.
DLI set to 16.
------------------------------
D14.
The end of the second week. By now, there's a clear size difference between the two girls, with the first being significantly larger. On the other hand, she also has twisted leaves, which the second girl doesn't have. One leaf is even a bit burnt.
I tested the soil today, and it clocked in at a neutral pH of 7, so I doubt it is a pH issue.
Instead, I suspect it is due to the topsoil being too "hot" with the top dressing I put on before the grow. In hindsight, it might have been better to wait with the top dressing until the plants had established themselves.
Oh, well. We grow and learn.
I still haven't given the girls any more water, so the fungus gnats get to enjoy life a while longer. Although, they haven't really become much of an issue. Still, the buggers have gotta go, and I'll water in SF nematodes to deal with them in a few days.
I raised DLI to 20 yesterday.
------------------------------

Likes
27
Share


@eldruida_lamota
Follow
Vamos actualizar la cuarta semana de crecimiento de estas Biscotti de RoyalQueenSeeds.
Será la última semana de crecimiento, ya voy a cambiar a 12/12 es un SOG
La humedad es perfecta, la temperatura me gustaría tenerla par de grados más abajo pero aún así es pasable.
Aplico el flash root de Agrobeta y Blue line A de Agrobeta.
Esta semana añadí tucán y gold joker también de Agrobeta.
Mars hydro:
Code discount: EL420
https://www.mars-hydro.com/
Agrobeta:
https://www.agrobeta.com/agrobetatiendaonline/36-abonos-canamo
Hasta aquí todo, veremos como progresan pronto. Buenos humos 💨💨💨

Likes
18
Share


@VI_Cannabis
Follow
June 14th not a ton happened, I believe I watered them (It seems I am having to water every second day now as they start to get bigger)
June 15th - still just growing away. I went out and got some different ducting so I could pull air from outside better with the ac infinity inline fan. I also received some insulated ducting from Amazon that is a hell of a lot better then the standard stuff I am using. I also grabbed a new 9 inch fan (still deciding the best place to place it, for now it is beside the door). I grabbed a larger oscillating fan aswell to keep air moving around.
June 16th - decided I would do some lst and then I gave them some water. I have been feeding nutrients every second day. I have also on every 3rd watering been doing just ph’d water. The humidity seems to drop quite a bit within 10-20 seconds of the door being open hence the lower reading. I am sitting roughly at 45-55 depending on time of day. As for temperatures I’m still struggling to keep it down during the warm days and it seems the highest I am getting is around 29 since switching the lights off from 11am - 5pm
June 17th - the girls seemed to have perked back up after yesterday’s lst. Not much new today just some growth!
June 18th - Unfortunately I forgot to take pictures today. But not to much difference. I did feed the girls with some nutrient water today.
June 19th - I again forgot to take pictures. They are just growing away and doing there thing. I did check for growth from the topped portion on the bigger plant, no growth from one of the 2 tops. So I indeed cut it to low… I won’t be doing that again haha.
June 20th - finally grabbed something to deal with the heat since it is getting hotter everyday. I picked up a 10,000 btu air conditioner. I have it set at 23 degrees. I also moved the plants around and re-arranged some stuff. I took the inline fan that was taking air out and instead the ac output is going to there. I ended up having to make the vent into a 6inch vent on the trailer. Temps stay around 23 now. Humidity is still 45-55 depending on time of day.
Likes
30
Share


@GrowMeistro420
Follow
Week has been going well. Had a really bad underwatering while I was unable to look after the plant, which stunted it for a few days sadly. Started to LST her as u can see on the video
But other than that, its looking good and growing fine

Likes
22
Share


@GrowinHome
Follow
Most ladies are showing signs of flowering so today I will start counting the weeks.
Here u can also see my mutant/special ladies. They germinated a bit different from the others.
Day 3 of flower is showing some major progress‼️🙌🏽
I did NOT top any of these mutated plants. I only removed some very ugly growing leaves.
So everything u see on them is done by mother nature.

Likes
19
Share


@DutchFarmer
Follow
She is responding very well to the trainer she is so strong it’s mind blowing!!!

Likes
1
Share


@Xpie77
Follow
Verslag derde week bloei – Purple Punch
De derde week van de bloeifase bij Purple Punch is een cruciale periode waarin de planten een aanzienlijke ontwikkeling doormaken. Hieronder vind je een overzicht van wat je kan verwachten
1. Plantengroei
Bloemvorming: De eerste tekenen van echte toppen worden zichtbaar. De bloemkelken beginnen op te zwellen en trichomen ontwikkelen zich.
Stretch: De planten zijn nog steeds bezig met hun "stretch"-fase. Dit is vaak het laatste moment waarin ze aanzienlijk in hoogte groeien. Zorg dat de afstand tot de lamp optimaal blijft om verbranding te voorkomen.
2. Verzorging en voeding
Voedingsschema:
Fosfor- en kaliumrijke voeding (PK-boosters) wordt belangrijker om de bloemontwikkeling te ondersteunen.
Blijf stikstof in balans houden; te veel kan de bloei vertragen.
pH-waarden: Houd de pH van het voedingswater rond de 6.0 voor optimale opname.
Watergift: Regelmatig water geven, maar voorkom overbewatering.
3. Licht en temperatuur
Lichtcyclus: Houd de cyclus op 12/12 uur. Controleer dat er geen lichtlekken zijn tijdens de donkere periode.
Temperatuur en luchtvochtigheid:
Dag: 22-26°C.
Nacht: 18-21°C.
Luchtvochtigheid: 40-50%. Een te hoge luchtvochtigheid kan schimmelvorming veroorzaken.
4. Controle en monitoring
Trichomen: Begin de ontwikkeling van trichomen te monitoren. De toppen zullen meer glinsteren naarmate ze rijpen.
Plagen en schimmels: Inspecteer de planten regelmatig op tekenen van plagen, zoals spintmijten of meeldauw.
Luchtcirculatie: Zorg voor goede ventilatie om hotspots te vermijden.
Resultaten derde week
De toppen van Purple Punch zouden nu meer volume moeten krijgen en de kenmerkende fruitige aroma's beginnen zich te ontwikkelen. Dit is het moment waarop de genetische kwaliteiten van de soort echt naar voren komsn

Likes
12
Share


@FlavoursUk
Follow
Last day of week 4 and the girls are looking well, growing and thickening up well. No problems so far. If you're following along make sure you follow my Instagram and YouTube for more in depth details on my grows. Both links can be found on my profile. Instagram.com/flavoursuk_v3

Likes
9
Share


@DaddyPrime2
Follow
9/8/2024
day 1 of veg. looking happy and healthy. im dealing with fungus gnats from other plants in the tent. i think the peat pellet wrapping is keeping them from damaging the young roots at the moment. im using diatomaceous earth in an attempt to keep them at bay.
9/11 day 4 theyre starting to show small differences. excited to see where these
9/12 so far im noticing one plant that stands out from the rest. she has longer petioles than the rest and seems taller and lankier. its still early on though so hard to say anything yet for

Likes
7
Share

@NSABND
Follow
Day 50 😍welcome to week 7 😃👌
Day 51 i like the colorchange 😍🙏👍
Day 52 everything seems to ok 😃🙏👍
Day 53 and a long weekend 😎🙏👍 after 3 weeks a new SF SE3000 has to build in 💪😃👌
Day 54 after 4 weeks with SE1500 LED i upgrade today to SE3000 from Spider Farmer 💪😃👌
Day 55 massive leave cuttings in the morning and after that nutrients 😵 we will see whats happens next 🙏

Likes
39
Share


@Theia
Follow
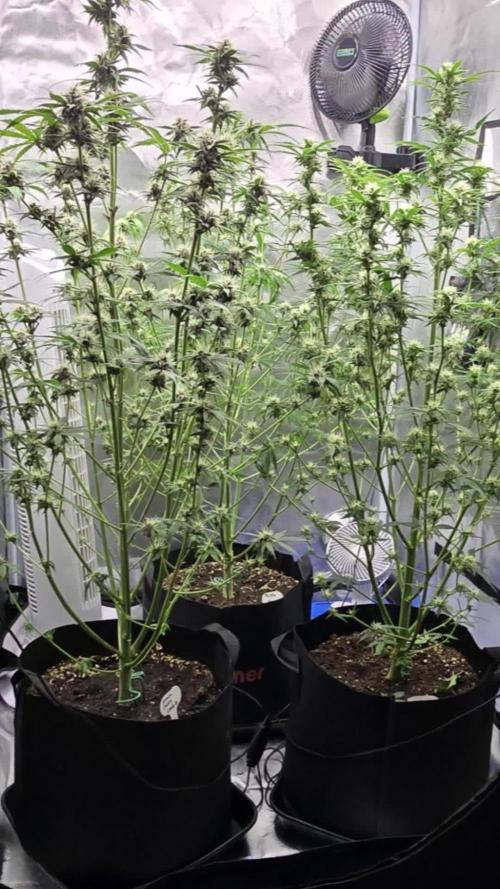
This plant is a beast.. she is massive and well into her stretch. Loads of bud sites and great spacing between nodes. I had to supercrop her as she was pushing twice the height of all othe girls in the room. She took it well and is fully recovered and just great.
Love this plant.
Very odd smell quite disgusting ATM tbh..
I started giving this girl a light misting with some fishmix and activera for a few days as she was looking like she was not getting enough food. 5 days on she is looking good
Thanks for stopping by.
Happy growing all🌿🌱
Stay safe😷😷😷

Likes
7
Share


@IguanodonDraper
Follow
On the 13th day after the seeds were planted, I dropped an oscillating fan in the grow tent and spilled one of these Dosidos 33 out of her pot and onto the floor of the tent. I panicked and tried to pick up the little seedling and bits of soil and replace it in the pot as well as I could, but I was convinced I'd killed one of my plants. Within a couple days you wouldn't have known anything happened. I'm so glad she survived, because she grew into a beautiful purple plant that ended up finishing early.


Likes
24
Share


@Susquihanna
Follow
Miss Mango was reaching for the sun this week. She grew 5 inches this week, however, it is still on the small side of 17 total inches. There is a lot of undergrowth on Miss Mango, so I am thinking this may be a bushy plant. The @Zamnesia website: "This plant stays close to the earth, only reaching 2.5ft indoors and around 3.2ft outdoors."
I included a magnified picture of a possible flower. @Zamnesia website it says, "All it takes is 10–11 weeks from seed to harvest to really get the best out of this cultivar." So, at 5 weeks, with a magnifier, I am seeing the beginnings of flower.
It is only It has been dreadfully hot here and I am giving 1 gallon of nutrients per day. I also have a large pool umbrella shading my plants from the direct sunlight.

Likes
25
Share


@BudHaks
Follow
Hey, there peeps!
Apologies for not updating my diary as I have been quite busy balancing non-plant responsibilities -.-!
Anyway, we are now on day 75 since I ordered my equipment and started germinating my seed and day 71 since I placed my seedling in her first Coco pot! She is now a staggering 4 foot 2 - which was overwhelming considering this is my first grow and orginally only cleared out 2/3 of my cuboard but now it uses the whole space but she's coming along so well! I have also added a LED Grow Light Full Spectrum 50W Red COB as I wanted some extra light for the bottom half nuggests.
She is very healthy (I assume from the strong healthy roots) and hasnt shown any major defects other then the initial defects i encountered in week 2-3 and slight light burn on the top cola in week 7 which was from the plant growing so quickly and touching the light, but I did then adjust the light within 2-3 hours.
What do you guys think and how did she get so tall consdiering she is an auto-flower and the strain is meant to be indica domiant?

Likes
6
Share

@Selkot
Follow
.
YEAR 5 - 1st quarter
----------------------
The 5th season begins with the same setup.
The novelty of this season is the substrate: from this point on, all my indoor grows will be done in coco coir.
Five Northern Lights plants, 2 from RQS indoor and 3 from Zamnesia outdoor, take up the first quarter.
With 5 plants, they will produce 212 g.
For the first time, one of them alone exceeds 100 g.
Second award on GD: 9th place in the DOTW 🙏
Likes
2
Share


@EtnoGrow
Follow
el segundo corte luego 15 dias o dos semanas, ya mas maduro punto mixto temprano, cogollos ambar y blancos nublados, predominantemente blancos . se ve con mejor pinta que el primer corte
Likes
2
Share


@High_Grade_Dadli
Follow
So far nothing to complain about buds sites are putting on some size....clone piece is holding up pretty good....hoping she get some roots this upcoming week...never really clone before
Likes
10
Share


@BodyByVio
Follow
After 21 days in turbo cloner I transplanted 4 Sweet seeds Green Poison into 1 gallon plastic pots filled with Cana coco. Few days later I transplanted another 4 clones into DWC!
Stay tuned!
Coco feed at 700ppm
Dwc feed at 480ppm
Likes
25
Share


@PrairieFrostGrow
Follow
**** Week 13 growth - February 27 to March 5, 2021 - Week 4 Flower *****
These girls are looking a little more different as we get further in flower. Pheno 1 is starting to swell more this week and here leaves are a nice rich green colour. Pheno 2 on the other hand has lighter leaf colour but is reacting less favourable to the amount of nitrogen and clawing down at the end of the week. It could be that she is also reacting worse to the increased light intensity this week. The frost production on Pheno 1 is also coming out more now. These two girls seems a little more reactionary to nutrient levels.
Light intensity increased this week. Pushed up to 525 watts and then to 550 watts at the end of the week. This got the a little hot by the end of the week though. Working with a new light and finding the sweet spots takes a run or two. Learning how the girls grow anyway so the whole run is a lot of learning......its all good😀
Nutrients were pushed a little at the end of last week and the start of this week so backing off a bit more again. Given that they were pushed with light intensity they started showing some signs of nutrient issues. It’s good though as there is reaction time and back off to plain water feed for a couple of days at the end of the week and into week 5. Week 5 is going to be the start of the last stage of flower feed and work with that for two weeks, then stop feeding at the end of week 6........the plan so far anyway.
Little more detail.......
Feb 27/21 - Day 22
- big feed day
- all IPP line plus silica @ 1ml, CalMag @ 1ml, Rezin @ 1.5ml, enzymes @ 1.5ml
- 1650ppm and 6.1pH - 4L
Feb 28/21 - Day23
- Microbe day but also added some CalMag
- Natures Candy @ 1.5ml, Recharge @ 1/2 tsp/gal, Magnifical @ 1.5ml, Micro @ 1ml, Bloom 1.5ml, Terpinator @ 2ml
- 950 ppm and 6.0pH - 3L
- leaf colour almost looks light today.
Mar 1/21 - Day 24
- dry out day.
Mar 2/21 - Day 25
- plain water
- 300ppm and 6.1 ph - 4L
- light power pushed up to 550 watts today.
- (too much from 16” to 20”........note!!)
Mar 3/21 - Day 26
- plain water with two suppliiments
- Terpinator @ 3ml, Rezin @ 2ml.
- 525ppm & 6.0pH - 4L
- stripped some leaves today......sticky in the middle😃😃👍👍
Mar 4/21 - Day 27
- no water added today
- light power reduced today 450 watts.
- been going too hard with intensity. Seeing leaf curl on other girls in the tent.
- joys of diagnosing cannabis😂
- starting with backing off light and reduce ppm going in but not the ml👍
Mar 5/21 - Day 28
- hit with microbes again to help with stresses.
- recharge @ 1 tsp/gal, Nature’s Candy @ 1.5ml
- 375ppm and 6.0pH - 3L
Moving right along we are through 4 weeks now and moving past the middle of flower.

Likes
17
Share


@Canna96
Follow
Hey now, I hope everyone is having a great weekend, it was a good week for the ladies in the 5X5, they are all starting to stack flowers and really starting to distinguish their own smells. The Bubble Runtz has the most indica dominant looking colas and smells absolutely amazing. The Sundae Driver is looking like she is gonna have the fattest colas and be the biggest producer. I am really hoping I get the red phenotype of the Red Hot Cookies, and both the Green Crack and Durban Nights are showing the most Sativa characteristics and looking great.
I now have the Medic Grow Light cranked up to 100% in F1 mode and am also using the UV/IR for 30 minutes per day prior to lights out. I am running a 12/12 cycle and feeding the same mix of GH nutrients which include Silica, CalMag, MaxiBloom, and Bloom Booster, with additional food grade Hydrogen Peroxide in the reservoir to keep algea growth to a minimum. I mix one 5 gallon bucket of nutes per day and clean my reservoir once per week. My pump is set to auto feed the plants every 5 hours after lights on, and I have a gravity self draining runoff setup I built.
Not much to do from here on out, just keep the reservoir clean and full, a little defoliation, and 5 minutes per day to mix a bucket of nutes. I hope they get fat in the next few weeks and then I have about 7 people lined up to help me trim, I will throw everyone two zips for the help. hoping to do the wet trim in a day.
I hope everyone has a great rest of your weekend, Thanks for stopping by, Stay Safe and Blaze On!!! 💪
Website: https://medicgrow.com/
https://growdiaries.com/grower/medicgrowled
Likes
39
Share


@Mr_und_Ms_Lue_Roots
Follow
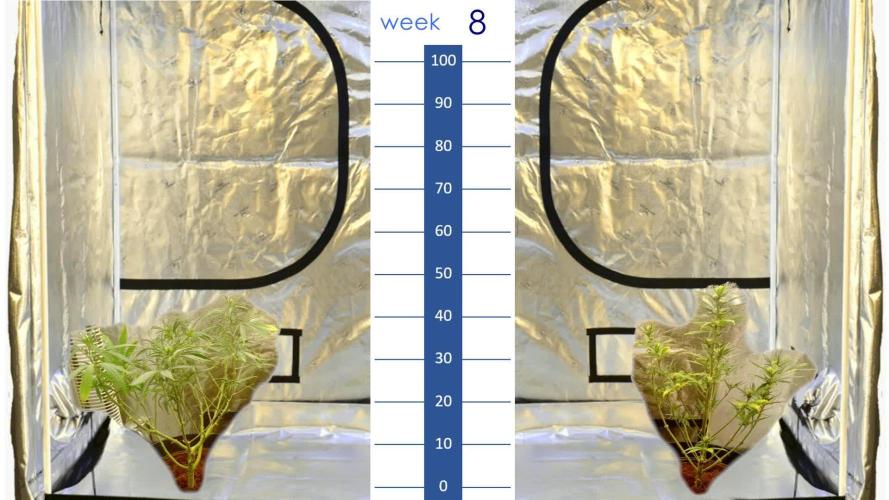
Hallo zusammen und willkommen in Blütewoche 8
Vor drei Tagen haben Sie zum ersten mal den EC- Wert von 2,2 genießen dürfen. Die Pink Mist arbeiten da wirklich super mit, wohingegen die SQ1 wieder arg am Limit gekratzt hat was den Nährstoffgehalt betrifft.
Seit dem her trinken sie nur Wasser mit nem Schuss Cal/Mag. Der schon in letzter Woche erwähnte getrocknete Kaffeesatz (Phosphor, Kalium Reservat) lässt uns über die Tage des nicht Düngens dessen ruhig Schlafen. Seit einer halben Woche fahren wir auch mit 11 Lichtstunden.
Dennoch und es war ja bewusst, der Bedarf war zu dem Zeitpunkt wirklich hoch und da wir vorher recht mager gefahren sind entschlossen wir uns für eine Anregung dahingehend.
Der eigenen Unachtsamkeit wird uns auch nicht mehr widerfahren, gut aussehende Pflanzen beim Messen so nicht mehr zu Beachten, dass es zu einer Verbrennung kommt. Das Wort ,,Ausruhen,, trifft es hier glaube ich ganz gut...
Dieses wiederum trifft aber auch wieder gut zu Perfektionisten hm hm :-)
Ansonsten sind sie einfach nur wunderschön anzusehen ;-)
Für ein Winter Grow wirklich schöne Farben!
In diesem Sinne, wir hoffen euch gefallen auch ein paar Bilder bzw. das kurze Video und wünschen euch allen eine angenehme kommende Erfolgreiche Woche!
Bis Dahin, beste Grüße 😉