
Likes
Comments
Share


@MrGrowthSpurt
Follow
This strain was easy to grow, she started flowering on the 5th week and reached maturity on the 13th week (8th week of flowering). I had 2 of these plants growing at the same time. White LSD#2 took on a reddish/burgundy tone which made it look completely different from#1 All in all it was really a easy grow.

Likes
10
Share


@Froggman
Follow
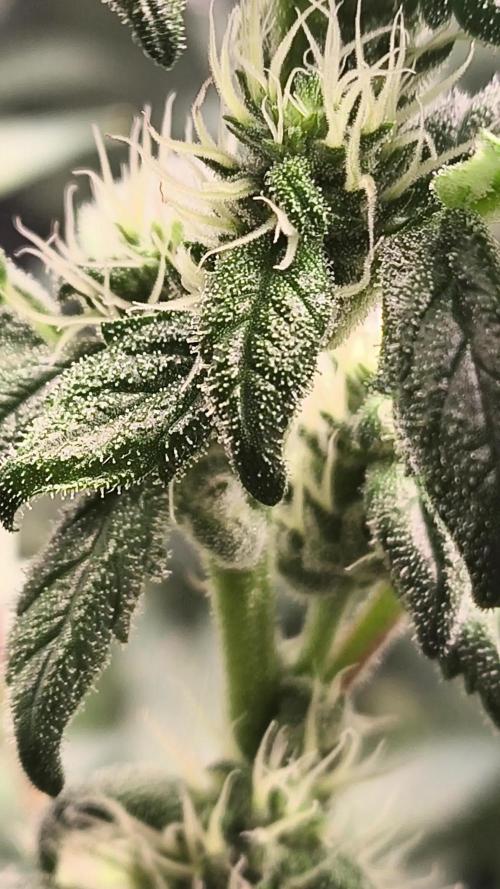
I think they are closer to done than I previously thought. All clear on trichomes though. Two more weeks?

Processing
Likes
18
Share


@TheItalianGrower
Follow
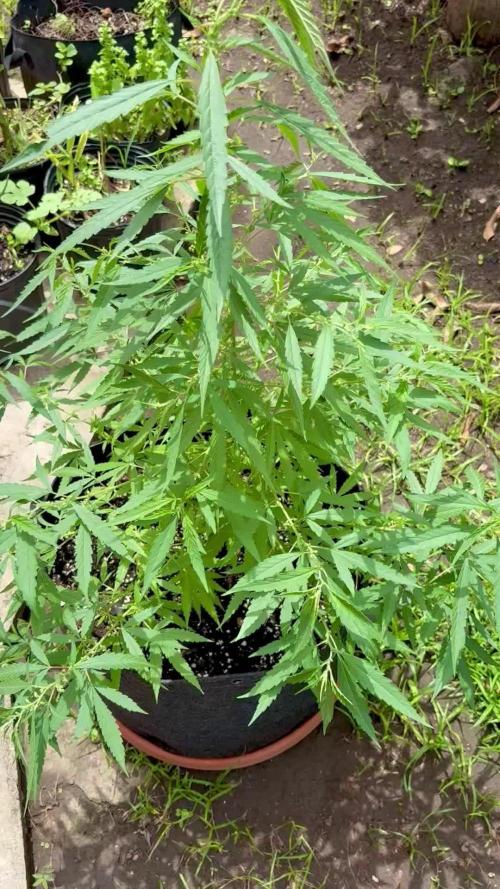
Hi guys, this week has been great for plant growth..they are 85cm tall and I think they will grow a little longer. You can see the future buds that will be covered with flowers.
From this growth I am learning that the FIM technique is better because the buds will all be at the same height and look much more (as you can see in plant number 4). Pistils begin to appear and in the next week I hope to see more pistils.
Stay Tuned 🦍

Likes
11
Share


@TgOgFaRms
Follow
week 5 flowering - No herms, strong aroma, and THC production! 🌿🌸🌱🔥
Hello, fellow growers! It's time for another thrilling update on my flourishing journey. We've officially entered week 5 of the flowering phase, and things are looking absolutely fantastic. Here's what's been happening in my grow room:
The most exciting news is that I haven't encountered any hermaphroditic plants thus far. It's a relief to see the ladies staying true to their gender and focusing solely on bud development. 🚫⚡️
The aroma emanating from the grow room is simply amazing! The fragrance has become more pronounced and enticing, filling the space with the delightful scent of resinous goodness. It's a testament to the terpene profiles of these strains. 🌿👃🌸
Additionally, the THC production is in full swing! The buds are swelling and becoming denser by the day. It's truly a sight to behold, and I can't wait to see how they'll develop further as we progress through the flowering stage. 🌿🌱🌸💪
While the plants are thriving, I've noticed a slight nutrient burn on the tips of some leaves. To address this, I've decided to dial back the nutrient concentration a bit for this week. It's important to maintain a careful balance and avoid overfeeding, especially during this critical phase. 💧💚
As for the nutrient solution, the pH has remained stable at 6.33, ensuring optimal nutrient uptake by the plants. The TDS (Total Dissolved Solids) level has been consistently maintained between 1150 and 1250, providing the plants with the necessary nutrient balance. ⚖️📈
With everything going so well, I'm filled with excitement for the upcoming week of flowering. Let's continue to nurture these beautiful plants and enjoy the bountiful rewards they will bring. Happy growing, lads! 🌿💚🌸😎


Likes
3
Share

@Liquido
Follow
Come nella settimana precendente tutti nella norma credo, sto trovando qualche foglia con delle macchie marroncine al centro ma non ho ancora capito il problema, avevo i ventilatori al massimo e ho diminuito un po' la potenza visto che ho trovato delle voglie con un po' di twist

Processing
Likes
5
Share


@Darkshaman
Follow
This week is been great. I started with high ppm on the 2nd week for the nutrient kick , now just a low dose of growth enhancer. Good roots system. Topped them just 1 time and cleaning them from useless leafs.
Using reverse osmosis water (15ppm)

Processing
Likes
73
Share


@Fibro_Witch
Follow
Blue Shark is still trucking alone nicely. No sign of bugs or nute issues. I had a friend who had issues with a couple of her Girl Scout Cookies that she's doing. She definitely had some lockout from heavy rain that we've been getting. That's why I'm glad I put down lime, but also got away from using mineral salts, because I think that was definitely an issue last year. Very happy with the reults so far of going au naturale!
Likes
8
Share


@JeyGanesha
Follow
La poderosa runtz forbidden sta per arrivare a maturazione.. ancora un paio di settimane più o meno e ci siamo...forse la lascio anche qualche giorno in più per farle creare un po' più di: CBN😜💪👍

Likes
17
Share


@HighZenBerg
Follow
Welcome back !
A lot of new branches developed and the tent gets fuller every day. The first flowers also developed, so I decided to start using Bio-Bloom and Top Max.
So far the plant did not stretch much, it’s more a horizontal bush. But I will wait, how she developed in her first weeks of flowering stage.
Keep in touch !
Cheers,
HighZenBerg


Likes
11
Share


@CityFarmer
Follow
Hello everyone,
Been busy but I shoot a little video for yall to see, also if growing is something you guys intended to do, I suggest you guys get yourselves a Digital Microscope or a jewlers loop.
I just got myself a Digital Microscope for under $20.00 on Walmart.com, I got me a cheap one to start with so I can learn how to use it properly. But for under $20.00 this one brings 8 led lights, a adjustable mount, comes with 3 different connection choices build in, magnifies from 50-1000x, can take pictures and also videos and my favorite part, it connects right to my mobile device, you download and install a Google app and your ready to go, ill work with it and add pictures next week...
See you guys soon 👊👊👊


Likes
5
Share


@HoddZ
Follow
Not much happening this week. Unfortunately i may have overfed PK as thought the bottle said 7ml per L but instead was 0.7ml. Noticed tips of leaves the next day browning so checked the feed chart again and pretty much shit myself. Flushed all 3 plants for about 5 mins and now they seem ok hopefully.


Likes
13
Share


@GangbudsGenesgdl
Follow
11/01/21. inicio de semana riego con giga grow y forza cilicia
13/01/21 no se aprecia bien en la foto haha pero ya esta mostrando pequeños pistilos , se rego con
nutrientes rootz.mx gigagrow, forza silicia , y magna flor. 2ml por litro
17/01/21. hoy es cierre de semana para esta pequeña ya con pequeñas preflores por todos lados
no la e podido medir pero ya rebaso el metro de altura muy estirada con genes sativos bien marcados👌

Likes
2
Share


@Ninjabuds
Follow
It's been a great week for the seedlings! They've really taken off and are looking strong. I'm planning to transplant them into larger pots in the next few days, so next week's photos should show some impressive growth. I'm so excited to see how they thrive in their new homes! I've been giving them distilled water from the start, and I'm still doing that, but I just started adding 10 milliliters of Fox Farm Big Bloom and 1 milliliter of Fox Farm Grow Big. All of the seedlings are doing really well, and there's not really any visible difference between all the ten strains. I started all ten packs of each strain and kept all the best seedlings, so that's why they're all doing so well.
Likes
2
Share


@gr3g4l
Follow
Los Led al 100%. 300W .
En un par o tres de dias las que parecia que tenian que ser mas grandes se vieron superadas por otras que crecían más lentamente.
Tocó rellenar las macetas.
Esta semana se notó mucho la preflora, crecieron bastante.
Las plantas empezaron a mostrar tímidamente sus primeros pistilos
Likes
35
Share


@ThatoneAKguy
Follow
3 of the 4 seeds popped. I can see the other one in the rapid rooter but I added another stardawg just to keep things moving. I started with 300 ppm and got the NFT system running and new HLG 260’s at 36” above them turned all the way down.
Likes
8
Share

@Organic473
Follow
This guy and all his bloom. I will harvest now and save the pollen the… blueberry skunk has been pollinated so many times already via pre flowers… when I do start flowing his her I am interested to see how those seeds will turn out.
This skunk male is a champion!
