
Likes
Comments
Share


Likes
6
Share

@Jardineiro_Br
Follow
UUma grata surpresa a evolução dessa planta, cada dia mais cheia de botões por todo.o caule, criando uma espécie de botão gigante . O aroma tbem é muito bom cítrico e doce.
Likes
121
Share


@Tropicannibis_Todd
Follow
💩Holy Crap Growmies We Are Back💩
Code Name FBT2307
Well growmies we are at 35 days in and everything is going great 👌 except for the fact that I may have some issues with my medium 😅
👉 Started to do some light low stress training and its looking good👌Let the stretch begin 💪
Lights being readjusted and chart updated .........👍rain water to be used entire growth👈
👉I used NutriNPK for nutrients for my grows and welcome anyone to give them a try .👈
👉 www.nutrinpk.com 👈
NutriNPK Cal MAG 14-0-14
NutriNPK Grow 28-14-14
NutriNPK Bloom 8-20-30
NutriNPK Bloom Booster 0-52-34
I GOT MULTIPLE DIARIES ON THE GO 😱 please check them out 😎
👉THANKS FOR TAKING THE TIME TO GO OVER MY DIARIES 👈
Likes
9
Share


@eldruida_lamota
Follow
Familia, actualizo la semana 9 de floración de las Kritical, y ya ultima semana que está.
Ya están listas para pasar por la tijera, variedad típica muy top que está entre los mejores clásicos.
Esta semana han estado solo a agua y hemos practicado un estrés hídrico, que cada vez que aplicamos riego la cantidad va siendo reducida progresivamente.
Agrobeta:
https://www.agrobeta.com/agrobetatiendaonline/36-abonos-canamo
Mars hydro:
Code discount: EL420
https://www.mars-hydro.com/
Las maximas de temperatura no superan los 27,5 grados y las mínimas no bajan 22, así que no me puedo quejar.
Los niveles de humedad también son los correctos van entre 40%/55% de humedad relativa.
Por supuesto el Ph lo estamos dejando alrededor de 6.
Hasta aquí es todo,os actualizaré la cosecha los próximos días, buenos humos 💨💨💨.

Likes
49
Share


@Roberts
Follow
I just changed the solution on FBT 2401. She was showing deficiency signs. I figured it was time to change it and try a little lower tds. She has been growing regardless. She just isn't thriving like I prefer. Everything is going okay overall. Hopefully my issue is now resolved and She will take off. Thank you Fast Buds. 🤜🏻🤛🏻🌱🌱🌱
Thank you grow diaries community for the 👇likes👇, follows, comments, and subscriptions on my YouTube channel👇. ❄️🌱🍻
Happy Growing 🌱🌱🌱
https://youtube.com/channel/UCAhN7yRzWLpcaRHhMIQ7X4g
If anyone needs to purchase fastbuds here is a link for my affiliate program
https://myfastbuds.com/?a_aid=60910eaff2419
Processing
Likes
4
Share


@Barcelona_Farmers710
Follow
Booom! Ya tenemos los cogollos formandose Farmers!! Ya casi no se nota la falta de magnesio por problema con el humidificador pero en breves ya empiezo lo buenoo!😜 espero que os guste farmers buen comienzo de semana!!💚

Likes
36
Share


@TheGreenLeopard
Follow
had a bit of a nightmare. bit much on over water and may have had a nutrient lockout. took one sweet cherry pie out and replaced with seedsman northern lights auto. also added a few more of those in the tent 5th dec. was unfortunate as this week was for topping. went ahead and did it. will be very careful next week. Purple berry Kush came on strong this week. took the nutrients fine. less damage from over water.


Likes
12
Share


@ciansta
Follow
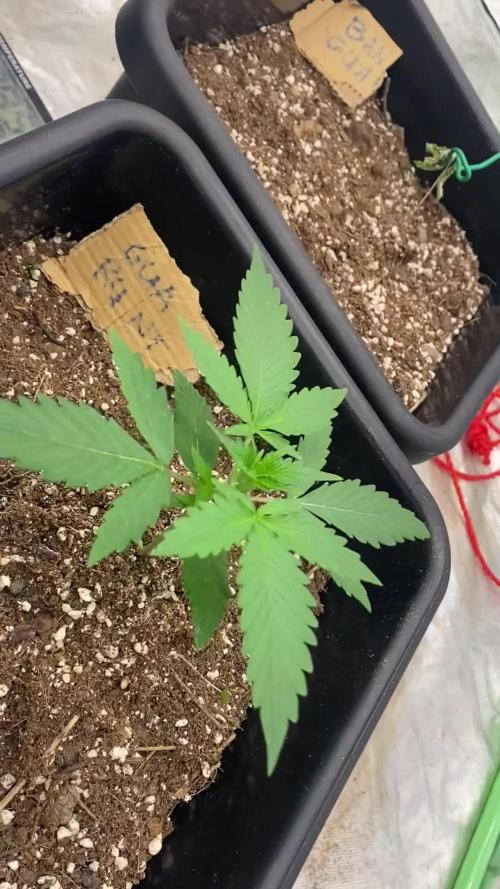
I’m going to leave the seedlings in the small brown pots until their 1st node and then I’ll transfer them into bigger plastic 3.5gal pots with 80/20 soil to perlite potting mix. One Dosidos is looking a bit behind and the one with the weird leaves ended up catching up to the Northern Lights, maybe even growing faster than it. All Dosidos’ ended up dying but one and I’m sure it’s on the way out. Northern Lights has had no issues and growing perfect.
Likes
22
Share


@Slobasian
Follow
You walk into the back yard and it’s a straight face punch of smells. Looking like some indoor rn moved all plants to safer place in case storm hits so now I atleast have a wind break


Likes
2
Share

@GreenEldritchGardens
Follow
This week Bloom should start, pre flowers seems to be appearing and today was cleaning day. So I decided to switch nutrients to Bloom.
Small defoliation on bottom to prepare for lollipop and leaftucking. I'll leave a big defoliation for 2 week Bloom.
Those auto critical does not seem that beautiful for me in veg in all my grows, this not different. But blooming is another story with her big sense buds and amazing effects.

Likes
65
Share


@Dendegrow
Follow
Week 2 of the flowering phase flew by 🌱💨. Unfortunately, I may have overdone it with potassium or kept the water level too high – the classic signs of clawing leaves were evident. Thankfully, they seem to be recovering now and are back under control 💪🍃.
My IR night experiment is showing clear results 🌌: The plants exposed to infrared radiation at night stretched significantly more. This might be especially beneficial for this indica-dominant strain as it leads to better canopy distribution, improved airflow, and reduced risks of mold and disease. Plus, the light distribution is much more efficient now, which I’m excited to see pay off.
On the downside, my Orange Sherbert turned hermaphroditic 😔. It’s hard to pinpoint the cause – overfertilization seems unlikely since I’m using only organic nutrients. I suspect it might be linked to an E-field experiment I’ve been running. To confirm this theory, I’ll conduct a new grow with a similar strain next year to see if the electric field negatively impacts cannabis development.
Stay tuned for updates! Drop a like and follow along for more grow insights 🌿✨. See you next week!
Woche 2 der Blütephase ist wie im Flug vergangen 🌱💨. Leider habe ich wohl etwas zu viel Kalium gegeben oder den Wasserstand zu hoch gehalten – die typischen Anzeichen von Adlerkrallen waren sichtbar. Zum Glück scheinen sich diese jetzt zurückzubilden und sind wieder unter Kontrolle 💪🍃.
Mein IR-Nachtexperiment zeigt bereits deutliche Ergebnisse 🌌: Die Pflanzen, die nachts mit Infrarotstrahlung bestrahlt wurden, haben deutlich stärker gestretcht. Das ist besonders bei dieser indica-dominanten Sorte wahrscheinlich von Vorteil, da es zu einer besseren Verteilung des Blätterdachs führt. Dadurch verbessert sich die Luftzirkulation, das Risiko von Schimmel und Krankheiten wird minimiert, und die Lichtverteilung wird effizienter. Ich bin gespannt, wie sich das weiter auswirkt!
Leider hat meine Orange Sherbert gezwittert 😔. Woran das genau liegt, kann ich schwer sagen. Eine Überdüngung halte ich für unwahrscheinlich, da ich nur biologischen Dünger verwendet habe. Ich vermute, dass mein E-Feld-Experiment eine Rolle spielt. Um das zu bestätigen, werde ich nächstes Jahr einen neuen Durchlauf mit einer ähnlichen Sorte machen und prüfen, ob das elektrische Feld tatsächlich eine ungünstige Rückentwicklung der Pflanze verursacht.
Bleibt dran, lasst ein Like da und folgt mir für weitere Updates 🌿✨. Bis nächste Woche!

Likes
134
Share


@Wastent91
Follow
Sono orgoglioso di poter dire che questa è una delle migliori genetiche che abbia mai coltivato! L unica cosa è stata un po la struttura dei rami un po esili, rispetto all enorme peso delle cime che hanno raggiunto in fioritura, resina in quantità enorme, ma soprattutto a livello terpenico è davvero qualcosa di eccezionale che non fumavo da un sacco di tempo, e forse nn ho mai fumato in vita mia! Ringrazio tutti voi che mi seguite assiduamente è tutto grazie a voi che ora posso produrmi la migliore erba medica del mondo nella mia umile casa, senza dover andare in posti in cui la mia medicina è fornita dalla criminalita organizzata, il mio paese è davvero una tristezza, spero davvero che un giorno le cose cambino anche qua, ma è una speranza vana che succeda nel prossimo immediato futuro... Ma non prendiamoci male in questi discorsi, è fate una buona fumata anche per me, come io farò per voi! Un buon 420 a tutti! 💪😸
Likes
12
Share


@Hawkbo
Follow
They all doin pretty good, leaves are a little too yellow for my liking at this point I should have added some grow to the mix but they will be fine I think. I have 3 of these going one is at an earlier stage but they seem to have very elongated bud structure with a solid stretch in flower.
REMEMBER , IF YOUR SHOPPING FOR GEAR YOU CAN USE THE CODE “BANGDANG” FOR 10% OFF YOUR ENTIRE PURCHASE FROM ANY OF THE FOLLOWING COMPANIES.
@greenbuzzliquids
@rainscience_growbags
@gorilla_grow_tent
@growlightscience.led
NEW* @Rocbudinc Seeds on his website *
*****Gorilla grow tent discounts extend to all companies affiliated with grow strong industries which include..*****
@super.closet
Lotus Nutrients
Kind LED grow lights
Likes
1
Share


@Ferenc
Follow
Day 72: 600W LED, 18 hours on 6 hours off the same with ventilation. Water intake also remains the same 200ml per day. Humidity approx 35 percent. Day 74: I have to start flushing next week is harvest time :*

Likes
28
Share


@Trickybis82
Follow
Will grow again for sure shout out to @420fastbuds for the strain what a all round great plant!!!!

Likes
18
Share


@cheetah844
Follow
Growing nicely, I'm excited for a high CBD and THC strain combination. It's supposed to be a good strain well-balanced medical strain with less stoney effects but still a pain & mood management, hopeful it'll work for me.
Likes
Comments
Share

Likes
16
Share


@Mrg7667
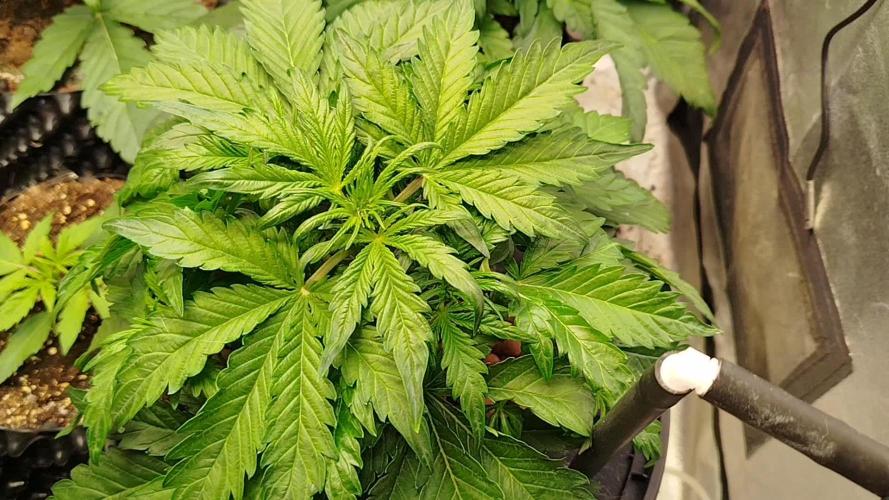
Follow
Fun week! Got to transplant all the babies and i started lst on them to get some more lateral growth and better yeilds!
No problems when transplanting roots looked good, you could tell that some had way more roots then others not sure if thats due to light positions or if its just genetics
Its interesting because as far as general growth the Chocolate Marshmallow has was more internodal growth and branching, shorter plants but also trained very easily. As in stems where not too stiff but stiff enough that after the first trainung they pretty much stayed in place with minor adjustments needed the Double Ds on the other hand grew very tall with little to no horizontal growth and very large internodal spacing! And as far as training goes these stems where stiff and rock hard had a couple LST turn into HST or slight super cropping because i was a little too aggressive too quick!
One DD had a top half snap practically all the way off but i just taped it up and lst the plant to lean into the break and it is doing just fine!

Likes
15
Share


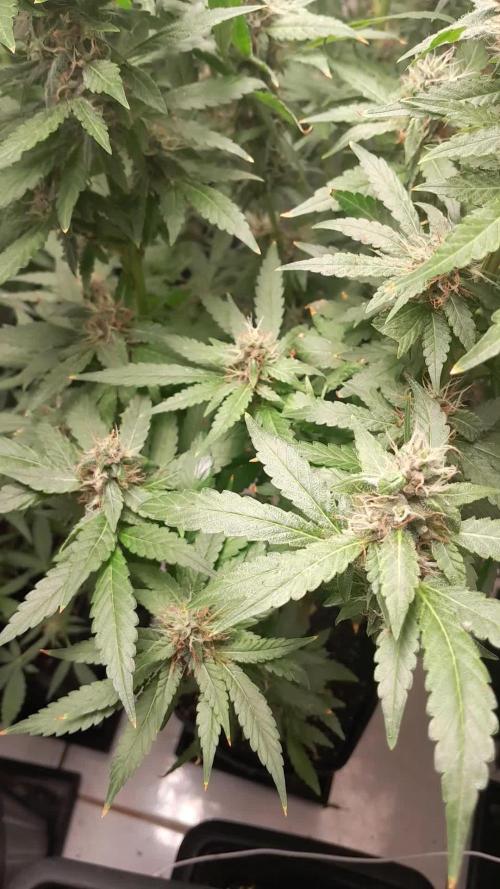
@Rinna
Follow
Ladies are doing great, finally fixed the pH problem, so the lockout should be fixed. Great growth, amazingly icy buds, especially pheno #1 is looking incredible. Smells of sour cherry candy with some hints of that gelato too.
