
Likes
Comments
Share


@TheCannaProphet
Follow
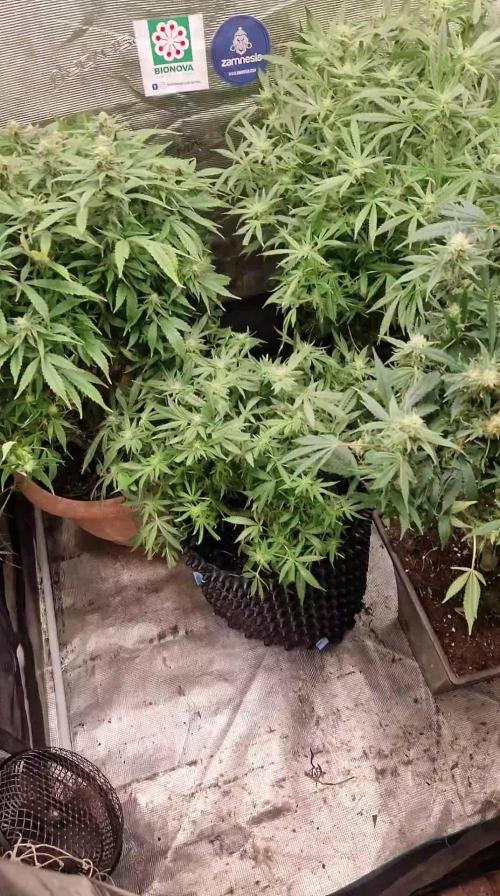
~ Auto Skywalker Haze®️ by Dutch Passion ~
Skywalker Haze x Auto Amsterdam Amnesia
Well friends, here we go on another 'canna-venture' together cultivating Dutch Passion's Autoflowering version of their outstanding Skywalker Haze along with three other incredible autoflowers from Dutch Passion that I'm running separately, so buckle up and hold on! This will be a wild ride for sure!
I've wanted to grow this strain for some time now and finally have an opportunity to see what I can do with it, and I've germinated two so double the fun!
"Auto Skywalker Haze has a very pungent and fruity aroma! The incredibly firm and frosty buds give off a strong lemony, yet sweet, haze-like scent. The citrus and haze notes are clearly dominant.
The combination of the fruity, sour, pungent citrus-dominant terpene profile with the more pungent, spicy haze character makes this a strain for real enthusiasts.
The buds are completely covered in trichomes and in addition to providing a high cannabinoid profile. It also gives a true taste explosion. The terpenes are in abundance and they provide an exceptionally strong fruity haze taste. " **
"Auto Skywalker Haze is currently Dutch Passion's most potent autoflower with THC levels over 25%! 26.2% to be exact! This makes this strain even stronger than most of the photoperiod seed strains currently available worldwide.**
"The feminized Skywalker Haze is a cross of our original and classic Skywalker variety, which consists of a cross of Mazar x Blueberry which in turn is crossed with an Amsterdam Amnesia from the Amsterdam underground scene.
By crossing this photoperiod Skywalker Haze genetics with Auto Amsterdam Amnesia, Auto Skywalker Haze was created." **
"Auto Skywalker Haze produces robust and stable autoflower plants. This Sativa dominant cannabis strain is known for strong and sturdy plants that can take a beating. Most ladies grow into large plants with a real Sativa appearance.
These phenotypes can grow quite tall with wide and long branching, thin leaves and elongated Sativa buds. These phenotypes usually take a little longer to mature. The flowers, which are completely covered in crystals, may have a tendency to foxtail slightly, but that doesn't take away from its true beauty. These buds also become a lot more compact than you might expect from the Sativa appearance.
There are also phenotypes that remain just a little more compact and tend more towards the hybrid side. These mostly Skywalker-dominant phenotypes grow very hard and compact buds, sometimes reaching as thick as a Coke bottle.
All plants have a good flower-to-leaf ratio and trimming the plants is relatively quick. Some plants can even be picked completely by hand and are ready really quickly. The small sugar leaves are also completely full of resin and trichomes, so you don't necessarily have to be very precise. If you want use it, then you have excellent trim to make your own hash, oil or other cannabis concentrate.
Auto Skywalker Haze generally has a short internode distance. The flowers can grow nicely together and completely fill the branches from top to bottom with sticky buds.
Most Sativa-dominant plants usually have a little more space between the buds. This lady can also stretch a lot. Outside we have seen occasional plants that have reached a height of more than two meters in the open ground. That is very exceptional for an autoflower."**
"Auto Skywalker Haze generally takes about 12 weeks from seed to produce fully mature plants ready for harvest. There are two phenotypes of Auto Skywalker Haze that take a little longer, around 13 to 14 weeks.
These are really worth the wait! During the last few weeks the buds get a lot thicker and heavier and the potency continues to increase. Outdoors, Auto Skywalker Haze takes an average of between 12-15 weeks to fully mature." **
**Credit- Dutch Passion.com
______________________________________________________________________________________________________________________________________________________________________________________________________________________________________________________________________________________________________________________________________________________________________________________________________________________
~THE SETUP~
~ Grown in 15L Gronest geotextile pots filled with Mother Earth Grow 70/30 Coco/Perlite with Xtreme Gardening Mykos added.
~ Seeds were germinated directly in the medium without any 'pre-soak'
~ Seeds were planted three days before the Full Moon (Waning Gibbons) and sprouted within 72hrs, on the Full Moon.
~ Feeding will be by Lotus Nutrients (first time using)
~ 24hr light cycle while germinating
~ 20/4 light cycle after first leaves appear.
~ 4x8 Gorilla Tent
~ HLG 650R w/ 30w Supplemental UVA Bar controlled by a Trolmaster Hydro X controller set for a 15min Sunrise/Sunset simulation. (also a HLG Blackbird for additional side lighting if necessary)
~ Supplemental co2 controlled by an AutoPilot APC 8200 co2 controller
~ AC Infinity Cloudline T6 with Controller 67 using a Terrabloom 6x24" carbon filter
~ De-Humidifier and Humidifier when needed.
~ 14k BTU IdealAir portable A/C unit plumbed into tent for temperature control.
~ BlueLab testing instruments
~ Two Hurricane 18" oscillating fans
~ Two 6" Clip-on fans
~ Two 10" floor mounted fans
______________________________________________________________________________________________________________________________________________________________________________________________________________________________________________________________________________________________________________________________________________________________________________________________________________________
As a cannabis grower, I recently had the pleasure of growing two Dutch Passion Auto Skywalker Haze plants indoors. This hybrid strain is a cross between Skywalker Haze and Dutch Passion Auto Ultimate and is known for its strong cerebral effects and uplifting high. In this report, I will share my experience growing Dutch Passion Auto Skywalker Haze and provide some 'High Humor'.
~Growing conditions~
I grew my Dutch Passion Auto Skywalker Haze plants indoors in a 4x8 Gorilla tent. I germinated both seeds directly in the Coco/Perlite medium and both sprouted within 72 hours!
The growing environment was kept on point with the help of an AC Infinity Cloudline T6 exhaust fan coupled with their Series 67 Bluetooth Controller along with two 18" Hurricane fans, two floor mounted 8" fans and a 6" clip on fan providing ample air movement.
Also crucial to this grow was the supplemental Co2 via a 50# tank regulated by an Autopilot APC 8200 Co2 Controller that I set to keep the tent at 700-1200ppm's throughout the run.
Tent temperature's ran between 68-78℉, humidity was kept between 40-60%. I used a lighting schedule of 20/4 for the entire grow with a pair of HLG 650R's that also have supplemental UV bars attached. The exception being the last three weeks, where I added 4 hours a day of UV, and cut the cycle back to 19/5 for a week, and then finally to 18/6 for the last two weeks.
I used Lotus Nutrients for the first part of this grow but became concerned when I noticed that I was getting yellowing I used starting on the #1 plant going from the bottom up indicating to me that their was a problem with the nutrients. Let me say that I'm VERY OCD when it comes to the PH/EC of what I feed my babies, following all of the recommendations from Lotus, but continued to see the yellowing progress. I then switched to Dutch Pro liquid nutrients and within two feeds I could begin to see a noticeable difference in the #1 plants color and overall health! As I continued using the DutchPro nutrients the #1 plants health, vigor and color continued to dramatically improve all the way up until harvest. I can honestly say the I believe switching to DutchPro nutrients saved this grow from a possible dramatic failure!
~Flowering time~
My Dutch Passion Auto Skywalker Haze plants had a flowering time of 93 days from seed to harvest for the #2 plant and the #1 in an unbelievable 113 days! The #2 reached a height of 23" and produced yield of 116g, while the giant #1 plant came in with a whopping 279g total yield and grew to just shy of 40" tall! In addition to all the tasty flowers that these two plants provided, I took the 'sugar trim' from them and ran it through my sift screens resulting in a 24 gram mound of sift on the first sift!
And now for some 'High Humor':
~Growing Dutch Passion Auto Skywalker Haze was a bit like being a Jedi, except instead of using the Force, I used Coco/Perlite and DutchPro nutrients.
~ My Dutch Passion Auto Skywalker Haze plant was so big and beautiful, it could have been featured in the Millennium Falcon's garden.
~When it comes to smoking Dutch Passion Auto Skywalker Haze, it's like taking a ride on the fastest ship in the galaxy - it's a real trip.
In conclusion, the Dutch Passion Auto Skywalker Haze was one of my all time highest yielding and longest growing autoflowers to date. It was a very easy strain to grow, and it only required minimal care and attention to ensure that it grew to its full potential. Cultivating these two Dutch Passion Auto Skywalker Haze plants indoors was a great experience that resulted in two beautiful and high-yielding plants. Smoking the buds provided a strong cerebral high that was uplifting and energizing. I would highly recommend this strain to other growers looking for a relatively easy to grow variety with strong effects. May the Force be with you as you embark on your growing journey... May all your days and grows be Blessed! 😎🙏❤️
References:
Dutch Passion. (n.d.). Auto Skywalker Haze. Retrieved from https://dutch-passion.com/en/cannabis-seeds/auto-skywalker-haze
Leafly. (n.d.). Skywalker Haze Strain. Retrieved from https://www.leafly.com/hybrid/skywalker-haze

Processing
Likes
39
Share


@Jubiedude
Follow
Day 8
Finally got to check out the plant. Still on same nutrient plan since I'm concerned still about the white dots that are visible on the video I posted. Still very happy to see the growth on the plant. Plant is now receiving about a third gallon of water every other day-ish with 15 ml/gallon of botanicare kind grow nutrients.
Day 9
Saw evidence of spider mites. Don't know how they got in since I'm in a grow tent. Got a treatment the guy at the hydro store said would work best since I'm in a small er tent. Sprayed leaves heavily with the spider mites killing solution and turned the lights off since the remedy calls for it and fed 8fl oz water with ~1 ml botanicare. Also bought Canna Coco A+B since I was at the store anyway.
Day 10 2-28-18
Evidence of some type of nutrient burn can be seen on some leaves. Possibly a reaction to the anti-spider mite treatment. Any info is welcomed. Opting to keep light on instead of treating for spider mites since I think the spider mites problem is less of a problem than the new discoloration on the leaves
Day 12 3-2-18
HELP!!! Anyone please look at the picture I posted and help me with what I need to do asap. TGIF because maybe I can spend the weekend saving this plant.
Day 13 3-3-18
Removed the cup from around the plant and added some soil. I think it looks healthier than it has and think it's going to make it.
Likes
30
Share


@DoDrugs420
Follow
NOTE: THE COUNTING OF DAYS STARTS FROM THE DAY THE SEED STARTS ITS PROCESS, IN THIS GROW DAY 1 WAS THE MOMENT THE SEED GOT INSERTED INTO THE EASY START (i do not recomend this method for experienced growers, but higly recomend it to unexperienced growers that might accidentally damage their seedling's new root as they move them from the germination zone into their next or final pot, with easy start you can just pick up the small cube of soil and place it inside the next pot GENTLY).
NOTE: For strain informations, soil recipe and nutrient's stock please do check "Germination Week" as you will find all the information there. (Do not replicate nutrient dosages as these are higly variable depending on the conditions within the grow room or tent, so you may end up damaging or killing your plants even if they are the same strain from the same breeder).
--------------------------------------------------------------------___________________________________________________________-----------------------------------------------------------------------_____________________________________________________________________----------------------------------------------------------------
03/11- All watered with 950ml of water per plant with dilluted nutrients in the rates specified above.
Light schedules changed to 19/5 and will be further extended to 20/4 to allow for more hours of heat from the lights as we progress into winter.
06/11- All watered with 1,4l of water with 2ml/l Bio Rhizhotonic + 0.45ml/l of Ancient Earth.
GG1- Removed first set of leaves as those were not in use anymore completely covered from light.


Likes
38
Share


@Green_Mountains
Follow
I took the tiny plant out of the tent due to state laws. She is happily sitting in a window... we'll see what happens with her!
Massive growth for both plants this week! They both doubled in size! I don't know whether to call my plants vegging, pre-flowering or flowering. I figured this was the last week of veg and next week is full on flowering!!
They both stink! Gassy for sure! I'll need to turn start using my carbon filter soon... I caught a few cool time lapse videos this week. Especially after feeding them last night!!
I fed them twice this week. The first time was at a third recommended dose and I jumped it to half yesterday. The leaves are clawing at the top of the plants... I think it is a lack of phosphorus due to me only watering them the last 2 weeks. Any thoughts out there?
I'd love advice about defoliating... I have a couple massive fan leaves I could remove to open the canopy for flowers... I just don't want to stunt the plant or rob the main cola of a major energy source... Thoughts are definitely welcome!
I tried my hand at LST... I think a few are working and a few aren't doing the job... Definitely need to figure this out! Again advice is welcome!
If you've made it this far... thanks!! Cheers!


Likes
200
Share


@Ferenc
Follow
Day 79, 28th of November 2020:
Hi there! Here we go let's say half way. Plants are pretty these Original Sensible Seeds genetics are fantastic! The 2 OG and the Runtz Gum is very strechy.
Black Ghost is pretty shorter bushier plant. Runtz Gum and Do-Si-Dos OG approx the same height Do-Si-Dos OG is taller a bit.
Wedding Gelato is really cool little, bushy anf nice buds forming not problem with her all she is quiet.
Do-Si-Dos OG has some deficiency and leaf gets dry but nothing very serious.....
Fertilization is still the same every second day with the rationand mixture above stated.
The lamp is on 11.15 min and off 12.45 min.
Last week was 15 min longer light cycle....
So every week 15 min shorter light cycle until the 5th week. So far -45 min. It switches on at 6 am and off at 17.15 pm.

Likes
4
Share


@GizaWRZ
Follow
Plants looks nice and heathy after some defoliation but they are still pretty small 🤔 dont know what is the reason, hopefully they gonna get bigger 🙏

Likes
15
Share


@B4nkz
Follow
Sprouted from soil after 3 days!
This diary will cover the complete growth cycle, seed to harvest, of this photoperiod strain from RQS, including drying, trimming and weighing. I’m planting this seed together with some autoflowers that just entered in the flowering stage.
The ideea is to fill the tent as much as possible since the autoflowers gonna be chopped by the time this pheno will be ready to switch from veg to flower.
Likes
48
Share


@AsNoriu
Follow
Day 85. Girls got small shock, for last two days temps at the end of light cycle dropped to 18 cel. Nights still was max 22. Some pistils went brown, had to crawl to other side to check for bananas, everything looks ok, had a chance to check Monster Blue Dream, she turned all buds to light and went through hard training like nothing. Turned off other tent and didn't though that it will influence main tent too... All sorted now
Before last watering took like 20 leaves covering tops here and there, but buds don't look that mature,that i need to see before taking more leaves off. They are slow runners a bit, but i guess it takes time to grow so many buds ;))) So hopefully defoliation at the end of this week.
Calmag and water, full feed, Great White and water is my feed plan for this week.
Day 88. Still frost during nights outside and i need to tune up heater : days +23 Cel., nights 24 ;)))) Put heater on timer, hopefully everything will settle up tonight. Girls start to bulk up, some has amazing frost, just my shitty camera and too intense lights can't show it in photos.
Day 89. Girls got 3-4 handfuls of BioBizz Worm Humus and Great White was sprinkled on top. Everything was rubbed into and mixed with pots top soil. Think its my last boost, i will do one more feed with full range of Biobizz and will go to just watering them till the end with 6.5 ph.
Happy Growing !
Likes
3
Share


@PoshGrow
Follow
Welcome to GhostGrow Chapter One by PoshGrow!
🌳 Week #9
6th week of flowering.
Humidifier was raplaced with dehumidifier to maintain 50% rH.
Still fighting some high temperature problems, it was very hot last week and this one so far in my city and the temperature in my grow room(not tent) is high 30s 32s...
So i keep my tent open and ventilated with additional standing fan.
All strains look healthy, happy and stacking up some nice weight, except 2 strains, Alaskan #2 and Alaskan #5.
Alaskan #2
Looks good but still falls behind in flowering time, also looks abit streesed out and with smaller budsites, dont know what to expect to be honest.
Alaskan #5
As mentioned last week got some serious Nitrogen deficiency to fight with. No results at this moment...
Alaskan #4
Seems to be fastest strain so far, stacked good buds, hard as rock top ones. Started watering only with pH'ed water for flush before harvest, because it seems to go down first of all this grow run, also I started to check its trichomes with mini digital microscope. 90% are cloudy, other still clear. Gonna wait till 10% amber & 90% cloudy before chopping this girl down.
Lemon and Blueberry doing perfect, stacking up well, all trichomes are crystal clear☺️
Watering when needed(2, sometime 3 times a week), every other watering I used Fox Farm Big Bloom, Grow Big & Tiger Bloom. Except with Alaskan #5 watering, its more in experimenting mode with increased Grow Big dosage so wont be covering it here.
UPDATE! JUNE 28TH.
Uploaded 2 new videos and Alaskan #4 picture. Enjoy!

Likes
21
Share


@Fullmeltalchemist
Follow
Alright I've updated this postmortem and cure just to give an idea of what I was up to during the dry and cure weeks. This grow was a ton of work and I'm very please with the results. I learned a ton about soil and environment control and really feel like I'm gaining confidence and coming into my own as a cultivator.
I've been playing a lot with ice water hash and rosin and have set some neat goals for the future like hunting ice water hash cultivars, going perpetual and expanding the amount of canopy I can work with by building a network of remote-operated satellite flower tents in friends' and family's abodes . I'm not sure I'll go through all this effort of documentation here again, but please follow along on my instagram, stay in touch and chill out with me sometime @Fullmeltalchemist.00
All in all, I was running 1000w of quantum board across three tents and pulled just over 1100 grams, which was a big goal of mine.
Thanks for all the advice and love growmies! And thanks growdiaries for the platform. It's been coo.


Likes
2
Share


@Albanymedicinalgarden
Follow
Pleasure to grow. Low maintenance in super soil setup in 5 gal cloth pot. Stayed small and compact but frosted up early and heavily. No deficiencies, steady growth, no training needed. Even minimal LST (which I did not do), would surely increase yield but I was more focused on quality and letting it do its thing. Genetically, it was determined to grow a perfect little canopy while not taking up much space, about as low maintenance as you can get on a plant imo.
Running autos is still a limited thing for me, I like the idea of having keeper clones of photos as this is all for personal medical use, but this plant was fun to grow, true to form and stable as heck. I have a few seeds left and I’ll definitely save them for an outdoor run down the line


Likes
25
Share


@DeepRootsGrowTrees
Follow
FAT BANANA 🍌 AUTO / RQS
This week she was harvested she was easy to grow from seed to harvest really no issues with this strain her buds are covered in trichomes with red hairs and smell great 👍 she's a strain you want to keep in the rotation 😉 if you like banana strains!! Stay Growing!!
Thank you for stopping by and taking a look during this grow it's really appreciated!!
Thank you ROYAL QUEEN SEEDS!!
RQS / FAT BANANA 🍌 AUTO
Likes
1
Share

@Olduffybastard88
Follow
Finshed strexhing a few days ago some plants nore ahead than others and looking to finsh on some of the plants I flipped a little bit ealier
Likes
3
Share


@Fergie
Follow
Hey guys so here is my blue cheese mutant starting to beef right out ww . some pure dank smells coming from her am super phyced to taste this girl .
Likes
13
Share


@FadedTotoro
Follow
The plant has officially outgrown the cabinet. I have a tent on order and will move her in as soon as it arrives.
So many bud sites. This strain continues to impress.

Likes
18
Share


@JohnnyBlaz3
Follow
I wish I could have put them in then tent a few days sooner to speed up growth but all good, ladies needed a few extra days in there. They were transplanted on the last day of this week. Doing a tent full of autos this grow, 20-4 light schedule with 7 plants 7 strains. this diary of course will just be covering my lady purple haze. I put them in 1gal pots for now and will be trans planting to 3gal in about 7-10 days.
Likes
17
Share


@Fitzwell
Follow
Buds really got phat this week. I been following the fox farm recommendations on the feed. Im impressed by the flowering sunlike leds I'm using on this grow it really made the difference. And comparing this plant to a plant i did nothing to I gotta say LSTing is the way to go.

Likes
176
Share


@DevilsBud
Follow
Hello fellow growers week 4 is upon us for the cookies gelato by RQS
Day 22 Veg Phase
I think i have bin trying to mutch technieks at same time idk it's my first grow . So the first topping i did didn't work there is still something sprouting out so i think that was fail on the cookies gelato #2 so i just Going to try to LST the main .
Cookies Gelato #1 was topped yesterday and i think that work better 🤔 but i did say that with First topping 🤣🤣🤣.
In the process i did twist some main leaves on both plants i hope that didn't do to mutch damage to the process .
Like was saying before i am still new to and very eager to learn . But to mutch at same time cannot be good either
Will see true the day's thanks for stopping by and have a look good luck growing everybody 💪💪
Day 23 Veg Phase
So today i find out that i wasn't doing topping but FIMing . And yeah it looks like it . She didn't stop growing but made more sprouts 😎😎😎.
Came home today and all looking good 👍👍
Day 24 Veg Phase
Broke one of my big leaves 😢 with doing the LST clips . It was def my own fault but you learn from your mistakes 🤘
Day 25 Veg Phase
They are looking good i see some yellow spots on some point of leaves but i think they had to much nutrients so i have bin giving just regular water in between watering . I have 4 plants growing and it looks like there all half week apart from each other . It's not very consistent but it def helps me see if something happens with First plant i can do something before it will happen to the other ones .
Day 26 Veg Phase
I have def bin giving them to much nut i saw white salt build up on my fabric pots . So today i have flush them with pH 6 water until all the soil was moist and would drain out . Now i am going to be not giving them anything until next week of growing phase 2days from now . And then start keeping up EC levels etc .
Day 27 Veg Phase
No watering just some LST with the clips on plant is def topped the other wel look your self it's a monster lol
Day 28 Veg Phase
Week 4 of Veg is over doing good no watering today . Tomorrow will be giving nutrition to water again 🤘🤘
Likes
3
Share


@clstr8
Follow
4-22-20: Ive added 2 tsp Tiger Bloom into the 1 gallon water feeding. Im still only watering 2 times max per week. Only feeding when pots are light. Every other feeding is room temp 6.5 ph water.
4-23-20: noticed some yellowing on lower fan leaf. Mixed up a gallon of Grow Big and equally divided it between 5 plants. Hopefully that stops it. And being so early into flower, a little nitrogen wont hurt or cause nute burn.
4-25-20: gave all 5 plants a trim. Plenty of light to lower bud sites and responding well.