Likes
Comments
Share
@Wilstang
Follow
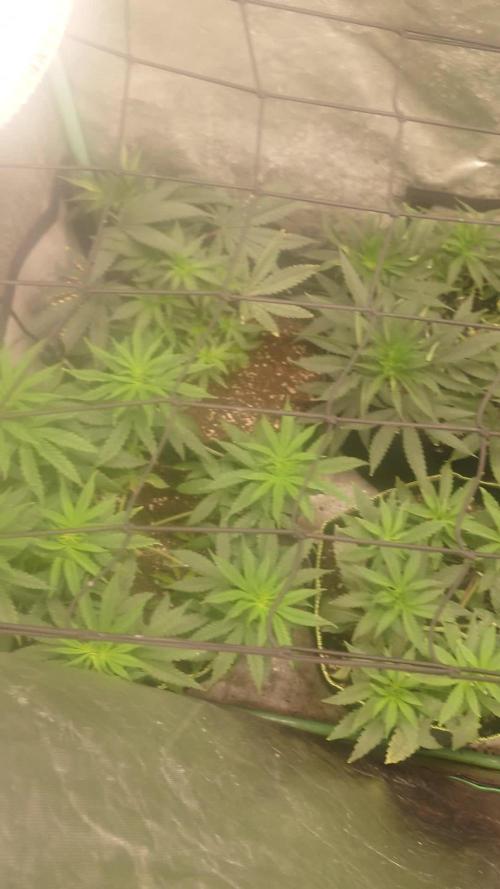
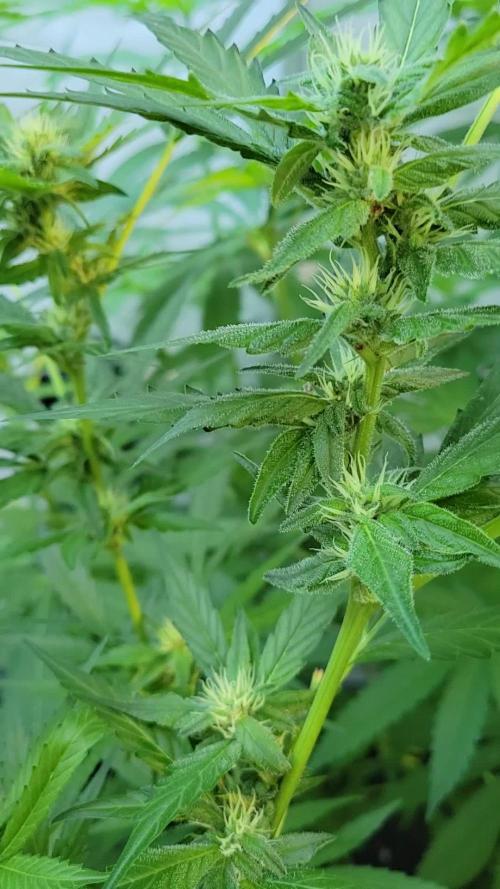
Sunset Sherbet's grow was simple, no hold back what-so-ever. Hungry eater fed ever other day for the whole grow. Performed super cropping, LST, and topping equaling 12 tops. Strong branches and enormous stalk needing no support during all of flower. Overall a powerful strain lineage to create Sunset Sherbet. Recommended all day to all for a great solid grow.🏅
Likes
6
Share
@Pjm70
Follow
7/7 17 days old. Calling this her first week of veg. She did not appear to be growing much for a few days after being transplanted. However in the last couple of days she has been putting on height. Now that she is growing again it seemed like a good time to top her. Topped her at the fifth node. A few of my previous grows I topped at the single leaves. This gave me two main branches that I just tied down. Then let all the branches grow up. Gave me a very uniform plant. 7/9 She has a very healthy dark green color. Her branches almost immediately started growing after being topped. I can see the difference in 2 days. Her nodes are very close together. 7/10. This lady has huge tits/leaves. Her leaves are so big they’re blocking out the light for the branches. I used some coat hanger to pull the leaves out of the way. Really her leaves are huge for her age. They’re almost the size of my hands and I’m 6,3. I pulled 1 leaf off to help open her up some. I will do some reading on this strain. I believe as she gets older she will look more sativa. Right now she looks heavy indica. 7/11 She broke ground 21 days ago. She graduated into veg 4 days ago. This plant is growing very nicely. 7/14 25 days old. Gave her water with liquid kelp. Her branches are quickly growing to the top. Would love to do some defoliation but I’m not. Other than a few 3 blade leaves in the center. Absolutely love her dark green color. So far the living soil is doing a great job. The company says just water. We will see. Ethos Genetics is top shelf. My friend grows mostly Ethos and these plants are just amazing. I was hunting for old school so I didn’t grow any Ethos until now. Old school is gone. I have never saw buds like these Ethos. This plant needs to come out close to or better than my friends. She is growing in organic living soil and her color is great. The only thing I added was myco supreme on her roots. The next time I water her she will get some liquid kelp and humic acid. The plant is relying on the living soil to eat. So I want to make sure her root system is very healthy and able to process nutrients.
Likes
5
Share
week four of flower I have a feeling these are going to be monsters. I have never had an Auto flower this big before all my other grows with then they have been on the smaller side. so far, they look like they are going strong adding bulk and one is starting to fade in the fan leaves using up the N as the plant needs it. I did do some defoliation. on some fan leaves bigger than my hand this was the warehouse for the nutrients it has been grabbing from the soil. I might do 1 more round of Bloom booster and a Cal mag. the stems are pretty strong and are holding the weight of the buds well. nothing needs to be supported at the moment. cheers all P.S, Roll 2 fatties.
Likes
21
Share
@Hashy
Follow
******************************************** Week 11 mid flower (week 5 flower) ******************************************** Light cycle=12/12 Light Power=160w 67% Extractor controller settings (during lights on). High temp= 26c Temp step=0c High Rh= 52% Rh step=0% Speed max=10 Speed min=3 Extractor controller settings (during lights off). High temp= 21c Temp step=0c High Rh= 56% Rh step=0% Speed max=10 Speed min=3 Smart controller settings (during lights on). Lights on=9.00am Radiator on= -22.5c Radiator off=+23.0c Top fan on= Smart controller settings (during lights off). Lights off=9.00pm Radiator on=-18.5c Radiator off=+19.0c Top fan on VPD aim=0.9-1.4 DLI aim=35-40 EC aim=0.8-1.6 PH aim=6.0-6.5 💧💧💧💧💧💧💧💧💧💧💧💧💧💧💧💧 NPK= 9-18-28 Method= Automatic Feed=Flower nutes Neutralise=0.1ml/L Plagron bloom=4.5ml/L Plagron Power buds=1ml/L Green Sensation=1ml/L Easy Ph Up=0.035ml/L (1ml=23 drops, each drop is 0.043ml) Ec=1.6 PH=6.3/6.3 Runs=18 Run times=4mins (L/L each) Gap times=16 mins Total runtime=72mins(L/L each) Total flowrate= ml/min(ml/min each) Auto start time=10.00am Auto stop time=15.44pm 💧💧💧💧💧💧💧💧💧💧💧💧💧💧💧💧 ******************************************** ******************************************** 📅15/12/24 Sunday (Day 71)(flower day 31) 📋 removed support from snapped cola as its mended now. Slight adjustments and defoliation. 💧 Automatic mid bloom nutes Ph up=0.43ml, 10 drops Ec=1.6 PH=6.3/6.3 Volume=12L Volume left=1.5L Volume used=10.5L(ml/min) Volume each=5.25L(ml/min) Runoff. Total runoff=2.4L Ec=3.4 PH=/6.2 💧 📅16/12/24 Monday (Day 72)(flower day 32) 📋 📅17/12/24 Tuesday (Day 73)(flower day 33) 📋 📅18/12/24 Wednesday (Day 74)(flower day 34) 📋 💧 Automatic mid bloom nutes Ph up=0.43ml, 10 drops Ec=1.6 PH=6.3/6.3 Volume=12L Volume left=2.5L Volume used=9.5L(ml/min) Volume each=4.75L(ml/min) Runoff. Total runoff=0.4L Ec=3.2 PH=/6.4 💧 📅19/12/24 Thursday (Day 75)(flower day 35) 📋 📅20/12/24 Friday (Day 76)(flower day 36) 📋 📅21/12/24 Saturday (Day 77)(flower day 37) 📋 Slight defoliation H=92cm D=23cm Dli=46 8 ppfd=1080 ******************************************** Weekly roundup. 📋 It's been bitter cold outside this week so the radiator has been in use a lot this week using 38.95Kw £9.73 She is loving everything so far, a little behind the other strain in development but not by much, got nice spacing between the flowers and great airflow around her. Back soon. Take it easy. ********************************************
Likes
7
Share
Alles super mein Training diese Woche war hart deswegen ist sie langsamer gewachsen dafür brauchte sie 2-3 Tage Regeneration ich hab sie mal verglichen Mit ein paar anderen aus dieser grow Community ich bin sehr beeindruckt von Euren aufzuchten aber ich muss sagen ich bin irgendwie paar Tage voraus trotz hartem Training Also wenn ihr Lust und Zeit habt vergleicht einfach mal selbst und Bildet Eure eigene Meinung sagt mir Was ihr denkt positiv wie auch negativ im Fine With that thx already and stay save and high!!!!!me stay save high!!!!enjoy life 💯💯
Likes
10
Share
@OldBill
Follow
First grow bit late on the uploads as I’ve only just decided to document it. Really happy so far cannot wait for harvest 3 plants didn’t expect them to get this big. The plan was to do 2 and I’ll be doing 2 from the next.
Likes
6
Share
@Moss420
Follow
Ended up flushing Mumma for about 10 days - got her ppm down real low. Night before harvest I set the timer so the light would not come back on in the morning before I harvested (I've seen people who swear by this and other who say it doesn't do anything but figured it couldn't hurt). At this point the other plants are pretty disappointing compared to Mumma so they aren't getting as much "love" lol.
Likes
27
Share
1/20/2023- So much to do pre grow and over the next 16 days, absolute first order of business is that I have to take down my current Grow---TIMBER-- Then I have a list of things I have to get done in order to be ready to start this grow 1 Feb. With that said T - 2 days until start 48 hour Flush T - 2 days until Start 48 hours of Light T - 4 days until TIMBER!!! Items that need to be done before 1 Feb 2023 1. I need to clean the tent out 2. I need to clean the equipment- Proper Sanitization between grows in Hydro is a must!!! 3. I need to get the hole in the ceiling above my tent repaired- For my last grow I had a deep sink installed in my grow room, to make Hydroponics a little bit easier and have a water source in the same room. The seals on the pipes they were installing broke and leaked through the ceiling causing some damage all the way across my grow room, I was already weeks into my grow and couldn't risk them working above my tent and it would have been very awkward positon for them to be working in as well, so have to get this done quickly between chop and germination. 4. I have to install my new light- I was using a Vivosun 4000 and for this grow I am switching up to a Spider-farmer SF 7000. 1/20/23- For this upcoming grow I am working with M/F photo seeds so I ordered 4 Sex determination kits. I recieved my my 4 Sex determination testing kits from Rimrock Analytics today. I will be using these to test my plants at week 2 of Veg so that when/if I take clones I know I am taking them off females. As well as I don't want to accidently pollinate my tent during this grow I am looking for big beautiful buds not seeded buds. :-) 1/24/2023- Harvest of current grow- Started at 2:00pm and finshed wet trim and firt batch into the freeze dryer. 1/25/2023- Next batch into the freeze dryer and cleaning all my equipment for this Grow. T-1 Day until the workers are supposed to be here to fix the hole in the Grow Room. T-3 days until I instll my new Gorilla Grow Tent and my New Light Spider Farmer SE-7000 for this grow. T-7 Days until Start of Germination 1/26/2023- Harvest is done ran through the Freeze dryer and dry tim completed. 1/27/2023- Grow Room repairs completed. Hole is gone Letting the paint dry before I install the new tent. T-2 days until Install the New Gorilla Grow tent and the new Light T-3 days until I put the hydro equipment in the new tent T-5 days until Germination 1/29/2023- Day 0- Final Pre Germination activities Germination Start T-3 days The paint on the ceiling was dry and it was time to finish prepping for Germination. I got the following items knocked off my list. New 4X4 Gorilla Grow Tent is up and ready New Spider Farmer SE-7000 Light is installed- Thanks Moony Grows for the suggestion and for the Code that got me some money off and free shipping (Moonygrows)!! I turned the lights all the way up to max and set the timer to 18/6 0600-0000. I will keep an eye on the temperature and humidity without my plants and see how hot it gets with the new light. I put my Hydro system back together and put in 40 gallons of water into it, time to monitor for leaks the next few days. I Setup my cloning machine for Germination Days 3-11 1/30/2023 let me break down the situation, ROOM in the TENT.. Enough said.. No really I tried putting my exhaust system up in the new tent with my new light, The light is so big corner to corner that it really didn't give me enough room for the lights be be raised, with the exahust hanging the buckets my plants are Starting in are 2 and 1/2 feet off the ground, great for plenty of room for roots but not so great for upwards space for the plant to grow. In a 6' 11 tent with the exauhst in side and hanging that only gave me a little over 4 feet of grow room to play with. My last grow if you saw my diary, anyone could tell I was struggling to keep the buds off the lights. No good, Since space was such an issue I was running my carbon filter inside on the ground but It really needed to be up sucking the heat out not shooting the cool out. With that setup I was sucking air through the filter and pushing it out the tent at a bottom exhaust hole cold out. Wasn't doing me any good for my heat. I was hitting temps of up to 85 degrees. I bought a portable AC unit and have been running it in the grow room to try and keep temps below 85 and I have had to lower the power on my lights during grow also not ideal.. With that said a friend of mine MoonyGrows (Check out his diary) took the time to look at my issue send me a picture of my grow tent setup with detailed instructions on how to suck the air out from the top but putting my filter and fan on top of my tent so no room issue and I am sucking the air out from the top where the heat is instead of pushing the air out from the bottom where the cool is... THANK YOU MoonyGrows For taking the time to help me get this straightened out.. Now I have room and I have the exhausts working right and now my temps with everything at 100% are topping out at 80 this dropped the temp by 5 + degrees at 100% max. T-2 days until Start of Germination Prepped my seed tray with humidity dome Prepped my Rapid Rooter plugs. I Used RO water, and I added a few drops of Hydrogen peroxide to Oxygenate the water. I then PH balanced between 5.7-6.0 the same that they will be getting in the Cloning Machine and when they get to thier final grow pod. I perfere the 5.8x range and I hit 5.84 for these rapid rooters. If you want to see a complete video on the process HowWeedGrow has an amzing video that shows step by step how to do it and explains it better than I ever could including how to plant the seeds. Which I will cover when I get to that step on Wed. https://www.howweedgrow.com/how-germinate-weed-seeds-cannabis-rapid-rooters/ 1/31/2023 T-1 day until Germination Start All set and ready have my Rapid Rooter plugs ready to go have my seeds out.. Have my seed tray warming up tonight. Tomorrow morning right into the Rapid Rooter then strait into the tray. I will spray the dome to start the humidity in there. 2/1/2023 Germination Day!! Let the games begin! 0600am Put the seeds into the Root Riots. And then put the seeded Root Riots into their first home the Seed tray. I have them under the light 24/7. Sprayed the dome 7:30pm Sprayed the Dome to keep humidity going on the dome. 2/2/2023 Day 1 of Germination Sprayed the Dome in the morning Sprayed the Dome in the evening 2/3/2023 Day 2 of Germination Roots are starting to come out the bottom of the root riot plugs and the heads are slowly popping out of Number 4 just below the surface. Afternoon- Number 4 has popped up Evening- Number 3 has popped up as well. Happy Dance!! 2/4/2023 Day 3 - Germination Surprise Surprise Surprise- all 4 have now poked their heads up.. Happy day!! 100% Germination succeeded. Now major milestone to track is how many are female and how many are male. I will take look at the roots this afternoon/evening and see if they have enough root to go into the cloning machine for the next 7 days before they go into their Hydro Pods. Day 3 - Germination - Evening.. Roots looked good and they were tall enough to make it into the cloning machine. Now that they are all in the cloning machine I have switched the lighting to veg state 18 on 6 off. 2/5/2023 Day 4 - Germination - Morning All the Ladies (fingers crossed) looking great stretching nicely and look nice and green, Photo synthesis underway.... UPDATE!! After a very interesting POD cast on FSTS by Dr. Bruce Bugsbee from Utah University, I have shifted my lighting to 24 hours on through seedling and then I am going to shift to 20 hours on the rest of Veg. 2/6/2023 Day 5 - Germination While Checking on my conditions inside the new tent last night, I found that the Humidity was down to 39 Percent. I added an AquaOasis Cool Mist Humidifier, the reason I selected this humidifier is that I needed one that could be turned on and off utilizing my Inkbird Humidity Controller IHC200 that I have my Pro Breeze Dehumidifier currently running with. Root structures are starting to get there about 1/4 of an inch. 2/7/2023 Day 6 - Germination Everything seems on track more roots poking out of each today. They are each getting a little taller as well. Checked in the evening and number 3 was drooping the Root riot plug on the bottome was dry and the roots were not in the water yet. I raised the water just enough that the longest root that was sticking out is now hitting the water. 2/8/2023 Day 7 - Germination Everything looked good while checking in on them this morning number 3 is now full up and no droop again. 2/9/2023 Day 8 - Germination T-2 days until Plant into Forever Pods and we start week 1 of Veg .. :-) Surprising thing to me is that number 1 and 2 were later in popping then 3 and 4 but the roots are growing longer in 1 and 2. 2/10/2023 Day 9 - Germination Number 1 and Number 2 are definitely ready for transplant today.. Based on how they were yesterday and where they are today I am hoping by tomorrow 3 and 4 are ready. Today they look to me where 1 and 2 did yesterday.. I really hope 3 and 4 catch up by tomorrow since.. T-1 day until transplant to new/ final home for grow. Need the roots long enough to have some clay down in the basket to keep the root riot out of the water and only roots in the water.. 2/11/2023 Day 10 - Germination Today they got placed in thier forever Home, 7 days from Sprout and 7 days until Week 1 Start. PPM- 180 this is water out of the Tap Temp Water: 70.7 Temp Tent: 77 Humidity: 40% I have a humidifier going 24/7 to try and bring this up.. I also have Humidity Domes on each plant. 2/12/2023 Day 11 - Germination Sprayed the domes, all are looking good.. Nothing much to do at this phase but Keep monitoring the PH level in the system and making sure they have a comfortable home. T-6 days until Week 1 start 2/13/2023 Day 12 - Germination Sprayed the domes, They were looking a little yellow today so I moved the light down to assist. Nothing much to do at this phase but Keep monitoring the PH level in the system and making sure they have a comfortable home. T-5 days until Week 1 start 2/14/2023 Day 13 - Germination Sprayed the domes, They were looking a little Florissant yellow today, with what looks like slight burn on the tips, I talked with a fellow grower and we agreed that It was probably that I was drowning them, Yes you can drown you plants even in Hydro, but only early on.. :-) It usually happens with the water being too high, which soaks not only the roots but the medium (root Riot plug in this case). I lowered the water from touching the bottom of the pot to about 1" away. This will probably take 3-4 days to resolve. I will continue my daily monitoring. T-4 days until Week 1 start 2/15/2023 Day 14 - Germination Sprayed the domes, continue my daily monitoring they look a little darker green instead of lime green now that I lowered the water levels in the system, so I think that I might have resolved the issue but it will take a few days for recovery to happen. T-3 days until Week 1 start 2/16/2023 Day 15 - Germination I looked in on them this morning, 3 and 4 look like they are doing well and recovering nicely. Number 1 not so much it has brown spots on the leaves, this very well can still be a side effect of the overwatering but I decide to go ahead and add Nutes earlier than I was planning just incase. I was going to wait until Saturday but I think intervention is necessary now especially after drowning them early on. I added 1/2 what I am planning on adding for week 1 start. I also think I am going to adjust my chart to add 1/2 2 days after plant from now on. I don't think it would hurt it to have some Nutes to pull from. .25ml/Gal Calmag = 12.5ml 1ml/gal GH FloraMicro= 50ml 1ml/gal GH FloraGro = 50ml 1ml/gal GH FloraBloom = 50ml T-2 days until Week 1 start = I will drain the system and start it over on Saturday with Week 1 Nutes. 2/17/2023 Day 16- Germination I didn't even want to post today after looking in on them this morning, 3 of the 4 are now showing signs of dronwing.. Brown spots on the leaves, the water levels were still too high.. I drained about another inch out of the tanks.. Will see how quick they recover.. I start week 1 tomorrow and will have to ensure my water levels are at least 1" away from the basket on this round.
Likes
3
Share
Everything went according to plan. From germination the plant displayed a very good development. With no training I believe she gave a very good yield. She always looked very strong with no signs of any risk.
Likes
18
Share
@Canna96
Follow
Hey now, hope everyone has been well. Super excited football season is finally here so things are about to get busy. I went out of town for 4 days and the plants struggled a little bit with the PH getting slightly too high before I returned. I also came back to see that some type of insect was munching away on the lower leaves of this little Sundae Driver, so I sprayed the plant and coco with neem oil, but hopefully they didn't do much damage before I can get them under control I have never experienced insect problems indoors, likely because I grow in Coco and not Soil. However, I left a 5 gallon airpot full of coco from a previous grow outside for a couple weeks by mistake, and pretty sure bugs got into. I won't make that rookie mistake again. Anyways the rest of the ladies are looking pretty good, They are almost getting what I consider a full dose of nutrients, even though it half of the manufacturers recommended dosage. I am feeding all Gen Hydro cal mag, Armor Si, and maxi grow. I also add some food grade hydrogen peroxide to keep the reservoir fresh for around 10 days or so but I clean it once a week. Not sure why GD website doesn't allow me to enter GHE under the old or new name. I did get all the ladies transplanted from solo cups to airpots on day 16, and it took 24 hours or so for them to recover from the transplant and start growing again. I am running 3 of the 3.4 gallon, and 2 of the 5.4 gallon just because that is what I had available. I hopefully top them all sometime this week for the first time, as soon as the roots are a little stronger. I let them grow to 7 nodes or so before I top them and make sure they're growing fast. Hopefully I can still mainline the Sundae Driver, she looks healthy other than those two leaves chomped off. All the plants are on their 5th nodes, except for the Green Crack 2.0 which is only on her 4th node. We got another heat wave coming through my region that I am not too excited about but at least its earlly in the game and I don't need to crank this light up yet. I am only running it at 30% and its putting off plenty to keep these ladies happy. Hoping to get a topping done this week, then another one next week, and be ready to flip to flower by week 7 or so. Thanks for stopping by, Stay Safe and Blaze On!!! 💪 Website: https://medicgrow.com/ https://growdiaries.com/grower/medicgrowled
Likes
18
Share
I feed up to 1300 now , try to mix properly at least and water 2-3 times a day. But handwatering half of them became hard. What do you think , I’m good to transplant ? I see the root from some pots already.
Likes
10
Share
@bcuzZ
Follow
- upped light intensity to ca. 600 PPFD by taking of the domes of the E27 LEDs - performed LST and defoliated larger leaves that were blocking the new nodes; snapped the main stem from Forbidden Cherry #1. Damn. She survived, but so much pain. Stupid beginner mistake. She´ll recover! - Otherwise, great growth, no other issues.
Likes
12
Share
@Ts1Ko
Follow
As you can see one of the phenos is flowering actively but the other one is still vegetating. I had to supercropp the vegetative one, because she was growing very tall and was going to burn her leaves. Other than that everything is great ✌️
Likes
5
Share
A it late with the update as I broke my phone,. To say it was my 1st harvest was very pleased with the outcome, 38grams dry of mostly tight nugs, trichomes on the main colas were turning Amber so cut those down couple of days earlier and left lower nugs to develop a bit more. Cured for 2 weeks now and buds smelling and smoking great, smooth taste and full of flavour! Next crop been planted very soon.
Likes
Comments
Share
@Nillenium
Follow
Und weiter geht's, Die Pflanze hat sich bis auf 70 CM gestreckt. Ein paar weitere Blätter mussten entfernt werden, der Tank brauchte auch eine Reinigung und es gab noch mal ne Runde Bio Pk Dünger. Erste leichte Mängel in Form von Rostflecken sind auch zu erkennen. (Ich werde erst mal beobachten ohne Panik zu schieben.)
Likes
5
Share
Week 8, the last feed! Defoliated to let more air flow and light penetrate down into the lowers of the plant. Bud's are sticky, plant is covered in frost, the pics don't do it justice. For a small pot grow, she's not that far behind her big pot sister
Processing
Likes
58
Share
@Dahoola
Follow
--------------- Start week 3 -------------- We started week 3 as we ended week 2, which is great. She continues strongly at the beginning of this week and seems almost unstoppable. She clearly enjoys her surroundings and looks very healthy. She has started preflowering and seems to be gearing up for another explosion in growth. She is very good at leaftucking and has already developed a good number of shoots. On to more! A new update at the end of this week. ----------------- Update Week 3: ----------------- End of another fantastic week for MBAP. This week was all about pre-flowering and you can see that she is preparing for an explosive bloom. She has benefited enormously from the LST that I applied and has a good number of shoots ready to explode during flowering. In addition to leaftucking, have also removed the lower shoots so that she can concentrate her energy on the upper shoots. I also did the biotabs in the ground in the middle of the week. We have opted for 3 biotabs in 20-25l soil. Have waited several weeks before putting the tabs in the ground because we work here with aitoflowers. And they prefer a light feeding regiment for the first few weeks. We are going to gradually lower the humidity and get ready for flowering and week 4! Until next update
Likes
17
Share
12/03/19 So there hasn't been a lot going on in terms of healthy growth. It seems I've been giving nutrients too often and that the pH of my water is too high (7.8) resulting in a Calcium defficiency and stunted/abnormal growth. Following some great advice from Bulbi to one of my questions. I've bought some Cal-mag and pH down to try and mitigate this issue, I've done the following :- : 1ml Cal-Mag to 1l of Water per plant : 2ml Cal-Mag to 1l of spray bottle to be used infrequently : I haven't pH reduced on this watering as I noticed the Cal-Mag slightly reduces the pH, so to not shock the plants I'll lower the pH marginally on the next 2 feeds untill it's at 6.5 : Raised the light to 45cm : Changed the lighting schedule to 18/6 Let's hope these few changes will bring these lil babys back to life! I'll post some mid-week pictures to show any difference.