
Likes
31
Share


@Mr_ZAF_Budz
Follow
Hello Ladies and Gentlemen😎
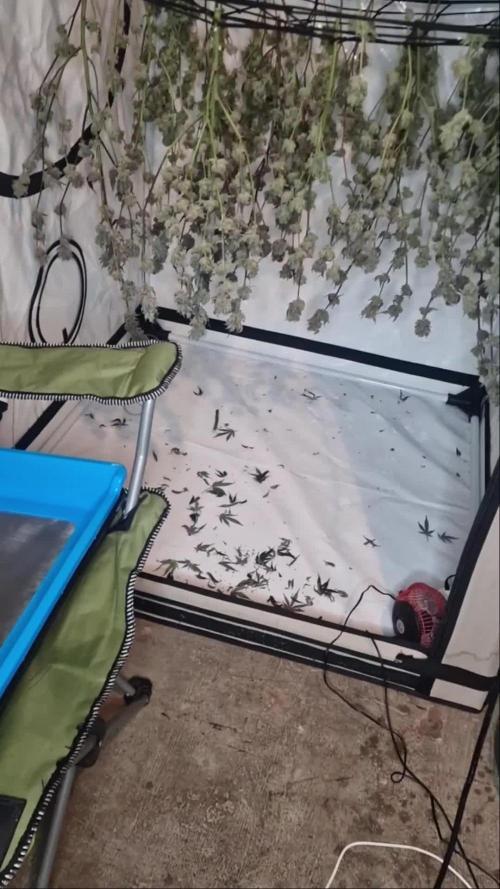
So my grow is coming closer to an end and so far it has not been so bad for a winter grow.
As of 3 days ago I completed the partial harvests to the LSD-25, Gorilla Cookies and the Girl Scout Cookies. The late blooming Gorilla Glue will go for another 2-3 weeks and the six shooter should get the chop next week marking 13 weeks since breaking ground.
I trimmed some of the 1st half of the partial harvest last night and the Gorilla Cookies seemed to have preformed well with nice sticky dense buds.
I hope you all enjoy the diary entry and happy growing ✌️🏼

Likes
Comments
Share


@Uneasy
Follow
Towards the end of the harvest, mold developed due to high temperature and humidity. I lost about 30% of my harvest. The buds did not fully mature. Despite all the setbacks, we managed to get a harvest.

Likes
36
Share


@MadeInGermany
Follow
Info:
Unfortunately, I had to find out that my account is used for fake pages in social media.
I am only active here on growdiaries.
I am not on facebook instagram twitter etc All accounts except this one are fake.
Have fun with the update.
Hey everyone 😊.
This week has continued to develop great :-).
It was poured once with about 200 ml because it is still under the hood with very high humidity that is enough :-).
Next week the hood will be opened bit by bit so that it can get used to the surroundings :-).
Otherwise the tent was cleaned and the humidifier refilled every day this week.
I think I'll repot next week and then start training :-).
Until then, I wish you lots of fun with the update.
Stay healthy 🙏🏻 and let it grow 👍
You can buy this Strain at :
https://www.zamnesia.com/de/3271-zamnesia-seeds-blue-dream-feminisiert.html
Type:
Blue Dream
☝️🏼
Genetics:
Blueberry x Haze
20% Indica / 80% Sativa
👍
Vega lamp:
2 x Todogrow Led
Quantum Board 100 W
💡
Bloom Lamp :
2 x Todogrow Led
Cxb 3590 COB 3500 K 205W
💡💡☝️🏼
Soil :
Canna Coco Professional +
☝️🏼
Fertilizer:
Green House Powder Feeding
☝️🏼🌱
Water:
Osmosis water mixed with normal water (24 hours stale that the chlorine evaporates) to 0.2 EC. Add Cal / Mag to 0.4 Ec Ph with Organic Ph - to 5.5 - 5.8 .

Likes
27
Share


@GrowInger420
Follow
This week is start of 4th flower week. The plants look good but i need buy some yellow cards. Buds become bigger and start to smell more intense. The lemon haze surprised me, because i germinated her 15 dsys after them other 2 and shes the biggest of them all. Hope, everything will be fine. ✌️
In the middle of the week i took the net away because it seems they stretched finally and they have a good shape now.


Likes
3
Share


Likes
38
Share


@Hempface86
Follow
Ladies and gentlemen week 12 has started day 25 of flower and 83 total as of the 3rd of August.. I just want to say so far she has been an effortless grow and she has handled the heavy feeding I've been giving her as well as the extreme heat that I've been trying to control but I have on an attic apartment with only two air conditioners so it gets to eighty five plus so sometimes I open the tent and I have an oscillating fan pushing air into both hands as I do not have an inline fan with carbon filter due to financial reasons.. anyhow thank you seedsman this has been awesome and I can't wait for my very first CBD one to one especially one with the numbers of potentially 22% THC and 18% CBD that's 40% + TAC .. hopefully I time her chopping perfectly and I get close to that. I hope and pray everyone is healthy and so are their ladies.. good luck to everyone with their plans and happy growing ! I will update if any major changes this week, until then ✌️

Likes
4
Share


Likes
92
Share


@DogDoctorOfficial
Follow
Week 18 (Week 10 Flower) Grow Diaries Report – Part One: Wrapping Up the Journey
🌱 Pre-Harvest Reflections
This week has been a mix of emotions as we approach the final chapter of this grow. Let’s talk about why we made the decision to pre-harvest portions of the Gorilla Melon and Papaya Zoap. While both plants have been incredible performers, a few buds on each started showing early signs of bud rot. This is an unfortunate but natural challenge when growing such dense and resin-packed colas. The decision to harvest those sections early was made to protect the rest of the crop and ensure quality and integrity for the remaining flowers. Vigilance is key in a packed garden like ours, and careful monitoring ensured the rest of the room remained safe and thriving.
🌈 A Symphony of Colors and Frost
The grow room is a visual masterpiece this week, with shades of deep purples, vibrant greens, and golden hues taking over. The fading is absolutely breathtaking, showcasing the natural progression of the plants as they near the end. Combine this with the insane level of frost blanketing the buds, and it’s safe to say this is one of the most beautiful gardens I’ve ever cultivated.
✨ Spectrum Management: The Secret to Stunning Results
The current lighting setup is a game-changer:
• 50% whites to maintain overall balance and structure.
• 100% reds for enhanced ripening and color development.
• 100% UVs to boost resin production and amplify those trichome levels.
The ThinkGrow LEDs paired with the TrolMaster spectrum control system have truly unlocked the garden’s full potential. Watching the plants sparkle under this setup feels like seeing stars on a clear night—magical and unforgettable.
🌟 Quick Recap: The Journey So Far
From seed to this incredible moment, this grow has been a testament to precision and passion. From germination to veg and through flowering, every detail was carefully tuned, every decision made with intention. Along the way, we navigated challenges like pests, mold, and environmental shifts, proving that adaptability and dedication are essential. And here we are, ready to bring this journey to a close with nothing short of perfection.
Week 18 (Week 10 Flower) Grow Diaries Report – Part Two: The Tools That Made It Possible
💡 ThinkGrow LEDs: These lights have been the heartbeat of the grow, delivering unparalleled spectrum control and efficiency. The ability to fine-tune every stage of the plant’s life cycle has been a game-changer.
🌬️ AeroFan System: Consistently circulating air while keeping the environment balanced and mold-free. The AeroFan’s role in preventing hotspots and ensuring even coverage cannot be overstated.
📱 TrolMaster System: The brain behind the operation, the TrolMaster system has provided unmatched control and precision. From monitoring temperature and humidity to dialing in lighting and CO2, it has truly transformed how I grow.
🏕️ Tent-X Setup: The foundation of the grow, this tent provided the perfect space for controlled cultivation. Its design maximized efficiency while keeping everything neat and manageable.
🌡️ Sensors and Monitors: Every parameter was tracked with pinpoint accuracy. From VPD to soil moisture, the sensors ensured every need of the plants was met in real-time.
Each tool, piece of gear, and setup component has worked seamlessly together, creating a true ecosystem of excellence. This grow wouldn’t have been the same without them.
Ending with Gratitude and Excitement
To the community: thank you for joining me on this incredible journey. Whether you’ve been here since the beginning or just tuned in, your support has been everything. From the lovers to the critics, you all push me to grow (pun intended).
To the sponsors: ThinkGrow LED, TrolMaster, Aptus Holland, Pro-Mix Soil, and everyone else involved—your products are not just tools; they’re inspirations.
And finally, to these plants: you’ve taught me patience, resilience, and the beauty of the process.
🔥 Next Up: Stay tuned for the epic harvest and a deep dive into the final results, from trichomes to yields and beyond. The end is just the beginning of the next adventure. 🌟
Let’s finish this grow strong! 🌱✨ Growers Love.
Discount Codes so you can save big on your next check out 💚💚💚
Kannabia - DOGDOCTOR 30% off
SeedsmanSeeds - DOGDOCTOR 10% off
CannaKan- DOGDOCTOR 15% off
terpyz.eu - DOCTOR 15% off
The Neutralizer - PORKIT5-DOG 15% off
Fast Buds - DOGDOCT 15% off
As always thank you all for stopping by, for the love and for it all , this journey of mine wold just not be the same without you guys, the love and support is very much appreciated and i fell honored and so joyful with you all in my life 🙏
With true love comes happiness 💚🙏 Always believe in your self and always do things expecting nothing and with an open heart , be a giver and the universe will give back to you in ways you could not even imagine so 💚
Friendly reminder all you see here is pure research and for educational purposes only
Growers Love to you all 💚💚💚


Processing
Likes
9
Share


Likes
33
Share

@GrowBro1981
Follow
Runtz von Barney's Farm 😎 die unteren Buds sind bißchen fluffi, aber sonst Top Pflanze, etwas anspruchsvoller als die anderen.
Für mehr Bilder, Videos und Infos Facebook: " Green Room Anbau und Austausch" !!! Kommt und schaut, es lohnt sich🤗

Likes
98
Share

@DogDoctorOfficial
Follow
I love growing its a big passion of mine , and the fact that GD exists makes everything so much better, one can interact with others and enjoy and learn from each others. Thank you all growers love and keep them green <3 <3 <3

Likes
120
Share


Likes
40
Share


@MrJones
Follow
47th Parallel Crowly's Comet
╰⊰🔹Popped Seeds 03.10.24🔹╰⊰
🌞Environment - 78F / 50% RH
🌾Training - Defoliating the buds as needed, a little at a time; they should be pretty clean by the time harvest comes.
⚱️2-Gallon 📊6.2 PH
💧 Feeding - Using Horti Late Bloom 0-24-26, Cal 12-0-0
🌞Mars Hydro FC-4800
🕷️ IPM - CannControl from Mammoth and Mosquito Bits
╰⊰🔹WEEKLY REPORT🔹╰⊰
📝 Notes - I ran the High Fortified P&K of the Horti-Late Bloom 0-24-26 for 2.5 weeks; going forward, I will be watering with H20 PHed to 6.2. The flowers are becoming oily, frosty, and have a strong smell. The terpenes are producing a gassy citrus scent with notes of garlic and herbs. It's the strong, aging orange aroma - quite impressive!
🗓️06.08.24 Feeding 2x Dail with Horti Cal and Horti Late Bloom
🗓️06.09.24 Feeding 2x Dail with Horti Cal and Horti Late Bloom
🗓️06.10.24 Feeding 2x Dail with Horti Cal and Horti Late Bloom
🗓️06.11.24 Feeding 2x Dail with Horti Cal and Horti Late Bloom
🗓️06.12.24 Feeding 2x Dail with Horti Cal and Horti Late Bloom
🗓️06.13.24 Feeding 2x Dail with Horti Cal and Horti Late Bloom
🗓️06.14.24 Feeding 2x Dail with Horti Cal and Horti Late Bloom
📝Fertigation injects fertilizers into an irrigation system to supply dissolved nutrients and water to crops.
╰⊰🔹STRAIN INFO🔹⊱╮
Crowley's Comet / https://www.47thgenetics.com/product-page/crowley-s-comet-10-fem-birdseeds
It's everyone's favorite piece of space rock, Crowley's Comet! The culmination of reversing our Matterhorn cut off Mr. Crowley to Intergalactic Runtz, and the results were out of this world (I had to do it). These ladies were slow to start, but once they hit their stride, they put any worries we had to rest. Compact, short-framed, and robust. They pack beautifully boulder-like flowers that reek of garlic and sickly sweet cotton candy. Dark green to a mosaic of purples, yellows, and silvers. Frost production is off the charts, the internode spacing is tight, and they certainly will impress in their last few weeks of flower. This is one of our favorite crosses in the new fem lineup. If you're looking for your hype fix, here you go.
Yield: Heavy to XL
Flower Time: 63 days
Feeding Schedule: Heavy


Processing
Likes
5
Share


@GrowXown
Follow
Seeing some great growth within these CBD Critical XXL and excited for this journey! Soon I’ll be reporting these babies into bigger 5lt pots


Likes
Comments
Share


@LegacyGrow
Follow
Englischversion below
Deutsch:
Tag 49 Veg:
Alle Pflanzen haben das Ziel erreicht - den Rand des Topfes. Eine starke Entlaubung und Entfernung der kleineren Triebe stand an. Dadurch soll verhindert werden, dass die Pflanzen viel Energie in die Biomasse stecken, die später ohnehin beschnitten wird.
Ein Pulse-Zero und ein Bodenfeuchtigkeitsmesser ergänzen nun das Setup. Im angesicht der kommenden Blüte wird der VPD in Richtung 1-1,2 gepusht ( hauptsächlich durch ein geringeren RLF%).
Sobald sich die Ladies vom Stress erholt haben, wird die Blüte eingeleitet - im Streach wird dann wahrscheinlich das SCROG-Netz eingespannt.
--------------------------------------------------------------------------------------------------------------------------------------------
Day 49 – Vegetative Phase:
All plants have reached the target — the edge of the pot. A heavy defoliation and removal of smaller shoots were carried out. This is intended to prevent the plants from investing excessive energy into biomass that would later be pruned anyway.
A Pulse Zero and a soil moisture sensor have now been added to the setup. In preparation for the upcoming flowering phase, VPD is being increased toward a range of 1.0–1.2, primarily by lowering relative humidity.
Once the plants have recovered from the stress, flowering will be initiated. During the stretch phase, a SCROG net will likely be installed.

Likes
20
Share


@CityFarmer
Follow
Hello everyone,
Been busy but I shoot a little video for yall to see, also if growing is something you guys intended to do, I suggest you guys get yourselves a Digital Microscope or a jewlers loop.
I just got myself a Digital Microscope for under $20.00 on Walmart.com, I got me a cheap one to start with so I can learn how to use it properly. But for under $20.00 this one brings 8 led lights, a adjustable mount, comes with 3 different connection choices build in, magnifies from 50-1000x, can take pictures and also videos and my favorite part, it connects right to my mobile device, you download and install a Google app and your ready to go, ill work with it and add pictures next week...
See you guys soon 👊👊👊

Processing
Likes
3
Share


@XxBILLZAxX
Follow
Increased their food by a tad. Looked perfectly health raised to about 1900ppm.
Again spider mites at it crawling up every leaf and creating a colony. I thought it was over until I sat there nearly every night finding the f*****s and rubbing the leaves with the spray.
Defoliation was needed ASAP due to them stretching nicely. Started slowly from the bottom up. (repeated this process every 3-5 days.)