Likes
Comments
Share


@DogDoctorOfficial
Follow
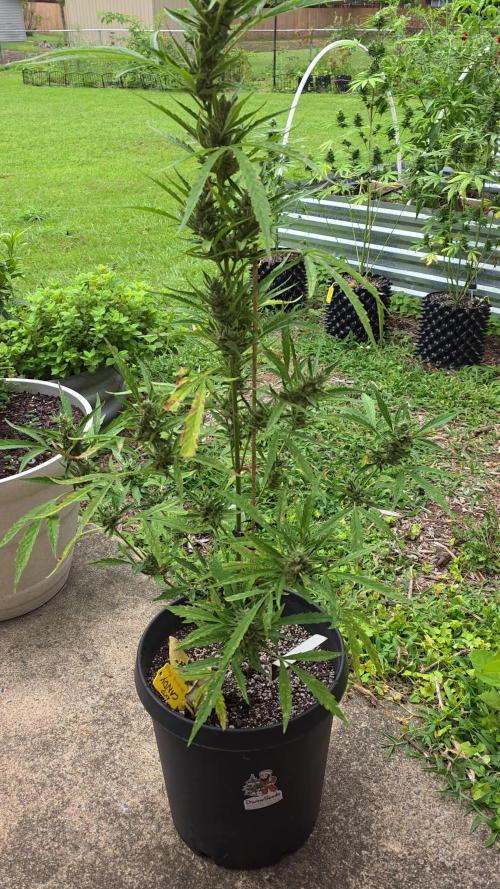
My unicorn is growing great and so amazingly beautiful , and she is a proud mom since her babies are coming along just fine also and rooting as they should, lets hope she is a keeper, i am putting all my faith in and on her hihihi
she is growing so fast and her pref-lower is starting to look more like flowering that pre hihihi but i will keep monitoring among and following in love more every single day, i mean what is there not to love on these one hihihi but i can already tell she will move faster than i am use too , but lets see
So far no defoliation i will do it about day 21 or so lets ee how she goes but for now i love how my kale is evolving and transforming her self in to the unicorn she is <3 <3 <3
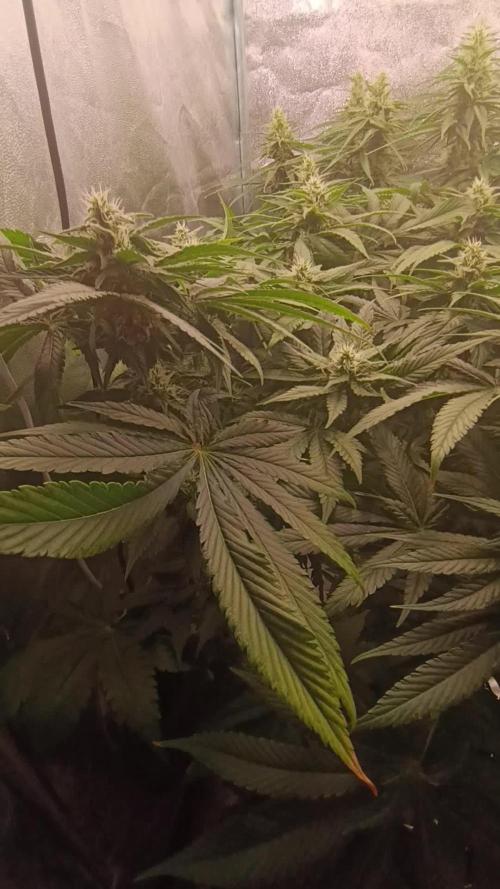
PPFD numbers with an averaged of 800 µMol/m2/S but as they grow i imagine t is will keep going up and should stop at about 1000/1200 µMol/m2/S, my CO2 Levels are always the same and going about 900Ppms and wen i am in the room it goes up to 1500ppmsand more lol
and this is it, for this week this is what happen , provably will defoliate her around day 21 or so but that will be a full defoliation and not just some clones and leafs
<3 <3 <3
For now wishing you all a great Spannabis, i was not hable to came this year but i am sure it will be amazing for you all <3 <3 <3
As always thank you all for stopping by , for the love and for it all, i fell blessed to have you all with me for one more love journey, and a different one form the rest i did so far <3 <3 <3 Thank you Thank you Thank you , you guys are great and have been amazing , thank you for everything <3<3<3
#aptus #aptusplanttech #aptusgang #aptusfamily #aptustrueplantscience #inbalancewithnature #trueplantscience #dogdoctorofficial #growerslove
With true love comes happiness , Always believe in your self and always do things expecting nothing and with an open heart , be a giver and the universe will give back to you in ways you could not even imagine so <3 <3 <3
<3 <3 <3 Growers love to you all <3 <3 <3


Likes
10
Share


@extraterrestrial1
Follow
--------------------------------------------------
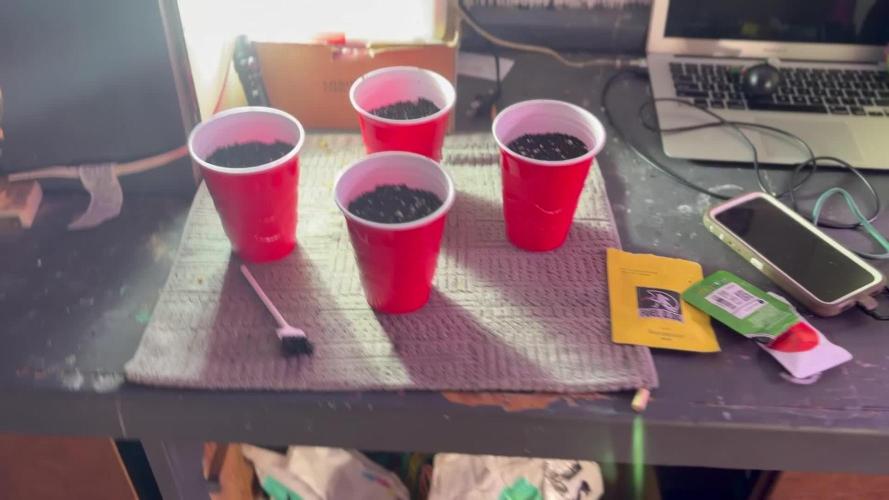
Day 8
Water: 50ml RO water
Humidifier: 65% (MID-MIST)
Fan Speed: Mid-Low
Light on @ 19:00 (23° celsius @ 76% RH)
Light off @ 13:00 (19.5° celsius @ 54% RH)
-------------------------------------------------
Day 9
Water: N/A
Humidifier: 70% (MID-MIST)
Fan Speed: Mid-Low
Light on @ 19:00 (22.5° celsius @ 74% RH)
Light off @ 13:00 (19° celsius @ ~84% RH)
-------------------------------------------------
Day 10
Water: 50ml RO water
Humidifier: 65% (LOW-MIST)
Fan Speed: Mid
Light on @ 19:00 (22.1° celsius @ ~75% RH)
Light off @ 13:00 (19° celsius @ 70% RH)
-------------------------------------------------
Day 11
Water: N/A
Humidifier: 65% (LOW-MIST)
Fan Speed: Mid
Light on @ 19:00 (23.3° celsius @ ~70% RH)
Light off @ 13:00 (20.7° celsius @ 66% RH)
-------------------------------------------------
Day 12
Water: N/A
Humidifier: 70% (MID-MIST)
Fan Speed: Mid
Light on @ 19:00 (23.4° celsius @ 66% RH)
Light off @ 13:00 (19.9° celsius @ 70% RH)
-------------------------------------------------
Day 13
Water: 150ml RO water
Humidifier: 65% (MID-MIST)
Fan Speed: Mid
Light on @ 19:00 (22.3° celsius @ 72% RH)
Light off @ 13:00 (21.5° celsius @ 67% RH)
-------------------------------------------------
Day 14
Water: N/A
Humidifier: 65% (MID-MIST)
Fan Speed: Mid
Light on @ 19:00 (24.5° celsius @ 63% RH)
Light off @ 13:00 (22° celsius @ 65% RH)
-------------------------------------------------
Likes
43
Share


@PEAKYPLANTERS
Follow
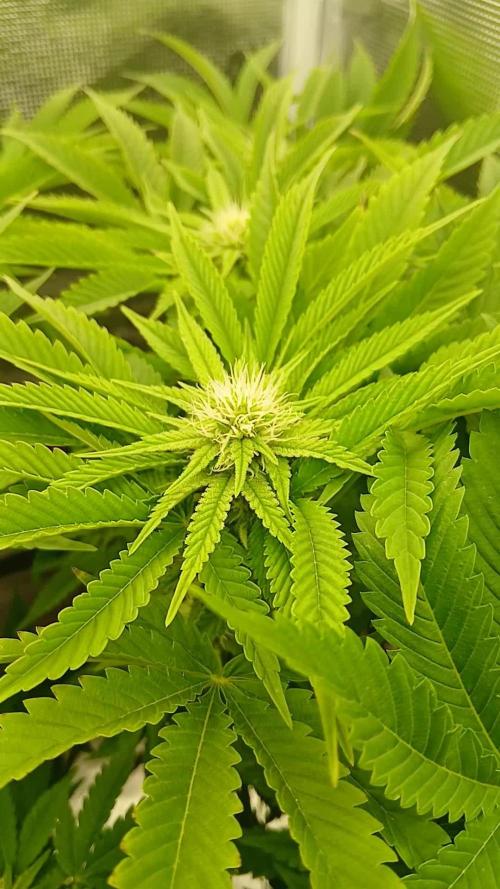
Very good friends .... we are ready to fill these solid goblets of huge white pistils and this wonderful girl!
a greeting to all farmers friends and I hope your crops are vigorous and abundant
best regards

Likes
68
Share


@Prototype0181
Follow
The cherry's are doing great and they look phenomenal 👌 With their next transplant to 7gal airpots, i gonna put 1 in plagron bat-mix combined with the bio tabs range for optimal taste👌

Likes
2
Share


@Sicktodeaf
Follow
So here's my first Diary. I'm a new grower just trying to find out what works best for me.

Likes
18
Share


@BudsBros
Follow
Alert alarm we have a beast.
The few friends who have seen her were amazed and with their eyes open, she is a real monster, in height and she is filling all the flowers very, very well along the entire length.
There is a very wise friend from the early hours of ganja cultivation who always tells me that Bubble Gum is a security, he explains it with genetics now I don't remember very well why but I think he's right. You can admire it with your own eyes.
The flowering is over we are just waiting for another bit of ripening of the flowers, a bit of red pistil and let's hope it gets a bit cold for the resin the spring arrives here with us.
Really kudos to the guys at Seeds Mafia
https://seedsmafia.com/en/
The light is sent to us by the legendary Emily of Viparspectra we are sorry not to hear from her anymore these lights drive me crazy they are so perfect.
https://www.viparspectra.com/
The finally good photos were taken by our friend at @Breadandbuds who, in addition to being a great grower, is now a boss with photos. hefe.

Likes
93
Share


@Ferenc
Follow
Week 16. This is the final week. I will harvest this girl on Sunday as it is ready. I have already tried some and it is very nice, strong, it makes my body relaxing, my limbs are easy. Lovely strain and very strong, this is good medical stuff. As it can be seen it is full of flowers, and a lot of THC. From tomorrow ( Friday) I will not give any water because Sunday it will be harvested. Friday: Last day of watering. Saturday: Tomorrow is harvest day. No water for the plant. I will be back tomorrow.


Likes
5
Share

@Ninjabuds
Follow
Trasplant day! Nothing special going on. Im excited to see how these turn out. Not to much visul difference between the LCR and the Papa at this point.
Likes
49
Share


@Tropicannibis_Todd
Follow
👉Alrighty Then👈
👉Purple Punch F1👈
So we are now moving into week 7 of flower and everything is looking good 👍
Everything is looking good 👍sidenote , I am using my well water which is hard so I am having slight issues 😅
So i continue to modify the nutrients to accommodate Flower .....
Soil by Promix
Nutrients by Cronks
Lights by MarsHydro.ca FC4800 X UR45 X Adlite Deep Red And Blue
Tent 4x4x6.5 & Equipment by MarsHydro.ca
High reflectivity inner mylar
Thick Oxford fabric
Smooth heavy duty zipper
Sturdy metal frame
Zipper blackout cloth
Good anti light leakage performance
The 6in Inline kicks ass moves alot of air
●Blue Light Effect:
Blue light shortens internodes, resulting in shorter, stronger plants, ideal for supporting fruit development later. During vegetative growth, blue light promotes lateral branch development effectively.
Well this should be fun 🙃
Thanks to all my growmies out there for stopping by its much appreciated 👈
👉Happy Growing👈

Likes
9
Share
@Trinidad
Follow
08.10.12
Day73
Day25 since 12/12
Her buds are beginning to fatten up.
Two days ago I added water to reservoirs as she needed topping up. She drank 10 liter in about 5 and half days. Today I did a fresh reservoir change out and added 16 liters of water. We will see how long it last this time. I think in my next grow of photoperiod plant I will use trellis net as I it is becoming a pain to constantly tie down branches with training wire.
Likes
10
Share


@Plzgrow4me
Follow
They are growing coots fast! I moved the smaller non-viable plants outside since it’s warm, but they haven’t done much. Think it’s time to say goodbye to those :(
I’m just happy with the 5 plants I have now. I’m sure they will all yield nicely!

Likes
19
Share


@Chubbs
Follow
420Fastbuds
TrainWreckAuto Week8
What up grow fam weekly update on these 2 gorgeous girls. Getting super hot in my tent as summer time is here. Over all besides some crispy leaf tips and having to water more frequently all is good.


Likes
7
Share


@Cultivatorcarlos
Follow
everything in the second week of flower went well. she really stretched and the buds quickly started getting fat. also every watering i would notice a very strong odor of weed.
december 22nd 2021: gaver her last half of gallon used in last feeding. also nothing was tested. ph tested at 6.6 last feeding and it usually comes out a little higher after a few days.
january 1st 2022 i noticed the first trichomes.
Likes
109
Share


@Wackytabacky_420
Follow
Hey fellow growers week 9 update of my critical purple and pineapple auto grow. Well today all 4 plants are 63 total days old. Critical purple #2 is now in week 6 of 🌸 the other 3 are in forth week of 🌸. This will most likely be critical purple #2's last update as she will be harvested this week hopefully! No big changes this week from last besides Pineapple auto #2 is still not happy and critical purple #1 is thickening up nicely! Well here's what I did to the ladies this week...
10/30/21
Watered all plants
Ph 6.2
178 Ppm
1ml ph down
Solution temp 73.2°F
11/3/21
Critical purple#1 & Pineapple auto #1
2ml micro
3ml bloom
Ph 6.31
420 Ppm
Solution temp 70.0°f
Critical purple #2 still flushing!
5ml flora kleen
Ph 6.24
185 Ppm
Solution temp 74.6
Pineapple auto #2
2ml micro
3ml bloom
Ph 6.5
430 Ppm
Solution temp 74°f
Here's my link for discounts on merchandise from viparspectra:
https://www.viparspectra.com/?aff=Wackytabacky420&utm_source=affiliate
Coupon code: Wackytabacky420
Well guys it's been a crazy week so I'm gonna wrap this up till next week. Best of luck and Happy Growing!😎🌱💚💪💪

Likes
84
Share

@Natrona
Follow
Divine Seeds Auto Contest Candy Outside Grow
👉Sponsored Grow👈
W11F7 8/10-16
This week’s weather has been a mix of rain, clouds and thunderstorms. Temperatures were mostly in the mid to upper 80s during the day and low 70s at night.
I watered 2 times with compost tea adding green sensation on the last watering.
Information from Divine Seeds indicates that Auto Candy grown outside can reach 120 cm. that is 47 inches. My candy is 41 and falls within the range.
My auto cady is a tall lanky girl. She has one main stalk and 4 short branches. The bud structure sits close to the stalk and small clusters of calyxes and smells sweet and syrupy and already sticky.
Auto Candy is fattening up her buds. The structure shows minimal hairs and sugar leaves and mostly calyxes. I check all my outside plants daily in the morning. If it rained that night, I give each stem a good shake to help dry them out. So far so good, no mold or other fungus or bug issues. The pics show the trichomes starting to fill out even without a magnifier. I am getting excited to see the full development of buds, colors and smells. Let’s go!
Thank you all for your continued support and encouragement. Your likes and comments motivate me to keep sharing my journey. Let’s continue to learn to grow together!
Stay green, growers love 💚🌿,
💫Natrona💫

Likes
6
Share

@Lombardy11
Follow
Zdar Bando .
Začínám 6 týden a holky nabírají hezký na objemu.
Hnojím podle deníku 2ml/l od všeho a myslím si že už je to na hraně.
Všechny dostávají stejně 3l akorát jedné se něco nezdá.
Možná už je na ní moc hnojiva.
O proti těm dvoum je pozadu a má menší paličky, při další zálivce změřím ec a uvidím, jestli bude velký rozdíl tak uberu něco na 1ml/l.
Už se těším na výsledek 😁.
Tak další hlášení za týden .