The Grow Awards 2026 🏆 


Likes
4
Share


@tsf_homegrow
Follow
🇩🇪
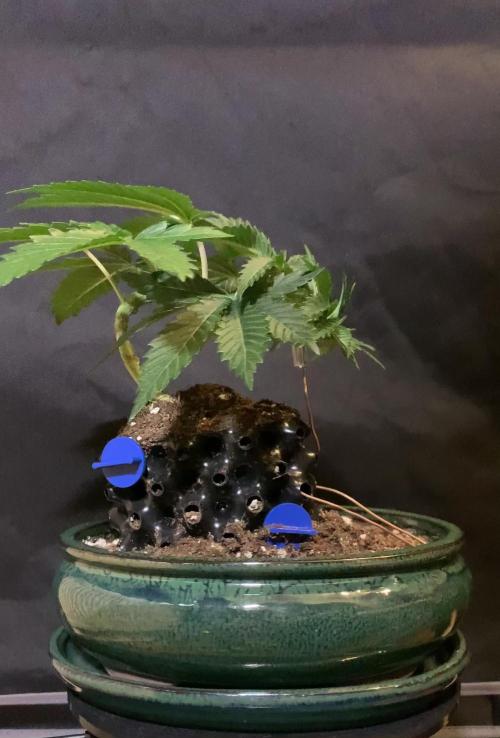
10.12. neue Drähte eingezogen um die kleine weiter in Form zu halten und etwas gerader auszurichten. Happy growing💛✌️
9.12. gestern den Draht unten am Stamm gelöst, und neue Drähte gesetzt. Heute das Video aufgenommen. Einmal eine rundum Ansicht.
7.12. einen weiteren Draht diesmal mit Gummi Stück eingebaut um den Trieb auf Höhe zu halten und keine Druckstelle zu hinterlassen.
🇬🇧
12.10. New wires were installed to keep the little one in shape and straighten it out a bit. Happy growing! 💛✌️
12.9. Yesterday I loosened the wire at the bottom of the trunk and attached new wires. I recorded the video today. It's a 360-degree view.
12.7. I installed another wire, this time with a piece of rubber, to keep the shoot at the correct height and avoid leaving a pressure mark.
Likes
23
Share


@Rooflower
Follow
Week 2 Flowering
Another week down and we getting there !
she is growing super bushy so decided to give another haircut today. only 35-40 per cent of the leaves are down and some light can finally reach the bottom parts of the plant.
Another and last defoliation session will happen at end of third week F.
Take a look at that Massive leaf 💪
D5
She's growing great, really bushy and that's a bit annoying but I can't do anything , I should have done more intense defoliation or lolipoping till one point , will probably do in couple days .
I just saw the first pistils at some nodes, she's getting into flowering a bit slow but steady so far.
Im expecting her to stretch a bit tho...lets see !
Introduced Canna Boost Accelerator to her diet at 2ml/lt and lets get it started
Her smell is already so nice and chemical ,leaves beautiful pale green but I suppose is due to genetics cause she's super healthy in general
Till next Update
Likes
14
Share


@danwho
Follow
9/29/2024
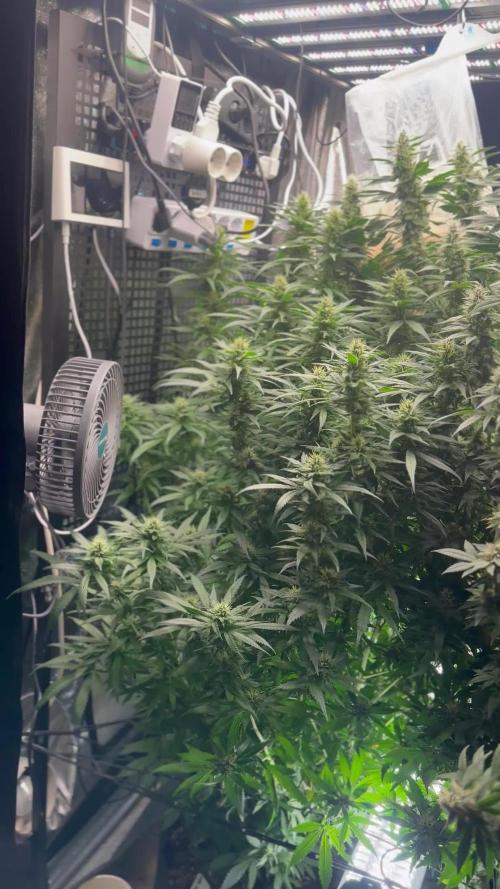
The plant is looking extremely healthy! There are tons of flower sights and they are starting to bulk up with nice frost development as well. Daytime air temps and humidity are slightly higher than I would prefer, but working to control it the best I can. Lights are currently at 90%, planning to increase to 95% in the next few days. Stretching looks to have stopped or slowed to a crawl at this point. I am continuing to defoliate large fan leaves and any areas of overgrowth/overlapping of leaves to open up the canopy and promote airflow.
10/1/2024
Raised light directly over the plant about an inch. Starting to put some thought into support as the branches are already putting on some weight and swaying from the fans. Have some 4-foot wooden dowels on standby and plenty of bunchers twine. Small issue with roots in the drain line causing the water level in the bucket to rise. Removed the roots and the issue was resolved. Working to maintain 800-900 PPM in the reservoir.
10/5/2025
Overall pretty stress-free week. Continued to add pH-adjusted water only to maintain 800-900 PPM when needed. Still defoliating a few leaves per day to continue to open things up throughout the canopy. Flowers are developing nicely and the frost is everywhere. The smell in the tent is wonderful and quite pungent! Arm hair is getting sticky from reaching in to grab leaves!
Likes
3
Share


@coolesrat
Follow
Leaves are starting to yellow / and pistils are burning - I believe I’ve overwatered them slightly trying to flush them the best I could with clean water - this or perhaps my last feeding was to high? The EC was 2.5 . But these signs were increasing for a few weeks . Let’s hope it clears up !
Processing
Likes
21
Share


@LittleBigTrees
Follow
Plucked a few more leaves but other than that just feed them this week including bloom.
Also gave them some rice starch (from boiled rice water collection) on day 42 as a boost for the microbes 👍
Turned the IR off now and turned up to 34000lux
Likes
5
Share


@GHdog22
Follow
Soo taaste and speciacl smell og is oG G G G nice grow really good mineral line feedeng is best of the bestest ever seen
Likes
26
Share


@Stash074
Follow
This week went well. Overall the ladies are healthy. They ended up stretching a lil more. I do know this will be the final week of stretch before focusing on producing buds. Which will be my goal over the next week,more defoliation. Also I've been using liquid kool bloom with feedings..we shall see if it makes a difference.. will keep yall updated in my next upload ..Happy growing 😎🍃
Likes
17
Share


@herbalistssword
Follow
Got first pistils on 8th day of flowering schedule. Gonna have lots of buds, it is a carpet of buds :D Shame didn't have all 4 pots like this. Looks amazing.
I have to say really impressed with this organic growing method, such healthy beautiful leaves!
Likes
13
Share


@Romepucks
Follow
All smooth sailing this week, she got some lovely rain, Temps are dropping each weak, but quite bushy, also I have notice her smell coming through, sweet citrus
Likes
15
Share


@Chubbs
Follow
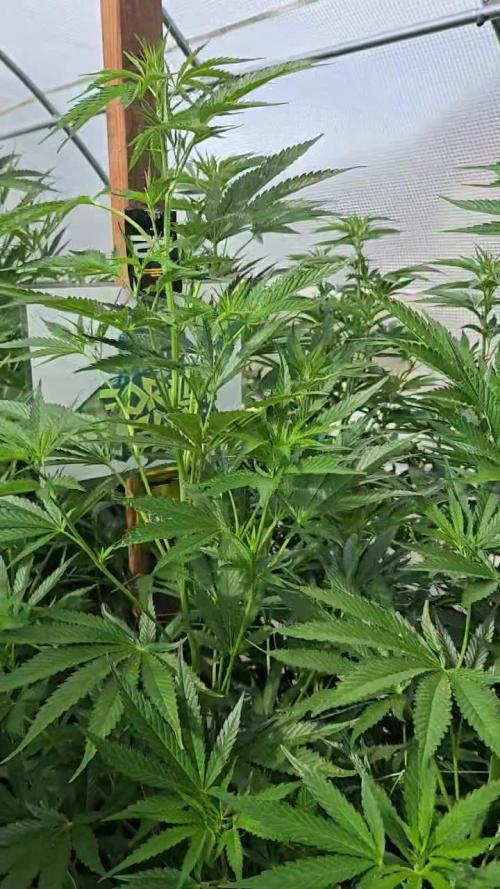
Weekly update for these lovely ladies. They've grown and grown since the last update so much I had to raise the greenhouse. Cinder blocks under the frame gave me an extra 16in. They're growing probably a foot of week and still reaching for the stars. I did switch to Athena's Bloom A & B and P&K booster this week giving 5-10ml per gallon. I really couldn't be happier with how they've grown up to this point.
All in all Happy Growing
Processing
Likes
26
Share


@rhodes68
Follow
8/17 Week 5 Flipping
Lights set to 11-13 for the first few days then 12-12
Nuets will transition accordingly
Took 2 cuttings from her for clones
Reducing feeds to once a day during the switch
Intro Cocotek Bloom a/b at 5ml/gal each
Reduce Grow to 10ml/g each
Next feed half and half
8/19
Switching to 12-12 from 11-13 think its done its work changes are afoot
8/20
Colas forming quickly may have to flip the week to Flower, lets hope so 😉
They getting a dose of Kangaroots 5ml/g and Fish Shit 2ml/g at intervals during transition purely as plants seem to need.
Pics tonight
8/21
Not there entirely yet but wont be long at all
Vertical growth has picked up strongly, 2" in 3 days, though I really wont call it stretch yet
Continued light defoliation keeping center clear
Nuets as is for now
Likes
16
Share


@danwho
Follow
2-24, Day 59 harvest
Plants were all cut down together. Hung to allow tent conversion to drying setup and reloaded into the tent. Some nicer images were taken with the R100 cannon camera, and also a mix of images from my iPhone and my buddy's Note7. Current drying environment: 62F, 62% humidity.
2-26, Day 2 drying
The tent is very stable around 60% humidity and 60F. I have the tent set up for negative pressure to pull a slight vacuum, ensuring the air will turnover inside the tent, with one oscillating fan helping to distribute the humidifier mist. I have an external air purifier running with active carbon filters to manage the smell.
Likes
16
Share


@Mo_Powers
Follow
we have the first week of flowering behind us. the plant looks healthy, but is growing very slowly. unfortunately the german summer is a long time coming. we sometimes only have 8 degrees at night and not much sunshine.
Likes
6
Share


@MaestroBud
Follow
🌸 Critical Orange Punch – Week 6 Flowering | Enter Overdrive
Critical Orange Punch is now showing off its compact and resinous nature. The structure is becoming more solid, and the buds are starting to accumulate mass and sugars thanks to the initiation of the Overdrive phase in the Advanced Nutrients Master Recipe protocol.
Irrigation management has been optimized with 3 watering cycles per day via drip kit, to keep the substrate constantly moist but never saturated.
🔆 Combined lighting:
Phlizon FD9600 at 100%
Mars Hydro ADlite 100W for undercanopy coverage
🌀 Evolving climate control: The Trotec TTK 33 E will be activated on Friday evening in automatic mode at set humidity, with continuous draining, to maintain ideal levels during the most critical hours.
➡️ No additional boosters beyond those in the table. Maximum fidelity to the AN recipe.
Likes
38
Share


@Dmars
Follow
7/22 Day 112 from sprout, day 58 of flower. Well, this was unexpected. I came home and found I have multiple branches falling over due to the weight of the buds. I got them all tied upright now, but I honestly thought I was harvesting shortly. Instead, they are still chugging along and packing on more mass. I removed a few more crispy leaves and at this point anytime I reach into the tent it’s impossible to not have my arm absolutely covered in resin. I suppose I can stop checking trichomes for now, it’s almost as if she hit a new growth spurt suddenly and clearly needs more time. This does throw a wrench into getting the Mac N Jack moved into the tent, but I’ve spent almost 4 months now growing this beauty; I can’t screw it all up now by harvesting too soon.
7/26 Day 116 from sprout, day 62 of flower. This is where Ethos says the Fanta Sea should be ready for harvest. As super pumped as I am to finally chop her down, if I’m honest with myself it’s just not there yet. Doing a trichome check says it’s getting closer, maybe around 50% clear, 50% cloudy, and a very small amount of stray amber here and there. So on we go. Leaves up top continue to fade and dry up, and as they get crispy I rip them off. Pretty sure I’ve heard Dr. Bugbee explain that in late flower it’s normal for the plant to pull extra phosphorous from the leaves, seeing as how we are pretty light on P using a 20-10-20 fertilizer. So I’ll keep letting her get her fade on while checking trichomes here and there and hopefully we’re close to the finish line soon.
7/28 Day 118 from sprout, day 64 of flower. Getting closer. I did a deeper dive into checking trichomes today, checking a few different top buds, a few different middle height buds, and a few way down below in larf territory. Up top was predominately milky, a small amount of clear, and a few ambers here and there. This progressed to more clear the further down I went. I’ll wait until Sunday before I check them again. I also did lower the light intensity just a hash mark under 75% to more simulate “fall”. Maybe silly, maybe not, but I’m trying it.
Likes
4
Share


@Jonathanv1988
Follow
Haven't got the hand of the nutrient think it takes to long on my phone so I'll take a pic later when I flush out in 1 or 2 weeks hopefully I make the contest


