
Likes
Comments
Share


@eLeMeNt3de
Follow
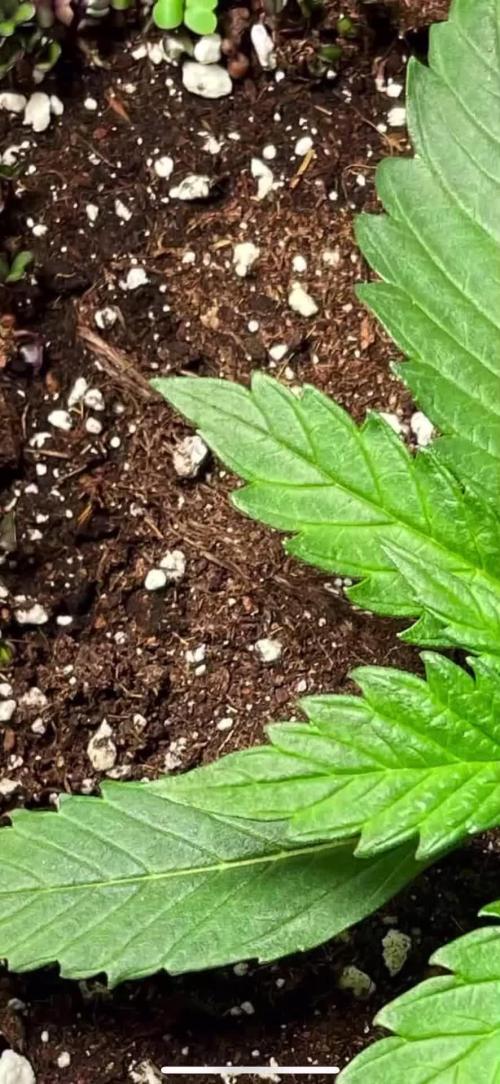
Fast Germination with this one, started to show a nice healthy root in about 7 hours. Easy simple and quick germination.

Processing
Likes
5
Share


@Ensign420
Follow
Week 02 Introduction
This week has been a bit of a struggle. Had my first experience dealing with slime and brown algae. But I think adding enzymes and increasing the beneficial bacteria helped to fix the issue. Also experienced nutrient burn for the first time. My nutrient solution strength got as high as 671 PPMs. So backed it down to about 430 PPMs during the end-of-week reservoir change. Also cut Hydroguard (expired?), CaliMagic, and Superthrive from this grow. Now she's still stunted, but is starting to recover. Hopefully...
[START OF WEEK 02]
Day 01 - Monday - 08/10/20 - Total Days: 008
-----------------------------------
- [0830]: Still looks a bit yellow. But getting larger!
--- Solution strength was at 248 PPMs.
--- Just topped off with a bit of distilled water
--- PH went up to 6.1 so PH'd down to 5.8
--- Ran the top feed for a bit to wet the hydroton.
- [2130]: She's looking even more yellow now.
--- Even the new leaves are really yellow.
--- Decided to add more base nutes.
--- Added 4ml of Sensi A
--- Added 4ml of Sensi B
--- Now at about
--- Solution Strength went up to 304 PPM.
--- PH was at 6,
--- Also raised the water level a bit more.
--- I really hope it's a nutrient deficiency and not an over-watering issue.
--- Please live!
Day 02 - Tuesday - 08/11/20 - Total Days: 009
-----------------------------------
- [0830]: Looking less droopy. But still yellow.
--- Decided to do a reservoir change.
--- 4.5gal of distilled water
--- 8ml of Sensi Grow A
--- 8ml of Sensi Grow B
--- 8ml of Voodoo Juice
--- 4ml of B-52
--- 4ml of CaliMagic
--- 4ml of Hydroguard
--- 4 drops of Superthrive
--- PH'd down to 5.8
--- Solution strength: 302 PPM
--- Since I didn't want to risk over-watering the rockwool, I did not to do a top feed, may do one tonight after the sleep cycle (lights are still set to go off at 10am and back on at 4pm).
--- As I was doing a reservoir change, I noticed that the tubes and bucket were a bit slimy. Didn't really stink or anything. Is this normal? Maybe due to the Hydroguard and Voodoo Juice?
--- I hope she gets better soon!
- [2215]: Getting larger! But still yellow.
--- Also can see a root growing through the net pot! Tiny little thing but it's there! Will have to start dropping water once more appear.
--- After looking over a few DWC diaries using AN nutes, seems like my solution strength is still too low. Most around this stage average around 500 PPMs with about 4ml per gallon.
--- Top fed for a minute to wet the top of the hydroton.
--- Solution strength went down to 263 PPM.
--- Added 8ml more of Sensi A
--- Added 8ml more of Sensi B
--- Now base nutes are at 16ml for 4.5 gal of water.
--- PPMs went up to 411.
--- Still lower than 500 PPMs, but that's okay.
--- PH was at 6. Not sure if I should adjust PH using AN nutes. So going to not ajdust unless PH goes above 6.1.
Day 03 - Wednesday - 08/12/20 - Total Days: 010
-----------------------------------
- [0830]: Looks like more root growth!
--- She still looks yellow. But leaves are perky.
--- PH was at 6.2 so lowered down to 5.8.
--- Solution strength was at 394 PPMs
--- Since roots are still growing, I decide to lower the water level a bit. Now water level is a bit below the net pot.
- [2200]: Root is getting longer!
--- Slime is returning. Not sure why.
--- Solution strength: 357 PPMs
--- PH: 6.1
--- Decided to add an enzyme along with more beneficial bacteria to hopefully cure the slime.
--- Added 16ml of Sensizym
--- Added 5ml of Hydroguard
--- Added 8ml of Voodoo Juice
--- New solution strength: 430 PPMs
--- New PH: 6.1
--- Top fed for a minute.
--- This slimy residue is really freaking me out! I hope the added enzymes will help eliminate the slime.
--- Going to do a full reservoir sterilization/nutrient change over the weekend. Please survive until then girl!
Day 04 - Thursday - 08/13/20 - Total Days: 011
-----------------------------------
- [0930]: I think the enzymes worked! There is little to no slime now!
--- Although I think the root was also dissolved in the process. It's now just a little stub sticking just below the net pot. The enzyme is also suppose to dissolved dead roots too but guess that root was too weak? Not sure what happened there. But I think the slime is cured!
--- Solution strength went down to 395 PPMs. Decided to add more base nutrients.
--- Added 8ml of Sensi A
--- Added 8ml of Sensi B
--- Added 4ml of B-52
--- Solution strength went up to 598 PPMs.
--- PH was at 6.1
--- As long as the PH is between 5.5 and 6.3, I'm not going to use PH Up or Down. But still will monitor PH levels.
- [1715]: Checked up on her after her nap and shes looking alive but stunted. But no slime!
--- Decided to add some sugars to help maintain the enzymes and beneficial bacteria.
--- Solution strength was at 587 PPMs.
--- PH was at 6.2
--- Added 8ml of Bud Candy
--- Solution strength went up to 671 PPMs.
--- PH also went up to 6.3
--- Lowered water level a bit to hopefully promote more root growth.
--- Top fed for a minute.
--- She is getting bigger, but still looks yellow.
Day 05 - Friday - 08/14/20 - Total Days: 012
-----------------------------------
- [0915]: Leaves look a little burnt on the tips. Still no slime.
--- Going to back off on the PPMs to hopefully fix the nutrient toxicity.
--- Solution strength was at 632 PPMs
--- PH was at 6.3
--- Added/Removed water until PPMs were at 536.
--- PH was still at 6.3
--- Raised water up a bit, then top fed for a minute.
- [2200]: Looking better. Still yellow though.
--- Solution strength: 514 PPMs
--- PH: 6.5
--- Added PH down.
--- New solution strength: 518 PPMs
--- New PH: 5.2
--- PH was kind of high. So decided to PH down. Had to use quite a bit to bring it down. But eventually got it to drop down to 5.3. A little low, but so far, the PH has always gone up so wanted to start it really low.
--- Ran the top feed for a minute to re-saturate the top of the hydroton.
Day 06 - Saturday - 08/15/20 - Total Days: 013
-----------------------------------
- [0830]: She looks stunted. leaves are still yellow.
--- Solution strength: 514 PPMs
--- PH: 5.6
--- Top fed for a minute.
--- Not sure what to do at this point. Going to do another reservoir change soon. Hoping she lives until then.
- [2145]: Looking pretty much the same.
--- A bit of slime has returned. Since I've been diluting the nutrient solution, the enzyme ratio has dropped. So I guess this is expected.
--- Also noticed that slime build up was on the air-stones. Never really checked the stones so not sure how long that has been there. Looks brown too, which can't be good.
--- Going to do an H202 sterilization of the system (minus the net pot) tomorrow so did not add anything.
--- Lowered the water level to below the net pot.
--- Then top fed for a minute.
Day 07 - Sunday - 08/16/20 - Total Days: 014
-----------------------------------
- [0900]: STERILIZATION DAY!
--- Decided to skip today's night cycle for a deep clean.
--- I'm hoping that skipping a night cycle won't be too stressful.
--- Temporarily moved her to a new bucket.
--- Used about a half of gallon of straight distilled water to flush out the net pot.
--- Drained the system and wiped up all the brown sludge. Also removed the air stones and cleaned up all the goo.
--- Filled the system with 2 gallons of distilled water and at least 30ml of food grade hydrogen peroxide (35% strength).
--- Yea its a lot, but since I'm not going to sterilize the system overnight, I went with a really high doseage. Basically I kept adding until I started to see little bubbles start to form.
--- Then I ran the water pump.
- [0915]: Boiled the air stones in tap water for about 10 min. Then reconnected them to the airlines.
--- I let the air stones and hose soak in the sterilization solution for about 5 minutes so the peroxide can absorb into the stones. Then ran the air stone to help mix and agitate the solution.
--- Occasionally, I'd repeat the process of turning the air pump off for a few minutes to let the stones soak.
- [1000]: Covered the top two row of holes of the net pot with some aluminum tape. Hopefully this solves the light leaking in through the hydroton.
- [1200]: Used an old toothbrush and scrubbed the pump clean. Then drained the system.
--- Refilled with more distilled water and peroxide. Again added a lot.
--- Ran system again to sterilize even more.
- [1530]: Drained the system and refilled with distilled water to rinse.
--- Ran the system for a few minutes, then drained and rinsed again.
--- Did this a few more times over about an hour.
- [1630]: Added 4 gallons of fresh distilled water.
--- Added 15ml Sensi Grow A
--- Added 15ml Sensi Grow B
--- Added 12ml of B-52
--- Added 16ml of Voodoo Juice
--- Added 16ml Sensizym
--- Solution strength was at 430 PPMs
--- PH was at 5.6
--- I was going to add Hydroguard, but I think the bottle is expired. Since 2017 or 2018!? I think Hydroguard is good for up to 2 years from the date on the bottle or 6 months after opening. So not going to use from now on. I wonder if this could have contributed to the slime build up.
--- Also removed the CaliMagic and Superthrive too. Going to only use AN products to eliminate the chance of incompatible nutrients.
--- Placed her back in the bucket and top fed for a minute.
--- Here's hoping for the best. Going to let it ride until morning! Please feel better!
[END OF WEEK 02]


Likes
9
Share


@MadeInGermany
Follow
Harvest day 62
since time switch
to 12 / 12 h
Hey guys :-)
Finally it's time 💚
The lady is done the large leaves have been removed and hung upside down to dry in the dark drying room.
You can now stay there for 13-15 days at a temperature of 16-18 degrees and 55-59% humidity.
After 13-15 days it is neatly trimmed by hand and placed in jars with boveda packs 62.
After 4 weeks Boveda 58% come in and are ready for testing ;-).
After everything has been cut cleanly, the last update comes with the smoke report and the finished pictures.
Let's get to the plant 💚.
Unfortunately, the rating system at Growdiaries is a bit strange because I have to give the stars before the Smoke Report and in the end it might have led to more stars in terms of taste.
. The smell is great I'm curious about the taste 💚
Have fun and stay healthy 💚🙏🏻
👇🏼👇🏼👇🏼👇🏼👇🏼👇🏼👇🏼👇🏼👇🏼👇🏼👇🏼👇🏼
‘Powered by GreenHouse Feeding’
Copy the link for 10% off all Nutrients 👇🏼
http://shop.greenhousefeeding.com/
affiliate/madelngermany_passiongrower/
👇🏼👇🏼👇🏼👇🏼👇🏼👇🏼👇🏼👇🏼👇🏼👇🏼👇🏼👇🏼
Water 💧 💧💧
Osmosis water mixed with Cal/Mag (24 hours stale that the chlorine evaporates) to 290 ppm and Ph with Ph- to 5.8 - 6.4
MadeInGermany

Processing
Likes
84
Share


@Beans
Follow
Trained hard AF this week. Couldnt have done it without the help of my man apollo creed and rocky's face. The real credit belongs to the montage though. Without it we would still be watching rocky II wondering who was gonna win.

Likes
60
Share


@Drgreenthumb627
Follow
This strain grew tall and lanky, with very compact and beautiful nugs. the frost that came out is quite incredible and the fruity sweet and piney smells coming off the plant are lovely. i would definitely grow this plant again, it was easily trainable and the node spacing allowed light to penetrate deep into the canopy, maximizing my grow surface area


Processing
Likes
15
Share


@Messypies
Follow
amazing growth this week from all 3 plants. The peanut butter cookies is recovering from the transplant. Both the auto cheese and auto cinderella jack have both started to show signs of flowering and have bushed out incredibly well. The pbc has had its first top done and has started growing 2 extra nodes.
07/08/2020 - training has been done on all the autos. They have recovered extremely well and seem to not be slowing down. Finally starting to see the type of flowers I have been striving for. After a semi unsuccessful first grow, this has been a huge relief. Both autos are now showing signs of going into flower so I will try to stop LST unless any unruly branches form.
The peanut butter cookies has now started to fully recover from the transplant and topping. Will now allow this to flourish and grow as big as it wants as both autos should be done before its too big (hopefully)


Likes
12
Share


@Roberts
Follow
Super Skunk is doing good. She is starting to stretch. I did a solution change on her yesterday. I will likely do another next update. I think I reduced it in grow. And not bloom. So I will do the swap soon. Thank you Spider Farmer, Athena, and Spliff Seeds. 🤜🏻🤛🏻🌱🌱🌱
Thank you grow diaries community for the 👇likes👇, follows, comments, and subscriptions on my YouTube channel👇.
❄️🌱🍻 Happy Growing 🌱🌱🌱
https://youtube.com/channel/UCAhN7yRzWLpcaRHhMIQ7X4g.


Likes
3
Share

@TerpShelf
Follow
🚀 Strain: Puppets Genetics - Gamper 🚀
Stage: Vegetation | Day 17
Medium: 4.6L Bottomless Pots
Status: Growth steady / Temps currently low ❄️
* Day 15: Successfully moved to 4.6L bottomless pots.
* Day 17: Settling in; thriving despite the chill.
* Day 21:Leaves are developing unusually
Likes
8
Share


@Random80
Follow
I smell trouble :/
well, actually the smell changed dramaticaly and I was overwelmed after opening the tent. But the trouble I smell are brown spots on the leafes that appeared on few more places. Maybe fungi? Did some googling and now I am not sure of anything :/
Other than that she seems healthy and is only affected on few places so I am not going to change anything in fertilizing for now. However I did took some steps...more defoliation to increase air streaming trough center of the plant, increased fan speed, disconect from autopot and dry out the root, took away (hopefully) all of the affected leafs.
She was given 8ml of BIO PK5-8 together with 4ml of orgatrex diluted in 2 lit of water. I will keep hand watering her with orgatrex only during next 2 days before I need to leave again. Could that be lack of nutrientes as I am acctually keeping her in autopots most of the time?

Likes
4
Share


@Naujas
Follow
49 days!!! it looks really cool, its flowers are starting to bloom a little, you can already see the "sugar leaves" :) this week was quite rainy, but there were 3 days that were really cool, it only got as much sun as possible on my balcony :) 6.3 ph water, with biobizz gave it what it wants :) good luck to everyone :).

Likes
133
Share


@PapaNugs
Follow
Great week inside this tent. The girl got her topping and then recovered over the week. There were already some good side branching and now they are being trained even more. Flipping to flower now.
Lights at 40% power.
Here are the lights details:
Medic Grow Mini Sun-2 150W LED
Model: MN150-022
Spectrum mode: V1
Efficacy: 2.8 umol/J
Thanks for stopping by!
You can find the light on Grow Diaries:
https://growdiaries.com/grow-lights/medic-grow/mini-sun-2-150-watts
You can find the light on Medic Grow's website:
https://medicgrow.com/

Likes
30
Share


@Fatnastyz
Follow
Chopped this lady on her 70th day!
Branches all were bent from being heavy!
Loved this strain very much. Super excited about the soon to come smoke!
This stinky sweet stuff
Started the dry, trimmed the buds and set em up. Temp 68F ( the best I can) and RH 62-65%
Flipped every 12 hrs.
Another in the books for me! I really enjoy the LST grows, very easy!
Now to figure how to make the buds FATTER!!
TYVM for the follows, likes and support through this grow. 😍
Looked forward to many more and hanging with you then!
MUCH LOVE!😍👊💪🙏
Likes
42
Share


@Only4passion
Follow
First feeding of week 3 juste before taking pictures!!
😁🍀✌️
Day 17 one of the gorilla melon looking not really happy after feeding!! She was doing great I don’t really know yet if it’s a deficiency or over feeding but I’ keep an eye on it 💚✌️
Day 18 I accidentally dropped a full bottle of water on my gorilla melon, which split in two at the base and break the pot😭she wasn’t able to stand alone so I hold her luck she continue to grow 🍀💚✌️


Likes
4
Share


@SuperGluedGrow
Follow
Number 2 pheno might herm on me so I have to watch but I have limited plants and I really want to keep these genetics so I need atleast one female. Number 3 the mutant stopped growing before I topped, or maybe not stopped but it threw out pistils at the apical meristem and not producing leaves so I topped to see if I could promote side growth but it hasn't worked; I'm going to keep her around just for the fun of it. 4 is my hope of producing female and a good clone.


Likes
9
Share

@Bread_n_Buds
Follow
Our first Monster Dwarf Automatic is a bit ahead of its little sister. The flowers have swelled nicely, and like its little sister, they're super full, full, absolutely full of resin, and it smells amazing. Oh my god, what a smell! Believe me, I hope one day they'll invent something so we can exchange scents remotely. A marvel of nature and Zamnesia.
It has a very strong smell, I think it's skunky. I need to dig deeper and smell it better, it's crazy right now. I'm out of weed, and when I smell these smells, my brain goes crazy, like dancing red ants or a beautiful girl you can't have (or the opposite, or whatever you want, of course). Gender isn't a problem for me as long as I don't find a hermaphrodite in the plants, which I've never seen with Zamnesia). The phenotype is the same as its little sister; like all the blue packages of the more classic Zamnesia strains, it's very stable.
Wow, what a smell! I repeat, what a smell! You should smell it to understand this plant.
Techniques chosen - Here we opted for a gentle LST, which gave the plant a beautiful shape.
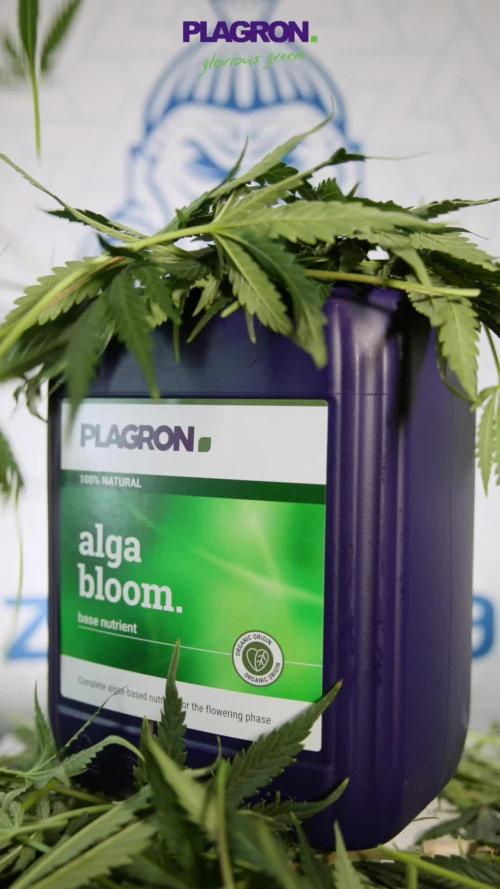
We are 100% organic and 1000% Plagron, as always.
The soil we chose is the recently launched Plagron Bio LightMix, which will allow us to start growing more smoothly and reliably, without the sudden changes that liquid fertilizers can cause. A week is enough, so don't overdo it.
We're in the final flowering stage and things are starting to get serious, so let's add our legendary bloom stimulator and get started with Bloom.
- Pure Zym 1 ml/l
- Silic Rock 1 ml/l
- CalMag Pro 1 ml/l
- Sugar Royal 1 ml/l
- Power Buds 1 ml/l
- Alga Bloom 0 ml/l (Too much dark juice additives to boost buds)
- Green Sensation 1 ml/l
Ready to flush, started on the day of the photos, but last week she was fed only additives to give the flowers a final boost.
Choose your preferred style and calculate your results on the website:
www.plagron.com
Z - https://www.zamnesia.io/it/531-growshop
A great strain, smells like heaven!
Z - https://www.zamnesia.io/it/4330-semi-zamnesia-monster-dwarf-auto-femminizzata.html
Z - Monster Dwarf Auto is a new addition to the Zamnesia range. Extremely compact, it's the size of a bonsai. This autoflowering strain boasts numerous qualities. To create this hybrid, Zamnesia combined some of the best autoflowering strains with an exceptional Skunk female, retaining all of its autoflowering characteristics.
Her name should already give you an idea of what to expect from this plant. Monster Dwarf Auto is small and mighty! As it grows, it maintains a very compact structure, never exceeding 40-60 cm in height, proudly displaying a large quantity of compact, elongated buds towards the end of flowering. This strain is suitable for small grow spaces. It performs equally well in larger grows, both indoors and outdoors, and requires no special growing skills to achieve excellent results in about 8-9 weeks. Given its autoflowering nature, even less experienced growers can easily achieve excellent yields of 60 g per plant, without requiring any special attention.
Thanks to its Skunk genetics, it's no surprise that Monster Dwarf Auto is capable of releasing very intense aromas and developing beautiful, compact buds completely covered in resin. Its Skunk lineage is also evident when smoking it: the effects are worthy of an incredible Skunk hybrid, full-bodied and very relaxing, yet capable of keeping you sociable without being overly heavy.
Monster Dwarf Auto is a small, fast, and easy-to-grow plant. Despite its small size, it stands out from other autoflowering cannabis strains!
You know it, but I recommend it. Here you will find so many wonderful things, essentially "all the best that nature has to offer."
Z - www.zamnesia.com
Music //
www.radionula.com
+ Feng Shui Music
+ Frequencies 432 Hz
