Likes
Comments
Share
Dry weight including airy lower buds from 6 plants is roughly about 16-17 oz.

Likes
37
Share
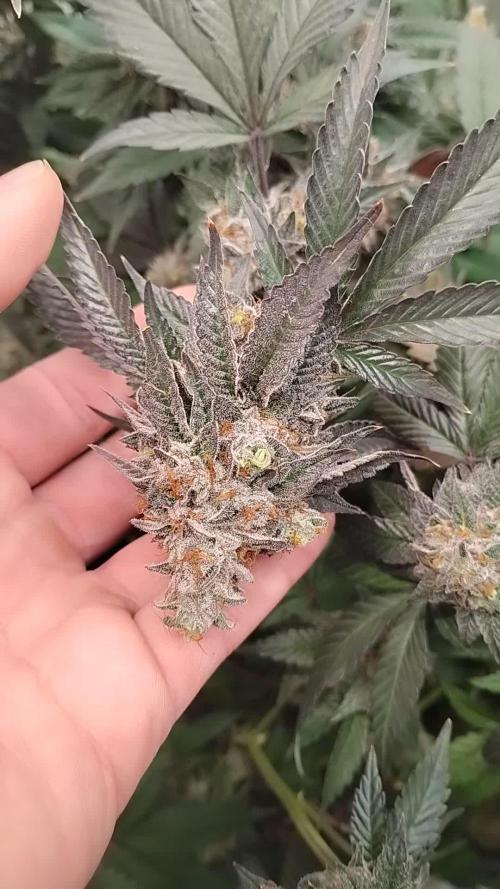
Day 70 for these Fastbuds beauties Blackberry Auto: With dark purple buds glowing fiercely and a dank smell to match, this girl could make anyone's tent look amazing. During the last few weeks her buds have become incredibly dense and sticky. She is very short and thick in stature compared to the other plants I have in flower. I inspected her trichomes over the weekend and ive determined that she is pretty much ready for harvesr. I expect about 2 oz of high quality flower after dry/cure. Forbidden Runtz Auto I'm really blown away with the turnaround in this girl. She was mutated & so small I almost tossed her out during early veg; I'm glad I changed my mind. She stretched significantly between weeks 4-6 and I really wasn't expecting much from her. In reality, she has blown my mind... incredibly dense and sticky buds have developed in the past 4 weeks. She's got the zkittles smell mixed with a gassy terp profile.. I think the higher humidity through flowering phase really helped develop these dense buds. When I checked her trichomes over the weekend I determined that she will be cut down within the next 7-10 days. Process/ Environment changes: - Lowered my SF4000 roughly 20 cm to increase photon delivery to the canopy - Water/kelp meal only from this point to harvest - My temperature has risen due to change of seasons .. roughly at 27-28 deg C during daytime.. this is why I lowered my lights rather than turning them up - Defoliating any unnecessary fan leaves at every chance I get - I've had to use spools of twist tie to use to keep the branches from falling over from their own weight. I'll tie one end to the top of a branch, and the other to the stock. Not ideal but its working. Cheese auto dry/ cure update: After 10 full days of drying, I gave the buds a decent trim and put them inside glass jars where they will remain for many weeks. I add 2 way Boveda humidity packs to help regulate the relative humidity within the containers. I also use tiny hydrometer pucks to measure the humidity and temperature inside the jars. My ideal cure is at 62% RH
Likes
12
Share
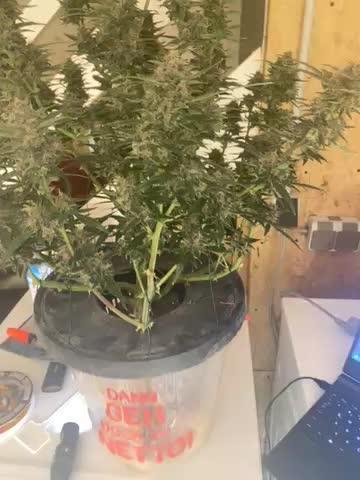
Arrancó la floración. Las plantas se fueron bastante arriba, así que estas dos semanas voy a estar aplicando lst para manejar la altura y no estresar a las plantas en floración. Es una variedad de floración rápida y 90% indica, por lo que no espero un estirón muy fuerte. Por el momento elegí usar EMRO desde el principio, dado que la reacción de las plantas fue mejor que al bioestimulante en las aplicaciones foliares. El presupuesto no me dio para delta9 esta vez. Pero la próxima espero que si. De todos modos le tengo mucha fé a la combinación de los dos productos usados. Estaré actualizando. Es el 5to día de flora y las plantas vienen mostrando un estiramiento medido. Por suerte tengo lugar para manejar la altura. Pero aún así voy a tener que agrandar el depósito ya que cada 2 días debo agregar agua. 18 litros no son suficientes para este tamaño de plantas. Pero voy contento con los resultados. El bioestimulante que usé no es muy bueno. He visto mejores reacciones con delta 9. Día 7. Tuve que usar LST obligado para intentar poner las plantas a la misma altura. Al final la pequeña de atrás no prosperó demasiado, así que va a quedar ahí y sea lo que sea. Por el momento las yemas no se muestran tanto, pero eso es la falta de un bioestimulante de calidad. De todos modos por el momento los resultados son buenos y las plantas están fuertes y sanas. Ya estan a 20cm de las luces y voy a tratar de mantenerlas ahí o como muy cerca a 15cm. Mañana cambio el depósito y repetiremos las fórmulas con un poco menos de EMRO.
Likes
32
Share
@Sadhus
Follow
A mon avis le boom florale arrive sur la fin et la maturation va commencer, l'odeur est vraiment incroyable !
Likes
15
Share
@RakonGrow
Follow
Hello and welcome to the last week of vegetative growth. The ladies have been in the flowering tent for a day now and feel refreshingly comfortable at DLI 37.23 . Enough wind is provided . May Gaia have a productive effect . Day 32: +Pantine ++ 2.5 L Bottlewater (EC 0.315) (PH 7.5) +++ Rhizotonic +++ Terrar Vega +++ Cannazym +++ CalMag ++ Final PH 6.0 + EC 0.425 Day 34: looks like the ladies have a problem, the leaves are hanging
Likes
64
Share
The plants streched a lot this week! The flowering has started 😎 I made a last defoliation to give some light to the lower buds. I started to give some BioBloom. It's impressive how much these plants must drink, this is the first time I have to water every day! Plants heights at the end of the week : ------------------------------------------- Gorilla Cookies : 90cm Purple Lemonade : 69.5cm Wedding Cheesecake : 89cm
Processing
Likes
5
Share
@MUDBUG
Follow
Almost CHOP CHOP time will give a full report one day but I can tell u this if I wouldn't of topped this plant no telling how big she would of got she had a 25 inch stretch after topping so u do the math this can easily be a 80 inch plant ✍️✍️✍️✍️✍️🔥🔥🔥🔥🔥🔥
Likes
26
Share
Day 8 08/07/24 Monday Light water with De-chlorinated tap pH 6.2 with half t spoon of DyNoMyCo. They seem to be loving it!! Germination week complete, Let's start the VEG 🤩 Updated short videos of strains ,✌️💚
Likes
97
Share
Hi people! I have nothing special to say. you can see everything in the photo! and all this can be summed up in one word! Perfect! it begins to show dark colors in buds, as well as on large leaves from the stem. in the photo this is not yet noticeable, but the eye already sees the manifestations of genetics! and I think that further it will only become more beautiful and more colorful!
Likes
19
Share
@Tommy716
Follow
Well my lovely ladies grew wonderfully it was my first grow with LED. Definitely a little learning curve still. I ended up with about 700 g out of eight plants not too bad for the size girl over my head. The smoke is amazing smooth with a henna citrus then knock you on your butt I did harvest plants at different time so I do have different outcomes some is a little more of the knock you down while others are a little more energetic. Great girl have lots to learn will continue to post in here love you guys.
Likes
17
Share
@m0use
Follow
This was a fun project that was a few years in the making and a year later to see if they would last a season for this upload to happen. Before any of this I would bike aorund town grabbing up all the old Ikea solid pine bed slats that I could find and storing them in the basement. I have a lot of wood down there, any size worked as long as I have enough of them. The hot days to find them were the first and last of the months because that's when people where moving in/out. I also kept an eye on the free section on local online classifieds as well. The entire purpose of this was to recycle as much off the streets as I could before buying anything to finalize the project. In the end I only bought sealer, screws and some takeaway/beers. All the wood was 100% free and salvaged off the streets of Toronto saving it from the dumpster bin. After collecting all the slats for about 2 years I was playing aorund with them on how I wanted to make this work. I had previously done a little project like this before but I messed it up and the boxes where crap. did not last longer then 2 seasons, they where thin and shallow as well could not grow much of anything in them. I Was talking to my friend who is renovating their house and we brainstormed some ideas on the boxes, I found some designs I liked online and said lets make something like this out of what I have here. We tossed out a few of the design features when looking at them as it would have been wasted wood and extra work not needed. If I had more wood them maybe it could have been an option but simple was the name of the game. They taught me what I needed to know like how the miter saw and sander worked, plus all the other tools I was using. They did help out with a table saw and creating the triangle support joints in the corners, They used some pine left overs they had while making a staircase indoors. I did not feel up to the task of using a table saw given all the relatives I know who have lost a finger to them. In the end we decided the design would be three boards high and take an alternating pattern on corners. layer one short, layer 2 long, layer 3 short. Went with a galvanized and painted deck screw so it can take the weathering. Ran into some problems like making everything level as some of the boards were warped and other ones had undesired aspects like knots and tacky sticker goo I could not remove. So I used them for the base that will not been seen so much. Clamped everything down and called it a day. Once it was all done and over with, I then brought them back home from my buddies work garage and started to seal them. I went with a boiled linseed oil as its a food safe option should the wood degrade into the soil I will plant in them. I will need to reapply it to the boxes year after year but the main coat is the most important one and I put it on 3 layers with a good dry in between coats. the inside of the boxes that where coated did not degrade at all as the sun did not hit them so it will not need a new coat just the outside. Overall the end result was very impressive for myself, I've never taken a woodworking class ever and It was a near perfect outcome for me. Heavy Duty Planter Boxes for all my gardening needs. I made a last min decision to add in a plastic liner to preserve the wood even longer and stapled that into the frame. it has held up quite well and may need replacing end of 2nd or 3rd year out in the sun. Used a thick moisture wrap plastic with UV protectors in its formula. Lets see what I can grow in them this year! m0use's haus of projects - garden box edition
Likes
37
Share
@Aedaone
Follow
The temperatures, humidity, and watering volume(if measured) in grow conditions are all averaged for the week. The pH is soil pH. Any watering done by me is well water which is 7.6 pH and 50° F. Any listed nutrients are ml/gallon of soil spread evenly across the top of the soil. Day 1 we had a high temperature of 85°F with sunny skies. I watered 3-5 gallons from the hose. Day 2 we had high temperature of 87°F with partly cloudy to cloudy skies. I watered 3-4 gallons from the hose. I added 100 ml of blood meal spread evenly across the top of the soil. Day 3 We had a high temperature of 85°F. It rained the previous night and intermittently raining and thunderstorms today. I did get these trained a little this morning. It's not the prettiest but I took some foliage off and opened them up by tying the branches to stakes arranged on the outside of the pots. I added 50ml plant tone and 50ml feather meal in top of the soil. The rain is watering today. Day 4 we had a high temperature of 73°F and all day rain. The rain was what remained of hurricane Beryl. There was a lot of wind up to 20 miles per hour. These girls handled it and loved the rain. Day 5 we had clear sunny skies and a high temperature of 85°F. I fed 150 ml feather meal and 45 ml Coop Poop. I watered 3-5 gallons from the water hose. Day 6 we had a high temperature of 86°F and partly cloudy skies. Plants #1 and #3 developed powdery mildew on their lower leaves. The #2 plant is showing immunity. I'm going to treat for the next 5 days with Arber organic biofungicide. I ran the fertilizer a little hot the girls are clawing and super dark green this evening. Day 7 we had a high temperature of 85 with partly cloudy skies. This week was a success. The girls added height and began flower. The powdery mildew that developed on #3 and #1 is minimal and only on the lower leaves. I'll remove these and try to get them a little more air flow. The girls have been so hungry now that they've gotten some size. The soil I used was recycled organic and had a lot of built up phosphorus from on my previous runs, which meant I couldn't add anything with phos as it would push them to lockout. It's finally playing out and I'm barely keeping these girls fed with enough nitrogen. The nitrogen I added actually had the leaves clawing about 6 hours after I added it. It wasn't bad and you can see on day 7, the girls were already back to business as usual. I finished topping these pots off with soil. The Sun plays a big part in my plants growth. There is very limited room with lots of morning and evening shade. That's why some of these were growing more on one side than the other. It's now changed direction and I've moved the plants to their permanent spot in the garden.
Likes
22
Share
@Mazgoth
Follow
It’s growing really well and she is tall enough for her 6/7L pot,I give her half of royal queen organic nutrients and the plant next day was happier than ever,I think she will be tall and fat NOTE:I’m not using all of them,some times I’m using half dose biobizz and half from royal queen,some times only biobizz..
Processing
Likes
45
Share
Hi guys! Week 4 has been my favorite week so far... plants are recovered and looking healthy if you compare the beginning of the week to the end it's dramatic :) They have been growing so quickly. It's awesome finding new growth every morning !. Im happy with the way the stress training came out. I've opened up the canopy on BDM 1 to allow as much light as possible to hit the potential bud sights. This will be the last week of veg.. bring on those blue dream buds !!! Happy holidays fam wishing you all a dank n heavy yeild!💚😊🌱
Likes
31
Share
@Reaper
Follow
week 7 flowering. the smell is all over the house i hope to harvest next week. i think they both got another 2 weeks left, not much of yellowing in the leaves but they get more to the yellow side here and there. the branches need support, very dense and heavy buds. next week i will chek the trichomes and decide to go another week or cut them down. what are your toughts on harvest time by watchong these pictures/vid ?
Likes
1
Share
Smooth trim and harvest, very time-consuming. I think we spent over 8 days working on the autos. Now I can rest until early September.
Likes
42
Share
⛺️ MARSHYDRO 💡VIPARSPECTRA 🍼GREENHOUSE FEEDING BIO GROW 🌱 WEEDSEEDEXPRESS