
Likes
Comments
Share


@OutForReal
Follow
🍎🍑🍋🍐🍏Fruity Jack Part.2 🍌🍍🍒🍊🍇
Song of the week : Konshens - Bassline
----------
She is now heavily feed like you can see the EC is reaching 2.2 but I have some difficulties to adjust the PH ( no PH down or up at home ) but 6.1 will be ok , next time it will be higher let's just hope that she will not suffer from the PH variations

Likes
283
Share


@love_2_grow
Follow
FD36 - True to form I completely forgot to take any pics before the lights were out. The third week in a row. I'm detecting a pattern... lol
FD37 - Pics!
FD38 - Today, I was proactive in trying to prevent botrytis (budrot) since I have had problems in the past when temperatures and humidity get too high in late flower.
I started with defoliating hard by removing fan leaves. That should lower the humidity in the tent as there are fewer leaves to transpire moisture, and also increase the airflow around the buds.
Finally, I put my small humidifier in the tent to further lower the humidity.
FD41 - The anti-humidity measures are working. The tent went from an average RH in the high 60s to the high 40s. (The average RH in the last 24 hours was 48.9%.) I'm happy with that, which should be enough to avoid budrot. Better safe than sorry, so I did additional LST to open up the plants and thus increase the airflow around the buds. It's also helpful to increase light penetration, so win-win.
FD42 - We're at the end of the sixth week of flower, and things are chugging along in the tent. The buds are slowly fattening up, but it will take some time before they are done.
There isn't much to do in the tent this late in flower besides watering. Today, each girl got 2.5-liters of water @ pH 6.5.

Likes
9
Share


@STAYINGONMYMAINCBATORUNTWO
Follow
Best flowers in the whole grow forming with these runtz! Amazing amount of bud sites regardless of bud blood or bud ignitor both plants developed so many and flowers are looking amazing under the mars hydro eco (discontinued) along side the ts600’s got some amazing shots hope you like and will continue to impress!

Likes
11
Share


@Organic473
Follow
No nutes this week just a little defoliation this girl would seeded from the skunk male close to her looking out for a bag full of seeds.
Likes
3
Share

@Wizardgreen317
Follow
Smell at night is stupid crazy smell like cake and weed , the noses are crazy on both strains but yeah I’m definitely growing some blueberry cupcake next go around. Yes, the strains are amazing and available at North Atlantic seed company for 15 dollars for three seeds. I had popped six seeds everything germinated.. really good seed . These plants where about four weeks veg 7 weeks in total but yes very easy but really got moody in transplanting but but yes Im please so far these are pheno hunt seeds photos not auto but they have the same deal for them to. Also the colors are coming in strong very light green with purple outlines on the cheese danish x gmintz and the blueberry muffins x nf90 s1 is smelling like cake straight up when prune the bottom leave it make the room smell amazingly like cake .this could be something special in both these strains .

Likes
12
Share


@CanadianFillmore
Follow
Week 4 begins for LSD and Green Crack. Moved both ladies to their new home, 4x8 vivosun tent. They look happy and healthy. Did a heavy defoliation this week.
Thanks for stopping by growfessors 👽🌳💚

Likes
56
Share


@Cannabeast40
Follow
The cold is taking a toll, that’s for sure. Still looking decent but I’m sure I’ll get my fight with this one
________________________________________________________________________
Light from @MarsHydroLED 😎
FC-E6500🔥
730 Watt⚡️💥
2.85 μmol/J🔥
Full Spectrum 🌈
WiFi smart connection 😱

Likes
22
Share


@CampExotic
Follow
Checking trichomes for cloudy looks. Still got a ways to go
Flushing started 1/1/21
Reading trichomes is tough


Likes
15
Share


@MrJones
Follow
Mr. Jones Fast Buds Moby Dick
╰⊰´🌿 ╰⊰´🌿 ╰⊰´🌿 ╰⊰´🌿 ╰⊰´🌿 ╰⊰´🌿 ╰⊰´🌿
🏡Indoor - 3"x2.5"x 4" Custom Built Grow Closet
🌾This strain likes to stretch, so a heavy training regiment will be needed.
🗓️Germenation - Soaking in Water Strait into Amended Soil.
⚱️3-Gallon Pots 📊6.4 / 6.8 PH
💧 Feeding - Gaia Green Grow / Bloom
🕷️ IPM - We will be using Green Cleaner" 1 OZ per Gallon, and CannControl from Mammoth alternating between products each month for Integrated Pest Management.
🌿╰⊰´🌿╰⊰´🌿 PLANT UPDATES 🌿╰⊰´🌿╰⊰´🌿
🗓️Saturday- 12.16.23 Having to deal with WPM, what a drag to see these ladies slow down because of this, using Mammoth CannControl, should see them bounce back quickly, the buds are rock hard and smell amazing!
🗓️Sunday - 12.17.23 Plants looking great today, uploaded a video.
╰⊰´🌿 ╰⊰´🌿 ╰⊰´🌿 ╰⊰´🌿 ╰⊰´🌿 ╰⊰´🌿 ╰⊰´🌿
📝 Notes - Original Moby Dick Auto is a world-renowned Sativa-dominant giant created from two of the most popular strains ever, the White Widow and Haze cannabis strains which are known for the huge delicious aroma, huge size and yields; It’s an extremely easy-to-grow variety highly recommended for growers of all levels seeking for maximum yields with minimum effort as this strain grows up to 150cm and yields up to 650 g/m2 in 10 weeks without extra maintenance. Thanks to its 23% THC, this marvelous hybrid is all about happiness as it will melt your worries away while boosting your mood, leaving you with a big fat smile on your face and ready to get things done as soon as you take the first hit, making it an excellent choice for social scenarios and busy workdays. The Sativa effect comes hand-in-hand with a mix of lemony, piney, and woody terpenes that translate into that classic aroma every stoner loves.
╰⊰´🌿 ╰⊰´🌿 ╰⊰´🌿 ╰⊰´🌿 ╰⊰´🌿 ╰⊰´🌿 ╰⊰´🌿

Likes
34
Share


@The_Bearded_Grower
Follow
So this is day three of pre vegetation that means the seeds have not yet broken the soil completely and grown their first true leaves. Not much to really say at this point they all are growing roots and doing very well so far. I'm just using tap water at this point. An important note to make these are seeds from a company called 7 East genetics here in Ontario Canada they shipped me my seeds in good time although Canada Post was slacking LOL. Can't wait to see how these babies grow and I very much hope they live up to their name.


Likes
16
Share


@HowtoBubatz
Follow
My camera died serveral times so i had to do some photos for this week. I hope i get it repaired for the next week.
Another week passes by and i defoliated some leaves again.
I LSTed the plant for the last time and will now let it grow without influence as possible.
Maybe i should use a trellis net now would be the perfect time.


Likes
39
Share


@Antares
Follow
Plant is doin ok
I noticed she's a little bit smaller than other phenotypes, but soon she will grow like a monster as she prepares for flowering stage, so I decided to start LST. As you can imagin guys, is my first LST and you may guess what happened 😢 Yes I broke a branch (with little sprouds) , Will I have serious consequences at harvesting?
****I confess i smoked the broken branch and the leaves (haven't smoke in months!)
Man, now I can see this will be some trippy sh^t****
Likes
5
Share


@Samsemilla
Follow
Auch diese Woche ist eigentlich alles gut gelaufen.
Die Luftfeuchtigkeit ist relativ hoch und das wird vermutlich noch Probleme bereiten.
Ich habe schon zwei Luftentfeuchter im Zelt platziert, die helfen allerdings nur bedingt.
In Zukunft werde ich wohl doch weniger Triebe stehen lassen und mehr ausdünnen, gerade im unteren Bereich.

Likes
22
Share

@DevelGrow
Follow
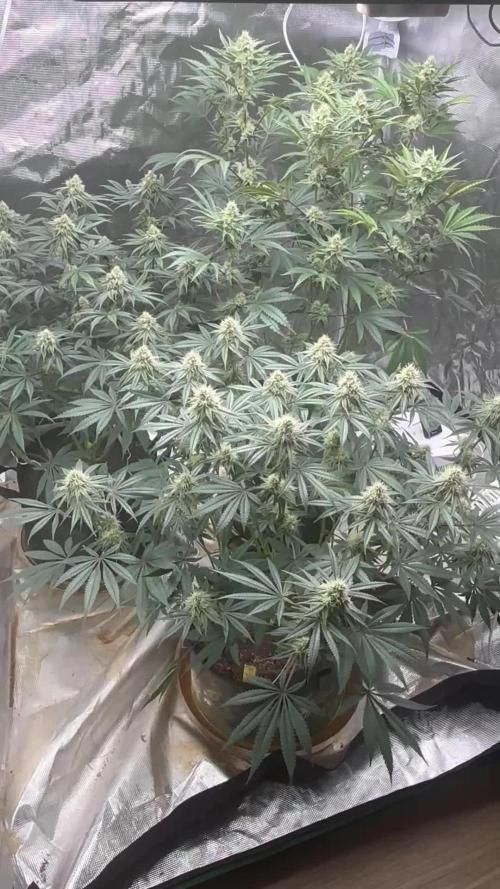
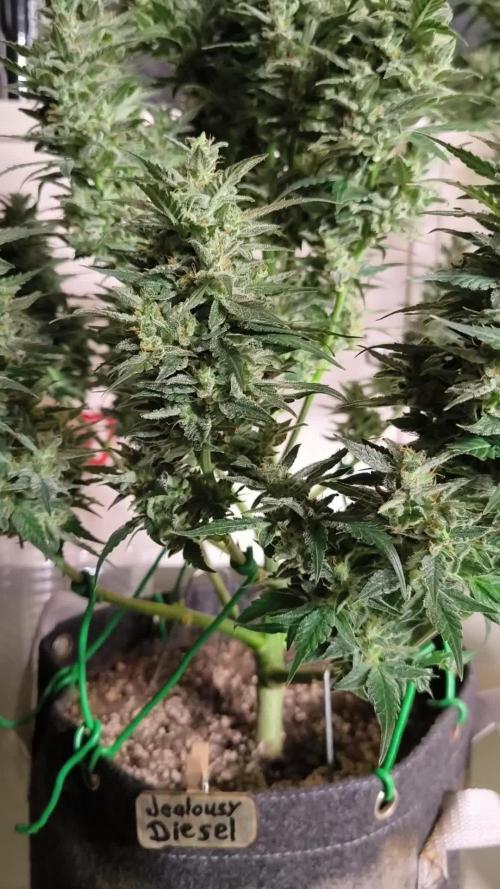
Hallo Freunde 👋 Jealousy Diesel sind 84 Tage Alt und nähern sich dem Ende entgegen! Beide sind schön harzig und klebrig und haben sich zu wunderschönen Pflanzen entwickelt! Noch ein paar Tage und dann ist es auch mit dieser soweit für die Ernte ✌️ keep Green and grow High 🍀💚🍀
Likes
7
Share


@Meksi2790
Follow
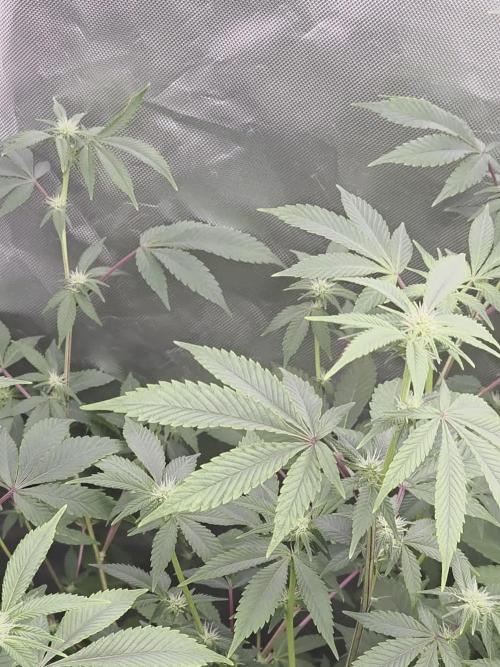
week 4 plants look nice slight nitrogen def pumped up the dosage on the nutes
Likes
9
Share


@Icedoutgreen
Follow
Die Woche läuft eigentlich ganz gewöhnlich, keine besonderen Vorkommnisse. Die Blätter fangen so langsam an sich zu verfärben und die Herbstzeit ist angebrochen. Bereite mich schon so langsam auf die Ernte vor.


Likes
38
Share


@MrSpooky882
Follow
Die Woche war solala, man sieht ja die überdungungs Erscheinungen und ich habe eine Woche ausgelassen bzw es nicht geschafft es hier zu aktualisieren, aber gut aus dem Fehler lernt man halt 😅😁
Sie sind auch so gut wie reif, heute noch einmal ohne Dünger oder booster gegossen und ich denke in 3 - 4 Tagen, wird das Licht ausgemacht für 24h und dann geht's ans ernten,trotz überdungung riechen sie wirklich gut und sind sehr fest und frosty 😁😏
Also mal sehen was bei raus kommt ich bin gespannt🤔😁 ansonsten wünsch ich eine angenehme woche!
🤜🤛
The week was so-so, you can see the symptoms of overdunging and I missed a week or didn't manage to update it here, but you learn well from the mistake 😅😁
They are also almost ripe, watered again today without fertilizer or booster and I think in 3 - 4 days, the light will be turned off for 24 hours and then it's time to harvest, despite overfeeding they smell really good and are very firm and frosty 😁 😏
So let's see what comes out, I'm curious🤔😁 otherwise I wish you a pleasant week!
🤜🤛..
