The Grow Awards 2026 🏆 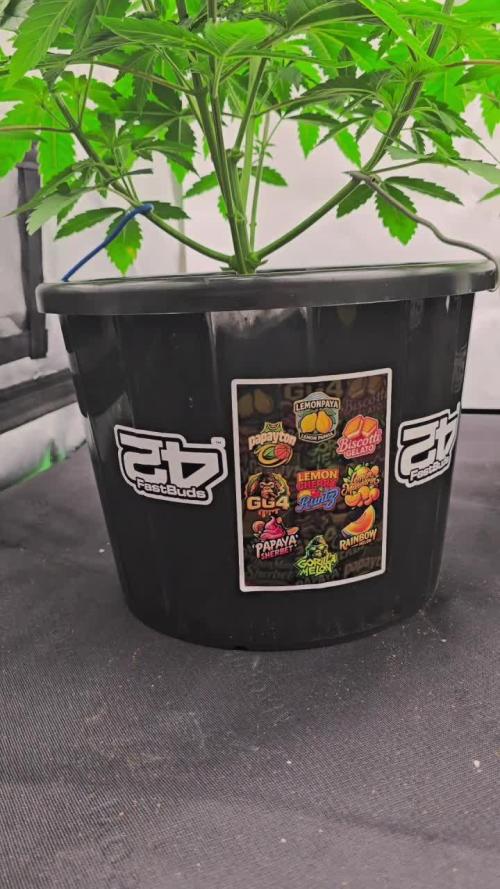


Likes
1
Share
@IslandTerps
Follow
Strain: Fast Buds – Mixed Photoperiod Trio
Grow Type: Indoor
Pot Size: 3 Gallon (x3 plants)
Medium: Peat Moss & Perlite
Nutrient Line: Athena
Week 4 Update
These three are really taking off now, strong growth, wide leaves, and the kind of energy you love to see right before flip. Each plant’s growing a little different, but they’re all healthy and filling out fast.
The canopies are thick, branches stretching nicely, and they’ve handled their feedings perfectly all week. I’ll be flipping them to flower now that they’ve hit that sweet spot in size and shape. Things are looking good can’t wait to see them start stacking soon.
Feeding
1.7 L Athena nutrient mix per plant (will increase gradually if needed).
Indoor Climate Conditions
Temperature: 18–23°C
Humidity: 60–65%
VPD: ~0.5–0.8 kPa
See y’all next week! And don’t forget to use my discount code ISLANDT for 15% off your next order at Fast Buds!

Likes
4
Share
@GandalfsHat
Follow
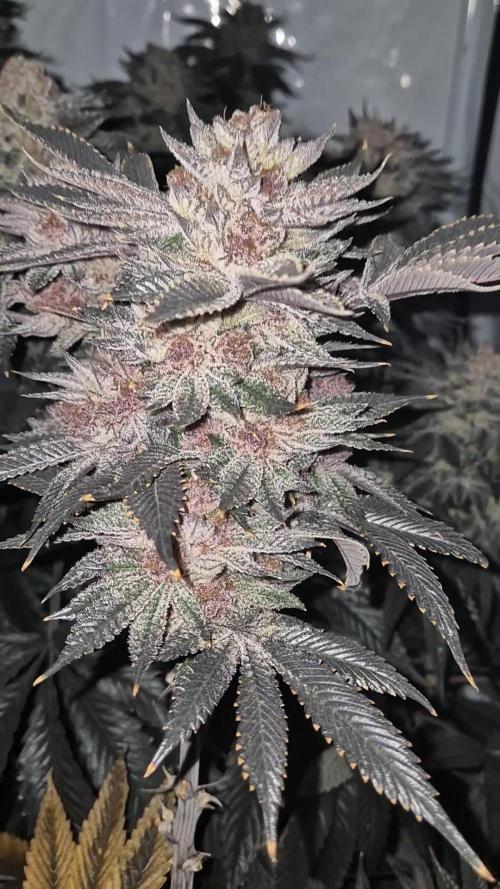
Really starting to fill out now. Dont know whether its the stronger light or dry ammendments but my ladies seem a lot frostier than my last run.

Likes
25
Share
@DrGanj
Follow
Spread this girl out a bit using some string and mild LST. She's responded super well and all the bud sites seem to be getting a nice dose from the TS1000 :)
Bit late uploading this week but the pictures were taken back on Tuesday meaning this is still an accurately dated upload.

Likes
20
Share
@Pulsar00
Follow
Welcome back boys,
A little update with those rock hard colas, the finish line is being seen not far away on the horizon.
I hope they gonna fat a little bit, I think we all wish the big fattening deep down ...
Stay tuned, stay stoned
Likes
15
Share
@Kurow
Follow
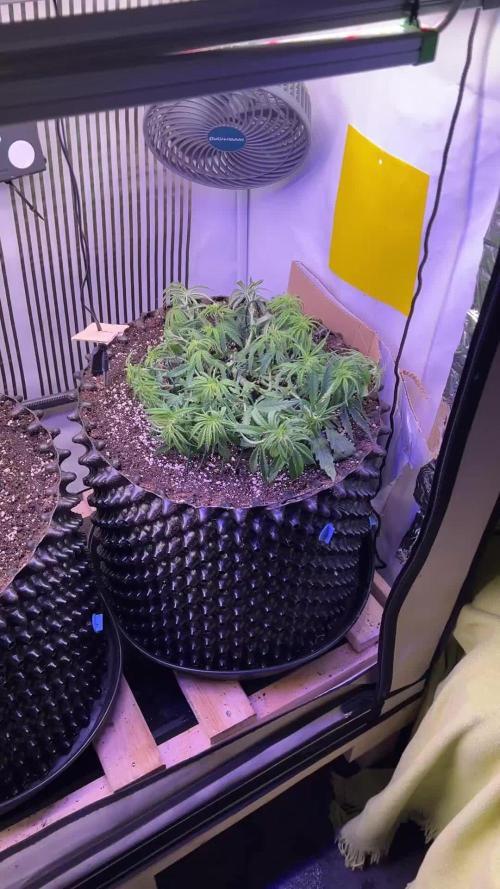
This week is dedicated to finalizing the pot and nutrients for the rest of the lifecycle, looks like it took to the nutrients very well not much new upwards growth but new leaf sites appeared!


Likes
2
Share
@GrownyStark
Follow
Day 50 Flower: So far the last few cold nights have kept any 8 legged pests away: fears averted. A couple Hoverflies have been patrolling.
After a quick google search I read they eat aphids so I think we're friends.
Night time temps dipped as low as 5c while daytime temps were 22-24c with sunshine 95% of the time. I keep it indoor until 10am when it warms up so that morning photosynthesis isn't inhibited.
I am aiming for 100g in 100 days so these last two weeks w may be tougher to keep her happy as temperature is rising into the high 20s(c). The one day i let her sit in the sun at 28c i noticed the top calyxs suffered UV damage and caused minor fox tailing. From then on if temperatures peaked above 26, my procedure is to shade it.
I've made more frozen water bottles to circulate in and out of my reservoir every two hours. Root health has improved they are looking pretty good and the water is always kept cold to touch. I haven't used h202 in a few days.
She smells more and more everyday! The smell drenches fabric and my darkroom smells for hours after taking her out for the day.
Day 52: Temps hit 32c high today. I had to put the plant in the porch shade by 1230 when it peaked over 26c. Circulation fan on full blast keeps her happy and fox tail free (knocks on wood)
She's drinking like a sailor close to 5 litres+/- in this heat. When i refresh the reservoir i give her a heavy dose 4ml/L. Then when topping up the reservoir I only use 2ml/L.
Day 53: Trichrome inspection with a loupe confirmed its mostly cloudy with over 25% still clear as glass.

Likes
33
Share
@ganjaman24
Follow
Going to harvest her today trichomes are nice n Amber :) what do you guys think??
Likes
10
Share
@Ieiogrow94
Follow
Eccoci qui...
Finalmente dopo uno stop per il lavoro torno ad aggiornare il diario con il capitolo finale...
Su questa genetica ho voluto mettere de bimbe e sono rimasto veramente strabiliato dalla stabilità e similarità che hanno avuto tra di loro, le cime sono di un altro pianeta con questi pistilli che esplodono formandone altri in maniera verticale davvero molto bella!!
Grazie ad Anesia Seed e ad Xpertnutrients per la collab e a tutti per il supporto🔥🌲❤️
NE VERRANNO DELLE BELLE
Processing
Likes
13
Share
@Cheesefarmer420
Follow
Week #9 of flowering is done, great week this week, still inching closer and closer to harvest day, all of the ladies except for the largest will start their flush today, I’d like to push that out to atleast 10-14 days if possible, this will insure I get a beautiful fade into harvest as well as mouth watering tastes and aromas coming off this flower, however with using final phase I’ve learned I can execute a proper and tasty flush in just 7 days if needed. Everyday I feel the smells are getting more and more intense becoming a hassle for my 4” carbon filter to keep up. Hopefully we continue to finish strong this last week or two! It will be exciting 😍
Likes
37
Share
@AestheticGenetix
Follow
Will update more. Easy grow super easy to maintain once I figured out my environment. They like to chunk up nicely. Definitely top and train outwards, it makes a huge difference in the plants.
7/19/24 a month after cure. i didnt do anything special or baby the curing process. these are thick and chunky feeling. breaking up a nug and i noticed the texture was different and the buds were so sticky that they kept sticking to my finger. they werent that sticky 2 weeks


Likes
Comments
Share
@MasterGrowda88
Follow
I've owned this wonderful red lady for about six years. She was my first plant imported from the States, and to this day, she's one of the best genetics I have here. Very robust, can withstand anything, likes to be trained, and the smell is very strong even before flowering.

Likes
53
Share
@Chucky324
Follow
Hello. This is the end of week 8 and the beginning of week 9 of flowering.
I'm a flusher. I gave their last food yesterday and will use nothing but water till the end. I've marked the branches that I've pollenated and will give food again after harvest if the seeds aren't finished. Easy as that.
I found some bud rot on plant #3 and had to cut it out quick. Too bad it was one that I had pollenated. It was only the top bud so I hope the other buds on that branch will still be good for seeds.
Everything else is going well in here. I didn't know what I would get when I made the cross 2 years ago but I'm very pleased with the way the plant have preformed so far. There's some big, heavy, dense buds in here. Can't wait to smoke them.
It's 30*c here today and will be for the next 4 days. It's 35*c in the greenhouse right now, I just stuck my head in while I'm waiting for the video to upload. That will kill any fungus spores that bother my plants.
Good Luck. Chuck.
Likes
7
Share
@Bluemels
Follow
Tag 25: Umgetopft in einen 15L Topf.
Tag 27: getoppt bei 5 Nodien.
Tag 30: Entlaubt (alle Sonnensegel am Hauptstamm entfernt) und mit LST angefangen.


Likes
43
Share
@TheCannaProphet
Follow
~ GG4 SHERBET FAST FLOWER by FastBuds ~
Well fam, here we go again with another epic strain from FastBuds Fast Flowering stable. After having such tremendous success growing their Gorilla Cookies Fast Flower outdoors last year, I've decided to run another of their fast flowering strains outdoors this year... GG4 Sherbet Fast Flower!
The best description of this awesome cultivar comes directly from my friends at FastBuds which is as follows:
"Bred from extremely potent and flavorful Gorilla Glue and Orange Sherbet genetics, GG4 Sherbet FF (Fast-Flowering) takes all the best traits to the next level, offering a high-yielding strain that can produce up to 600 g/m2 in a 7-week flowering time. This super resilient Indica-leaning hybrid thrives indoors and outdoors, and in all types of climates while producing mouth-watering sweet, fruity, spicy and earthy terps that translate into a delicious sugary hazelnut aroma. Expect an extremely relaxing and overall happy effect that’ll leave you with a huge smile from ear to ear. It’s the perfect strain for growers of all levels of experience seeking low-maintenance yet highly productive photoperiod varieties that deliver quality and quantity without extra effort.
GG4 Sherbet FF grows chunky buds with long dark orange hairs and spade-shaped calyxes that get encrusted with trichomes by harvest time, giving them a gorgeous silvery-white appearance. This medium-sized photoperiod can reach up to 200 cm in height and yields up to 650 g/m2 while developing that typical hybrid structure. GG4 Sherbet FF grows with a stocky, bushy appearance, developing one sturdy main cola and fat side branches that support huge yields without much effort. This super-fast variety produces distinctive light-green buds with a high bud-to-leaf ratio, making your trimming sessions a breeze. It’s a top-notch resin producer that doesn’t need much maintenance and will thrive in almost every climate, rewarding growers of all levels with extremely flavorful resin that makes for outstanding hash end extracts."
________________________________________________________________________________________________________________________________________________________________________________________________________________________________________________________________________________________________________________________
The Setup:
This is going to be an outdoor grow, but I have started the GG4 Sherbet Fast Flower indoors as our weather is still too cold to put her outside (nighttime temp's dipping regularly into the 30's℉).
The plan is simple... let her grow inside under a 19/5 light schedule until the nighttime temperatures stay above the mid 40's℉, at which point she'll be moved outside and transplanted into the soil which I have already setup and inoculated with beneficial microbes, and then let the fun begin!🤪💚
________________________________________________________________________________________________________________________________________________________________________________________________________________________________________________________________________________________________________________________
Weekly Updates:
8/2- Here we go into Week Three of flower for the GG4 Sherbet Fast Flower from FastBuds and this lady is kickin butt and taking names!
She has flowers sprouting out, it seems, from everywhere! I did dive into the middle of her canopy and removed a dozen or so small, scraggly shoots that would have only drawn nutrients that are better served elsewhere on the plant!
8/4- Our weather continues to be hot and humid. I am continuing with my daily watering routine, watering in the late afternoon after the sun sets. I went through the underside of the GG4 Sherbet FF and removed some shade leaves that were either dead and brown or all yellow, and basically gave the entire plant a good look over to spot any issues that may arise as early as possible. If any issues are identified, it's a lot easier to cure them when they are spotted early!
8/6- We finally have some much needed rain on the way in the way of a tropical system which will be bringing on and off showers beginning tomorrow through the 9th. As a result of this gift from above I will not have to water the rest of this week!
8/8- Well there's three full weeks in flower for the GG4 Sherbet FF and she's continuing on course to be another epic result from FastBuds genetics!
Thank you for checking out my diary, your positive comments and support make it all worthwhile! 💚Growers Love!💚😎🙏


Likes
Comments
Share
@LegacyGrow
Follow
Englischversion below
Deutsch:
Tag 36 Veg:
Das Umtopfen bereitet den Damen noch sichtbar Schwierigkeiten. Auch der Temperaturunterschied stresst die Damen sichtbar. Der VPD muss angepasst werden, da sich die Temperatur von im Schnitt 28,5 Grad auf im Schnitt 22,5 Grad gesenkt hat. Die Blattoberflächentemperatur liegt im Schnitt bei 20,5 wodurch die RLF% bei ca 60-65% gehalten wird.
Heute wurden die Damen auch vollständig mit ca 8,5L mit einem PH von 6,3 und 0,5 ml/L CalMag gegossen.
Ein leichtes LST hat die Fürsorge heute abgerundet. Ziel ist es mit einer wider gesunden Pflanze an den Rand des Topes zu kommen.
--------------------------------------------------------------------------------------------------------------------------------------------
Day 36 – Vegetative Phase:
The transplant is still visibly causing stress to the plants. The temperature difference is also clearly stressing them. The VPD needs to be adjusted, as the average air temperature has dropped from around 28.5 °C to approximately 22.5 °C. Leaf surface temperature averages about 20.5 °C, which requires relative humidity to be maintained at roughly 60–65%.
Today, the plants were fully watered with approximately 8.5 liters per pot, adjusted to a pH of 6.3 and supplemented with 0.5 ml/L Cal-Mag.
Light LST was also applied today to round off plant care. The goal is to reach the edge of the pot again with healthy, stable plants.
