@SlowpokeFuegobud
Follow
🍪 🍒 🍰🍩 🎀🍪 🍒 🍰🍩 🎀🍪 🍒 🍰🍩 🎀🍪 🍒 🍰🍩 🎀🍪 🍒 🍰🍩 🎀
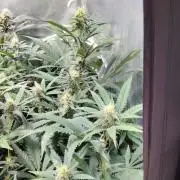
Day 95 chop time, harvest went fast, the stems were loaded with buds. Hehehehe.. Cannot wait to smoke this one! 😎😍
As you can see, we made a real break-up cake. 😋 You will find the recipe in the smoke report, down there! ⬇️ 😏 Beware! It's a really strong cake, I do not take responsibility whatsoever! ✌️😁
Thanks for showing up and supporting me and the girls, bless you, growmies!! 😘 ❤️
Shouts go out to my sponsors @GreenBuzzNutrients, thanks so much for your support!! 💚 💚 💚
If anyone would like to try their amazing organic products, you can find a generous discount code of 25% in my weekly comments! 😜 🙏
If you want a recommendation which product to get first.. BIGFRUITS!! 😍 I love the tasty terps with this one!!
https://greenbuzznutrients.com/
Thanks also of course @Kannabia, for the beautiful genetics!! 🧡🧡🧡
Pouring all my love into this grow, thank you for joining in, growmies!! 💚 💚 💚 😘 ❤️ ❤️ ❤️
Wishing you all the best for your beautiful gardens!🌱 🙏 Grower love!! 💚
_________________________________________________________
Strain Info:
https://www.kannabia.com/en/feminized-cannabis-seeds/break-up-cake
We need to talk
You’ve got to celebrate everything in this life, and that includes love and heartbreak. Since you’re all familiar with Wedding Cake feminised marijuana seeds, we’ve put a Break-up Cake in the oven at the Kannabia Seed Company – because things don’t always go well, and we sometimes need a friendly seed to lean on.
Break-Up Cake has a base of Girl Scout Cookies, one of North America’s best-known strains, which is earthy with a very potent indica effect. And we top it off with a delicious Cherry Pie which, in addition to giving it an elegant dark attire, adds a silky, deeply sweet flavour of cherries and berries. Look no further – it’s the perfect cake.
This seed will be celebrated for its ease of cultivation and abundant production. It’s one of the best investments you’ll make this year. But if it’s going to be memorable for one thing, it’s for its sweet complex flavour that’s full of contrasts. If we have to break up, let’s do it sweetly and amicably, right?
How to: Break-Up Cake
Break-Up Cake is an “all-terrain” marijuana seed, which will adapt to the place you allocate to it. An ode to independence, it’s a plant with only the most basic needs that knows how to grow by itself.
It’s a pale branching plant with tremendous dark green leaves, purple tips, and an icing sugar coating of trichomes. Its immense buds are some of the stickiest ones we’ve found in our seed bank recently.
Indoors, it needs 60 days of flowering to give no less than 600 grams per square metre. Use a Screen of Green method without hesitation, or plant it using hydroponics if you want to obtain the full benefit of its potency.
Outdoors, it reaches two metres in height with a harvest of 800 grams per plant, which is reason enough to give it a go. Like a good break-up cake, this plant doesn’t need to live with a partner, and knows how to live well in a Guerrilla plot. Between 25th and 10th October is its moment.
Taste and effect of Break-up Cake
Very relaxing but not causing lethargy, it’s a good indica-dominant plant. Its effect is mellow (we’re too old for childish games). It calms the consumer but it also gives rise to creative moments. Head on up to the top floor, later to make your way, little by little, down to the kitchen later (where you might want to give in to temptation if you need to stimulate your hunger).
The flavour is full of nuances. It will remind you of a vanilla sponge or cheese cake: you’ll notice a cherry topping, something sweet that you can’t quite distinguish, and an earthy undertone on a biscuit base… You’ve got to sample it to know it.
_____________________________________________________________________
SETUP:
80x80x180 cm Zelsius
240W Full Spectrum LED IR UV dimmable
DW240H-A6-HS
Heatsink color red
LED Chips:
512pcs SAMSUNG LM301H
24pcs Osram 660nm
8pcs Osram IR 730nm
8pcs UV 385nm
Color mix: 2700K
4000K
2,8umol/J
Driver HLG-240H-C2100B
Coverage: veg 5x3ft / flower 4x2ft
Product size: 628x205x68mm
Green Buzz Nutrients
Shouts go out to my sponsors @GreenBuzzNutrients, thanks so much for your support! 💚 💚 💚
If anyone would like to try their amazing organic products, use code GD42025 for generous 25% discount (for orders of minimum 75€) ✨
https://greenbuzznutrients.com/
Biobizz Lightmix
custom exhaust fan 320/270cm³/h
Carbon Active Granulate 240cm³/h
tab water pH 8 - EC 0,25 with Calmag to 0,5
Advanced Hydroponics pH minus Grow
Bloom to pH 6.2
🍪 🍒 🍰🍩 🎀🍪 🍒 🍰🍩 🎀🍪 🍒 🍰🍩 🎀🍪 🍒 🍰🍩 🎀🍪 🍒 🍰🍩 🎀



@HirdoWeirdo
Follow
Hi everybody!!
Time is passing out and we ended also 6th week.
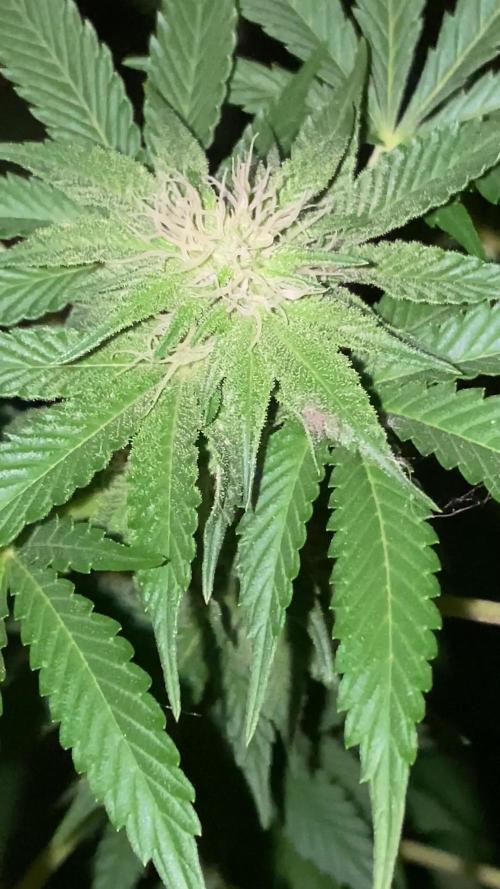
I have still troubles with minators and while with other plants neem’s oil work great, for this lady it didn’t do his job. However she is super healthy and has a super sweet smell which is increasing day by day (Could this be why parasites find it so appetizing?).
During last week we have had several storms and I have not been able to move it, however it has resisted very well to the rain and wind. The size of this bubblegum is still small, but her look is delicious. I hope she will meet my expectations regarding the quality of the smoke!




@JohnnyBarrel
Follow
Week 21
Daylight 12h20 - 7h45/20h05
Unstable weather, alternating heavy rain and wind quasi every days and sunny afternoons. Moderate temperatures around 14°C min / 23°C max.
Plants are safe in the veranda; the sun is lower on the horizon now and the angle of the light is now perfect for a good finish. I need to test the humidity level in the room but it seems reasonable. No signs of diseases or moisture.
Last weeks were hard with multiple aggressions: plants are like War Veterans with some damage and scars. The flowering process look not affected by this episode and harvest is approaching.
Brake Pad Breath: almost ready. Pistils are rusty colored, buds are thick and dense, firm and sticky. Subtle fruity aroma: tonic and stimulating. Most advanced plant: will be the first harvested soon.
2L watering / 2 days
flowering booster finish + water
flawless finish + water
Flash Back #2: ending the flowering cycle and starting maturation. Last plant infested by insects, may be the plant is reacting by accelerating the flowering: buds are not so dense compare with the previous plant. Pretty spicy smell and good resin production.
flowering booster finish + water
flawless finish + water
GMO x Zombie Kush: starting the last flowering stage. Recovering good and was less injured by caterpillar than the others. Pistils are long and the flowers will enlarge soon: need almost 3 or 4 weeks to be ready.
Grower master flo + bud XL
enzyme + pk 13/14
Royal Moby is tall and late flowering but seems producing lot of flower. With the stress the plant become hermaphroditic, I discovered some bag of males flowers. I hope there is no pollination between the other plants.
Grower master flo + bud XL
enzyme + pk 13/14


@Salokin
Follow
Hello Growmies! 🌿👋
Welcome to Week 17 of our Epic Buzz journey! We're observing some noticeable progression in our plants, and we're nearly at the finish line with the next entry poised to be our final harvest week!
Here’s the breakdown for our Epic Buzz phenotypes:
Pheno #1 is thriving with its buds thickening up nicely, showcasing a frosty appearance that promises high-quality resin production.
Pheno #2 remains a bit smaller in comparison, yet it's catching up with an increase in bud density and trichome development.
Pheno #3 stands out with its robust growth and resin-packed buds that are slightly ahead in terms of maturity compared to its siblings.
As we approach the harvest, maintaining optimal environmental conditions—consistent humidity and temperature—is more crucial than ever to maximize their potential.
Stay tuned for our final week's update, and as always, stay lifted! 🚀🌱



@frigo_camelo
Follow
end of week 6 flower | damage not gettong worse | beautiful colors and look | strong rotten fruit smell | its gonna go into the freezer and will be washed in winter


@iMpulsive_Grow
Follow
I went in scared that I would screw this up and waste money. I kept learning and fell kore and kore in love with it. Now I’m building a room and already growing 7 plants moving to 20 🙏🏼😝


@Joni2017
Follow
reaching the end 😁 control of trichomes😎😋
the rest of the days only with water 💦💦 temperature 27º C ☀️ humidity 65% 💧 and music 🎼 😉👍


@DaddyPrime2
Follow
9/7/24 this is a clone from my outdoor jokerz plant. she's had to reveg but is currently showing new growth. i wanted to see what she looks like when grown indoor. i wanted the outdoor ones to be indoor plants[ i mostly run indoor] but they got too big for my space but i didnt want to consider it a complete loss and took some clones.
9/12
her growth is improving. i didnt realize that this was considered monster cropping. Underneath the main she has atleast 4 side branches coming out thats new growth. im curious to see how this affects plant growth, plant training and over all plant
FYI the pictures and test results that i posted are from the nurseries website that the clones/cultivars i have are from. i have no affiliation with them. im a rec grower in a rec


@maneaura
Follow
I came back from vacay. Im harvesting the amensia haze next week!! i’m really excited! i wonder if the painkiller will make it tho. spider mites and thrips somehow got to the plant even though it was inside. and all the pests collectively decided to leave the amnesia alone? Also got new seeds! only paid for 3 lol


@GreeneScene
Follow
Day#37 update: i finally made her beg for her water . The way all her leaves are hanging at a downward angle , then in the 1st video if you look you can see her “drooping” leaves begin to “pray” stand themselves back up. O watered her to run off then did a life-medium defoliation instead of a super heavy one like I planned and then I “ponytailed” each of her main tops to allow the other nodes to become strong to produce more branching .
Day#40Update: the re-growth from defoliating & pony tailing has been decent . On one or two she’s trying her hardest to break out of the tie. I’ll release her from the ponytails later today & we’ll see where we are in two days for day #42 week 6
The plan is still to top all her main tops after untying the ponytails .
Day#42 Update : end of week #6 she’s growing so evenly and well that I ru still don’t see a benefit in topping. These lateral sode branches are growing for what they know .
She’s a squat plant for sure but man is she full. She’s been in this one gallon since day #9 so it’s been 33 days she should be asking for food soon . I’m debating on top dressing her in the one gallon or up-potting during a transplant for her . Part of me wants to skip forward straight to a 6gall pot but part of me is saying to “punish” her a little more and leave her in this pot a few more weeks .


@walletinspector
Follow
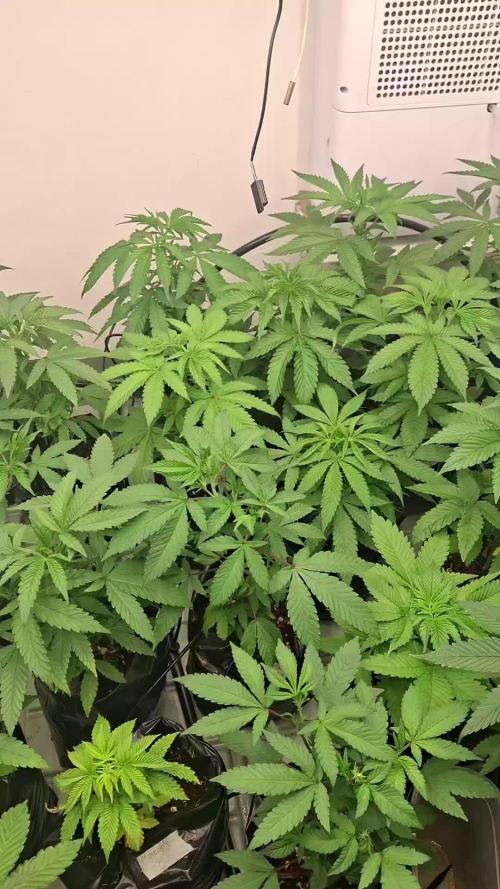
The growth exploded last week, I just have no words on how beauty this is... On the other hand Im flipping officially tomorrow 🏾

shorts_status_processing


@MississippiRich
Follow
Week 2 is actually week 3.
Only giving water.
My dog decided he loved the plant so much, The he would dig her up when left outside!
I guess I am lucky the plant was young and she seems like she recovered very well. I think she is stunted, because she looks small compared to others I have seen.
I’m about to crack open and beer and wish for the best.




@Chubbs
Follow
Weekly update on these lovely ladies. They've improved a bunch since last week as I think they needed a boost of nutes. I added some grow nutes to add some nitrogen and I think it worked. The pistols on the Colas are very cool to look and see the the flowers starting to form. All in all Happy Growing.



@MadProfessor
Follow
She is such a Beauty Queen! Such a nice plant. Even that she is straight under the Lightbar she does not give a damn. ?🔥


@RDWCGrowing
Follow
1/20/2023- So much to do pre grow and over the next 16 days, absolute first order of business is that I have to take down my current Grow---TIMBER-- Then I have a list of things I have to get done in order to be ready to start this grow 1 Feb.
With that said
T - 2 days until start 48 hour Flush
T - 2 days until Start 48 hours of Light
T - 4 days until TIMBER!!!
Items that need to be done before 1 Feb 2023
1. I need to clean the tent out
2. I need to clean the equipment- Proper Sanitization between grows in Hydro is a must!!!
3. I need to get the hole in the ceiling above my tent repaired- For my last grow I had a deep sink installed in my grow room, to make Hydroponics a little bit easier and have a water source in the same room. The seals on the pipes they were installing broke and leaked through the ceiling causing some damage all the way across my grow room, I was already weeks into my grow and couldn't risk them working above my tent and it would have been very awkward positon for them to be working in as well, so have to get this done quickly between chop and germination.
4. I have to install my new light- I was using a Vivosun 4000 and for this grow I am switching up to a Spider-farmer SF 7000.
1/20/23- For this upcoming grow I am working with M/F photo seeds so I ordered 4 Sex determination kits. I recieved my my 4 Sex determination testing kits from Rimrock Analytics today. I will be using these to test my plants at week 2 of Veg so that when/if I take clones I know I am taking them off females. As well as I don't want to accidently pollinate my tent during this grow I am looking for big beautiful buds not seeded buds. :-)
1/24/2023- Harvest of current grow- Started at 2:00pm and finshed wet trim and firt batch into the freeze dryer.
1/25/2023- Next batch into the freeze dryer and cleaning all my equipment for this Grow.
T-1 Day until the workers are supposed to be here to fix the hole in the Grow Room.
T-3 days until I instll my new Gorilla Grow Tent and my New Light Spider Farmer SE-7000 for this grow.
T-7 Days until Start of Germination
1/26/2023- Harvest is done ran through the Freeze dryer and dry tim completed.
1/27/2023- Grow Room repairs completed. Hole is gone Letting the paint dry before I install the new tent.
T-2 days until Install the New Gorilla Grow tent and the new Light
T-3 days until I put the hydro equipment in the new tent
T-5 days until Germination
1/29/2023- Day 0- Final Pre Germination activities
Germination Start T-3 days
The paint on the ceiling was dry and it was time to finish prepping for Germination. I got the following items knocked off my list.
New 4X4 Gorilla Grow Tent is up and ready
New Spider Farmer SE-7000 Light is installed- Thanks Moony Grows for the suggestion and for the Code that got me some money off and free shipping (Moonygrows)!! I turned the lights all the way up to max and set the timer to 18/6 0600-0000. I will keep an eye on the temperature and humidity without my plants and see how hot it gets with the new light.
I put my Hydro system back together and put in 40 gallons of water into it, time to monitor for leaks the next few days.
I Setup my cloning machine for Germination Days 3-11
1/30/2023
let me break down the situation, ROOM in the TENT.. Enough said.. No really I tried putting my exhaust system up in the new tent with my new light, The light is so big corner to corner that it really didn't give me enough room for the lights be be raised, with the exahust hanging the buckets my plants are Starting in are 2 and 1/2 feet off the ground, great for plenty of room for roots but not so great for upwards space for the plant to grow. In a 6' 11 tent with the exauhst in side and hanging that only gave me a little over 4 feet of grow room to play with. My last grow if you saw my diary, anyone could tell I was struggling to keep the buds off the lights. No good, Since space was such an issue I was running my carbon filter inside on the ground but It really needed to be up sucking the heat out not shooting the cool out. With that setup I was sucking air through the filter and pushing it out the tent at a bottom exhaust hole cold out. Wasn't doing me any good for my heat. I was hitting temps of up to 85 degrees. I bought a portable AC unit and have been running it in the grow room to try and keep temps below 85 and I have had to lower the power on my lights during grow also not ideal.. With that said a friend of mine MoonyGrows (Check out his diary) took the time to look at my issue send me a picture of my grow tent setup with detailed instructions on how to suck the air out from the top but putting my filter and fan on top of my tent so no room issue and I am sucking the air out from the top where the heat is instead of pushing the air out from the bottom where the cool is... THANK YOU MoonyGrows For taking the time to help me get this straightened out.. Now I have room and I have the exhausts working right and now my temps with everything at 100% are topping out at 80 this dropped the temp by 5 + degrees at 100% max.
T-2 days until Start of Germination
Prepped my seed tray with humidity dome
Prepped my Rapid Rooter plugs. I Used RO water, and I added a few drops of Hydrogen peroxide to Oxygenate the water. I then PH balanced between 5.7-6.0 the same that they will be getting in the Cloning Machine and when they get to thier final grow pod. I perfere the 5.8x range and I hit 5.84 for these rapid rooters. If you want to see a complete video on the process HowWeedGrow has an amzing video that shows step by step how to do it and explains it better than I ever could including how to plant the seeds. Which I will cover when I get to that step on Wed. https://www.howweedgrow.com/how-germinate-weed-seeds-cannabis-rapid-rooters/
1/31/2023
T-1 day until Germination Start
All set and ready have my Rapid Rooter plugs ready to go have my seeds out.. Have my seed tray warming up tonight. Tomorrow morning right into the Rapid Rooter then strait into the tray. I will spray the dome to start the humidity in there.
2/1/2023
Germination Day!!
Let the games begin!
0600am Put the seeds into the Root Riots. And then put the seeded Root Riots into their first home the Seed tray. I have them under the light 24/7. Sprayed the dome
7:30pm Sprayed the Dome to keep humidity going on the dome.
2/2/2023
Day 1 of Germination
Sprayed the Dome in the morning
Sprayed the Dome in the evening
2/3/2023
Day 2 of Germination
Roots are starting to come out the bottom of the root riot plugs and the heads are slowly popping out of Number 4 just below the surface.
Afternoon- Number 4 has popped up
Evening- Number 3 has popped up as well. Happy Dance!!
2/4/2023
Day 3 - Germination
Surprise Surprise Surprise- all 4 have now poked their heads up.. Happy day!! 100% Germination succeeded.
Now major milestone to track is how many are female and how many are male.
I will take look at the roots this afternoon/evening and see if they have enough root to go into the cloning machine for the next 7 days before they go into their Hydro Pods.
Day 3 - Germination - Evening..
Roots looked good and they were tall enough to make it into the cloning machine.
Now that they are all in the cloning machine I have switched the lighting to veg state 18 on 6 off.
2/5/2023
Day 4 - Germination - Morning
All the Ladies (fingers crossed) looking great stretching nicely and look nice and green, Photo synthesis underway....
UPDATE!! After a very interesting POD cast on FSTS by Dr. Bruce Bugsbee from Utah University, I have shifted my lighting to 24 hours on through seedling and then I am going to shift to 20 hours on the rest of Veg.
2/6/2023
Day 5 - Germination
While Checking on my conditions inside the new tent last night, I found that the Humidity was down to 39 Percent. I added an AquaOasis Cool Mist Humidifier, the reason I selected this humidifier is that I needed one that could be turned on and off utilizing my Inkbird Humidity Controller IHC200 that I have my Pro Breeze Dehumidifier currently running with.
Root structures are starting to get there about 1/4 of an inch.
2/7/2023
Day 6 - Germination
Everything seems on track more roots poking out of each today. They are each getting a little taller as well.
Checked in the evening and number 3 was drooping the Root riot plug on the bottome was dry and the roots were not in the water yet. I raised the water just enough that the longest root that was sticking out is now hitting the water.
2/8/2023
Day 7 - Germination
Everything looked good while checking in on them this morning number 3 is now full up and no droop again.
2/9/2023
Day 8 - Germination
T-2 days until Plant into Forever Pods and we start week 1 of Veg .. :-)
Surprising thing to me is that number 1 and 2 were later in popping then 3 and 4 but the roots are growing longer in 1 and 2.
2/10/2023
Day 9 - Germination
Number 1 and Number 2 are definitely ready for transplant today.. Based on how they were yesterday and where they are today I am hoping by tomorrow 3 and 4 are ready. Today they look to me where 1 and 2 did yesterday.. I really hope 3 and 4 catch up by tomorrow since..
T-1 day until transplant to new/ final home for grow.
Need the roots long enough to have some clay down in the basket to keep the root riot out of the water and only roots in the water..
2/11/2023
Day 10 - Germination
Today they got placed in thier forever Home, 7 days from Sprout and 7 days until Week 1 Start.
PPM- 180 this is water out of the Tap
Temp Water: 70.7
Temp Tent: 77
Humidity: 40% I have a humidifier going 24/7 to try and bring this up.. I also have Humidity Domes on each plant.
2/12/2023
Day 11 - Germination
Sprayed the domes, all are looking good.. Nothing much to do at this phase but Keep monitoring the PH level in the system and making sure they have a comfortable home.
T-6 days until Week 1 start
2/13/2023
Day 12 - Germination
Sprayed the domes, They were looking a little yellow today so I moved the light down to assist. Nothing much to do at this phase but Keep monitoring the PH level in the system and making sure they have a comfortable home.
T-5 days until Week 1 start
2/14/2023
Day 13 - Germination
Sprayed the domes, They were looking a little Florissant yellow today, with what looks like slight burn on the tips, I talked with a fellow grower and we agreed that It was probably that I was drowning them, Yes you can drown you plants even in Hydro, but only early on.. :-) It usually happens with the water being too high, which soaks not only the roots but the medium (root Riot plug in this case). I lowered the water from touching the bottom of the pot to about 1" away. This will probably take 3-4 days to resolve. I will continue my daily monitoring.
T-4 days until Week 1 start
2/15/2023
Day 14 - Germination
Sprayed the domes, continue my daily monitoring they look a little darker green instead of lime green now that I lowered the water levels in the system, so I think that I might have resolved the issue but it will take a few days for recovery to happen.
T-3 days until Week 1 start
2/16/2023
Day 15 - Germination
I looked in on them this morning, 3 and 4 look like they are doing well and recovering nicely. Number 1 not so much it has brown spots on the leaves, this very well can still be a side effect of the overwatering but I decide to go ahead and add Nutes earlier than I was planning just incase. I was going to wait until Saturday but I think intervention is necessary now especially after drowning them early on.
I added 1/2 what I am planning on adding for week 1 start. I also think I am going to adjust my chart to add 1/2 2 days after plant from now on. I don't think it would hurt it to have some Nutes to pull from.
.25ml/Gal Calmag = 12.5ml
1ml/gal GH FloraMicro= 50ml
1ml/gal GH FloraGro = 50ml
1ml/gal GH FloraBloom = 50ml
T-2 days until Week 1 start = I will drain the system and start it over on Saturday with Week 1 Nutes.
2/17/2023
Day 16- Germination
I didn't even want to post today after looking in on them this morning, 3 of the 4 are now showing signs of dronwing.. Brown spots on the leaves, the water levels were still too high.. I drained about another inch out of the tanks.. Will see how quick they recover.. I start week 1 tomorrow and will have to ensure my water levels are at least 1" away from the basket on this round.