
Likes
Comments
Share


@Gerbillionaire
Follow
Getting some ambers on the buds now, so not too much longer. The buds just keep getting tighter and more dense so I'm not complaining.

Likes
11
Share


@adam_pawloski87
Follow
Pre98 Bubba , oh how I’ve missed you for so many years! These ones came out absolutely gorgeous! Loving the the purple phenos 😍 ! These ladies liked to stretch quite a bit so you’re gonna want to use some LST on em but I also recommend topping at least 6 times to get a better bang on your yield ! Expect nice tight purple buds with a tremendous amount of frost covering, some of the frostiest Bubba I’ve ever had! Over all I give it 10 stars an would definitely over an over run this strain!

Likes
1
Share


@Pestitel
Follow
Amazing experience with the Mix Pack, I will try it again next summer for sure. Love the variety.

Processing
Likes
30
Share


Likes
16
Share


@Pot_Portraits
Follow
We are in flower ! Trainwreck is doing great, the defoliation delivered the shape I wanted like always, simple training but can change the plant shape a lot.
The flower stretch went super well, I think she will stretch a bit more but should be almost done.
I cleaned the lower branches completely to avoid any problems down below, better airflow and less risk for Pm etc.
Still not using any nutrients, all living soil from Sonnenerde.


Likes
4
Share


@Organic473
Follow
Travelled...she held up for 4 days. Give thanks for the rain. She is a lil monster.

Likes
6
Share


@Chuckwaggon420
Follow
This week has been good for this group girls, they are awaiting room to get moved into 1 gallon pots. In the next couple days will fill up flower 1 and the room will have more space. These girls love their environment they are constantly happy plants. Just all standing their proud!
💧: They recieve about 125 ml of food every 2 days like clock ⏰️ work. Keep the ph around 5.6-5.7 and they all just seem toblove it.
Stay up
Likes
5
Share

@KushHunter
Follow
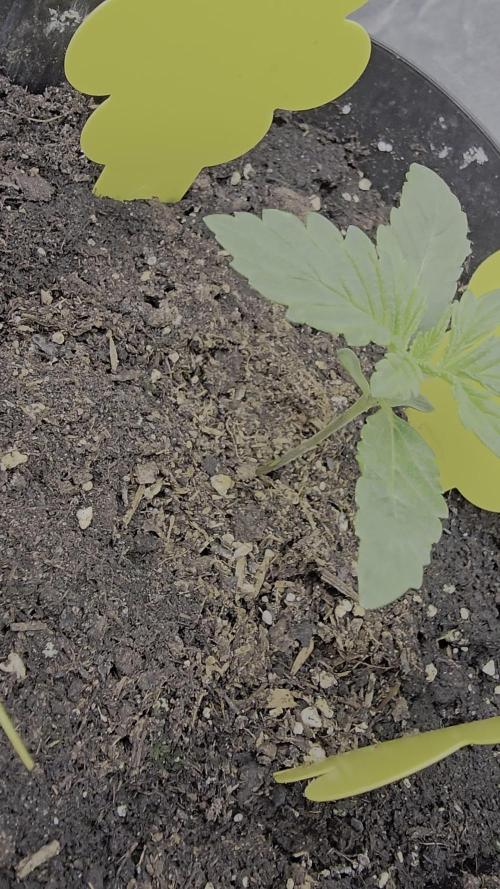
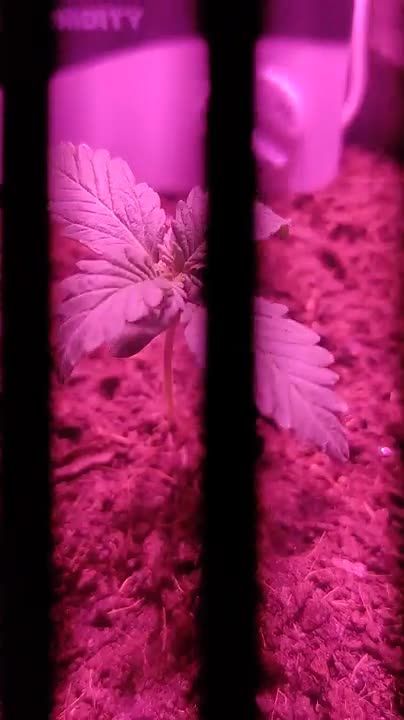
Rettungsaktion!! der einzige sämling der die letzte erde überlebt hat. Es lag nun definitiv an der alten Erde wie man sieht. Seit dem umtopfen gehts ihm prechtig.
Lockdown Kush von @sensiseeds.official vereint die kalifornische Genetik der San Fernando Valley OG mit der Afghani#1, um einen potenten, indicadominierten Hybriden mit zitrisch-kieferartigem Aroma und tief entspannender, euphorischer Wirkung zu schaffen.
Likes
7
Share


@Mrg7667
Follow
Lowered the lights a good 8-10inches just because i realized i could get them closer without burning! Going for around 6-7 inches above canopy getting the temp in the high 70s low 80s om top canopy. All pheno are getting very unique and super resinous! I have a slight lnat problem going to spray this week when i get paid

Likes
10
Share


@GoldenWeedGrower
Follow
📅 D43 - 26/09
📜New res and new light setup (only bloom lights): so T decreased and I need to take under control the H. Changed res with flowering mix. EC is 2 and pH 6. Removed SCroG net.
✍️ 2 EC
♒ 6 pH
🌊 10 L
📏 50 cm
📅 D44 - 27/09
📜 Posed a new SCroG net over the buds, only to give a support and guide the buds. As EC is raising, today I will give her only 2 L of water with only calmag and hydroguard. I purchased another lamp, that will arrive tomorrow with dimmers both on bloom and veg lights
✍️ 2,2 EC
♒ 6 pH
🌊 10 L
📏 55 cm
📅 D45 - 28/09
📜 Added of fresh water as the EC is raising too much. Let see if I've to add more later, trying to take EC under control. pH is quite stable , but it always goes decreasing and never raising. NEw lamp setup: I've purchased one that seems really good with 2 dimmers for both VEG and BLOOM lights. Very compact but powerful. Now I put bloom dimmer on 100% and veg dimmer on 80%. I'm not sure about the light time: the product sheet say 9-12/24 but now I'm 18/24. I will sniff around others diary to see what to do.
✍️ 1,8 EC
♒ 5,9 pH
🌊 9 L
📏 60 cm
📅 D46 - 29/09
📜 Added 1 other L. of fresh water and stabilize the EC 0n 1,5 and pH 6.1 I decided to keep the ligths on 18/24. Nothing else to report
✍️ 1,5 EC
♒ 6,1 pH
🌊 9 L
📏 65 cm
📅 D47 - 30/09
📜 So far so good. EC and pH are stable now and Lucy is healty and she's growing very fast.
✍️ 1,5 EC
♒ 6,1 pH
🌊 9 L
📏 65 cm
📅 D48 - 01/10
📜 Added 2 L with EC = 1,4 and pH= 6,1. Now the res is stable on EC 1,6 and pH 6,1. She's drinking about 2 liters and more every day. Tomorow I will report last day of 2nd flowerng week, So the harvest should be in the middle of November.
✍️ 1,6 EC
♒ 6,1 pH
🌊 9 L
📏 70 cm
📅 D49 - 02/10
📜 Last day of second week. Lucy is growing a lot and my tent is very small. I could consider to buy another tent, we will see. Added 2 L of water with only calmag and Hydro. I will keep the res untile the middle of next week.
✍️ 1,5 EC
♒ 6,1 pH
🌊 8 L
📏 75 cm
Likes
7
Share


@Naujas
Follow
I'm happy :) I couldn't do it as it should have been, my ph meters broke and ruined everything :( well, but I'm very, very satisfied with the result :) a big thank you to my teacher :)@AsNoriu you are super :) without you it wouldn't have been possible :) I learned a lot of useful information from you :) the house is full of lemon aroma :)

Processing
Likes
9
Share


@Silverlok
Follow
Hey Guys,
Sry for no Update, i wasnt at home and a friend of me watered the plants...
So im back with a good flower start!
I gave them no nutrients this week because they are looking good and im waiting for some deficiency...
Greetz

Likes
17
Share


@Bread_n_Buds
Follow
I had some difficulties in the vegetative phase with this passarello strain so even if late I applied a series of techniques to maximize the harvest. I applied a late topping, I did LST on the lower branches and I elegantly widened them and topped x 8 in the center. By doing so the center came out a bit weakened because the power went to all the branches below (that's why the main lining is better), but by eliminating some branches that would not have reached the top I obtained an excellent result, there are really many buds and a result that will exceed 100 grams by a lot I think going closer to 150 grams.
The flowers are very beautiful, nice mature pistils, large calyxes, this plant has really large calyxes that make it a bit difficult to clean or rather it is easy to cut some calyxes here and there. But the grass is so much you can easily make sense of it.
The smell is wonderful I still have to go into more detail but it seems something strawberry, sweet, I'm still trying to understand what it reminds me of and I have to study the terpenes and terpene profiles better.
The trichomes are mostly milky but we honestly have little amber still and a bit of transparency, it could have been another week probably but that's fine.
Zamnesia Strain Description // Yes, Karen, you read that right. Load up a bowl or roll a joint and kick back with Karen Kush, our indica-dominant hybrid. This breathtaking strain was created when our skilled breeders crossed Monster Bud Kush and White Widow. As expected, both parent strains rose to the challenge and passed on their most prized traits to their progeny, such as a solid THC level (24%), great yields and a relatively fast flowering phase.
- Get a seed of this fantastic strain --- https://www.zamnesia.io/it/10780-zamnesia-seeds-karen-kush.html
The plant has eaten the 100% Organic feeding of Plagron: Alga Grow and Alga Bloom as basic nutrients, the rooting Power Roots, the amino acids of Sugar Royal, the Enzymes of Pure Zym that eat the dead parts in the soil, Power Buds that always gives us immense satisfaction with rapidity of start of flowering and composition of the buds, the legendary Green Sensation that now needs no introduction, a name a guarantee.
The fertilizer kits that you can find on the Zamnesia website are perfect for this purpose, there is everything. Choose them based on their mineral/organic composition and the soil you have chosen.
at the link --- https://www.zamnesia.io/it/11457-plagron-easy-pack-natural.html
The quantity was measured using the sheet prepared on purpose on the Plagron website based on the soil chosen: Plagron Pro Mix + Perlite.
at the link --- https://plagron.com/en
Secret Jardin DF16 ventilation system and all the fans too make wind into
at the link --- https://www.secretjardin.com/it/
The light was supplied by Viparspectra
at the link --- https://www.viparspectra.com/
A fantastic selection of seeds, a headshop and a selection of exceptional accessories on the world of cannabis, many other things about mushrooms, health, well-being and all the beautiful things that nature offers only on the Zamnesia website
at the link --- https://www.zamnesia.com

Likes
28
Share


@Zannabis7
Follow
Day 35 – The Buddha Haze I is stacking on some killer looking flowers and the pistols, frost, and trichomes are starting to develop nicely. She continues to stretch as she has gained 6" in vertical height since last week.
Continuing to feed the Nectar for the Gods nutrients and have added Triton’s Trawl (liquid fishbone meal that is rich in calcium from fish cartilage and is designed to deliver flavor, aroma and color to the finished product) and Aphrodite’s Extraction (a rich blend of sucrose, fructose, chelated nutrients, and organic acids necessary for enzymatic activity, and a complete balance of vitamins A, C, D, E, B1, B6 and B12, which are essential to a plants’ biological growth processes). These two additions are known to increases oil, resin, frost, and terpene production in flower. Continuing to add Recharge as a soil amendment to establish colonies of beneficial fungal and bacterial microbes.
Temperatures are consistently between 74° - 78° and humidity between 30% - 45%. Soil pH is 6.5 and PPMs at 321 which is perfect for the Nectar for the Gods nutrient line.
Added a homemade Co2 generator to boost carbon dioxide levels and to improve overall plant growth and health. – Zannabis7
Day 36 - Fed the Nectar of the Gods nutrients as indicated above and in photo. Added Recharge to the nutrient mix for microbes and to aid in the breakdown and uptake of nutrients. - Zannabis7
Day 39 - Fed the Nectar of the Gods nutrients as indicated above and in photo. Again added Recharge to the nutrient mix for microbes and to aid in the breakdown and uptake of nutrients. Also did some very light defoliation and more leaf tucking to expose flower sites - Zannabis7


Likes
54
Share


@MadeInGermany
Follow
Flowering day 42
since time change
to 12/12 h.
Hey guys :-)
The lady develops more beautifully every week 💚.
She concentrates fully on her bud production.
This week she was watered 3 times with 1 l each time.
When watering, there was GHSC Enhancer 1 g per liter of water 👍.
Her health was checked every day.
Fresh osmosis water was filled in the tank for the coming week.
Stay healthy 💚🙏🏻
👇🏼👇🏼👇🏼👇🏼👇🏼👇🏼👇🏼👇🏼👇🏼👇🏼👇🏼👇🏼
‘Powered by GreenHouse Feeding’
Copy the link for 10% off all Nutrients 👇🏼
https://shop.greenhousefeeding.com/affiliate/MadeInGermany_PassionGrower
👇🏼👇🏼👇🏼👇🏼👇🏼👇🏼👇🏼👇🏼👇🏼👇🏼👇🏼👇🏼
You can buy this strain at :
https://www.amsterdamgenetics.com/product/choco-cheesecake/
👇🏼👇🏼👇🏼
Use the coupon code: madeingermany
for 10% on all Amsterdam Genetics seeds
Water 💧 💧💧
Osmosis water mixed with Cal/Mag (24 hours stale that the chlorine evaporates) to 290 ppm and Ph with Ph- to 5.8 - 6.4
MadeInGermany

Likes
146
Share


@Haoss
Follow
Shes Excellency the Future #1®️
The buds are normal density, has the smell and aroma of grapes, is very sugary and sticky
After drying I will add pictures and comment on the effect
This breed of Anesia is a true masterpiece💚


Likes
37
Share


@Wrongholn519
Follow
Day 70 for these Fastbuds beauties
Blackberry Auto:
With dark purple buds glowing fiercely and a dank smell to match, this girl could make anyone's tent look amazing. During the last few weeks her buds have become incredibly dense and sticky. She is very short and thick in stature compared to the other plants I have in flower. I inspected her trichomes over the weekend and ive determined that she is pretty much ready for harvesr. I expect about 2 oz of high quality flower after dry/cure.
Forbidden Runtz Auto
I'm really blown away with the turnaround in this girl. She was mutated & so small I almost tossed her out during early veg; I'm glad I changed my mind.
She stretched significantly between weeks 4-6 and I really wasn't expecting much from her. In reality, she has blown my mind... incredibly dense and sticky buds have developed in the past 4 weeks.
She's got the zkittles smell mixed with a gassy terp profile.. I think the higher humidity through flowering phase really helped develop these dense buds.
When I checked her trichomes over the weekend I determined that she will be cut down within the next 7-10 days.
Process/ Environment changes:
- Lowered my SF4000 roughly 20 cm to increase photon delivery to the canopy
- Water/kelp meal only from this point to harvest
- My temperature has risen due to change of seasons .. roughly at 27-28 deg C during daytime.. this is why I lowered my lights rather than turning them up
- Defoliating any unnecessary fan leaves at every chance I get
- I've had to use spools of twist tie to use to keep the branches from falling over from their own weight. I'll tie one end to the top of a branch, and the other to the stock. Not ideal but its working.
Cheese auto dry/ cure update:
After 10 full days of drying, I gave the buds a decent trim and put them inside glass jars where they will remain for many weeks. I add 2 way Boveda humidity packs to help regulate the relative humidity within the containers. I also use tiny hydrometer pucks to measure the humidity and temperature inside the jars. My ideal cure is at 62% RH
Likes
24
Share


@Firepharmer
Follow
Update the to a 4x8 this week and added a HLG 300 V2 RSpec with the futur vert FM8 flora max 660watts pumping 960 watts now ..
Every thing is stacking up an fattening up beautiful in week 4 , The frost is coming out like a snow storm now in to week 5 flower ... I’m very impressed with the bud size on the slurricane ix this early on !!


