
Likes
Comments
Share


@GanjaDjarin
Follow
For the Grow section on my page: Throughout the germination stage, I explored three distinct seed germination techniques: the direct soil implantation, immersion in a hydroponic medium, and the classic paper towel method. My tests involved the Gods Gift autoflower from Premium Cultivators, Northern Lights from Royal Queen Seed Bank, and the F1 Epsilon strain, also from Royal.
My primary focus, however, has been on the F1 Epsilon strain. As part of my shift towards commercial operations, I'm currently pushing the potential of these seeds to achieve maximum efficiency and productivity. I'm in the midst of identifying the optimal strains for my commercial venture.
My objective, quite simply, is to strike an optimal balance between quality and yield for my future cannabis crops. With astute business planning and leveraging emerging laws, I plan to provide these products at a significantly lower price than my competitors. End of Germination Stage - Staring Vegetation Stage
Day 9 - I inadvertently oversaturated my plants with nutrients, which led to the immediate demise of two plants. A key lesson learned was that utilizing old woolite medium is not advisable. Instead, using dirt plugs proves to be a more effective method. Moreover, it's crucial to ensure that nutrients are introduced directly into the water supply to avoid any potential harm to the plants.
Additional Note: For enhanced root stability and quicker access to the water supply, it's important to situate the dirt plugs deeply within the pebbles.
Also ensure germination process as follows: 12 hour soak, drop into soil plug deep into hydroponics pebble medium.


Likes
4
Share


@BGT420
Follow
Flushed with PH'd water (4.5L) to bring EC run off from 2.2 down to 1.9.
Time for another retuck!
This should be the last veg mix before transfering Cindy to the flower tent 😎
UPDATE: Timelapse added for this week.

Likes
14
Share


@grower1212
Follow
Comenzando la semana 6
Usando full co2 para el engorde final.
Con el hit de calor en el que estamos, lo aprovecharé para preparar un input KNF, el FFJ de cherries, beetroot y damascos para entregarle el potasio que necesita para estas últimas semanas.

Likes
11
Share

@Mannirumpel420
Follow
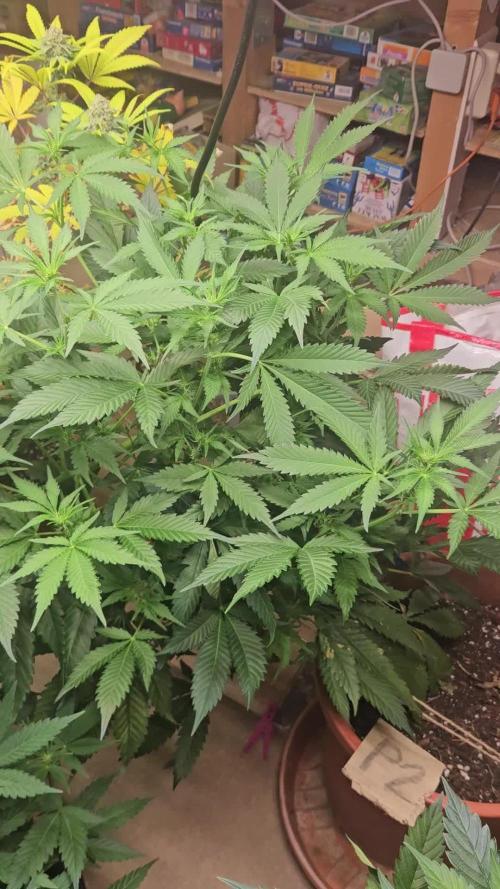
P2 und p3 sind wirklich gigantisch und in den nächsten Wochen sollte sich zeigen was für terps sie verbergen.Bei den Stecklingen von P2 viel auf,dass sie ein starkes Wurzelwachstum besitzen.P1 und P4 vegetieren noch etwas vor sich hin,bis ich das gesamte Zelt auf 12/12 switche.

Likes
10
Share


@StickyFingah420
Follow
Otra germinación exitosa con semillas de éste banco, bastaron menos de 24hrs para que las semillas explotaran y así es como se ven 3 días después.
Buenos humos! 👽
Likes
4
Share


@Creme_De_La_Creme
Follow
day 70 was harvest day !!
really fast strain, 24h light ON really played a big role as well
frosty buds and amazing strawberry smell, now lets dry it !!
Likes
31
Share


@THCpapa
Follow
Week 12 in the garden, and it's time for some serious plant pampering! The ladies got a trimming fit for royalty, and even a leafy lollipop treat – because who says plants can't enjoy a little sweetness in their lives?
With the flipping of the plants just around the corner, it's like the calm before the botanical storm. I can almost hear the plants whispering among themselves, "Get ready, folks, it's about to get real in here!"
As I prepare for the flip next week, I can't help but marvel at how far my green companions have come. From tiny seeds to leafy giants, it's been a journey filled with laughter, love, and a whole lot of growth.
So, here's to Week 12 – a week of trimming, lollipops, and anticipation for the flip. Stay tuned for more leafy adventures as we enter the next chapter of the garden saga! 🌿🍭


Likes
57
Share


@Kmikaz420
Follow
Et voici le reste du jardin (sans la cherry cola qui sèche deja;)
Rien à signaler à part les 2 monstre dans la tante qui n arrêtent pas de grandir ;) j ai fais une defoliation aux 2 ainsi qu aux dos i dos (qui produisent pas mal de feuilles à enlever;)
Mais autrement elle aussi évolue bien .
Demain la 2eme cherry cola va être recolter ainsi que la gorrilla x purple punch , et le reste du jardin ça continuer sont chemin encore une semaine avec nutriment puis on passera au flusch voilà voilà on y arrive tous doucement à cette douce et tendre recolte;)
En espérant que se que vous voyez vous plaît ;)
Bon dimanche à toute et tous je profite de vous postez quelque photo du jardin presque au complet (vue que j vais couper la cherry cola 2 ..et la gorrilla x purple punch
Mention spécial à la dos i dos de barney qui m étonne de jour en jour plus une odeur folle de kusch ,des têtes dur comme la pierre, et pour une plante de 40cm elle va faire une bonne recolte !! (A voir d ici une semaine voir 2 ) et j ai dans les dos i dos comme pour les strawberry x gorrilla 2 pheno différent
Un des pheno de strawberry prend 2 voir 3 semaine de plus à finir (j avais se pheno à mon premier journal de strawberry x gg4..
Dommage car l autre pheno est juste magnifique avec des têtes énormes (c celle de droite ) et elle fini bien plus tôt que l autre.. bon c été à peut près tout j voulais juste mettre quelque souvenirs en plus de ces magnifiques ladys 😀
Likes
2
Share


@YAMA47
Follow
Dia 67 desde germinacio.aqui muestro las 2 mas avanzadas.comparando cultivos de bsf Arg. Con Bsf España. LLEGO A LA.CONCLUSION QUE A NOS NOS TRATAN DE SUDACAS Y NOS MANDAN SEMAS DE CALIDAD MEDIA.PROX CULTIVOS CAMBIO E BANCO¡

Likes
18
Share


@Rinna
Follow
As said before, I'm incredibly happy that I got to harvest a little bit. Never expected her to make it, but she kind off did! The smell was pungent and sweet like an amnesia haze should be, hoping that will be even better after drying and curing!

Likes
Comments
Share


Likes
7
Share


@eldruida_lamota
Follow
Venga familia que acabamos la quinta semana de estás Gelato Olandese de Dutchfem.
Entramos en la recta final esta próxima semana aplicamos el PK de Agrobeta, ExplotaCogollos.
Iremos viendo el proceso de engorde de las flores.
Se ve que tienen un buen color están bien sanas, se ve que progresan adecuadamente.
Agrobeta:
https://www.agrobeta.com/agrobetatiendaonline/36-abonos-canamo
Mars hydro:
Code discount: EL420
https://www.mars-hydro.com/
Las maximas de temperatura no superan los 26 grados y las mínimas no bajan 20, así que no me puedo quejar.
Los niveles de humedad también son los correctos van entre 50%/65% de humedad relativa.
Por supuesto el Ph lo estamos dejando alrededor de 6.
Hasta aquí es todo, buenos humos 💨💨💨.


Likes
5
Share


@Creatorknbsland
Follow
Semana 2 de floração e estão respondendo bem pela aparencia!ate o momento não apresentou nada de deficiência ou over!tive que levá-las a um novo lugar por motivos maiores!e agora ja estão na cabine de cultivo indoor novamente! Algumas delas apresentou bananas de macho pela genetica da mãe que tb apresentou e floriu normalmente depois que tirei fora os sacos de pólen!espero que consiga o mesmo resultado dos cultivo anteriores!por enquanto é isso e proxima semana tem mais!boas colheitas!

Likes
49
Share


@masterofsmeagol
Follow
6/23 Due To The Two 8 Day weeks this week will only consist of five days to get me back on track. SEE LAST WEEK FOR DETAILS. I DID ANOTHER EIGHT DAY WEEK. I'LL DO THIS WEEK AS SIX DAYS. THAT WAY IM BACK ON SCHEDULE. WATERED 6/22. WENT BACK AT NIGHTCAND WATERED ANOTHER GALLON WITH 1/3 TSP Armor Si. I mixed the solution with kelp you kelp me but I dumped it out. I've mixed silica with other nutes before but I had read something earlier about bioavailability issues and I didn't want to risk it. My plants are the healthiest I've ever grown. I'm considering transplanting the large 10th planet that I'm light depping. I also need to develop my ipm and my nute schedule. Still gonna have to keep an eye onvthe water situation. Luckily I have a buddy in my corner that's co tinualkt Bern a great help.
WENT BACK OVER AROUND NOON. BEAUTIFUL OUTSIDE AND THE PLANTS WERE LOVING THIS SUN. I DEFOLIATED SOME BURNED LEAVES AND MIXED A SOLUTION IF KELP ME KELP YOU THAT I PLAN TO FEED TO THE GARDEN TODAY. IM HAPPY WITH HOW THINGS ARE GOING. WE HAVE SOME RAIN AND THINDERSTORMS COMING. I NEED TO GET MY IPM UP AND RUNNING AND THE NUTES ONLINE. I ALSO NEED TO DECIDE IF IM GOING TO TRANSPLANT THE LIGHT DEP 10th PLANET. Went back over to put the girls to bed at six and if was still 90 degrees. The water from yesterday had dissipated. The tops were dust dry. I mixed two gallons of kelp you kelp me and fed it to the garden. Afterwards I pointed qbd found a couple plants that were more open to the wind were a little lighter. I know tomorrow will be very hot. Maybe quarter inch of rain. However after that it will rain (showers) off and on for days. I wanted to make sure the girls had what the needed to make it through tjis heat wave until they get that rain. I had another gallon mixed up and I'm thinking I should've given it to them. Oh well. I'd rather underwater than overwater any day. I did notice a burnt top on the plant furthest from the tarp that the sun JUST BARELY TOUCHES when the rest are in shade. I'll just raise the tarp a little. These are tiny problems. Can't upload video until tomorrow.
6/24 Good thing u gave the plants that water. I know it wasn't much but we didn't get any rain. Suppised to get a qtr in today and another qtr in tomorrow. Then rain a couple more days. It's working our really good for my watering schedule lol. Yesterday the girls got there first dose of a bottled nute. They got two gallons of kelp me kelp you (1/3 tsp per gallon) and another gallon of just phed water. I was going to do another gallon but held off due to the threat of syring rain. Didn't get it bur it looks like the plants loved the kelp. It had reached 90 yesterday. They look better today. It's 70 at 9 today. I LST the 10th planet in the 3 gallon. It's getting huge. I should start a separate diary for those three light dep plants. Its cool as hell watching this. One of the purple punches is flowering pretty good. I probably should start another diary for them. I'll be starting to feed my plants soon. Wondering if I should pinch plants again. TUCKED THE LITTLE GIRLS IN AT SIX AND SHOT A VIDEO AND TOOK SOME PUCTURES. PLANTS LOOKED PHENOMINAL! GOT HOME AND AROUND SEVEN IT JUST STARTED RORREBTIAL DOWNPOURS! THE TYPE OF RAIN THAT BREAKS STEMS. I SHOULDVE PUT MY OTHET TARP UP BUT I DIDNT. I WISH I HAD. IM A LITTLE NERVOUS. I KNOW THESE GIRLS ARE STRONG THOUGH! TOMORROW. ILL ROLL THE RARP UP AND SECURE THE BOTTOM FOR FAST ACCESS. IM ALSO GOING TO KOOK INTO FINDING A TOP FOR MY CAGE I CAN USE IN INCLIMENT WEATHER.
6/25 That little qtr in of rain we were supposed to get turned into torrential downpours and high winds. Luckily no REAL damage. If you watch the video you'll see what I mean. I'm going to havecto be cognizant moving forward. Noticed a few chunks from leaves butvplants are still healthy. I'm surprised how well these girls withstood this storm. They are certainly resilient. The 2 purple punch 1 10th planet that I'm light depping are flowering nicely now. They missed all the commotion from the storm as they were inside. It's smelling good. I'm happy.
6/26 It's what a friend would say is "maineing") out. That mistcthe plants love. I'm surprised the plants are doing as good as they have been considering the wind. Will be adding nutes soon. Need to add extra supports too. Light dep
6/27 Brief periods or torrential downpours. Light depped 3 gallon 0lants are under an overhanfcwhete the hatsxrain can't hurt them but they still get sun. They are really starting to flower now! I'm going to begin feeding with a base nute and a flower nute I think. I'm thinking about giving the light dep some open sesame or something similar. I need to set up a nute program soon but the plants ALL look so healthy! And it's been raining! I've only watered like once or twice since they've been in the big pots. I've seen zero pests aside from a chunk missing from a grasshopper. Usually by now I'd have battled half a dozen things and be battling another half dozen. However I was posing from clones. These are seeds and boy don't I see the difference!


Likes
2
Share


@EtnoGrow
Follow
well everything is going well without pests without at least not noticeable or minimal deficiencies surely, which leaves us calm, potassium soap and neem oil were purchased but it was not applied at the end, it will be the next one, after this pruning work a new one was installed scrog mesh and as you can see we also did with some or one at least the 2nd largest an attempt at sog, so it's like a mixture, then this big ugly mesh, we change it for an ideal girl what we want is that it doesn't grow too much in that The mesh helps us, well, we also change and go to flowering officially when we see that the plant is already flowering by itself, we spread a little so that the small 5 small pots grow a little more, the intensive pruning is to compensate for the ventilation that The temperatures may still be somewhat high, the air circulation in general, my closet is 60x60x160cm, so it comes in handy, it seems to me that we have carried out a good sativa plant by taming it in such a small space and it is I am proud, in addition to having the other copies as well, I hope I have taken advantage of the space and the light as best as possible, that was the idea.
Likes
9
Share


@Irshaads
Follow
Approaching week 5 of flower.
Ladies are healthy as can be.
No signs of deficiency or stress.
Increased bloom nutrient feed.
Removed Grow nutrient from feed.
Likes
10
Share


@UrbanFog
Follow
Plants continued to mature this week and all the buds are getting fat they will have there last nutrient feed this week in prep for flushing and harvest next week.
The Lemon Zkittles looks and smells amazing looks amazing. Nearly all the plants look and smell the small, good genetics and breading.
The Cxx is again a very stable genetics and flowered and smells exactly as the last grow did. Good genetics.
The Peyote Cookies and Shishkaberry also grew well and similar, good genetics.
Afghan Kush amazing buds and very earthy smell.classic
The gorilla cookies had a rather large variation in pheno types but all look amazing and each will be a pleasure to smoke.


Likes
40
Share


@GYOweed
Follow
Looking kinda poopy. I fimmed it, maybe doesnt like the small pot. Maybe overfed. Will feed ro for now and foliar if needed.
