Likes
Comments
Share
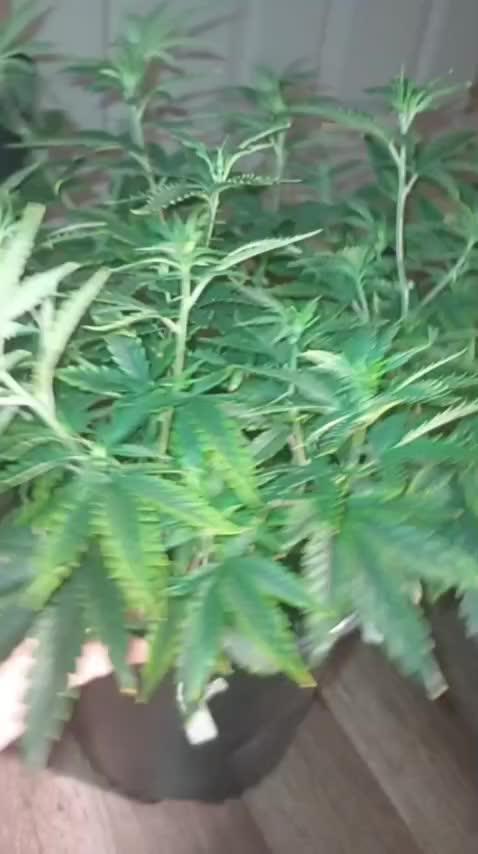
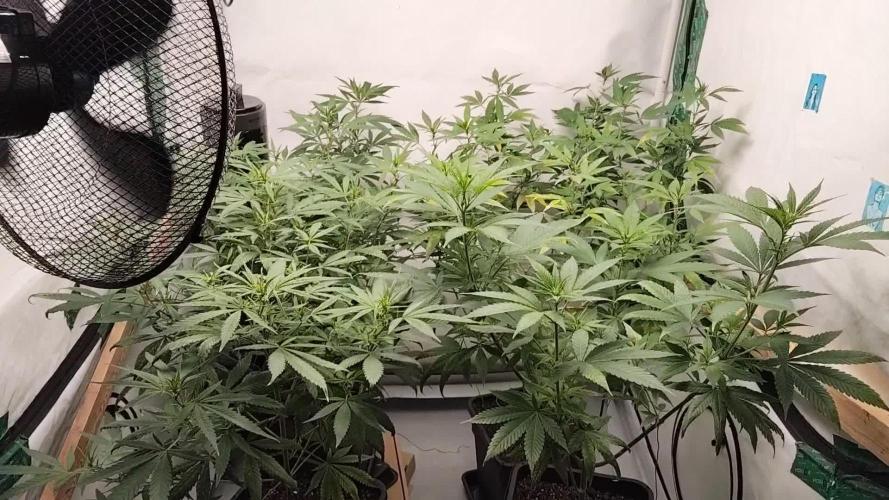
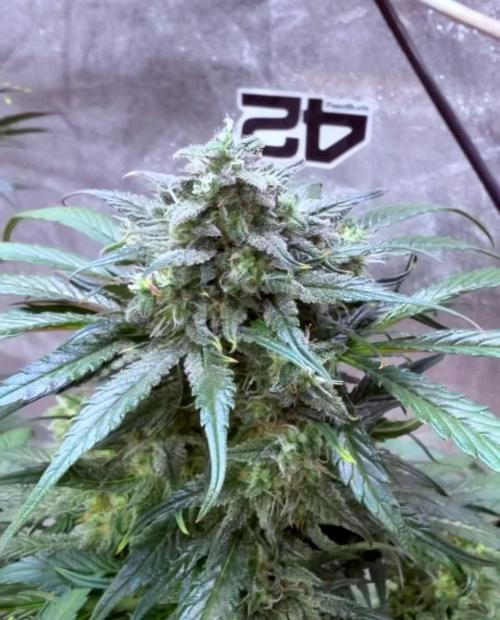
June25:🤦‍♂️🏿🙆‍♂️🏿🤷‍♂️🏿 June27: the lizards have attacked again... for this... today we are going to raise the girls and place a mesh June28: I have no idea how they did it... but they got in again!
Likes
10
Share
@RFarm21
Follow
Week 4/03 - 10/03 Its almost harvest time!
Likes
26
Share
SORRY TO EVERYONE WHO TRIES TALKING TO ME....I STILL CANT TALK TO ANYONE BECAUSE I TRIED CHANGING MY EMAIL ON HERE AND IT MESSED EVERYTHING UP. I CANT LIKE ANYTHING OR COMMENT ON ANYTHING. THE WORST IS I CANT JOIN CONTESTS😪😢😭 FINALLY STARTING ANOTHER GROW. MY BACK HAS BEEN FUCKED FOR MONTHS. CANT WAIT!!!! IM DOING 24 AUTOFLOWERS FOR THIS GROW AND IN 5 WEEKS IM STARTING ABOUT 20 FEMINISED PHOTOPERIODS IN MY 5X5 WITH A TSW2000 SO THEY CAN BE READY TO MOVE INTO THE 8X8 TENT AFTER THE AUTOFLOWERS ARE FINISHED. HOPE MY TIMING IS GOOD🤞🤞🤞🤞 LOL
Likes
41
Share
******* Week 7 Flower - October 31 to Nov 6, 2020, Days 43 to 49 ********* This was flush week.......hurry the hell up and flush week!!!!!😃 This strain is an 8 week strain!! She was close to ready at the end of the week, Day 49. Start your flush week 6......I waited for week 7 thinking she would go 9 weeks. Gave them two doses fo Flawless Finish and 10 gallons of water each. Cant do much more than that🤞👍 She is a sticky girl........move any leaves around and you find out just how much😃 These are some nice Freakin looking buds!!!!!! Beautiful colours and so frosty all the way down the fan leaves........so pissed off at myself because I missed her flush timming.....there are some beautiful purples and yellows in this strain that I missed!☹️ Little more detail....... Nov 1/20, Day 44 - Heavy flush day today. - 32L of tap water with 180oom and 5.7pH going into the girls. - runoff numbers for the girls were both pretty close to the same at 185ppm and 6.3pH. - last 3.5L of flush contained Flawless Finish @ 2ml/L. - Decided I do need to use a flushing agent with these girls......they are so close to done now!!!!! Nov 3/20, Day 46 - Another flushing agent watering today. - each girl given roughly 5L mixture of half tap water and half RO water with Flawless Finish at 4ml/L - More than I would normally do but feeling a little desperate at this point!!! - I am almost feeling like C472 is close to pulling now........damn.....I need a couple of more days yet so just going to let more go amber and hopefully she will continue to take the water and flush herself. Nov 6/20, Day 49 - 1L of plain water for each girl. 25ppm and 6.2pH. - we are at the finish line.....just keeping the pot moist right now. - they are ready for darkness anytime now........they are......I am not😂 Looking good Apolo.......Trichomes are lots and smells are plentiful👍 They finishing too damn fast though😀😀 Good problems I guess, wish I cut some clones to run her one more time and stop feed at week 5 flower😞
Processing
Likes
36
Share
Bonjour à tous les padawans et maîtres jedis Tout d'abord merci à @zami_official de zamnesia Seeds de me permettre de cultiver leurs fabuleuses génétiques ainsi que @Cellmax_Nutrients de me permettre de faire cette culture en m'offrant le substrat et l'engrais nécessaire à ce run. Cette souche sera ma première féminisée étant un jeune cultivateur (mars 2019) je voulais apprendre en cultivant des autofloraisons durant un an. Aujourd'hui nous y sommes enfin et pour ma première féminisée j'ai de grand projet, j'espère arriver à faire un main-lining de 32 buds et pour ce j'ai pas choisi une souche au hasard car j'ai opté pour la Bruce banner #3 de @zamnesia Je rappelle que je cultive par passion et que le rendement n'est pas ma priorité et que je n'utilise que le strict minimum du matériel nécessaire à une culture correcte au prix le plus bas possible MATÉRIEL CONFIGURATION Box 80×80×160 Lampe led Lampwin 300 watts ×2 Lampe COB led Macegrow 450 watts Ventilateur à pince 15 watts Xiaomi Deerma humidificateurs 5L Hygrometre thermomètre Extracteur PROFAN 107 m3/h - 100 Prise programmable électronique ×2 Pot 0.25 litre Pot 1 litre Pot 3 litres Pot 11 litres Pot 50 litres Cellmac nutriments Cellmax biobloom Cellmax biogrow Substrat cellmax bio ligthmix Fil de fer et pince coupante Microscope Petite balance de précision CULTURE ÉTAPE PAR ÉTAPE J'ai tout dabord fais tremper ma graine dans un petit verre d'eau pendant 12 heures dans le noir et je l'ai ensuite placé dans un Tupperware hermétiquement fermé entre de bouts de sopalin bien humidifié dans un endroit noir à environ 27 degrés celcus. Une fois la graine germé et d'une taille de 1 ou 2 centimètres je la prend délicatement et la dans un pot de 0.25l je recouvre de terre je tasse et arrose. Je place ma lampe led 300watts à environ 90 centimètres de la plantule avec un cycle de lumière de 24/24 pendant une semaine. Au début de la semaine 2 le cycle de lumière passera en 18/6 grace a un programmateur. Jour1: léger arrosage Jour2: léger arrosage eau ph 6.3 Jour3: léger arrosage Jour4: arrosage avec 10 centilitres d'eau ph 6.3 à laquelle j'ai ajouté 5 millilitres de cellmax rootbooster Jour5 arrosage
Likes
39
Share
hi guys, This strain is fast becoming a fat lady😃💪 I love the smell, it reminds me of lemon and orange now with that touch of "fizz" if you know what i mean👍 .... it forgives mistakes (I gave her a little too much .. so she got burned a bit ...😐 she does not like much fertilizer .... very surprising .... noticed for the next time👆 ... but otherwise everything looks pretty good .. let's see how long she still grows, since she already looks premature .... because of this year's heat wave, all my plants have had problems in the root zone. these problems are now unfolding their effect .. the root zone has taken so much damage that the roots can no longer properly feed the plant, resulting in finishing wayyyy too fast ... shit happens The resin production is of the hook and she is producing more and more😍 The grow: ph 5.8 Ec.0.9 i will lower it to 0.8 and inrease N a bit at the same time RHD:45% very good for this stage.. have a nice one people till next week
Likes
50
Share
Room setup rundown, examples of bud, et al in pictures... Seedlings/Clones lights - Viparspectra XS1500. Vege lights - Mars Hydro FC-4800 Flower Lights - 650w 3400K 1900umol/s PAR, (3) 226w DIY 2900K 630umol/s PAR (678w and 1890umol/s), Substrate - 50/50 sphagnum peat moss and vermiculite in 5-gallon pots Climate Control - Luckily, the lights, winter and normal furnace use all equate to a decent temperature, though a bit on colder side in in vege phase, sadly. Humidifier is needed early and later a dehumidifier is needed when canopy develops. I only grow in the winter months. Irrigation - do not use the emitters in this diary. They suck a big fat dick to skip a line to suck a bigger dick. Use the pressure compensating type. https://growdiaries.com/diaries/232811-strawberry-cookies-og-r1-cherry-diesel-bbgs-ego-epg-ebg-grow-journal-by-001100010010011110/week/1366923 -- use something similar to those. They come in different shapes, too. Basic process The little light takes care of seedlings in 2.5" wide seedling pots until first up-pot. The 1-gallon pots fit well under the FC4800 in a 4x4 tent until day 21 after sprout. I plant 150% or more of what i need, so i can kill the weak without concern. The goal is for every plant that makes it to the 5-gallon up-pot being capable of producing a minimum of 160 grams with a maximum of a 35-40 day vegetative phase. Third up-pot is into 5-gallon nursery pots and now under the 3 DIY lights and the 650W light in the big tent for a couple more weeks of vege. An irrigation system in the big tent saves a lot of time. One scrog for training and another for support, just in case. Reverting back to a more systematic approach to canopy composition moving forward. About 2.3 colas per sq ft and 8 primary colas per plant. Yields were similar when over-crowding and being less systematic, but the proportion of less dense nugs is greater and trim time is needlessly elevated because of that fact. I was very controlling about this the first couple years but got away from it for far too long at this point. Drying / Curing - Into mesh racks for 9 days. I wet trim and cut down to similarly sized buds for even drying. Temps are controlled around 68F and RH is set to 60%. Then into some 5-gallon buckets with gamma seal lids and (3) 2-way 67g boveda humidipaks (58% or 62%) in each bucket - 1 at bottom, 2 at top. Temp/RH probe confirms that they hold the RH steady at 60-63%. Cost - 0.33 cents (USD) per gram produced. This includes an accelerated depreciation expense for all equipment used, fertilizer, water, electricity for all equipment used, new filters and other yearly purchases - bti, ph strips, sticky traps, etc. I'm a finance guy, so these numbers are comprehensively accurate and purposely err slightly on high side of cost. The only facet not included is the cost of my labor.
Likes
16
Share
These were quite an experience to grow. My second grow ever and they are great. I loved the way they flowered and how they responded to topping. They absolutely loved it. I would 10/10 grow again. Strong genetics and a very strong high.
Likes
4
Share
Likes
4
Share
*** Encontrarás la traducción a Español al final de la traducción en inglés *** ----- MEDIUM & EQUIPMENT ----- Luminary: HLG 100 v2 3000 k Tent: DR60 - 0.6 x 0.6 m Intractor/Extractor: None Vent: 10W Static Pots: 3 galon textile Nutrients: B.A.C., Advanced nutrients & Atami Soil: BioBizz ----- GROWING DATES ----- Seeds planted on Soil - May the 4th (be with you), I am them father Harvest - June 21th Complete Cycle from Seed - 76 Days Light Hours complete cycle - 19 Hrs ----- NUTRIENTS USED ----- Bases & Stimulators: B.A.C. Additives: Advanced Nutrients Others: ATAMI Bloombastic Cleaning: One Week with Advanced Nutrients “Flawless Finish” ----- GROWING ----- @Techniques, there were 2 plants: A taller one that growed it’s own, she was 1.07 m tall, you can see in the videos how she looks like, itˋs an Auto Beast. A smaller one on where i applied 2 techniques, a double topping (Topping x3), and a bit defoliation as can be shown in the video, she ended up with 0.5 m tall, 4 main colas, and the most dense buds i had among my autos. @Weight: The weight dried was surprisingly equal in both plants, while the bigger plant ended up in 67 gr, the small one was 62 gr and with much more bud density and crystal concentration, anyway both plants were very dense and crystal poblated. On wet, the weights were 276 g vs 226 g the smaller, what is translated wet2dry in a 24,28% vs 27,43% for the smaller one FTW!. That difference is very well appreciated in the density of the smaller plant buds, while both are very dense/compact/strong, the smaller plant buds are really MoonRocks. @Trim: Well well well, this part was awesome, very very very little amount of trim material, i finish the trimming of the bigger plant in about 6 min and 15 for the smaller what is real awesome in both cases, and the quality of the trims was incredible too, very good to ice wash it. @ Final product: The final product is almost equal in both plants, the smallest one acquired a stronger taste and concentration of crystals than the taller one, while both tastes are strong grapefruit, when you smoke buds from the small one is like real eating a grapefruit and it leaves a residual taste to orange some seconds after exhaling it, and when you touch or tear up any of both plants, the smell is also very strong to Grapefruit. My friends were shocked by the strong taste and smell to grapefruit it has, really. Good Job Spliff Seeds!, awesome strain!, I will grow it again for sure. 💪👌👌 ***** ESPAÑOL ***** ----- GENÉTICA DUTCH AUTO (Spliff Seeds NL) ----- Dutch Auto es una genética increíble en todos los aspectos, desde la facilidad de cultivarla hasta el producto final, pasando por la resistencia, la salubridad, el tamaño de la planta y la sencillez del pelado, son todo aspectos increíbles y notables de la planta. Sin podas, toppings ni cortes masivos, la planta ha alcanzado 1,07 m con una cola principal de más de 35 cm y una producción final de 67 gr de un producto espectacular, con un sabor de esos que se te quedan grabados y por el cual pasas a reconocerla de inmediato (lo que ocurría antiguamente (1998) con la Skunk). Los cogollos son compactos, gordos, duros, pegadizos y muy olorosos. El aroma y sabor del producto final es muy cítrico, es muy reconocible el sabor fuerte a pomelo, y en el caso de la planta pequeña deja un suave sabor a naranja en boca después de exhalarlo. ----- MEDIOS Y EQUIPO ----- Luminaria: HLG 100 v2 3000 k Tienda de cultivo: DR60 - 0.6 x 0.6 m Intractor/Extractor: Ninguno Ventilador: 10W Static Tiestos: Textiles de 3 galones Nutrientes: B.A.C., Advanced nutrients & Atami Sustrato: BioBizz ----- TIEMPOS DEL CULTIVO ----- Semilla a tierra - 4 de Mayo Cosecha - 21 de Junio Ciclo completo desde semilla - 76 Días Horas de luz - 19 Hrs ciclo completo ----- NUTRIENTES USADOS ----- Bases y Estimuladores: B.A.C. Aditivos: Advanced Nutrients Otros: ATAMI Bloombastic Limpieza: Una semana con “Flawless Finish” ----- CULTIVO ----- @Técnicas, son 2 plantas: Una alta que ha crecido sin técnicas aplicadas, ha alcanzado 1,07 m de alto, en los vídeos se puede ver cómo es una Auto brutal. Una pequeña a la que le he aplicado 2 técnicas, un topping doble (3 cortes) y una ligera defoliación que se puede ver en el vídeo. Esta planta ha acabado midiendo 0,5 m, teniendo 4 colas principales y los cogollos más densos que me haya dado ninguna auto. @Peso: El peso en seco es sorprendentemente parecido en ambas plantas, mientras que la planta grande ha terminado pesando 67 gr, la pequeña ha acabado en 62 gr y con cogollos más densos y poblados de cristales que la grande, aun así, ambas plantas han dado cogollos compactos y muy poblados. En húmedo los pesos fueron 276 gr Vs 226 gr la pequeña, lo que es una diferencia de húmedo a seco de 24,28% Vs 27,43% la pequeña. Esta diferencia es bien notable en la densidad de los cogollos de la planta pequeña que son como rocas lunares. @Pelado: Bueno bueno bueno, esta parte ha sido increíble, muy muy poca cantidad de restos de corte, acabé el pelado de la grande en unos 6 minutos y unos 15 para la pequeña lo que es increíble en ambos casos. Me he quedado sorprendido por la poca cantidad de material a pelar y la calidad de la misma, excelente para hacer bubble hash. @ Producto final: El producto final es casi igual en ambas plantas, la pequeña ha adquirido un sabor más fuerte y una concentración de cristales superior a la planta grande, mientras que ambas saben fuertemente a pomelo, cuando fumas de la pequeña, es como estar metiéndote un pomelo en la boca además de que deja un ligero sabor a naranja después de exhalarla. A la hora de tocarla o desmenuzar cualquiera de ellas el resultado es igualmente un fuerte aroma a pomelo. Mis amigos fumadores se quedaron realmente impresionados del fuerte sabor cítrico a pomelo que tiene, en serio, es increíble. Muy buen trabajo Spliff Seeds, Dutch Auto es una genética increíble, la volveré a plantar seguro!!! 💪👌👌
Likes
8
Share
@Abreuvoir
Follow
Day 28-35 Mistake d28-29 (videos) Shortly after transplantation, I tried to LST the plants by making a bend in the main line. However, I did it too quickly and without proper preparation. This ended up more like a HST. The poorly developed roots suffered from the force coming from the bending. I also happen to have increased the DLI from 25 to 30-32 which surely didn't help. The result of this was stomped growth plus leaf scorch mainly caused from roots damage and lack of hydration/nutes intake. Fortunately, they did a nice comeback during the following days. Plants 1 and 3 survived the pinching d31 Plants 2 and 4 were topped from severe pinching d31 Grow room was updated to final setup d34 They are drinking like healthy plants d34 Controls setup: DLI 32mol RH 60% Temp 24.8°C Plants fan 30m/15m - on/off Extract fan >= 25.3°C
Likes
7
Share
Fattening and Stacking! 😍Ladies are doing great, no pests, no extreme weather. Noticed a slight potassium deficiency in #2, will correct at next feed. Only about two weeks or so left! 🇨🇦❤️🌱😎💨
Processing
Likes
10
Share
@UrbanFog
Follow
This week again had some challenges with power and humidity but we push on. The ladies are getting seriously frosty and start to fatten up. They all looking good but the Lemon Zkittles is most impressive. Also the one pheno of Gorrila Cookies is frosty frosty frosty. But all the plants are looking good and stacking on buds nicely. Looking forward to harvesting in a couple of weeks. Here to hoping no more power or humidity issues, only fat and tasty buds ahead
Processing
Likes
12
Share
@Piablo
Follow
Lessons learned from week 1 of my first grow so far: the best watering solution I found so far is a mix of distilled water from the store and filtered tap water. with a final ph of 6 and ppm of 20-40. a little ph buffer goes a bloody long way. Use with caution. performing tasks like mixing solution and potting a germinated seed are best performed without a phone (camera) in one hand. the seed germinated within 24 hours using paper towels. I planted after 36 hours. After 24 hours of potting, the stem was already shooting up, and I turned on the lights, set to an 18 hour schedule. I wasn't quite ready for this, so it took me some time to research and get the desired humidity and temperature. At this point I added more nutrient in even quantities of FloraGro, FloraMicro, and FloraBloom, according to instructions. Perhaps a little early though, although after just one 18 hour light cycle this plant is shooting up like a rocket and showing leaves. I bought a fan for the inside of the tent and propped it up on a box, and a humidifier to bring the humidity from 40-50% to around 70%. Since it's a winter grow, I have to periodically increase the temperature to keep it at 25 °C. The intake fan, humidifier, and inside fan are significantly lowering the temperature. I'm also experimenting with finding the right humidifier settings since the humidity seems to increase a lot when the lights go out, and the machine is still new.
Likes
8
Share
Las plantas asimilaron bien el calcio y siguieron adelante, se realizó un trasplante en el día 20, de 300cc a 5lts airpot con solo coco, ahora solo queda esperar a empezar el lst💪💪💪
Likes
10
Share
@L1lium
Follow
Es ist soweit! Am Freitag habe ich die fünf Easy Buds nach knapp 11 1/2 Wochen abgeschnitten und geerntet. Leider musste ich feststellen, dass eine Pflanze ziemlich stark befallen war. Ich vermute eine Milbenart oder möglicherweise Fliegeneier. Unterhalb der Blätter waren etliche dunkelgelbe und dunkelbraune Eier, die man auf den ersten Blick kaum erkennen konnte. Bei genauerem Hinsehen sieht man jedoch, dass sich der Befall auf die ganze Pflanze ausgeweitet hatte. Glücklicherweise blieben die vier anderen Pflanzen verschont. Aus diesem Grund trockne ich die Pflanzen auch getrennt voneinander. Die befallene Pflanze wollte ich nicht direkt wegwerfen, sondern erstmal trocknen lassen. Im Nachhinein werde ich schauen, wie ich mögliche Schadensbegrenzung betreiben kann. Die vier gesunden Pflanzen werden in einem geschlossenen Zelt in einem Trocknungsbeutel getrocknet. Die befallene Pflanze habe ich in dem Folienzelt aufgehängt und mit einer Plane abgedeckt. Nach wenigen Tagen der Trocknung sieht soweit eigentlich alles gut aus. Die Eier scheinen nicht mehr zu schlüpfen, sondern fallen von der Blüte ab oder verschrumpeln zu Kompost. Ich hoffe, dass es dabei bleibt. Der Geruch hat sich nach dem Abschneiden deutlich verändert. Schon nach der kurzen Trocknungszeit kann ich einen intensiveren Geruch feststellen, der sich noch nicht so richtig beschreiben lässt. Die Blüten waren stark mit den sogenannten "Sugar Leaves" verwachsen, weshalb ich sie grob getrimmt habe, um sie zum Trocknen aufzuhängen. Nachdem die Blüten vollständig getrocknet sind, werde ich die Buds noch einmal einzeln trimmen und durch meine Trimm-Maschine von Vevor jagen. Der Ernteprozess hat zu zweit circa eine Stunde gedauert. Die Pflanzen waren zum Zeitpunkt der Ernte noch sehr gesund und kräftig. Die Verwurzelung war trotz des geschlossenen Topfes sehr gut. Die schönste Bud hat definitiv die zentrale Pflanze, Greta, ergeben. Nass hätte ich den Bud auf mindestens 12 g geschätzt. Ein Gesamtgewicht des nassen Pflanzenmaterials habe ich nicht ermittelt. Sobald alles trocken und fertig beschnitten ist, werde ich das Tagebuch um den trockenen Betrag ergänzen. Stand jetzt würde ich schätzen, dass der Ertrag aller Pflanzen bei circa 40-50 g liegt, was mich für meinen ersten Grow ziemlich zufrieden stellt, besonders in Anbetracht dieser wirklich sehr simplen Strain. Mehr Infos und Fotos folgen in Kürze, wenn das Curing beginnt. Bis bald! :)
Likes
100
Share
@AsNoriu
Follow
Day 71. Girls went through two plain waterings, planing to give tomorrow first feed without BioGrow. Will try to ramp everything and achieve 800 ppm. No space, girls are showing signs of few top bleach and foxtailing starting ... All Northern Lights are like two weeks behind ... One Green Crack is rocking my soul with sizes of buds - FATASS buds ;))) Diesels are looking fantastically too !!! Amazing house ! Day 74. Chopped FB LSD 25, so got a bit more space, but those side plants missed space a lot !!! Some big branches on Northern Lights died off without proper light and space , so now they should be happier ... Day 75. Girls loved more space and I think two first Alaskan Diesel will fall in 10-14 days. Cut food for them now ! All others are pushing and looking very promising ! Happy Growing !!!
Likes
5
Share
Finally bud sights day 38 from seed 👌🏾🤞🏾