
Likes
Comments
Share


@Jays_Not_Here_Man
Follow
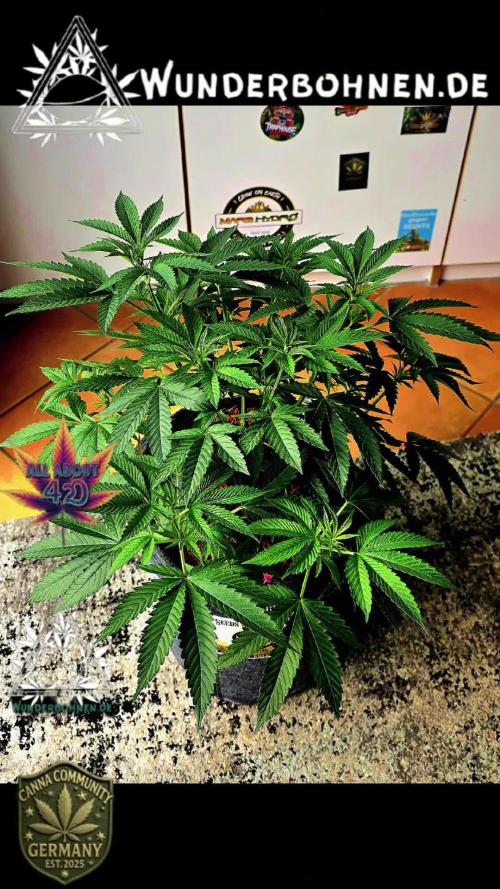
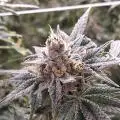
This was an easy grow, and had some amazing results. This is some of my best homegrown to date ❤️ the ladies were easy to manage, no PM, pests or disease. The root balls were enormous, wasn’t much soil to recover. They got heavy in the end from the weight but managed to stay upright for the most part. They were big stretchers , prepare for that, scrog was a good way to go but some of the eager beavers got away from me, which ended in some massive colas. Overall easy to grow, no surprises and you won’t regret the results! 10/10 ❤️👊🤤

Likes
207
Share


@DogDoctorOfficial
Follow
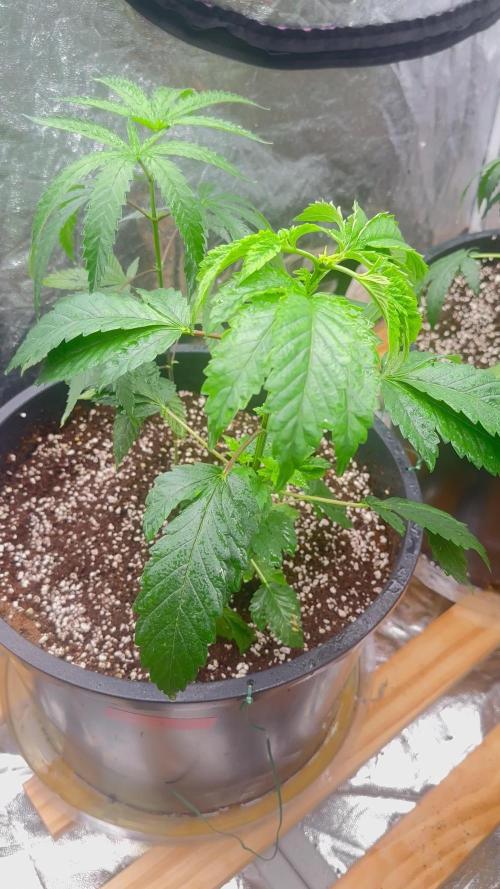
One more week up we go 💚💚💚 they are now in final pot, i will provably top them some point this week and start trainings, still dividing what and how i am gona train this beauty’s 😆 lets see, it will all depend on my mood 🤪😁💚💚💚
And the time to top came and so i did it , they look happy, lets see how they react, they have been great genetics so far so i belive they will do just fine 😁😆🙏🌱
Not even 2 days passed and this girls are going for the P2000 like there’s no tomorrow, they are acting like nothing append, they loved that i topped them with is great news 😇💚
You can check out last week timelapse https://growdiaries.com/diaries/126067-grow-journal-by-dogdoctor#gallery=5030892 and if you in to timelapse stuff i have just recently uploaded the Magnum auto Timelapse just for fun here https://growdiaries.com/diaries/105893-grow-journal-by-dogdoctor , hope you guys enjoy it 💚💚💚 growers love and one more week up we go 🙏🌱💚
And with enormous honor and pleasure that i start collaborating with Zamnezia and Viparspectra
For this run i will have the pleasure of growing some Runtz genetics from Zamnezia seeds that they wore kind enough to send me for test and review 🙏🙏🙏💚💚💚🙏🙏🙏 and for the testing and reviewing i was blessed with the VIPARSPECTRA model P2000💚💚💚🙏🙏🙏 they wore amazing and send me this LED light for me to do some testing and some reviews. Special thanks to Zamnezia and to Viparspectra for this opportunity, lets make magic together 💚💚💚🙏🙏🙏
All i grow is medicine for myself, for me and for my best friend with is me 😆 nothing to sell, so don’t even ask 😅💚💚💚
All info and full product details can be find in can find @
https://viparspectra.eu/collections/grow-lights DISCOUNT CODE 5% - DOGDOCTOR ( all store )
https://www.zamnesia.com DISCOUNT CODE 10% - GROWITGD ( just for seeds )
https://aptus-holland.com/
More info and updates @
https://growdiaries.com/grower/dogdoctor
https://instagram.com/dogdoctorofficial
https://youtube.com/channel/UCR7ta4DKLFMg2xxTMr2cpIg
💚💚💚Growers love to you all 💚💚💚

Processing
Likes
11
Share


@Blacksheep
Follow
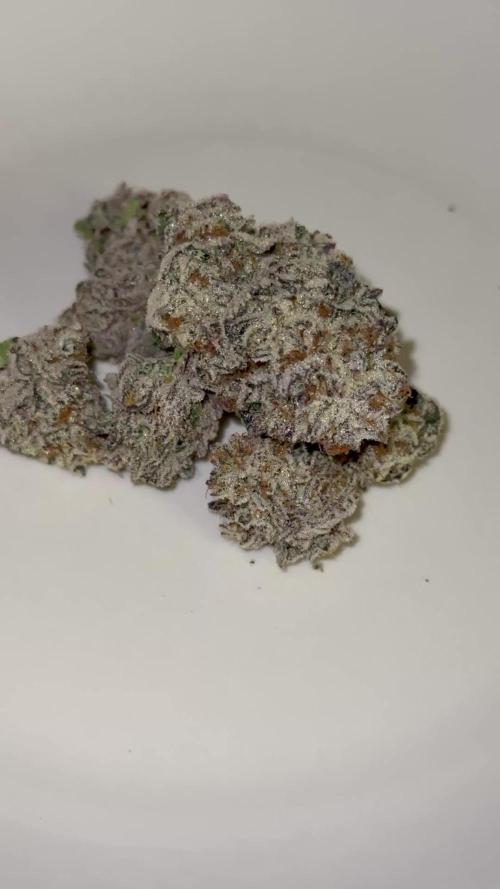
Wow! What a difference a week makes! The purple leaves are really showing now in the Glueberrys & Colorado Cookies. 7 Glueberrys, 2 Colorado Cookies and 1 Blueberry will come down in a few days. Upd

Likes
24
Share


@ChachoGreenCrown
Follow
Buena cosecha, nos costo un poco mantener la alimentación ya que con 1.6 Ec pedían más , les subimos algo en las últimas semanas y dio resultado. El panel.es muy potente les mete mucha carga lumínica.
Estas GELATO-K han ofrecido varios fenotipo con sabores muy dispares.. aún así todos bastante buenos.
Ha sido un buen aprendizaje. Gracias a todos los que pasan a visitar mi perfil. En breves volvemos con más! Saludos

Likes
23
Share


@HideAndFly420
Follow
Day 37
Great growing this orange sherbert by @fastbud420. This week is starting to really get into flowering, i think will stretch à lot. At least i hope.
Need à lot of feeding.
Trying to get as much light is possible to flower but i defoliate being really carefull.
Day 42, last two days stretching became really fast, as results i think that needs a lot more nutrients i’ll increase bio grow from 1(as schedule) to 3 ml/lt, and i’ll stop Top max as i started big bud and i don’t want too many salts to accumulate into the soil.
Suggestions are acceptéd and welcome.
Video of day 42 is took in darkness just a few minutes after lamp switch off.
Let’s ho

Likes
4
Share


@Geili_Seili_fireinfireout
Follow
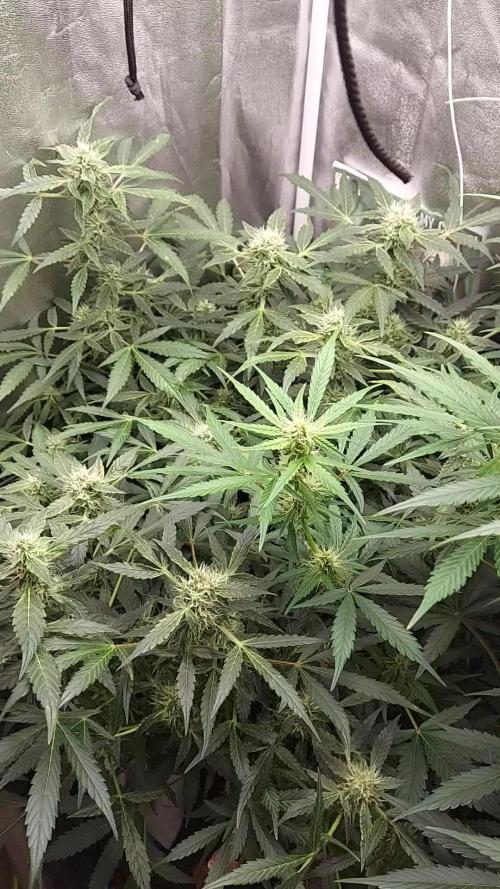
Start woche 6 in flow.
Diese mischung an terpine hatte ich noch nie. Duftet sehr fruchtig nach äpfel,bananen parfüm.👌
Wie ne gut duftende lady🔥🙃

Processing
Likes
5
Share


Likes
17
Share

@Flavors
Follow
🌱 Week 6 Update 🌱
So I caught a little hiccup this week — turns out my timer was off by 2️⃣ hours! 😅 I’ve adjusted it back to the proper 18/6 light schedule 🌞🌚 so we’re back on track. The girls are definitely getting bigger and looking healthy! 💪💚
The autos are starting to flower already! 🌸✨ A bit earlier than expected, but hey… we’ll see what the future holds. 👀🤞
Happy growing, growmies! 🌿🔥
#GrowDiary #Week6 #CannabisGrow #AutosInBloom 🌱💡🌼

Likes
Comments
Share


Likes
46
Share

@squalino
Follow
🌿 Journal de Culture : Mac 1 – "Spirit" (Plante #2) – Pleine Floraison
Date du jour : 27/05/2026
Âge de la plante : J+53 (Semaine 8)
Taille actuelle : 1m15
Évolution : +21 cm par rapport au dernier suivi (Le stretch ne s'arrête plus !)
C'est un départ improvisé ! Sur un coup de tête, je pars en vacances avec ma petite famille du côté de Rimini. Ce matin, c'était la course avant le grand départ, j'ai fait de mon mieux pour prendre quelques clichés rapides et administrer les derniers soins à la va-vite.
📊 État de Santé & Évolution de la Structure
Une poussée incontrôlable : Spirit a officiellement dépassé le mètre pour culminer à 1m15. Sa croissance est tout simplement monstrueuse, voire même un peu trop par rapport à l'espace dont je dispose. Visuellement, elle reste magnifique : une structure vigoureuse qui continue de se couvrir de têtes de haut en bas.
Développement des fleurs :
Les pompons se densifient nettement par rapport à la semaine dernière. La formation des buds s'accélère et la plante montre un excellent potentiel de rendement sur l'ensemble de ses branches secondaires.
Le repère visuel :
Notre figurine "Spirit" est toujours fidèlement installée au pied du tronc pour identifier cette championne.
⚙️ Paramètres Environnementaux & Culture
Lumière :
Intensité fixée à 75%. La gestion de la distance devient un art millimétré puisque la plante continue de manger l'espace vertical.
Climat :
Les températures restent stables (24°C jour / 21°C nuit). Le déshumidificateur tourne pour essayer de contrer l'humidité ambiante causée par le réservoir et le système de la pièce.
Arrosage & Ajustement :
L'Autopot gère l'autonomie en eau claire pendant mon absence.
Nutrition & Entretien (Aujourd'hui)
Apport anticipé :
J'ai donné 4 ml de Bio PK 5-8 de Biotabs dans 75 cl d'eau ph 6,3
Ajustement de planning :
J'ai dû avancer ce repas de 2 jours à cause de mon départ à Rimini. Le but est de lui donner le carburant nécessaire pour qu'elle puisse continuer à gonfler ses fleurs sereinement pendant que je profite de la plage.
📝 Résumé de la situation
Spirit porte définitivement bien son nom : indomptable et sauvage. À 1m15, elle demande énormément d'énergie et l'apport de PK 5-8 tombe à pic pour soutenir l'explosion des bourgeons.
La canopée est bien verte, aucun signe de stress majeur, le run suit son cours de manière spectaculaire. Place à quelques jours de repos en Italie, la nature va faire son travail en autonomie !
le 31/05
j'ai posté une nouvelle video tellement que j'étais impressionné de sa transformation 😍😍😍😍 au retour de mes 4 jours de vacances.
🙏 Remerciements
Un grand merci à @mia_biotabs et à Mrs_Larimar pour leurs précieux conseils horticoles, ainsi qu'à vous tous qui suivez les aventures de Spirit et sa sœur depuis le début.

Likes
3
Share


@dvr147
Follow
11-25-2024 - All three plants received 2000ml PH'd tap water with a dose of Recharge and Silica yesterday. These plants are in full on stretch mode now and they're growing rapidly. These three plants are already as tall as the last grow I had and we're not even into flower yet. My expectation is this week all three plants will go into flower. I'm seeing pre-flower on two of the three plants and would expect that all three will have signs by end of tomorrow. The Mystery Seed continues to be pushed in ways the other two have not. I top dressed the Mystery seed yesterday with 3 Tbsp Gaia Green Power Bloom and we'll see if that makes a difference or kills the plant. I suspect it'll be ok. If I do not detect any burning I'll probably treat all three with power bloom next week.
Otherwise, things have been going exactly to plan. There are no blemishes on the leaves and they've been maintaining a healthy green throughout the grow. I'm going to be watering a little more frequently as we get fully into flower AND I'll be ramping up the lighting in the tent to between 600-700PPFD. Should top out between 900-1000PPFD within the next couple weeks.
11-27-2024 - At this point I'm the big worry for these plants going forward as I have a hard time not messing with them. Since these are Autos, I'm only performing necessary defoliation to expose bud sites. As these girls head into flower I want to make sure I have light getting to as many as possible. These plants look very healthy and two of three are in pre-flower while the "Mystery" seed continues to stay in veg but is also an inch or two shorter than the other two plants....and has been topped. All three plants right now are as tall as the last three plants when I harvested so I consider this a good sign. Happy Thanksgiving!!
11-28-2024 - Happy Thanksgiving. Today I'm thankful for sites like this where I've learned so much. This morning, my CO2 levels finally are getting over 1000ppm which can only mean that the exhale bag is working now....took about 3.5 weeks. This morning I watered all three plants each with 2 Liters of dechlorinated tap water PH'd to 6.5. My tent conditions are OPTIMAL @ 75F/60%RH/1.1VPD/1000PPM CO2 and PPFD readings at the top of the canopy at 650 or so. The plants are growing vigorously now and are getting ready to go into full flower. I would expect flower sites throughout by the start of week 6 if not sooner. Its flower time!
11-29-2024 - Plants grew over an inch since yesterday and all three are stretching nicely. The Mystery Seed, which I topped, is a couple inches shorter but coming along nicely. All three are healthy, no bugs, no signs of anything except health. The conditions in the tent are still perfect and I'm feeling very confident in a good harvest.
11-30-2024 - Bumped up the lights this morning to 70% which should yield around 700-750 PPFD. Watered Granite Runtz and Frosted Cherry O's 2 liters each but the Mystery Seed was still a little wet so I'll water that one tomorrow. Its still not in flower so water uptake is a little less. CO2 levels continue to hover around 1000ppm and I've bumped the humidity down to around 50-54% since they're heading into flower. I also top dressed both the Granite Runtz and Frosted Cherry O's with Gaia Green Power Bloom.

Likes
12
Share


@MichaelPearson
Follow
Hello. There were difficulties in growth. Corrected the mistakes of the past days.
The ground was too wet. Very few useful items. 4 bush came to life. I'm fighting for the other three.
I created a new report with the same sieve bank, but with a new earth.


Likes
2
Share


@HighOhioAn
Follow
What can I say rainbow melon for the win absolutely loving life today starting to build her buds beautifully. No spacing is spectacular. Feel like I’m gonna get giant cola all around the plant.🔥💯


Likes
10
Share


@YAKDADDYDWC
Follow
Going along well have no microscope so idk where the trichromes are at....


Likes
38
Share


@GanjaGecko
Follow
WEEK 7/4F // D43/22F - D49/28F
Dafür das Lady#2 mit der Blüte ein paar Tage hinterher ist, ist sie mittlerweile aber größer als Lady#1 und ist definitiv stabiler was die Seitentriebe angeht. Beide Ladys werden ordentlich voll sein. Jeweils die unteren vier Seitentriebe wurden mit Bindedraht an der Stange in der Mitte befestigt das die Triebe und dicker werdenden Buds bei starkem Wind etwas gestützt sind.
Gegossen wurde an Tag 43/22F, an Tag44/23F, an Tag45/24F, an Tag48/27F und an Tag49/28F.
An den Tagen gab es jeweils ca 1L-1.2L.
Die Töpfe werden vor dem gießen leicht angehoben um zu abzuschätzen wie viel jede Lady benötigt.
Temperatur
Tag: 22-28°C
Nacht: 13-19°
Höhe
#1 94cm
#2 106cm