




Likes
21
Share


@Grey_Wolf
Follow
ACE Seeds Malawi x Northern Lights Auto
8th March 2020
Welcome Back it's now Day 32 since Germination and she is Moving into Full stretch and early flowering .
Hopefully I got enough LST training done so that I can maximise my harvest potential. Ive got her back out in the sun today because the weather is ideal.
I reckon a bit of natural sunlight and UV couldn't hurt her and could even be a very good thing actually.
Whilst she's outdoors I'll feed her with some Fulvic , Humic and amino acids plus Mycorrhizae and one last mix of Grow Nutes.
This should be enough to see her thru the stretch phase hopefully and then she'll start getting more Potassium and Phosphorus for Bud production.
That's about it for This week so thankyou for Reading this update see you next week 👍


Likes
8
Share


@Lucidite
Follow
I’ve harvested the remaining Strawberry Pie (1/2oz) and most of the Gorilla (1oz). There is about 1/2oz Gorilla left. This is giving the next grow (Fruit Salad) more room in the tent as well.
Ideally I would go a week longer maybe before touching the Gorilla. But I need to be moving the perpetual cycle along atm. So far I’m using everything I grow and I need to build up a supply that is curing. With that in mind my next grow (Purple Pair) needs to be germinated this week. These plants from Fastbuds are quick though!

Likes
30
Share


@Growgirl1114
Follow
My Northern Lights has a little calcium deficiency gave her some CalMag yesterday will have to see how that goes ✌️🌱✌️
🌱update🌱 the cal mag worked , she’s back to her beautiful color and no more new spots ✌️🌱✌️
UPDATE...
MY Northern Lights has made a amazing recovery.... ✌️🌱✌️

Likes
7
Share


@Bluemels
Follow
Tag 39: Heute habe ich an alle Seitenarme Holzspieße befestigt. Befestigt habe ich diese mit kleinen Stücken Softdraht die Arme werden zusätzlich noch durch den Softdraht unten bzw. Vorerst in der Waagerechten gehalten(gezogen). Ich muss noch schauen wie ich die noch tiefer ziehe um eine optimale Lichtausbeute zu erreichen. Es ist also noch einiges an Geduld und Grübeln angesagt.
Tag 40: Die Cookie Gelato ist etwas zu trocken geworden, das ging so schnell ich hatte sie erst vor 2 Tagen gegossen davor alle 3. Die Blätter hängen schon, das LST hat sicher auch dazu beigetragen 😬 ich hoffe sie erholt sich.
Tag 41: Sie ist noch nicht aus dem gröbsten raus, so ein Mist. Das Wetter ist auch wieder so wechselhaft, ständig versuche ich den Schwankungen entgegen zu wirken, doch es gelingt mich nicht immer 😫
Likes
6
Share


@Weedosaurus
Follow
Hello
The pistils are turning Amber, the leaves are getting more and more purple and the buds are getting bigger by the day.
Im starting to flush her now and I believe I could harvest her around 23 october, in 10 days.
The smell is already delicious and powerful.


Likes
19
Share


@Changman
Follow
It went well except for the G13 Haze seedling which unfortunately did not make it, we look forward to the week to come, when we will begin incorporating nutrients.

Likes
Comments
Share

Likes
26
Share


@Probation2Propagation
Follow
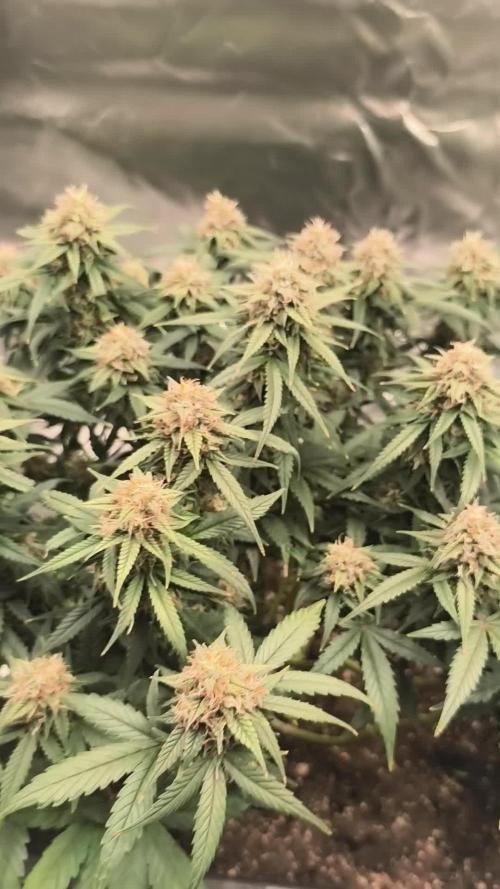
Pheno 1: strong natural tart cherries with a slight candy
Pheno 2: loud cherry candy
Pheno 3: cherry fun dip
Pheno 4: cherries mashed with earthiness
Pheno 5: the strongest cherry pheno I’ve ever smelt. Just loud cherries in your face.
I kept pheno 3 and 5. I pressed both into rosin and the terps were insane it smelt like I worked a double at the marischino cherry factory. The terps on 3 were cherries on the inhale with a candy fun dip exhale (absolutely up my alley). Pheno 5 was the most in your face cherry I’ve ever tasted. It was straight cherries throughout the inhale exhale with a slight tart/candy on the back end. I have found my cherry phenos for my future business. Thank you for riding this journey with me. Harvest results on my YouTube channel link in my bio!

Likes
2
Share

@Earthsower
Follow
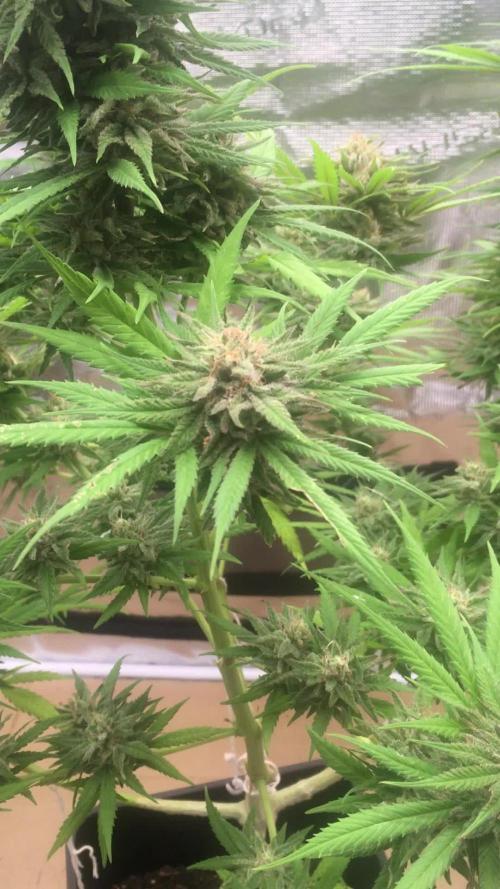
The Afghan #1 has received a full defoliation and all flower sights are exposed. Leaves showing signs of nutrient deprivation. The is slight bud rot but nothing too concerning. most of the calyxes are swollen with nearly every pistol fading to a reddish brown colour and the try chromes are changing from milky to clear. The Afghan #1 feminised has a sweet pungent floral aroma emanating from her. There’s Stem decay as the lady is dying of the stem colour is fading to a dull green. Feeding is all complete!
Likes
8
Share


@Max1973
Follow
Day 35 - few pics and vids..... everything going along nicely 👍
This is a pretty big update, so i'll add to it over the next few days, as i
finish building it all....
i'm building these 2 x SS haze, the full tent, just finishing up the setup.....
trimming them, changing solutions to 12/12 and flower.....
changed the exhaust fan and filter setup to the better outside the tent method....
and installed 12v CPU computer fan, lol ("alta9" fits in 4in ducting perfectly), drops wattage on extractor fan.... 10w tops...
got a few kg of active carbon and making/replacing the carbon filter ....
i'll add afew vids of the new setup in afew days...
Day 36 - few pics/vid of new tent setup...... "alta 9" fan :)
post tomorrow after i finish trimmin and settin up night mode etc......
and into tomorrow we go, lol ... Day 37....
slowly getting there..... little bit more to go...
this should make things abit more interesting..... right tank (short babie) has : 19 lts of tap water @18oC + 150 ml -dutch master one gold FLOWER.... 6.4 PH - 1400 PPM
left tank has : 19 lts of tap water @18oC + 50 ml of elements a and 50ml of b and 10 ml of nitro and 20ml of Crystalic (molasses/pot) .... 6.5 PH - 1200 PPM
more pics / vids of the finished tent setup.... roots, transfer, etc... Day 37 is alot of vids of the clean and change to flower.....
edit - day after build noticed left tank (nutrifield) not enough bubbles..... pulled out the 4 air pump and swapped to the 2 x original oxipumps...
much better, also to fix the problem with ph goin high, and bubbles not stirin the mix, was to add another 10ml of crystallic and another 5ml of nitro...
then pumped both tanks with ph down and set em to 5.8-6.2 - both plants have fully recovered from the big trim, and bounced back within 12-24hrs,
post pics/vid in abit.....
Day 39 - made a freaky video... was curious about what the plants would see looking up at the lights...
the lights and buzzing of air compressors and bubbling tank water, and dazzling lights turned out pretty cool in vid editor,
was in selfie mode....
and final vid of the bounceback from trim :)
👍😎

Likes
8
Share

@Mrs_Larimar
Follow
2025-11-30
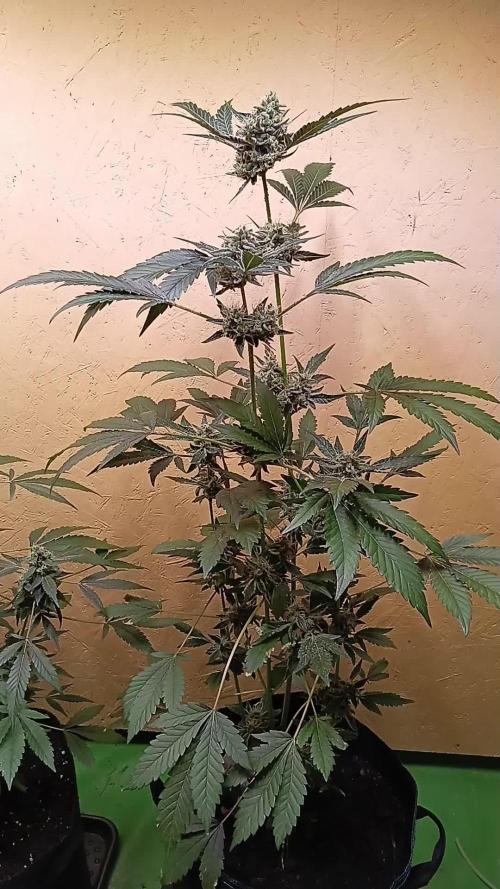
buds are swelling , the autopot plant is closer to be ready, shes covered in trichomes, and the pistils starting to change.
the handwatered Girl doing her best
Multi-Setup Grow Comparison - started September 8th, 2025
🌟 Strain Profile: Permanent Marker
🏆 Breeder Information
Genetics: Award-winning strain - Leafly's Strain of the Year 2023
Breeder: JBeezy @ Seed Junky Genetics
Potency: Up to 31% THC
Aroma Profile: Floral base with soap & gas notes
🔬 Experimental Setup Overview
Total Plants: 3 seeds
Goal: Comparative analysis across different growing methods
🌱 Setup Configurations
Setup #1 -Biotabs " water-only strategy"
Container: 35L Smart Pots
Nutrients: Biotabs "Water-Only" strategy
💧 Watering: Manual feeding schedule
📍 Location: Standard grow space
Setup #2 - autopot system
🏺 Container: 35L Flex Pots
Nutrients: Biotabs "Water-Only" strategy
💧 Watering: Autopot automated system
📍 Location: Autopot station
Setup #3 - Alternative Organic Method
🏺 Container: 35l flexpot
Nurients: Alternative organic nutrient line
💧 Watering: [To be documented]
📝 Note: Separate diary documentation
📊 Expected Outcomes
Comparative Analysis:
⚙️ Automation impact on plant development
Nutrient system efficiency comparison
💧Water management effectiveness
📅 Timeline Status
Current Stage: flowering
Next Update: Weekly progress documentation
🔍 Research Focus
This comparative study will provide insights into:
Automation vs manual care benefits
Biotabs system consistency across setups
Likes
4
Share

@GoodWeedBerlin
Follow
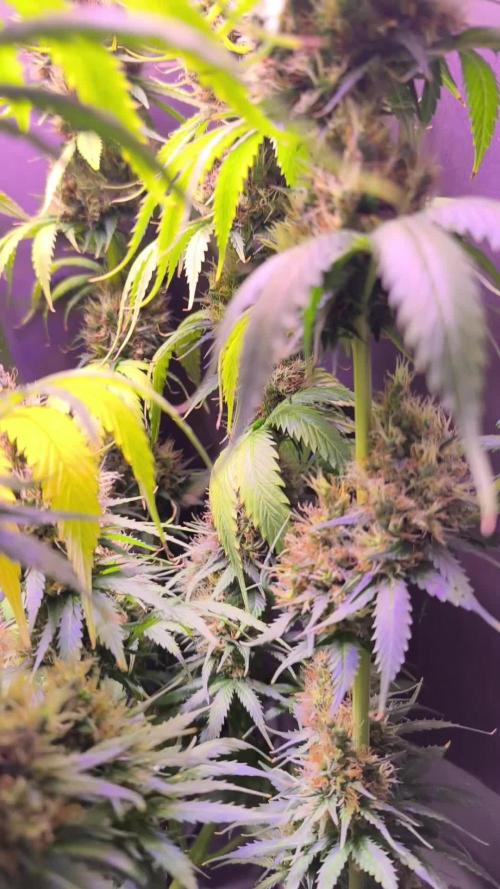
Die Lady ist in ihren letzten Tagen angekommen. Seit einer Woche gab es nur noch pures Wasser, entsprechend haben die wenigen Blätter einen sauberen Fade ins Gelbe genommen und sind dann (zum Teil) abgefallen.
Die Hitzewelle hat sie überstanden, aber die typischen und erwartbaren Reaktionen gezeigt: Sie hat einige Foxtails entwickelt und weniger Terpene entwickelt (bzw. viele verloren).
Richtig vital ist sie nur noch in den Foxtails, die schwer zu inspizierenden Trichome (der volle Besatz fängt erst tiefer in den dichten Buds an) sehen auch kurz vor reif aus. In den nächsten Tagen ist Ernte.
Likes
11
Share


@UrbanBoer
Follow
I cannot come to a conclusion, when it comes to this strain it could be the grow medium, because Unknown Strain has the same vigorous growth rate in recovery and development of new growth while flowering you would not say i defoliated all these ladies on the same day, worse this is a 2nd aggressive defoliation which my other four ladies are showing slow growth and development of new growth, and this past eek I have not been feeding them any nutrients just rain water stored in a 1000lt tank.
Likes
1
Share


Likes
40
Share


@MadeInGermany
Follow
Info:
Unfortunately, I had to find out that my account is used for fake pages in social media.
I am only active here on growdiaries.
I am not on facebook instagram twitter etc All accounts except this one are fake.
Flowering day 65
since time change
to 12/12 h.
Hey guys :-)
We arrived in the last days before the harvest 😊.
The buds have swollen again the last few days.
The trichomes are 90% milky and 10% amber 👍.
This week it was poured twice with 1.2 l each time (for nutrients, see table above).
As always, it is put in the darkroom for 48 hours before it is harvested.
There is still a harvest update and a final update after fermentation 👍.
Until then, I wish you all a lot of fun with the update and stay healthy 🙏🏻
You can buy this Nutrients at :
https://greenbuzzliquids.com/en/shop/
With the discount code: Made_in_Germany you get a discount of 15% on all products from an order value of 100 euros.
You can buy this Strain at :
www.Zamnesia.com
Type:
Runtz
☝️🏼
Genetics:
Zkittlez x Gelato
👍
Vega lamp: 2 x Todogrow Led
Quantum Board 100 W
💡
Bloom Lamp : 2 x Todogrow Led
Cxb 3590 COB 3500 K 205 W
Soil :
Canna Coco Professional +
☝️🏼
Nutrients :
Green Buzz Liquids :
Organic Grow Liquid
Organic Bloom Liquid
Organic more PK
More Roots
Fast Buds
Humic Acid Plus
Growzyme Big Fruits
Clean Fruits
Cal / Mag
Organic Ph - Pulver
☝️🏼🌱
Water: Osmosis water mixed with normal water (24 hours stale that the chlorine evaporates) to 0.2 EC. Add Cal / Mag to 0.4 Ec Ph with Organic Ph - to 5.8 - 6.4
Likes
19
Share


@growbville
Follow
Last week I fought some yellowing of the leaves. Did some small adjustments on PH to keep it in the 5.6 range. Seemed to stop it from progressing.
For Week 3 Veg I topped the plants. I plan to flip the lights at the end of week 3 and move into flower.
Day 15
I continued to have yellowing leaves even though I had everything looking right. (Added Pic). I decided to look into the PH to see if I was having issues with it. I have a meter in the water 100% of the time taking a reading every 1 sec. It all looked right. But I decided to Calibrate it in 4,7,10 solutions. Found out that my meter was off. So new to the check list is to calibrate the meter before each grow.
I was thinking my PH was High, when in reality it was low. put in some PH up to get it back to 5.5 and over the last 16 hours things look pretty good. Leaves look darker.
Day 17
Things are looking good. Leaves are getting darker and new growth coming in.
Day 18
Turned room temp down to 73F from 76F. Fearing it is warming up my res tank too much.
Day 19
Starting to get yellowing again. checked everything and can't find a good reason for it. Did notice some cloudiness in my res tank. Added 2 ML/Gal of peroxide. have Hydroguard on the way to help. I'll be adding more fans this weekend. I have light air movement currently.
Also found a few spider mites and sprayed Greencleaner to all plants.
Current environment settings:
Room Temp 72.74 F
Room Humidity 63.63% (After spraying, Trending down).
Room CO2 589PPM
Tank PH 5.70
Tank PPM (500 Scale) 953
Tank Temp 74.05 F
Day 20
Recalibrated my EC probe just to be sure it was also accurate. wasn't off by much.
Dialed back my flooding to every 5 hours to encourage Rooting. <-- Strong roots = strong Plants
Sprayed for mites
Likes
9
Share


@Tango_Hotel_Charlie
Follow
I absolutely love big bag growing. Check out my discord...
https://discord.gg/wWM4rsCv
Likes
10
Share

@MadeInGermany
Follow
Info:
Unfortunately, I had to find out that my account is used for fake pages in social media.
I am only active here on growdiaries.
I am not on facebook instagram twitter etc All accounts except this one are fake.
Have fun with the update.
Flowering day 47
since time change
to 12/12 h.
Hey everyone 😃.
The lady looks beautiful 😍.
The buds get thicker and thicker 👍.
They smell incredibly delicious 😬.
It was poured twice with 1.4 l.
The tent was cleaned and the humidifier refilled.
I wish you a lot of fun and all the best 👍
You can buy this Strain at :
https://www.zamnesia.com/de/5165-zamnesia-seeds-kalini-asia-feminisiert.html
Type:
Kalini Asia
☝️🏼
Genetics:
Black Domina x Purple Kush
👍
Vega lamp:
2 x Todogrow Led
Quantum Board 100 W
💡
Bloom Lamp :
2 x Todogrow Led
Cxb 3590 COB 3500 K 205W
💡💡☝️🏼
Soil :
Canna Coco Professional +
☝️🏼
Fertilizer:
Green House Powder Feeding
☝️🏼🌱
Water:
Osmosis water mixed with normal water (24 hours stale that the chlorine evaporates) to 0.2 EC. Add Cal / Mag to 0.4 Ec Ph with Organic Ph - to 5.5 - 5.8 .