
Likes
Comments
Share


@oregonian
Follow
Yellowsticky traps capture hundreds of thrips. She is just beginning to become a girrrrl.

Likes
111
Share


@Salokin
Follow
Hi Growmies,
I feel I had a root issue, may have even been root rod. So as I saw a few of the very deeply submerged roots turning brownish and decay, I decided to generously cut away the affected areas and cleaned everything with hydrogen peroxide as good as I could and then properly rinsed the whole system.
It seems, however, like she has started a whole new set of roots that started to submerge after I started feeding the orca from plant success (can be seen in the video below). Can highly recommend this product! She has also not show any signs of stress due the suspected root issues.
Other than that she is a super pretty indica lady :) almost crazy how symmetrical she is. I have trained all main colas horizontally until the canopy had evenly opened up. Now I will let her grow towards the scrog and depending on her stretch, I will flip her at some point towards the middle or end of next week.
Here is the code that’ll give you 20% in Zamnesia‘s online store, just input ZAMMIGD2023 at checkout.
Thanks for stepping by and until next week!

Processing
Likes
3
Share


@indacouch
Follow
Day 8 Not much to say today, just kept an eye on them. watering tomorrow so ill give an update on that.
Day 9 Alright so I watered them today cuz im stubborn. lol but im sure they'll be fine. anyways hope you guys are doing great :D
Day 12 Girls are doing great! watered them and waiting a couple days in between watering. have a great day everyone!!!
Likes
Comments
Share

@ibbzy
Follow
Slowly recovering, hopefully starts booming off this week as theirs definitely been a reduce in growth because of the PH issue last week
Two in the back are Stardawg
Front row is Strawberry Gotila

Likes
10
Share

@DogDoctorOfficial
Follow
LSD Zamnesia Tripping 🙂 | Final Report — Cure, Smoke Review & Closing The Chapter
Well…
Here we are.
The final chapter of this LSD journey.
And honestly, after everything:
* from seed,
* to flower,
* to harvest,
* to drying,
* to trimming,
* to washing,
* to temple balls,
* to curing,
* to finally sitting down peacefully and actually enjoying the medicine…
…I can honestly say this run became something much bigger than just “growing weed.”
This became a full experience.
A full learning process.
A full journey.
And before diving into the smoke review itself, let’s do one final recap for everyone arriving here for the first time.
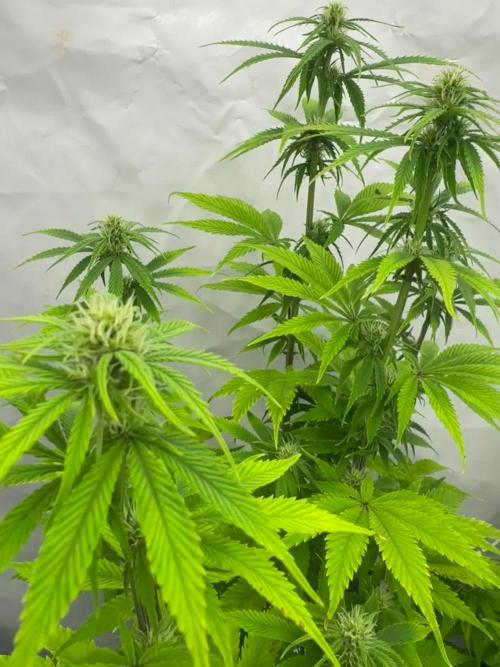
These girls were grown under 12/12 from seed from the very beginning.
No long vegetative stage.
Very little training.
Almost no aggressive manipulation.
Mostly allowing the genetics to express themselves naturally while we simply guided the environment around them.
And throughout the entire run, these plants surprised us constantly.
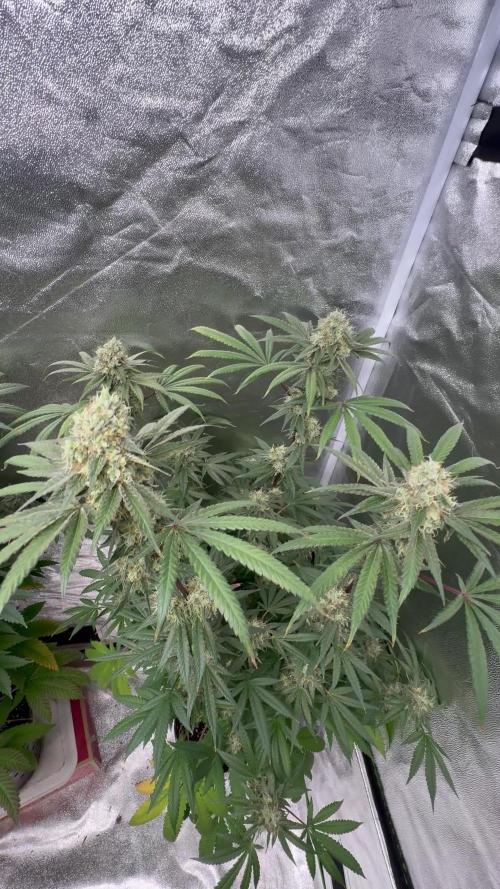
Huge central flower development.
Massive stacking.
Incredible resin production.
Beautiful terpene expression.
And honestly… some very unexpected structure for indica-leaning genetics.
This harvest was divided across several reports because there was simply too much happening to compress everything into one single update.
We wanted to properly document:
* harvest,
* drying,
* trimming,
* curing,
* fresh frozen preparation,
* washing,
* temple ball production,
* extraction evolution,
* and finally the smoke review itself.
GrowDiaries limits the amount of files we can upload per update, so instead of rushing through everything quickly, we decided to slow down and explain the process properly week by week.
And honestly?
I’m very happy we did.
Because now we can finally close this chapter understanding not only how these girls grew…
…but how they evolved.
And evolution is honestly the perfect word here.
The flowers themselves cured for well over a month, some even approaching two months now.
And during that time, the transformation became beautiful.
The aroma deepened.
The sharp greener notes disappeared.
The smoke softened dramatically.
And the terpene profile became something honestly very difficult to describe perfectly with words.
To me personally?
This smells like:
* earthy sourness,
* soft skunk,
* herbal spice,
* and a gentle diesel layer hiding underneath everything.
Not aggressive diesel.
Not overpowering fuel.
More like an old-school soft diesel wrapped inside earthy sweetness and skunky herbal notes.
And somehow…
despite not being truly sweet…
it still feels sweet.
One of those terpene profiles that almost tricks your brain.
The smoke itself became incredibly smooth.
Very soft inhale.
Very soft exhale.
Dense smoke without becoming harsh.
And one thing I really appreciated:
the inhale and exhale remain surprisingly similar.
Sometimes flowers smell incredible in the jar but lose complexity during combustion.
This one did not.
The flavor stays present throughout the entire experience.
Now about the effects…
Despite the name LSD, I personally would not describe this as psychedelic medicine.
At least not in the “seeing colors and melting walls” kind of way 😄
To me, this is euphoric medicine.
Social medicine.
Happy medicine.
The kind that:
* makes conversations flow,
* makes music feel warmer,
* makes nature feel beautiful,
* makes food taste amazing,
* makes you laugh more,
* makes you relax without disconnecting from yourself.
This is the kind of medicine I would happily enjoy:
* during a beach walk,
* with friends at dinner,
* during a peaceful afternoon,
* listening to music,
* creating art,
* talking for hours,
* or simply enjoying life slowly.
Very balanced.
Relaxing without becoming sedative.
Strong without becoming overwhelming.
And honestly?
Very emotionally comfortable medicine.
No paranoia.
No anxiety.
No mental heaviness.
No unpleasant race.
Just calm, warm, euphoric relaxation.
A really beautiful balance.
Now let’s talk about the extraction side of this run…
Because these girls absolutely shined there too.
And honestly?
They washed beautifully.
The fresh frozen material produced incredible resin quality and gave us one of the most satisfying parts of this entire journey.
Everything regarding:
* freezing,
* washing,
* ice water extraction,
* collection,
* freeze drying,
* pressing,
* temple ball formation,
* and curing…
was explained in detail in previous reports for anyone curious about the full process.
But now that some curing time has passed…
something magical started happening.
The temple balls evolved.
And this is where hash becomes truly fascinating.
The hash you are seeing now looks completely different from the fresh temple balls shown previously because the compounds inside are evolving over time.
And that evolution is natural.
At first, freshly pressed hash is often:
* smoother,
* more uniform,
* more elastic,
* sometimes shinier.
But during curing:
* oils begin migrating,
* terpene fractions separate and recombine,
* cannabinoids continue evolving,
* moisture stabilizes,
* oxidation slowly changes color and texture,
* crystalline structures begin appearing,
* and the entire resin starts transforming internally.
That sandy crystalline texture appearing inside the cured hash?
That is part of the evolution process.
And honestly…
it is beautiful to observe.
The hash almost begins looking alive.
Changing week after week.
Softening internally while crystallizing externally in some areas.
Developing complexity.
Developing depth.
Developing personality.
This is why traditional hash makers allow temple balls to age for months or even years.
Good hash is not rushed.
And the smoke?
Absolutely beautiful.
The small sample we opened after roughly 15–20 days of curing already showed:
* full melt behavior,
* deep flavor,
* rich oily smoke,
* long-lasting taste,
* and incredibly smooth combustion.
The rest now remains vacuum sealed for long-term aging.
And honestly?
I cannot wait to revisit it months from now.
Final dry flower numbers for the LSD girls:
* 287g dry flower
* 107.3g dry flower
Final total:
🌱 394.3 grams dry flower
And that does not even include:
* the fresh frozen extraction material,
* temple balls,
* finger hash,
* trim-bin collection,
* or future cured resin evolution.
For a 12/12-from-seed run with minimal intervention…
I’m honestly very happy with these results.
We also have to talk about Grove Bags for a moment because they genuinely made curing extremely easy and consistent during this process.
For anyone unfamiliar:
Grove Bags are designed to help stabilize humidity exchange naturally while reducing the need for constant burping and jar management.
Do they replace proper drying?
Absolutely not.
Nothing replaces a proper dry.
But once the flowers are dried correctly, they help maintain an incredibly stable curing environment with much less stress and handling.
And honestly?
For larger harvests especially, they become incredibly practical.
Now…
before closing this chapter completely…
Thank you.
To Zamnesia for the genetics, the Bubbleator, the support, and the trust.
To Plagron.
To F.O.G.
To the LEDs.
To Grove Bags.
To the gear involved.
To GrowDiaries.
To the entire community.
To the longtime followers and OGs.
To the new curious visitors.
To the supporters.
To the skeptics.
To the silent viewers.
To the people who stayed since the beginning.
To the people who discovered this journey halfway through.
To the lovers.
And yes… even the haters 😄
If someone spent even a few moments here sharing this experience with us, then they deserve gratitude too.
And of course…
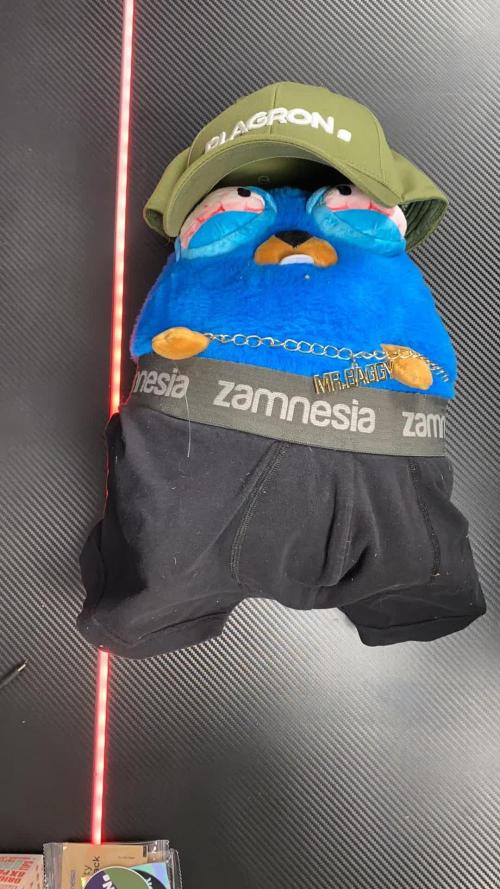
special thanks to Mr. Baggy for staying with us through every single stage of the madness 😄
From trimming sessions…
to washing…
to temple balls…
to studio chaos…
to hash curing…
the fluffy supervisor never abandoned his post.
And even though this chapter closes here…
the journey itself continues.
We may return months from now to revisit the cured hash evolution and see how time transforms it further.
And meanwhile?
New runs are already beginning.
New genetics.
New experiments.
New lessons.
New mistakes.
New beautiful moments.
So if anyone enjoyed this journey…
You are always welcome here.
Wishing everyone:
healthy plants,
peaceful minds,
sticky fingers,
beautiful medicine,
great friends,
slow sunsets,
and curiosity enough to keep learning 🌱
📲 Don’t forget to Subscribe and follow me on Instagram and YouTube @DogDoctorOfficial for exclusive content, real-time updates, and behind-the-scenes magic.
GrowDiaries Journal: https://growdiaries.com/grower/dogdoctorofficial
Instagram: https://www.instagram.com/dogdoctorofficial/
YouTube: https://www.youtube.com/@dogdoctorofficial Deleted by Youtube - https://www.youtube.com/@TheDogDoctorOfficial NEW
Vimeo : https://vimeo.com/dogdoctorofficial Under construction stay tuned ⸻
Explore the Gear that Powers My Grow
If you’re curious about the tech I’m using, check out these links:
🔆 Lighting & Environmental Control
• Future of Grow — Advanced LED lighting technology
https://www.futureofgrow.com/
DISCOUNT CODE: DOG20
• Lumiflora — Under-canopy LED lighting
https://lumiflorade.com/
• TrollMaster — Environmental controllers and automation gear (past collaboration)
⸻
Genetics
• Zamnesia Seeds — Genetics used in this project
https://www.zamnesia.com/
⸻
🌱 Soil, Substrates, Boosters & Root Support
• Plagron — Substrates, bio mixes, and supportive products
https://plagron.com/en/
⸻
🎒 Storage, Curing & Preservation
• Grove Bags — Curing and storage solutions
https://grovebags.com/
⸻
📸 Photography Equipment & Tools
(Not sponsors, but part of my creative toolkit)
• Sony A6700
• Sony full-frame macro lens + few more
• Stacking photography workflow - learning
• iPhone (for behind-the-scenes shots)
As always, this is shared for educational purposes, aiming to spread understanding and appreciation for this plant. Let’s celebrate it responsibly and continue to learn and grow together.
With true love comes happiness. Always believe in yourself, and always do things expecting nothing and with an open heart. Be a giver, and the universe will give back in ways you could never imagine.
💚 Growers love to all 💚
📸 P.S. – The Eye Behind the Lens
All photos in this diary (for now — except for the ones showing the camera, which I took with an iPhone) are taken with a Sony A6700 paired with a Sony full-frame macro lens and a few more.
Photography is part of the story — it’s how we share the fine textures, the glow, and the quiet details that words can’t always capture.
I’ve also started experimenting with photo stacking — a technique where multiple images, each taken at a slightly different focus point, are layered together to create one perfectly sharp image from front to back.
It’s not digital enhancement or AI; it’s pure photography — a way to reveal the plant’s beauty in microscopic depth, from trichome to petal.
You’ll even see a few shots of "ghost me" capturing the shots — camera, lens, setup — because every grow deserves not just to be cultivated, but documented like art.
FOR DISCOUNT CODES AND MORE JUST FOLLOW THE LINK https://website.beacons.ai/dogdoctorofficial
NEW DISCORD - Official Server Invite Link : https://discord.gg/ksjAkA5T74
Likes
5
Share


@Ringoworm
Follow
Every thing is looking fine I think the two at the back looks really good 👍

Likes
92
Share


@Krisis
Follow
03/26/24 So, I hadn’t been giving the micros I have because I noticed it has a lot of nitrogen in it and they already had too much in the past. This wasn’t a good idea apparently.. getting some serious yellowing and reds in some of the leaves. One of the girls seems perfectly fine with no signs of this, but the other 2.. yeah. I’ve not made any changes from last update other than adding the micros. Hope they’ll be alright as I’m pretty sure this is way too early for any colors other than green 😢 Any input here is completely appreciated.
Other than that the girls are smelly, frosty and sticky af. I can’t really figure out how to describe the smell. Something like chemically-cough medicine? With like some kind of funky but then a whiff of sweet with a bit of the marker smell. Terrible description, I’m sure.. but it’s hard to explain.

Processing
Likes
39
Share


@Jubiedude
Follow
Day 1 (day I got plant)
-Placed clone in cup of soil with bottom cut off in larger pot for easy future transplanting. (Pics. 1&2)
-Cut 2 bottom fan leaves off
-Sprayed leaves and soil with water
Day 3
-noticed tiny white spots on some leaves. Looks like spider mites but probably not since I'm in a grow tent and I couldn't see evidence of mites under the leaves (UPDATE Day 5 I added a video of the white dots)
Day 4
-Didnt get to see plant today. Received first watering to overflow of the smaller cup
Processing
Likes
76
Share


@ThrashedTV_BakedByGlaze
Follow
MID-WEEK UPDATE:
Gave the twins their second last feeding today. A few nights of 14-16 Hour Dark periods as well due to plans/not having timers but as I said before I think the longer Dark periods have really sped up the flower development.
PURPLE IS STARTING! Some very nice purple is starting to come into the cals and sugar leaves 😈 Going to push some lower temps in week 8 to get as much colour out of them as possible.
Arnold still heavy fan leaf fading. Ran straight water through the medium before todays feeding incase any build up nute locked it. Never fully bounced back from the last feed but also getting near the end. I have a feeling I'll pull Arnold first in week 8 then maybe let Danny go for a more couch lock.
Danny: GRAPE SMELL. Holy, I don't know if it's more of a Grand Daddy Purp pheno or what but holy is the grape smell off of Danny insane. Almost like a different strain compared to the smells off Arnold.
WEEK 6! HOME STRETCH OF GLAZED GROW #1!
The smell is insane. What started as a premature musk has slowly evolved into sticky ass chocolate goodness, fresh mint/herb, and even some grape/fresh fruit smell on the fingers after defol and mold checks. Noticing a hint of that GASSS too as we start to enter the final ripen.
This will also mark the final week of Nute feeding. Fed today and probably two more Weds/Sun. Then will switch to Molasses/Water for Week 7 and plain water for first half of Week 8 before the dry out.
As you can see, Big Arnold is showing cal/mag and PH problems. Always bounces back after PH perfect feedings and I've been defoliating the faders as we go to save bud energy. It's been rootbound since mid-flower and I'm sure the whole root zone is a mess. The extra work I've had to put into a soilless peat-based medium like ProMix with a photoperiod plant has been great practice and experience but I'm looking forward to a few round of autoflowers and soil grows to dial back the difficulty settings through the winter months.
Broke out the good camera for some shots since we're getting to the good stuff 😎
- Canon EOS 760d
- 75-300mm
- 50mm
Have the twins hanging out with the SoundLink again for those good vibrations 👊
PLANT PLAYLIST:
Kendrick Lamar - To Pimp A Butterfly
Sublime - Sublime
Shad - TSOL

Processing
Likes
28
Share


@Elysian_gardens710
Follow
Day 57: #1 has been successfully transplanted to a 10gal smartpot. We used ocean forest soil and happy frog mixed at a ratio of 1:3. It has higher p&K and were getting ready for flower
Day 59: #2 is still in the 3gal pot of happy frog. She isn't showing any signs of nutrient deficiency or stress and because of size restrictions I think I'll leave her in this pot.
Day 61: watered with real growers recharge today. 1st time watering since transplanting #1. And she seemed to be okay. We have decided to start watering every day and not for run off.i cant get a good routine and sometimes they get bone dry. So to avoid that we will water a couple cups every day and allow 36hrs of drought 1x a week.
Day 63:
Pulled the girls out for a photo OP tonight 😁 also we watered #2. Then we did a mild defoliation because the new optic 8+ arrived today!!! The entire tent is set for flower!! I will be starting flower tomorrow morning and also be taking clones from these girls as well so we can get some good info logged on how the Choc mint clones too!
Week recap:
2x optic 8 LEDs for 1000 true watts
60%-70% dehumidity at all times
73°-83° tent temps all times
Happy frog soil
Real growers recharge
Ac Infinity t8 fan with carbon filter
Dehumidifier
Several oscillating fans
8,00btu portable air conditioner
Likes
14
Share

@Chubbs
Follow
This week we did a major defoliation and lollipop on the girls. We also switched to Bloom A & B with a PK booster 3ml/gal of each. Over all I'm excited to see as they just started flower and look amazing. I bumped up the co2 this past week up to 750ppm. I can't wait to see the flower progression through the next few weeks.
Happy Growing
Likes
4
Share

@Ninjabuds
Follow
White Runtz from Barney's Farm is a real showstopper. It was the biggest plant in the garden, with strong stems that supported solid, egg-shaped nugs. The buds are practically dripping in frosty trichomes, and the aroma is a mouthwatering mix of sweet and fruity candy. White Runtz delivers a powerful punch of relaxation and euphoria that'll melt away stress and leave you feeling amazing. If you're looking for a top-shelf strain that's both beautiful and potent, White Runtz is a must-try.
I recently upgraded to the GrowPro Solutions Under Canopy lights, and wow, what a difference! The colors on my plants are seriously popping – they look so vibrant. Plus, I think it really helped them finish strong. If you're looking to boost your grow, I'd definitely recommend checking these out.
Processing
Likes
45
Share


@AsNoriu
Follow
Day 78. 4 girls started to fade away, for them its last feed and i hope by january 9 they will be choped. I see some cloudy trich, got small bud for a test and better view under microscope, still early, hope two weeks for them and 3 for other except Strabery Cough which is still in veg and late FastDiesel which will flower till mid-late february ..
StrawberyCough will have heavy defoliation on friday.
Merry Christmas !
Day 80. Strawbery cough had a hard life, she was the biggest plant, but didnt fit into my edited plans, so i gave her away.. she had low temps, no light for 6 weeks, i took her back totaly f**ked. Now she has new home, will defoliate and Lst her on saturday, thought i will have to wait couple days for her to recover from transplanting but she loves life !
Other girls are fine, not so fat as i would want it 4sure ...
One girl will fall on new years eve and time will be changed to 12/12 for strawbery cough to finish in februrary...
Just havent made my mind, have super sugary Fatty or Early Tangie, those two plants are most matured and i need one space for Strawbery ...
Day 81. All girls are geting second round of water after heavy feed. Trich still clear or partly cloudy, thinking to make one more feed for all. Decided to leave all girls to mature, even under weaker light because of Strawbery Cough, which got heavy training, now couple days to recover and she goes to 12/12.
Day 82. Couldnt hold it, some of them smells so nice, that my patience was weakend ;))) Bud is dense and really sticky, now i know, they need minimum two weeks. Low light hours, leds, couple mistakes made them to mature really slowly compaired to my expectations.
Think some of them will need maybe 3 weeks+ to mature ...
Rethought my feed plan, no more nutes for all girls , just Late FastDiesel and StrawberyCough will be on nutes schedule. For all other girls its ph water 2x and light molasses mix to finish round, will repeat it till chop day . Hope they will start to fade away quicker. Plus when i was transplanting Strawbery noticed nutes salts inbetween air stones, quess they have a lot in pots, maybe taste will be cleaner even if i loose part of weight.
Never bumped them so much, my cheap ppm meters shows 780-950 readings and i put almost recomended dose, usually i go with 1/4 of recomended dose of nutes.
Strawbery loves new 50 L pot and recovers from haircut, couple more days and she goes into flower mode.
Night temps droped to 19 from 22.
Day 83. Got Christmas presents from RQS, now will have to start new crop in midle of February if i want to finish it before real summer heat will kick in. Girls dont grow indoors at mines, too hot.
So plan is to finish Late FastDiesel in main tent( Strawbery Cough forcing me to buy new small tent for it to finish and save some time for me), hope it will be around midle of February and to start new my dream run by then ;)
Will try to do diary with all my mistakes from previos grows explained and hopfuly prevented ;))))
I will see how much time it takes, but next will be 100% of action documented and explained.
One more time, Thank You #RoyalQueenSeeds !
Day 84. Just wait now, think all way is clear and i just need to finish my trip ;)
Happy New Year !


Likes
19
Share


@valiotoro
Follow
Wonderful color😈
The smell is divine🤩
The trim was super easy & the buds are dense & super sticky👌
Likes
7
Share


@Adam22
Follow
Flushed for 3 days so far so good. No yellow tips on the leafs yet but I may just have to pull this plant down today I have just 1 plant in the tent it doesn't seem worth running this just for 1 plant so I will pull down later today I think and upload pics and remember where I went wrong for next time. I have some new seeds just been delivered I think next time I will try to have an additional tent slightly bigger so I can have 2 different strains growing at the same time. Definitely using feminised seeds also as don't have time to waste vegging for 6 weeks a plant to just end up with balls. Next run will be:
4 x cookie dawg
3 x velvet moon
1 x sherbert punch
I will be looking for a decent led light for the next tent also I would like to run the same strain in both tents and see what the difference in the results are using my hps light vs led
Harvested plant 1
5oz budd
14g popcorn buds and leaf trim


Processing
Likes
13
Share


@Grass_slinger
Follow
So all the plants are topped twice now and have all took well , my next step will be lowering my scrog net into position and also attach some gutter for collecting my runoff

Likes
78
Share

@AsNoriu
Follow
Day 155. BUD ROT !!!!!!!!!
And million questions what to do ....
I have next window only in 11 days, so in 60 min I will be on the spot and will decide what to do ...
Plan A - clean all infected areas , by cutting all branch. Disinfect with spirit and apply BioBizz Leaf Coat.
Plan B - just chop ALL and bubble hash shit.
It's two weeks at least too early. If I'll find more than five infections - they go down !!
If I'll chop them I'll update diary, if no - I will come after two weeks straight before chop.
Happy Growing !!!
Likes
6
Share


@Kramouss
Follow
Heading to harvest in about 2 weeks boutta full send on overdrive + bud candy for the last week prior to flush with flawless finish. The smell is definitely crazy. Worth noting that i’ve switched from biobizz to AN and their nutes definitely worth the price
Likes
91
Share


@DogDoctorOfficial
Follow
i normally dont do this of changing to 11/13 and in the same week full and hard defoliation like i did, but i was seeing my space getting short so , it is what it is and lets have faith that they will still feet in there lol i mean i still have a bit of space to bring up the LEDs but is just not that much so i better safe than sorry , i prefer to stress the “stretch” by defoliating and with this i hope for a smaller one , lets see.
I mean they are completely recovered to a point i am thinking in changing the diary name and all since its not an SOS thing at all any more lol
Started my fruit stimulator and my P supplement to help them realize is time for changing and off they are to what i believe will be a interesting Grow journey.
For now that is all i am doing and i believe is more than enough love for the first week flowering lol
As always thank you guys for your love , your time, your support and it all, i fell blessed and i am truly thankful <3 <3 <3
All i grow is medicine for myself, for me and for my best friend with is me nothing to sell, so don’t even ask <3 <3 <3
All info and full product details can be find in can find @
https://www.zamnesia.com
https://aptus-holland.com
#aptus #aptusplanttech #aptusgang #aptusfamily #aptustrueplantscience #inbalancewithnature #trueplantscience #zamnesiaseeds #growerslove
With true love comes happiness <3 <3
Always believe in your self and always do things expecting nothing and with an open heart , be a giver and the universe will give back to you in ways you could not even imagine so <3 <3 <3
More info and updates @
https://growdiaries.com/grower/dogdoctor
https://instagram.com/dogdoctorofficial
https://youtube.com/channel/UCR7ta4DKLFMg2xxTMr2cpIg
Growers love to you all