
Likes
Comments
Share


@CanarianGrow92
Follow
This strain is awesome, 2nd time i grow this strain and close to one of my favorites.
I grew 2 plants and we have one very sweet plant with nice fruity touches, the other plant reminds me of the sour gumballs i ate when i was a little kid!
Nice sticky and extremely hard buds, these buds exploded in THC! Totally recommended, a true gem 💎 of Dutch Passion seeds

Likes
15
Share

@LetUsGrowTogether
Follow
Einen wunderschönen guten Tag wünsche ich euch, liebe Growfreunde 🤗😊
Hab diese Woche den entfeuchter angemacht und auf 60% gestellt damit die luftfeuchtigkeit bissl runter geht. Am Dienstag hab ich auf 12/12 gestellt, da die Lemon Shining Silver Haze nen ganz schönen schub gemacht hat und die Runtz auch😁😁😁😁. Zuvor hab ich alle etwas entlaubt und paar unnütze Triebe entfernt.
Haze: ca.50cm momentan Runtz: 45cm Green Gelato: ca 40 Sweet ZZ: ca. 40cm die Peyote Critical hat gan schön aufgeholt: ca.40cm💪💪 und die Gorilla Zkittlez hinkt hinterher mit etwas über 20cm. Ich hoffe auf min. 100% stretch bei den großen und vllt 150% bei der Gorilla Zkittlez. Naja, die Hoffnung stirbt ja bekanntlich zuletzt


Likes
78
Share


@PEAKYPLANTERS
Follow
hello , weed masters
this baby stretches so much.... its stems begin to shine with resin and its aromas do not take long to arrive! i hope to have a good experience with this strain
I leave you my greetings and if you want to follow me also on instagram

Processing
Likes
10
Share


@DudeGrowsWeed
Follow
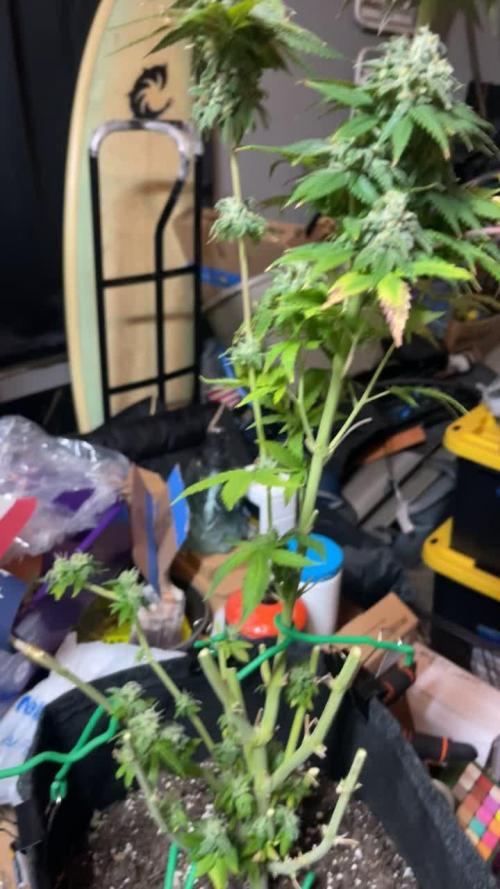
Sour Hound is stretching for the moon. She's the tallest plant I've ever grown so far!! Just starting the flowering stage now. I can't wait to see how she yields. I backed down a little on the Recharge this week, but still giving twice the suggested amount. Also still giving her Mammoth P. Will start with MegaCrop (Greenleaf) nutrients later this week. 👍

Likes
23
Share


@nonick123
Follow
Día 27 (20/05) Riego con 250 ml de Té de Compost
Día 28 (21/05) Vuelven a tener sed! Las riego con 250 ml sólo H20 pH 6.2
Día 29 (22/05) Riego con 750 ml H2O+ Regulator 0,15 ml/l + CaMg-Boost 0,25 ml/l + Startbooster 0,25 ml/l + TopBooster 0,2 ml/l- pH 6.2
NYC Diesel Auto vuelve a recibir aplicación foliar de sales de Epson (4 g/L) porque presenta de nuevo ligera clorosis
Día 30 (23/05) N/A
Día 31 (24/05) N/A
Día 32 (25/05) Las plantas no paran de crecer! 😍
Día 33 (26/05) Riego con 750 ml H2O + Regulator 0,15 ml/l + CaMg-Boost 0,25 ml/l + TopBooster 0,2 ml/l- pH 6.2
💦Nutrients by Aptus Holland - www.aptus-holland.com
🌱Substrate PRO-MIX HP BACILLUS + MYCORRHIZAE - www.pthorticulture.com/en/products/pro-mix-hp-biostimulant-plus-mycorrhizae
Likes
52
Share


@Salokin
Follow
The High intensity was to strong (clearly my fault) in the beginning which stunted her overall stretch, she however still delivered super dense, terpene and trichome loaded buds.

Likes
220
Share


@CRiSPrGrow
Follow
Week 13 : Six Shooter
So i've been looking into these plants' trichomes daily, sometimes twice daily, they're all really really cloudy, like full white, completely curled in. Some have a slight beige tint to them, so i'm guessing that's the first few ambers ! That means it's time for the chop ! these wrapped up their second week of flush with three x additive flush. To flush you water until run off then add 20% which is just about 4 pints for me. Now i'm at the end of the grow i can say that the full tent is a good idea, but it does get crowded and that will surely affect my yield as there are a fair few colas that are totally f-ed in the sense they are thin, skinny, a tiny bit of flower with just a few pistills... so those are useless and they're going into my bubble hash project, so let's see, maybe i can extract value out of the trim , the popcorn buds, and the rest of the plant ! Wish me luck and drop me a message, i'm chopping these down real soon ! 🚀

Processing
Likes
Comments
Share


@Mr_nugs_lover_David
Follow
She's looking very beautiful in her 3rd week of flower right now,I'll be topping her on her 4th week probably.looks very healthy,I think she's loving the soil organic mix I prepared for her,

Processing
Likes
15
Share


@CannabisAprendiz
Follow
Hola con esta semana ya quedamos al dia con el seguimiento ya que estaba atrasado en el tiempo. Se nota una producción de resina notable en esta genética que nos ha gustado mucho por su olor y estructura de las plantas .
hemos creado un video por cada una de las 14 plantas del seguimiento, hay varias muy llamativas que están "pre-seleccionadas" para mantener a futuro, el olor que se llega a sentir es muy florar y dulce, si tienen alguna pregunta no duden en preguntar saludos.
Hello with this week we are already up to date with the follow-up since I was late in time. There is a remarkable resin production in this genetics that we liked a lot for its smell and structure of plants.
We have created a video for each of the 14 floors of the follow-up, there are several very striking that are "pre-selected" to keep in the future, the smell you get to feel is very flowery and sweet, if you have any questions do not hesitate to Ask greetings.
Likes
2
Share


@Saintvicious
Follow
Holy Lst. Getting crazy now for just a few weeks from seed. No stopping it now.
Likes
3
Share


@TrimQueen
Follow
It’s day 30. One month old since her first sun light exposition. It’s been an amazing journey. A great start for 2025!

Likes
1
Share


@Andres
Follow
we will see how it is going....she grows fast ... I dont have much information for now


Likes
2
Share

@GingerGarageGrow420
Follow
Strain: Fast Buds Rainbow Melon Photo Feminized
Harvest Day 64 of Flower
Day: 113 from sprout
Medium: Growers Gold
Light: Vivosun VS2000 at 100%
VPD: 1.5 kPa
Light Distance: 8 inches
Watering: By hand, ~20 oz daily
Nutrients: pH Perfect Advanced Nutrition Grow, Bloom, Micro 2 ml / L and 1 ml / L big bud.
Pistols turning red (50 percent)
35 inches
Likes
14
Share


@Terpyboyz
Follow
Alrighty growmies 👌🏻 so I’ve had a bit of a week set back due to issues, but back on track, the heat wave has definitely given a few girls a bit of a hard time not being able to attend but none the less, lifted the light again, trying to get on top of this PH fluctuating I’m having again using these stupid PH drops as my PH pen also keep jumping. Besides that I’ve managed to make a new home for the clones and got them under a couple UFO LEDs so that will house them for a few more weeks and al bring out the 600w HPS for them, but these runtz since being repotted have not taking nicely to it at all even using dynomyco so again hopefully by Friday they should be past that stage if not on flowering either way going to be a bomb scare when these taller plants start to stretch might have to bring out the net for sure 🤣🤙🏻 if all goes wrong at least I have my clones for back ups, keep eyes open for the incoming fire thou 🔥


Likes
25
Share


@eldruida_lamota
Follow
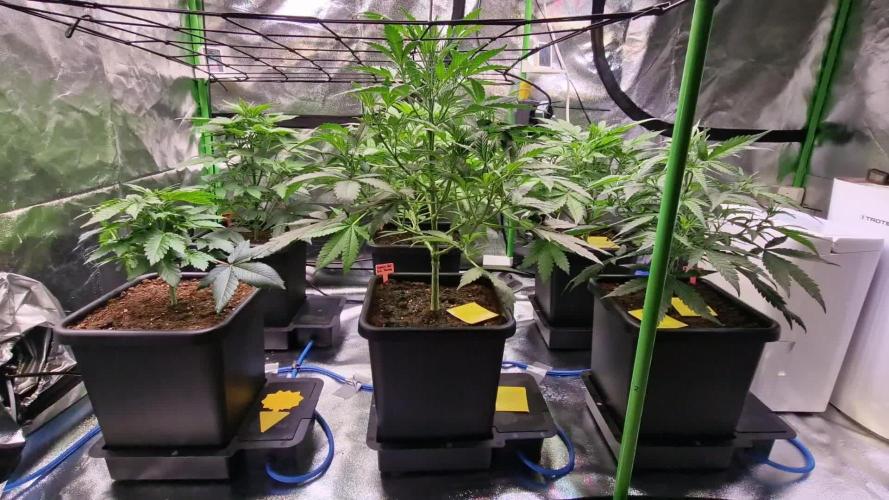
Vamos familia, actualizamos la cuarta semana de vida de estas Runtz de Seedstockers.
Va a ser la última semana de crecimiento ya esta semana cambió a 12/12 el foco
Temperatura par de grados por encima pero tampoco habrá problemas la humedad está en su punto.
Añado ya el crecimiento de Agrobeta, blue line A , y seguimos con el flash root.
También añadimos Gold joker y tucán de Agrobeta.
Vemos como avanza esta semana.
Mars hydro:
Code discount: EL420
https://www.mars-hydro.com/
Agrobeta:
https://www.agrobeta.com/agrobetatiendaonline/36-abonos-canamo
Hasta aquí todo, Buenos humos 💨💨💨


Likes
120
Share


@Hologram
Follow
OK, im doing an update now becouse my breakup cake is going tranny!!(hermie)
I already have noiticed she was not growing as strong .. but u can blame that on anything , especially when growing outdoor..
but this morning i saw that she was g(r)oing 'bananas'!😢
I have put her aside from the rest (in the back of garden) but think gonna have to terminate her asap!..(and i will, right after this post👍)
The weed she will give will be filled with seeds and those seeds will be hermies too, so wothless..
and if i dont throw her away quick she can infect the rest.
So goodbye breakup cake..😢
who wants to eat a cake when they are breaking up anyway..😒 (just hiding my pain with lame humour 😳)
happy growing for all ✊
