


Likes
Comments
Share


@DaVinchi720
Follow
Doing a rerun with the keeper pheno due to herming stemming from a power outage.


Likes
24
Share


@FrostyCloudzz
Follow
Diese Woche haben sich nochmal schön Knospen und Nebentriebe gebildet sie schlucken viel Wasser und sie machen sich gut hoffe die Knospen werden fetter.
Werden bald anfangen zu spülen

Likes
2
Share

@Chucky324
Follow
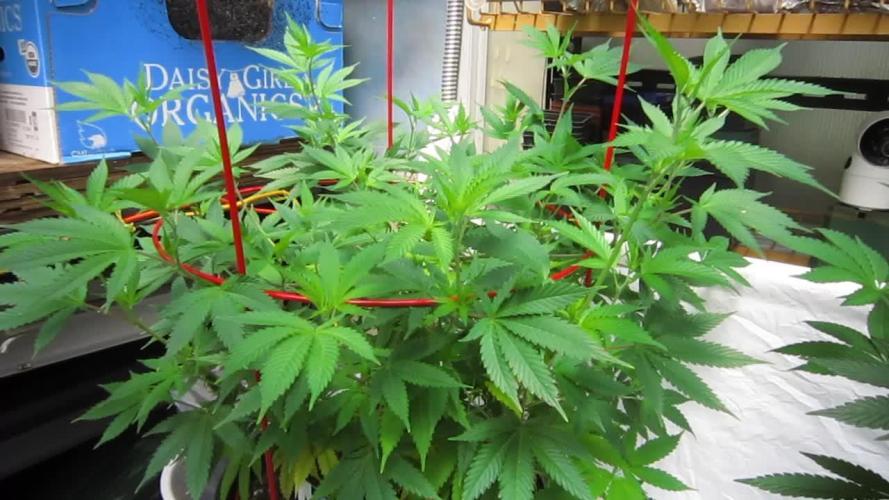
Hello. This is the end of week 10 and the beginning of week 11 of veg.
The plant is getting some yellow leaves. I'll have to give it some good food next time it's watered.
The plant looks like it's over it repotting shock and is stretching up now.
Been weeding in my veggie garden this week. This next week is going to be hot.
OK. Be Cool.
Chuck.
Likes
15
Share


@BigNate89
Follow
So the purple. Widow is in full bloom
The grandaddy purple is just starting to show flowers now (~35 days in) Hoping they'll be a nice heavy yield of resin coated marijuana buds! Keep checking in and thanks for the support
Likes
2
Share


@BDDDDD123
Follow
Tasty bud, and tough plants, when the Gelato's were struggling with mildew and budrot, the mimosa's didn't have any problems, even when they stood in the rain. Had a few nanners because of light leaks, but no seeds. Too green at harvest I know, even after two weeks of flushing. Guess there was still too much left in soil. Still, this is some outdoor that looks and tastes like indoor.
Likes
155
Share


@deFharo
Follow
Bienvenidos cultivadores de marihuana clandestinos y también a los que tienen la fortuna de no serlo!🖐️👨🌾👍
Este es un diario donde semanalmente explico algunas de mis técnicas de cultivo y preparados orgánicos, los cuales llevo experimentando dos años en cultivos de marihuana interior.
• Hay dos componentes absolutamente necesarios para cualquier cultivo y de los que no se puede prescindir: La luz y el agua... hoy toca hablar de agua, homenajear al agua que la montaña y el cielo me regalan para mis plantas de marihuana!! 💧💧💧
Tengo que decir, que hasta el momento, nunca he usado agua con cloro en mis cultivos, mi interés por el agua pura de manantial ya venía de antes, pues yo mismo la consumo habitualmente, el cloro es añadido al agua corriente para hacerla potable y acabar con posibles bacterias o patógenos, pero no distingue entre buenos y malos. Siempre he creído que el consumo de agua pura, ayuda a mantener la micro biota de nuestro sistema digestivo, os podría hablar de las ventajas palpables, pero voy a obviar comentarios escatológicos.
En el caso de mi modo de cultivo, donde baso toda mi técnica en el mantenimiento e inoculación masiva de Microorganismos de Montaña (MM) en el sustrato, el uso de agua pura sin cloro es obligado.
El 03 de julio de 2020, publiqué lo siguiente:
GROWING TIP: Agua!! Mineralizada, viva y estructurada.
La importancia de la calidad del agua para el cultivo es vital para mi, he recorrido los manantiales, ríos y arroyos de mi zona con el medidor de EC y el de PH para conocer las aguas que me rodean, recojo siempre que hay oportunidad agua de lluvia de la terraza de un vecino, nunca me falta agua pura, desecho regar con agua del grifo. Para mi, y actualmente, la mejor mezcla de agua que puedo ofrecer a mis plantas es agua de lluvia 75% con otra de un manantial de montaña de agua alcalina (Carbonato cálcico PH: 9.2) y muy mineralizada (EC: 0.85), esta agua yo mismo la consumo regularmente, consigo una mezcla de agua pura con un EC alrededor de 0.19, me garantizo así el aporte de calcio y otros minerales. En épocas donde no llueve uso agua pura de manantiales y arroyos con EC de 0.3.
Estas aguas las filtro y almaceno a obscuras en mi casa, la cuestión es que el agua parada pierde oxígeno y también desordena su estructura molecular haciéndola caótica. Para poder recuperar esta estructura y oxigenación, el agua debe estar en movimiento como en la naturaleza, yo me ayudo de un agitador magnético para volver a tener agua viva, el agitador crea un vórtice implosivo que en 10 minutos pone las cosas en su sitio y carga de oxígeno nuestra agua, una vez hecho este proceso voy añadiendo los nutrientes uno a uno y sigo agitando hasta el final.
El agua tratada con esta técnica, mejora la asimilación de nutrientes porque favorece el intercambio catiónico e inunda de oxígeno nuestro sustrato y raíces, también con esta técnica se pueden bajar las concentraciones normales de EC en un 30% y conseguir los mismos resultados, prueba y verás!!
------
Hoy tengo algunos comentarios nuevos sobre los diferentes tipos de agua que uso y usé.
- Agua de río: Comencé recogiendo agua de los dos ríos caudalosos que cruzan mi pueblo, buena agua, no hay industrias en su cauce, pero sin embargo las aguas fecales de los pueblos acaban en él. Por lo que, ante la duda, deseche el uso de este tipo de agua.
- Agua de lluvia: Como comenté antes, recogía agua de lluvia desde el desagüe de la terraza de un vecino (PH: 7, EC: 0.07), mucho trabajo, exposición vecinal y explicaciones surrealistas a los transeúntes que me preguntaban, como decir que recogía el agua para mi perro que no podía tomar agua con minerales por tener tendencia a la formación de piedras en la vejiga, en otras ocasiones, respondía con entusiasmo que era la mejor agua para cocinar alubias!! 🤷♂️😎 Definitivamente dejé de recoger agua de lluvia de ese lugar, pues el agua que explico a continuación ya viene con los niveles de EC que yo busco...
- Agua de montaña: Manantial permanente a 700m de altitud, el PH varía según la época del año, cuando en otoño, invierno y primavera hay más lluvia, el PH está en 7, y el EC en 0.25, en verano el PH sube a 8 y el EC a 0,5, esto es debido a que la carga de minerales es mayor cuando no hay lluvias. Según la geología de la zona, rocas cálcicas, arcillas y basalto principalmente, este agua mineral contiene suficiente mineral (Ca, Mg, Si, Al, Fe, K...) para no tener necesidad de usar aditivos como CalMag. Esta, es el agua que más uso para riegos.
- Agua de manantial alcalino: Casi a nivel del mar, muy mineralizada, con menos variación de PH y EC en épocas de lluvia: PH entre 8 y 9.2, EC entre 0.5 y 0.9.
Esta agua la uso de varias maneras:
a) Es el agua que yo bebo.
b) El café y la comida la hago con esta agua.
c) Por su nivel de alcalinidad la uso para los diferentes fermentados anaeróbicos, compensa la extrema acidez de estos preparados y aporta minerales ya solubilizados.
d) Este invierno la he usado para riegos mezclada con agua de des-humificador al 50%, obteniendo agua con un EC de 0,25.
e) Las raras ocasiones en que riego sólo con agua, uso ésta si el cultivo va bien, y si necesitara hacer un lavado de sustrato por sobre fertilización, uso el agua de des humificador: PH: 7, EC: 0.09, que al no contener minerales el poder de disolución es mayor.
- Agua de des humificador: Este invierno debido a las bajas temperaturas, alta humedad relativa y aparición de oídio, me vi obligado a tener funcionando permanentemente un des humificador, y para hacer de la necesidad virtud, he estado recogiendo esta agua exenta de minerales, mezclándola al 50% con las aguas del manantial alcalino, de esta manera me he he ahorrado algunos viajes al manantial de montaña.
Recientemente medí el consumo de este aparato, y casi me caigo de espaldas al comprobar un consumo de 140w, lo he tenido encendido más de 3 meses las 24h del día y en ocasiones he tenido funcionando dos des humificadores! y yo, engañosamente, pensé que no consumían más de 50w... bueno, después del disgusto de saber el despilfarro de vatios, yo, que me he esforzado mucho en los últimos cultivos, acarreando macetas del interior al exterior, por consumir el mínimo de luz eléctrica y que me ha supuesto obtener unas cosechas medio bajas para lo que estaba costumbrado, ahora, en mis nuevos 4 cultivos la luz no va a ser el obstáculo, ya que ahora los des humificadores están guardados, y voy a alumbrar estas plantas con todo lo que me quepa en la carpa, la media de vatios por planta de mi última temporada de cultivos fue de 40w/planta, esta temporada voy a llegar a los 100w por planta... más luz es igual a más masa floral!!🌲🌲🌲🌲
- Agua de mar (for nerds): Yo no me he atrevido a usarla para riegos, pero con el agua de mar preparo Ormus casero con agua del mar Cantábrico, donde separo el sodio y hago precipitar los minerales:
Publicado el 10 de julio de 2020
a) Fuente principalmente de Magnesio, Azufre y calcio para todo el cultivo. El Ormus contiene de un 30 al 60% de magnesio. Yo lo uso sistemáticamente en todos mis riegos, las dosis van desde el 1% al 2%.
b) Contiene más de 70 minerales, la mayoría en modo monoatómico que mejora el intercambio catiónico y la asimilación de nutrientes.
c) Al ser un producto alcalino se puede usar para subir el PH del riego cuando se necesite. Aumenta muy poco la carga de EC.
d) Forma parte de mis componentes en la solución acuosa que preparo para germinación y establecimiento de semillas.
e) Almacenado a obscuras el producto no tiene caducidad conocida.
• Agua de coco (for nerds).
Producto natural rico en azúcares, vitaminas, proteínas y aminoácidos, enzimas citocininas (División celular, crecimiento), ácido giberélico (Estimulación de raíces) y minerales (Ca, Fe, P, Mg).
- Los momentos clave de más demanda de enzimas citocininas comienzan en la mitad de la primera etapa de germinación y establecimiento de la plántula, y al comienzo de la etapa de floración/reproducción. En la última etapa de los cultivos es innecesaria.
- Los momentos clave del ácido Giberélico comienzan también en la primera mitad de la primera etapa de cultivo y las últimas semanas de crecimiento vegetativo, después de estas etapas la necesidad del ácido decae hasta hacerlo innecesario en las últimas semanas del cultivo.
- Yo uso el agua de coco, alternándola con otros nutrientes, sólo en las primeras etapas de la planta y hasta la preflora.
- Las dosis dependen de la carga de EC que se prefiera. Como mínimo aconsejo una carga en disolución de EC de 0,4 o PPM 200.
- El agua de coco natural se debe guardar en el refrigerador, como máximo 4 días, pues fermenta con mucha facilidad.
y esto es todo por hoy... tengo sed! 😁
Hasta la próxima semana...
SALUDOS CULTIVADORES!!🖐️👨🌾💧💦🌞💡
=================================
Likes
92
Share


@DogDoctorOfficial
Follow
Week 3: TrolMaster Chronicles – Transplanting, Growing Strong, and Thriving in PRO-MIX HP 🌱✨
Hey Grow Fam! Another exciting week has flown by in the grow room, and I’m thrilled with the progress! We kicked off Week 3 with our first set of transplants. The Gorilla Melon was transplanted at the end of the week, while the Papaya Zoap is still patiently waiting for its turn to shine. Each plant that’s been transplanted is now comfortably settled in 15-liter Autopots, filled with PRO-MIX HP BIOFUNGICIDE + MYCORRHIZAE, and wow, I’m loving this mix!
🌱 Why PRO-MIX HP is a Game-Changer
For those of you unfamiliar with PRO-MIX HP, let’s take a closer look. This soil provides superior drainage and aeration, thanks to its high porosity. The addition of fibrous peat moss and coarse perlite creates an ideal environment for water flexibility. It’s been perfect for the girls as they transition into their final homes. Plus, the biofungicide and mycorrhizae are doing wonders for root development, giving them all the support they need for vigorous growth. The plants are showing off a beautiful, vibrant green, each with its own unique characteristics—no two plants are the same, and I love that!
🌡️ Environment Update: Temps, RH, and More
Let’s talk about the conditions the girls are thriving in! We’re sitting at:
• Temperature: 26.7°C
• Relative Humidity: 62.9%
• VPD: 1.30 (I know it’s a bit high, but they’re handling it like champs)
• CO2: 800 ppm
• pH: 6.18
• TDS: 215 ppm
• Solution Temperature: 23.2°C
To make things even more efficient, I’ve adjusted the light height, keeping the PPFD around 360 to 400 to save on energy. These beauties are still soaking in the light perfectly, and I couldn’t be happier with how they’re responding.
💧 Watering and Feeding
At this stage, the plants are thriving with just enough nutrients to keep them happy. I’ve kept things simple with a balanced solution, ensuring everything stays within the perfect range. The PRO-MIX HP, with its mycorrhizal fungi, is really helping with nutrient uptake and boosting overall health. It’s amazing to see how quickly they’ve adapted!
🌟 Transplants Complete – Progress Feels Incredible!
I’m super excited with how everything is shaping up! Most of the transplants went smoothly, and the growth we’re seeing is just amazing. The Papaya Zoap is still waiting for its final move, but it’s growing strong, getting ready for the next step. It’s an honor to work with these genetics—they’re each unique, yet all thriving in their own way. 🌱💚
🌍 Shoutouts and What’s Coming Next
I couldn’t do this without the support of my amazing sponsors and all of you, Grow Fam! A huge shoutout to TrolMaster and Aptus Holland for their top-notch gear and nutrients, and of course, to all my followers—whether you’ve been here from the start or are new to the journey, thank you for the love and support! 💚🙏
Don’t forget to check out my Instagram and YouTube, where the Seed to Harvest Series just kicked off! I’m going deep into all the gear, techniques, and day-to-day grow updates you see here. Exclusive content and more are waiting for you on those platforms, so come by and join the fun!
Growers Love to everyone, and here’s to another epic week of growth! 💚🌱 Let’s keep pushing the limits and making magic happen.
• Nutrition: @aptusholland @aptus_world @aptus_es @aptusbrasil @aptus_thailand @aptus_portugal @aptususa_official @aptusplanttechnz @aptusplanttechaus
• Controls: @trolmaster.eu @trolmaster.eu.support @trolmaster.support @trolmaster.agro
• Soil: @promix_growers_eur @promix_cannabis @promixmitch
P.S. Let’s talk about these new Model One LED bars I’m running. 🌿💡 They’re not just any lights—these are full-spectrum beasts designed to give my plants exactly what they need at every stage of growth. The real magic, though? The dimming feature. With just a quick adjustment, I can dial down the intensity without sacrificing the quality of the light. This means I’m saving on energy costs while still delivering top-tier PAR and maintaining a balanced spectrum. It’s not just about blasting plants with light; it’s about giving them the right light at the right time. By fine-tuning the PPFD (Photosynthetic Photon Flux Density), I’m hitting that sweet spot where the plants thrive, and I don’t have to run the LEDs at full power. So, while I save a bit on electricity, my plants still get the perfect environment to reach their full potential. 🌱✨
This level of control lets me optimize the growth, and trust me, my plants are loving it—just another reason I’m thrilled with the Model One setup.
💚💚💚 Growers Love everyone 💚💚💚


Likes
6
Share


@4MReviews
Follow
Planned Nutes:
SRS Full Auto, Cal Mag, ph up+down, Silica, Dynomyco, Kelp, CS run clean
DAY -3 - 8/14/24 @ 10PM - Seeds touch water
DAY –2 - 8/15/24 @ 3PM - Seeds touch coco, light @ 3 ft, 100% power., covered with humidity domes.
FEED: 1 gal + SRS nutes, Veg A 60ml, Veg B 60ml, CalMag 1ml @ 3PM, 1 gal plain water - NO PH @ 10 PM
DAY
HIGH: T 81.9 H 88.1
LOW: T 68.3 H 62.9
AVE: T 75.9 H 75.8
DAY -1 - 8/16/24 - Moved light down to 40% brightness, 1.5 ft from plant
FEED: 1 gal + SRS nutes Veg A 60ml, Veg B 60ml, CalMag 1ml + cal mag + 1 extra gal plain water, PH’d TO 5.8 @ 12 PM.
DAY
HIGH: T 81.9 H 88.1
LOW: T 68.3 H 62.9
AVE: T 74 H 77.9

Likes
17
Share


@herbalistssword
Follow
These girls are looking beautiful and growing really well.
Another good week, the girls still looking amazing healthy, buds growing nicely.
I've printed some root drippers and installed 5 of them per pot, got their first watering with the root drip system this week, makes things much simpler now as it is getting too busy and bushy for me to get to water them.
It is day 21 of flower so time for some more defoliation, didn't go as crazy as on the first day of flower but more on plant 1 (schwazzing) very little on plant 2 and lollipopping plant 3.

Processing
Likes
10
Share


@StarletBud21
Follow
Start of week 3 I believe the girls are doing good a few minor worries but that’s at ease for now I think , i have added nutes at a low level and will increase once I see how the plants react to the introduction of the nutes .. Looking into starting lsd on some plants but not too sure wether it’s to early or so . will continue to update the week but for now
Started lst on a few plants day 15 and seen good reactions by day 17 so quite happy with that and will continue this process I will also look into topping my plants as well but not just yet ... they seemed to like the nutes as well so all good week so far
Soo topping done on 4 plants wasn’t as scary as it sounded haha let’s see how they recover ! Going to combine lst as well now
Very good recovery it looks like and the end of week 3 looks promising with the plants
happy growing
Likes
31
Share


@forestgum
Follow
Its my first plant so I'm very excited, sometimes I'm just staring how they growing for an hour and it's making me very relaxed😅
Likes
6
Share


@Rockymountainhigh
Follow
Probably a week to two weeks ahead of all of my photoperiod plants. Not producing resin yet. Growing big, I’m expecting about 3-4oz from this girl.
Likes
59
Share


@AsNoriu
Follow
Day 50. Took one more bottom set away .
Gave 150 ml of 6.3 water. Thinking to add some mono potassium with next.
All goes well for those conditions;))))
Day 55. 150 ml 6.3 pH water in. Decided to go with no food for as long as she is happy.
Happy Growing !!!

Likes
4
Share


@S2993
Follow
Buds have developed really quick and the whole room smells like gas and candy


Likes
10
Share


@Bigbombbudz
Follow
Another week closer....
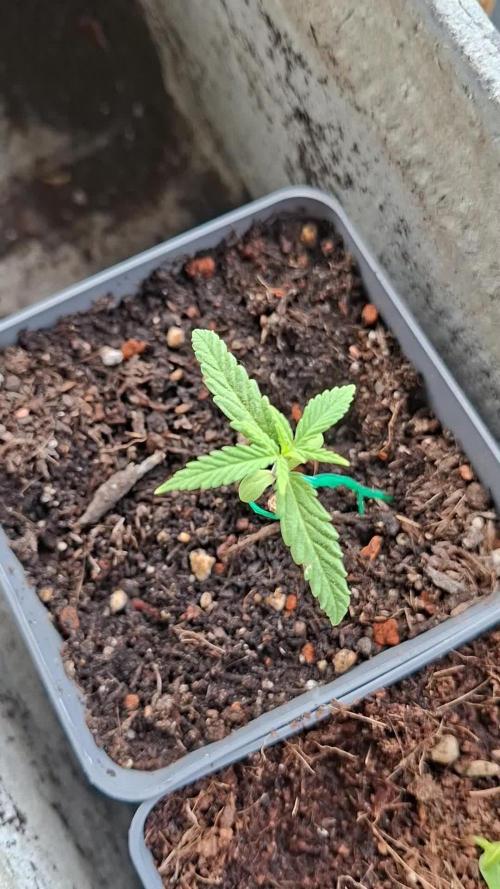
Well its coming to an end and the girls are going into there last 10 days, the flush will begin tomorrow, with 5 days of PH water with Sweet Raw added, then last 5 days straight PH Water.
It was a great crop, very easy to grow and no problems at all just feed and watch them grow.
Until next week, smoke a fatty, help out your fellow grower.


Likes
6
Share


Likes
8
Share


@Bigfudge
Follow
Big week, started to strap down the trees. Tied branches to main stem and stakes around the plants so as to open them up a bit and provide support in case of windy conditions. Only staked the pair and not the three in the back yet. This was a bit of a mistake as the big one in the back needed it sooner. Defoliation of note... need to keep defoliating these trees all the time. Pretty relaxing though...
Likes
96
Share

@DogDoctorOfficial
Follow
Greetings, fellow cultivators! Today, I'm thrilled to share the grand finale of our journey with the remarkable Big Cheese Auto from Seeds Mafia. At day 81 from seed, she reached the pinnacle of her splendor, and the harvest was nothing short of spectacular.
As I gently snipped each ripe bud, I couldn't help but marvel at the beauty and resilience of our Big Cheese Auto. From the moment she emerged as a seedling, she embodied strength, vigor, and an unwavering determination to flourish. Now, as she hangs upside down to dry for the next two weeks, I'm filled with a profound sense of gratitude for the privilege of witnessing her growth.
Our journey with the Big Cheese Auto has been nothing short of extraordinary. From the excitement of germination to the meticulous care during vegetative growth, from the anticipation of flowering to the aromatic crescendo of the harvest, each phase has been a testament to the plant's resilience and the joy of cultivation.
The journey began with a tiny seed, a promise of potential waiting to be fulfilled. With the nurturing support of the Autopot system and the guidance of Aptus Holland's nutrients, our Big Cheese Auto thrived, transforming into a botanical marvel with each passing week. From the emergence of her first true leaves to the explosion of trichome-rich buds, she captivated us at every turn.
A heartfelt thank you to Seeds Mafia for providing the genetics that sparked this incredible journey. Your seeds have not only produced exceptional plants but have also inspired a community of passionate cultivators. Your dedication to quality and innovation is truly commendable, and I am grateful for the opportunity to cultivate such remarkable genetics.
Before the trimming and curing process begins, I took the time to capture the beauty of our Big Cheese Auto in a special photo shoot. Each snapshot is a testament to her magnificence, a visual ode to the journey we've shared together.
To the entire community, both near and far, thank you for accompanying me on this horticultural odyssey. Your support, encouragement, and shared passion for cultivation have made this journey all the more rewarding. Let's continue to cultivate greatness together!
Thank you for being a part of this incredible journey! Wishing you all abundant harvests and joyful cultivation endeavors ahead!
Genetics -Seeds Mafia Big Cheese Automatic
Light - LUMATEK ZEUS 465 COMPACT PRO
Food - APTUS HOLLAND
All info and full product details can be find in can find @
https://seedsmafia.com
https://aptus-holland.com/
https://lumatek-lighting.com/
As always, thank you all for joining me on this journey, for your love, and for it all. My horticultural odyssey would never be the same without you. Your love and support are cherished, and I feel both honored and blessed to have you in my life

Likes
7
Share


@growerfromnc
Follow
She reeks ooh my God if you haven't grown this strain you gotta she smells horrible rotten fruit jet fuel sweet she looks wonderfull
All she is getting is water from here on out
Gallons on gallons start the Flushing
11/26/23

Processing
Likes
5
Share


@Mr_nugs_lover_David
Follow
Very good looking just like her sister, powerful citric and sweet aroma, very good strain, and starting to smell seriously at the start of 2nd week I'm noticing the same thing on both plants! Awesome strain