
Likes
Comments
Share


@TheStaffedition
Follow
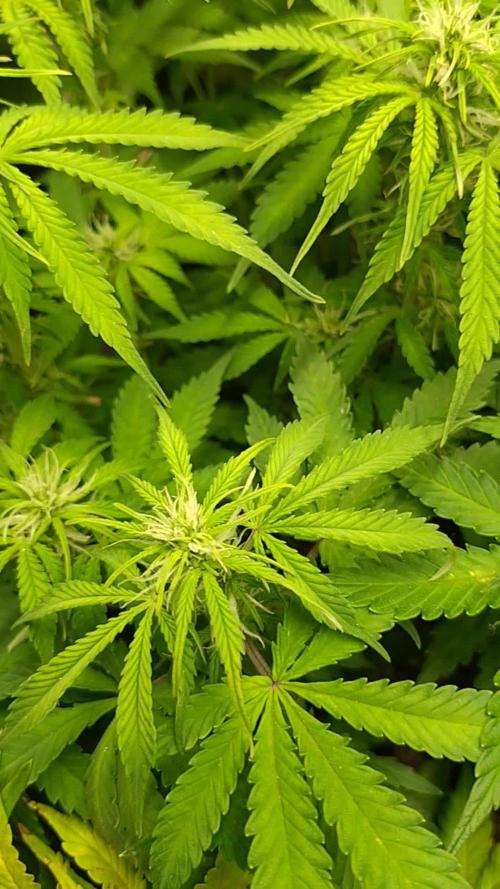
Сорт мне понравился.
Единственное не устойчив к плесени.
Если не контролировать вдажность, то плесень обязательно будет.
В целом сорт не плохой.
Рекомендую новичкам


Likes
435
Share


@Ju_Bps
Follow
Hello my friends 👨🌾👩🌾🔥🔥,
2nd week of blooming 🌲🌲, plants continue to grow up, and forming buds 🦔🦔
This week I've found thrips😱
I've make a treatment 🥊🥊 today with spray 🤞🤞
Except this issue with thrips, plants look happy and healthy, and lot of buds site 💜💜🌲🌲🌲😁😁
💦I've given 1.5 l/plants 3 times.
Start week, Mid week, today
1x water + tera vega + boost
1x water + cannazym
1x water + tera vega
PH@6
Thanks community for follow, likes, comments, always a pleasure 👩🌾👨🌾❤️🌲
Also to @marshydrococo2 , @News_SweetSeeds for sponsoring 💕💕.
Mars Hydro TS 1000
https://www.mars-hydro.com/ts-1000-led-grow-light
If you want a litle discount on your Mars Hydro order, you can use the coupon Ju_Bps
Gorilla Girl F1 fast version
https://sweetseeds.es/en/photoperiod-dependent-seeds/3065-gorilla-girl-f1-fast-version.html
See you next week my friends
Have a good week end 😁💕
Likes
121
Share


@DogDoctorOfficial
Follow
And with and enormous honneur and pleasure that i start collaborating with MARSHYDRO, they wore kind enough and send me a 4x4 grow tent and a TSW2000 for me to do tests and reviews, i got to admit the quality on the materials, the easy assembling, the user manual, even the art detail that came with a bunch of cool stickers, are plus things that can not go unnoticed 🙏💚 Thanks Marshydro for so many details 🙌😉 i will try and post them all in here, but you can follow me on my instagram account https://instagram.com/dogdoctorofficial for every day updates , videos giveaways etc, or in my youtube channel- https://youtube.com/channel/UCR7ta4DKLFMg2xxTMr2cpIg keep tuned 💚💚💚
Thank you MARSHYDRO for having faith in my love for growing , lets make magic together 🙏🙏🙏
For this run i will be testing some Cookies Fam Genetics, to be more exact they’re Sunset Sherbet , just moved them to they’re final pot and installed a scrog net, now i need them to bounce back , adapt to the new conditions and do a full canope 😅 so keep tuned for constant updates , this one will be a fun run 💚💚💚
Happy Halloweed for you all 🎃 🎃🎃 and remember do it for the love , with love , growers love 😅💚💚💚
Genetics - Cookies Fam genetics - 3x SunsetSherbet
Grow tent - MARSHYDRO 4x4
Ligth - MARSHYDRO TSW 2000 @75%
Filter - vanguard hydroponics Falcon Filters
Extraction - 2 x vanguard hydroponics 280m3h
Extraction control - SMSCOM Smart MK2
All i grow is medicine for myself, for me and for my best friend with is me 😆 nothing to sell, so don’t even ask 😅💚💚💚
All info and full product details can be find in can find @
https://www.mars-hydro.com/grow-tent
https://www.mars-hydro.com/led-grow-light/mars-ts-series-led-grow-light/mars-tsw-2000-led-full-spectrum-hydroponic-led-grow-light
https://marshydro.eu/ DISCOUNT CODE - DOGDOCTOR 💚💚💚🙏🙏🙏💚💚💚
https://marshydroau.com/
More info and updates @
https://growdiaries.com/grower/dogdoctor
https://instagram.com/dogdoctorofficial
https://youtube.com/channel/UCR7ta4DKLFMg2xxTMr2cpIg
💚💚💚Growers love to you all 💚💚💚


Processing
Likes
20
Share


@Fabhz
Follow
Im hopping she will recover from the roots locking, i think she will, she has lost most of the big leaves, there is two left. Smell is very weak, i think its going to take 4 weeks more at least to harvest .


Likes
11
Share


@Ginger_gnome
Follow
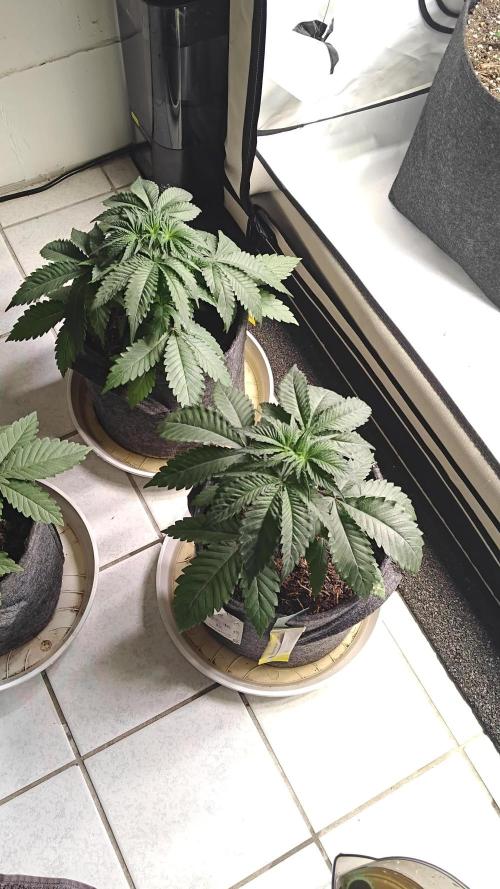
Man what a busy week. I left for a small vacation with the family and left the plants in the care of someone and luckly everything is still alive lol. Then today I almost forgot to post my weekly diary because I was busy build my new grow office and moving all the equipment in. The room I built is where all the plants well eventually end up ones my coco and perlite arrive.
The runtz themselves are both doing really good and haven't slowed down much after topping them. Roots are starting to reach the bottom of the 1 gal pots so hopefully I can transplant them I to the autopot system soon.
Well happy growing!!!

Likes
17
Share


@HowtoBubatz
Follow
After deciding to start this new growing journey, I chose to germinate a Banana Purple Punch seed from Fast Buds.
This particular strain caught my attention with its unique characteristics, and I couldn't resist giving it a try.
I began by using a hydrogen peroxide water solution to germinate the seed, which helps oxygenate the water and prevent harmful pathogens.
After about 36 hours, the seed cracked open, revealing the first signs of life.
With a taproot emerging, I carefully transplanted the sprouted seed into a 20L airpot, ensuring enough room for the roots to breathe and grow freely.
This marks the beginning of an exciting new adventure, nurturing this intriguing strain to its full potential.🌱💚
_________________________________________________________________________________________________________________________________________________________________________________________________________________________________
One of my cannabis seedlings unfortunately didn’t survive in the pot....😭
Now, I’m trying again with two more seeds of the same strain, but I’ve changed my approach. Once they've successfully sprouted, I transfer them into coco tablets.
There, they’ll remain until they’ve developed healthy roots before being moved to their final growing environment.
I’m hopeful that this method will help me handle the early phase of the cannabis plants more successfully, and I’m excited to see how things turn out.💚💚
Likes
60
Share


@Secretflower
Follow
Hello my friends,
...June 24, 2022.. ..Day N°104...
...Flowering day N°59...
My two Feminized Royal THCV are fine, Sativa style. Smells very gud.
I give them water with a tablet of Easy Plus Micronutrients from RQS Organics Nutrients.
They are under a MarsHydro TSW 2000 at 80%of power and at 20cm of the canopy.
www.royalqueenseeds.com
www.mars-hydro.com
www.marshydro.eu
Thank you very much for passing by.
Wish you the best with your green projects, peace.
See you soon 💨💨💨
Likes
12
Share


@yd_grows
Follow
Semana sem grandes surpresas.
Grade funcionando muito bem para espalhar as colas.
planta crescendo rapidamente, como era de se esperar no início da floração.


Likes
9
Share


@NanoLeaf
Follow
End of Week 8 (First week of flower)
Increased the CO2 to 1200ppm and the ladies love it, already started stretching within the first 3 days of flower which shows that CO2 definitely boosts the grow cycle of cannabis.
The main top-sites are popping up everywhere and everything looks evenly spread out. I defoliated again because the fan leaves are growing so fast and blocking bud sites. I also did one last lower canopy maintenance and removed small and stalky bud sites and stems below the trellis net to make sure I get maximum energy distribution to the main colas.
I also added some GHF BioEnhancer to make sure the soil-microbes are happy and that the plants reach their maximum potential.
Pest Report: EXTERMINATED!
Thrips VS Ladybugs VS Neem Oil...
I decided to fight fire with fire - I purchased Swirski-Mites from Koppert (They are beneficial insects that feed on the eggs and larvae of thrips and other unwanted pests). As for the adult thrips - I got very lucky and found about 10 Ladybugs in my garden and decided to introduce them into my grow room as they will feed on adult thrips and any other unwanted pests.
Then to be extra sure I know that neem oil hinders the life cycle of pests like thrips causing them to stop colonising in my grow room. So I sprayed the ladies every day during the dark period to make sure there are no pests that I or the Ladybugs have missed.
Mission accomplished. No more wilting and definitely no more thrips.

Likes
23
Share


@HomeGrownFamz
Follow
Hi guys. The girls have settled into producing bigger buds this week and have no signs of issues. I think two of them may have at least 2 or 3 weeks left and the big plant may have 2. This is the time I struggle with the most using autos. The breeder states a harvest time but this is under ideal environmental conditions and I am not clear if I have provided the perfect environment. I am going to let them go until hairs turn 80-90% orange. Overall they are looking frosty and feel very dense.
This is the part were being patient is very important and imo the most difficult part of any grow. I just want to cut one bud off and smoke it 🤪 but I won’t.
I have uploaded a picture of the new seeds for my next grow. Moving to photoperiods next grow woohoo.
If anyone had any suggestions please comment and let me know 🧐
Cheers guys
Microgrowery
Likes
16
Share


@GrowBeforeHoe
Follow
I'm really not disappointed with the growth this week. All are doing well except the Royal Cheese but she is fighting against the damage.
Keep Growing everyone! 👍


Likes
18
Share


@cannasaxx
Follow
Alles im grünen Bereich 👍🏻💚🍉🌈🎄
Ja, viel gibt es nicht zu sagen außer das ich sehr zufrieden bin mit dem Grow. Adlite IR, UV, Deep Red sind mit angeschlossen, sie sind nämlich jetzt in der Pre-Bloom Phase das heißt 16std. Licht eine Woche und dann 12/12 Umstellung.
Euch eine fröhliche Weihnacht 🎄😇


