
Likes
Comments
Share


@snoopdogguy
Follow
I basically skipped week 17 as there was nothing new except I added some compost tea that I made with come compost, vegetable scraps, a few cedar clippings and neam oil (oh and some fertilizer ... I forget what)
Sprayed with neam oil/soap mix


Likes
20
Share


@TragicTerps
Follow
Week 16 I added new tie-down and tried to fill the tent as much as possible. The Aroma is amazing coming from the tent with super sweet berry tones. Trichomes are all still clear and no stunt in growth has been detected.
I've gone back to a 90 degree rotation daily and a hybrid watering schedule with 1L from top and 1L subirrigated alternating days to keep nutrients in play hoping to prolong flushing the plant over the next 2-3 weeks instead of over a single week.
Pests have not re-emerged since the spray but nonetheless less ill be spraying again partway through the week.
The buds are mainly all golf ball sized now with the colas starting to fill out nicely. I cannot wait to try these mouth watering buds.
Day 6 As the week progressed we saw a filling of the branches, the internodal spacing was almost perfect for this plant which is nice considering all things. As seen on the video, the trichomes are mainly clear on a lot of the outer buds but the more centralized buds are appearing cloudy. Regardless going for a 85/15 cloudy/amber trichome ratio. So 3-4 weeks more possibly, observation will be crucial.
Likes
2
Share


@xTaps
Follow
Just checking the trichome heads daily to harvest them at the for me perfect moment.

Likes
7
Share


@Mortelinos
Follow
Holky se nam krasně košatí a dorazil calmag a rhino skin tak uvidime co to sněmi provede , viceméně není o čem ted.... čekame na defo...:)
Likes
11
Share


@4_Pro2Bono_0
Follow
Decided to let these ladies get one more week before I flip, wish me luck 🤞

Likes
3
Share

@Ketamine
Follow
This is the last week will be flushing last 3-4 days of it. Not too bad for a low yielder. We will see the final numbers. Next Crop is going to be TOAD VENOM which I was lucky to get.
Likes
29
Share


@Rangaku
Follow
BM is coming right along , smells absolutely divinely fruity and is well sticky. Just keeping up the defol once a week and spreading her out a little. She’s been effortless to grow so far just gonna keep doing the same same and watch her fatten up the next few weeks

Likes
300
Share


@Ju_Bps
Follow
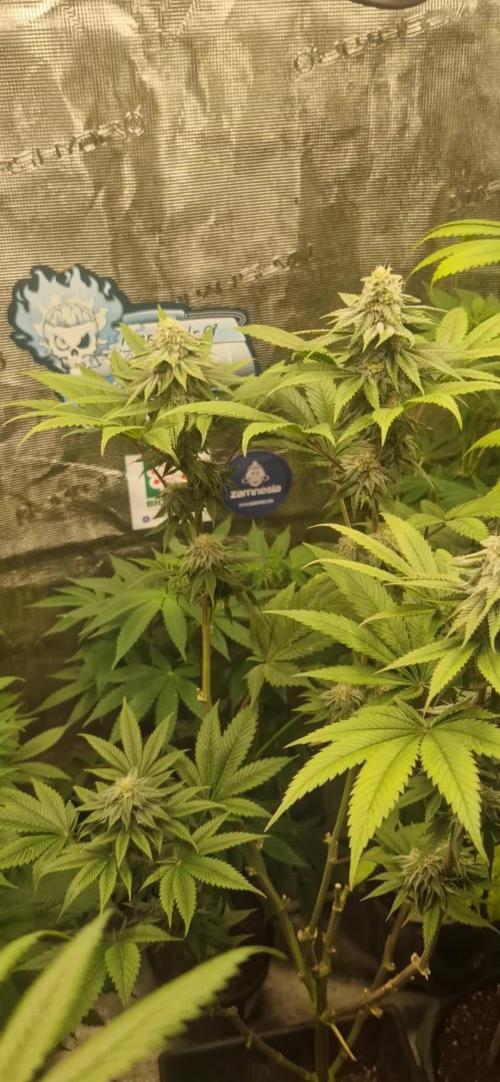
Hello growmies 👩🌾👨🌾🌲🌲,
👋 Plants still looking good,
Have been transplanted in 11l pot
💪 Continuing Defoliation, lst
💧 Give water each 2/3 day
And vaporise plant with water + Plagron Roots (1ml/l)
0.75 l Water + Roots + Grow + Zym (1 + 5 + 1 ml/l)
0.75 l Water + Roots + Grow + Zym (1 + 5 + 1 ml/l)
PH @6
💡Mars Hydro - FC 3000
30% 54 cm
Mars Hydro Fan kit
Setting 4
Have a good week and see you next week 👋
Thanks community for follow, likes, comments, always a pleasure 👩🌾👨🌾❤️🌲
Mars Hydro - Smart FC3000 300W Samsung LM301B LED Grow Light💡💡
https://www.mars-hydro.com/fc-3000-samsung-lm301b-led-grow-light
Mars Hydro - 6 Inch Inline Fan And Carbon Filter Combo With Thermostat Controller 💨💨
https://www.mars-hydro.com/6-inch-inline-duct-fan-and-carbon-filter-combo-with-thermostat-controller
Fast Buds - Tropicana Cookies FF🌲🌲
https://2fast4buds.com/us/seeds/tropicana-cookies-fast-flowering


Likes
6
Share


@all_about_420
Follow
Der Reifeprozess der Permanent Marker erreicht eine neue Stufe der Intensität, wobei die enorme Trichomproduktion mittlerweile jeden Millimeter der Blütenkelche und Zuckerblätter mit einem frostigen Schleier überzieht. Diese massive Harzbildung lässt die Colas unter dem Licht förmlich glitzern und zeugt von der außergewöhnlichen Qualität der Traphouse Genetics Genetik. Während die Buds weiter an Dichte gewinnen, verfärben sich die Stigmen zunehmend dunkler, was das nahende Finale der Blütephase ankündigt. Die Pflanze steht stabil im Saft und fokussiert ihre gesamte Energie auf die Terpenanreicherung und das Anschwellen der Kelche, was diesen Run zu einem echten Highlight macht.
Likes
1
Share

@Olduffybastard88
Follow
Missed a couple week so just updating as much as I can the now plants are doing brillant flowering away nicely not long now the smells are amazing

Likes
25
Share


@OZDAOgrow
Follow
I'm really contemplating dropping Bruce & Diesel. They're developing very badly. We'll see how they continue to develop, another week and it will be clearer.
Likes
14
Share


@MasterKush714
Follow
03👹👺YOOOO GANG UPDATE!!!!! So its now Week 6 of veg lots of things have happened this week!!!! LETS GET INTO IT!!!!:
1) Did another flush again today and upped the feeding amount to 1040ppm from 955 wanted to see more growth
2) DID HAVE A SIDE BRANCH CRACK IN HALF about 60% BREAK FMLLL!!! Happened during super cropping one of the branches
Even though i had done it fine week in and week out, real learning lesson, anyways.
3) Repaired it and now waiting for it to heal, crossing fingers hoping it is going to be okay, other then that though she okay,
4) Did do another topping to all the split points and also a light defoil of lower leaves that arent going to get much light, and larfs.
5) Will update accordingly not going to lie, drain and fill DWC is not as easy as i thought it would be anyways gang CHEERS LFG!!!!
6) THANK YOU FOR STOPPING BY COULD NOT BE WHERE I AM WITHOUT YALLS HELP THANKS!!!!!👽👽👽
≈==============================
===============================
👽03/17/2024- Happy Saint Patrick's Day!!! The best month of the year for me, it's My birthday day month which happens to be 2 days after st Patty's day love the green lfgggg! Hope all are well as for GFOG she is chugging along go scope her out!!! 👹👽🤯
Likes
25
Share


@cheetah844
Follow
She's getting tall! I'm excited to watch the colors she hopefully picks up during her grow. That is the main reason I picked this strain for her purple genetics. I hope to make future colorful crosses using her and the purple Zkittlez phenotype I already have.

Likes
9
Share


@russrahl
Follow
Had a bad week 4 as my PH pen decided to go wonky. Once I got it all straitened out plants took a few days to bounce back and took some lower leaf damage but nothing to bad and it will mostly be trimmed off soon anyway. Still waiting to start LST on 3 of these girls until they get a few days of normalcy after the ph shock. Will probably be end of week five we tie the other 3 down and get the screens in place to prep for Scrog.

Likes
181
Share


@GODSGIFT_2005_JM
Follow
🍼Greenhouse Feeding BioGrow & Bio Bloom
🌱GARDEN OF GREEN SEEDS
⛺️MARSHYDRO
The ⛺️ has a small door 🚪 on the sides which is useful for mid section groom room work. 🤩
☀️ by VIPARSPECTRA (models: P2000 & XS 2000)

Likes
5
Share


Likes
14
Share


@portcityplug
Follow
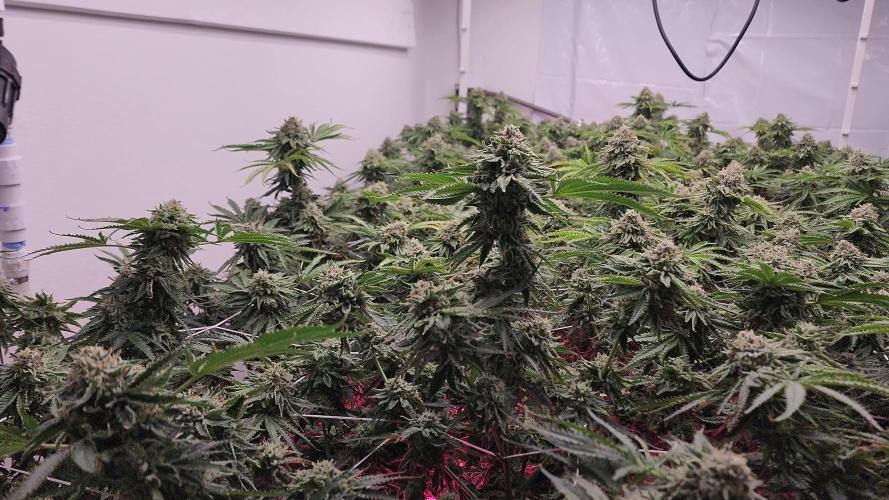
Day 43 of flower and its looking good moved some branches around to improve light penetration love to Hear from you guys in the comments
Day 44 ph 6.1 ppm at 350
Day 46 ph 6.3 ppm 270
Day 49 ph 5.9 ppm 300 removed the nuts added the dense nut at 300ppm will do this for 2 days and flush after that for a week or so so close to done one of the tops of the small plant got bud mold was removed hope it will be the only one to happen to