
Likes
Comments
Share


Likes
1
Share

@avan1garde
Follow
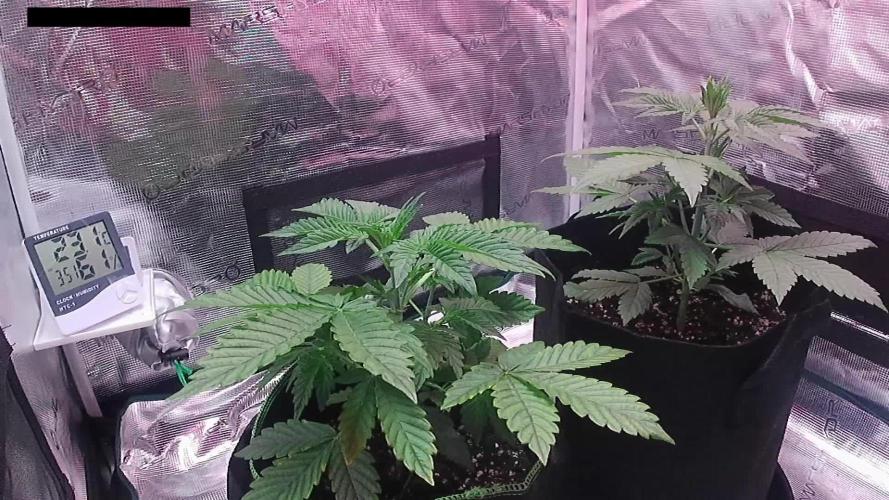
Very bushy grow, gonna have the net up soon to spread the leaves out a bit.

Likes
45
Share


@masterofsmeagol
Follow
9/17 Didn't know this was a new week or I would've taken more pictures. I'm glad I took those two plants. As it dries and I start to trim I could see where it could've turned to rot real easy. It rained enough last night to soak all the girls. The two bottoms I harvest look like the have pm on them. If so I'll wash it or through it in the concentrate bag. Found a few colas a dropped which will go in the concentrate bag. Scoping the toasted toffy and the event horizon and the both look AMAZING! I've scoped the others and I'm extremely impressed. They may be difficult to grow strains but they have high cannabinoid content. The sherb cream pie has really come to life and turned totally purple with beautiful flowers. The girl in the 50 has several soda can sized buds. I hope this weather holds up. I don't like flowers this size getting wet. The sativa leaning hydrid us the only one I may have trouble with. It's only in a 10 gal but it's enormous! If needed I coyld bring it inside at night. The buds look like cat tails. I'm used to growing indica dominant strains. Plant us super healthy though. I'll be intrigued jail for a while and I've gotta make contact with whoever is going to do my extracts. I'll keep this updated. It's a lot of work bur it's worth it.
9/18 WATERED EVERYTHING I GALLON BUT THE BOTTOMS OF THE 2ND EV AND THE TT WHICH EACH GOT A HALF. Since harvest I've noticed some pm spring up on the toasted toffy. Looking at the other event horizon through a scope the trichs are all milky with some amber. I'm just waiting for A LITTLE more amber. And for me to have time and or room. I decided to harvest the tops and majority of one of my event horizon and toasted toffy. Today during an inspection I found a couple grey mold branches and some botrytis on my big GMO on the back. This plant is done. It's by far the furyhest ahead. Septoria effected the yield a little but pistols were retracted and amber was at like 10%. I thought about it and I watched the plant next to it with the pm have a branch I supported just "slough off". Right in my face. I figured if there was a sign tjis was it. I cut that rot off and put the buds from the branch in a bag and froze them then I went around and harvested the limbs on the other plant that were furyhest along. I took about half of it. I could've taken more and maybe I should've but I'm tired. I also noticed a couple spots of grey mold on the plant in the 50. All the leaves were falling off. I finally scoped it and it was right whetr I wanted it to be. Looking at the colors I'm glad I spent so much time the past few days. That one I hung whole. The sherb cream pie has something eating the fresy shoots (probably ear wigs. But the buds are fattening and the trichs aren't quite there. I'm going to let the rest of this stuff go ad long as possible. With the exception of the other event horizon. I finally tried it. It's fucking killer. I could take that plant now. The only reason I'm not is because I have to much work on my husband's as is. I'll do some videos amd pictures but I'm tired as fuck. Got to try event horizon. Very fucking impressed!
9/19 The past 3 days I've been working 5 a.m. to dark. I went back and harvested the bottoms of the toasted toffy and event horizon 1. After injury from harvest they contracted wpm. I used this as a learning experience and put some away in the freezer for concentrates and used a peroxide and water bucket. That's what kills the p.m. anyway. I hung them and they spun in the wind. I blew them lightly with a leaf blower before putting them ok strings I had previously setup with a fan in front of it. I kicked ass today. Toasted toffy got sampled and did NOT disappoint. I had it in a jar though and it was green so I'm not counting this. I do have some dry. I have indoor left too. Like in the video that one GMO looks like it's fucking dying or something. I'd rather cut it and use it for concentrates if it effects my healthy plants. I just checked on that plant in the 50 I hung. It looks amazing under the scope and smells better. Decisions, decisions. I do have a few calls I should make sooner rather than later. We are supposed to be getting rain.
9/20 The past 3 days have been hard. The wife's medical stuff is acting up and I had to tend to harvesting a few. My whole body hurts. I even did my first bud wash yesterday! The ev and tt I took and left some buds on ended up covered in pm. So I decided fuck it and tried bud washing. I also froze some for extracts. Speaking of which I need to male contact with whoever I'm going with this year because I think I've reached the point of diminishing returns on that dieing GMO. When it comes to grey mold and botrytis I don't fuck around. Winds are really high today. Putting the scope to the sherb pie is making me second guess myself too. Oh well. It's not going to rain today. And if needed I can move them in the barn. If I get ahold of Mt processor I'll chop that GMO and bring it right there. The other thing is that I've got tons of weed and a lot of its hanging so I've gotta find someone that will do a batch of live rosin then like a elbow of dry. This is the best part of the year. We'll It's supposed to be. Cutting down good plants us bittersweet. I don't mind chopping that one gmo a little early though because it's close to hitting the point of no return. That little sativa dominant hybrid in the ten is HUGE! The buds are swelling like crazy too. It's got a COUPLE septoria spots but this thing is resilient and easy to move around. This will finish perfectly. So far I'm happy with what I have. I'm GRATEFUL. The two September plants I tried were GREAT. A 90/10 and an 80/20 and they both suprised me and got me exactly whete I wanted to be. I'll keep things updated. I did a video I'll upload.
9/21 Weather is still great and the buds don't even seem wet in the morning. The thing is is that something (rot or ear wigs probably both) have stripped lower interior branches. In some cases stripping them ENTIRELY or chewing the stem right off. It wasnt happening to my favorite GMO or the one in the 30 and the like on in the ten. The Sherb pie I noticed grey mold on 3 different branches. Last time I checked trichs it wasn't ready but I've got to get a handle on this mold/pests or it's going to he taken a little early. We have incliment weather coming Wednesday I think. I'll bring the 10 inside and if I have to I'll bring that perfect GMO in as well. I'm going to scope everything again today. I called a bunch of extractors for prices. I was going to do fresh rosin and just yank and drive but that is looking to be harder. I can get badder made CHEAP from a reputable lab. I think I'll do that. They prefer dry and that way I could through what's left from last year in there. I have this other one GMO that I've had the same issues with. I'm sick of removing bud rot or having to cut interior branches off due to pm. Tried toasted toffy and it was fucking amazing. I'm planning on trimmingvthe ev and if I finish I can bring the other one in. It's done. It's not getting any bigger. Trichs aren't changing. That GMO I am going to scope when I get home and it will be coming down in the next couple days. Otherwise I'll end up with half of what's there. The GMO I took the tops from is finishing up too. If I scope that and it looks decent and I have the time I'll take the remainder. I'm leaning towards doing at least a lb dry for extracts. I've got some frozen. I've got some hanging and most is still in the ground. I sleep on all major decisions. However, I know getting my nice buds soaked when I'm already losing shit to budrot and grey mold isn't the smartest thing. I'll probably take what I can and bring the others inside to keep them safe. I didn't think I'd have this much quantity. I knew quality would be good but this isn't a bad year quantity wise either. I'll keep this updated.
9/22 Busy as hell! Rain coming Tuesday. After a final check of the scope and the flowers and I took the GMO that all the leaves had fallen off of. That plant is going straight to extracts with the one in the thirty. I also "finished" harvesting that GMO that was furthest along. Trichs were getting amber. Been in trim jail. Was going to take the Sherb Pie but I'm not seeing amber yet. I did have to cut off some branches that had rotted. I'll keep an eye on it. It will come down when it's ready. It just sucks losing little bits of it. My favorite GMO is sooooo close to perfect. I should just take it but I'll wait. If we get rain I'll bring that and the sativa looking one in the ten is the barn. Back to work now. Before I forget what strain is what lol.
9/23 Still busy as fuck. I chopped the other event horizon amd hung it whole. It's DONE and it doesn't need to go through the rain storm. I also took the majority of the GMO early pheno. What's left will get plucked off and used for extracts. The big one in the 50 is getting dry. I have finished the event horizon and I'm not "finished" with the toasted toffy but I have it in 5 gal buckets with a food grade lid so u can at least cure correctly. The gmo is still hanging. I'm wondering whether I should wait it out or chop. I'm gonna take care of what I have inside first and hope that shit doesn't eat my plants or that it doesn't rot off. That perfect GMO has one branch with some grey mold. I might cut it off. I'll keep this


Likes
23
Share


@Horseluisweed
Follow
Teniendo el sustrato preparado con antelación un par de días antes.. nos animamos a germinar, tengo una tremenda ilusión con esta pequeña, me hace muy feliz verla crecer!🌱 Ojalá todo salga bien y pueda acompañarla hasta el final en este precioso viaje 👽❤️🌱
Nos hemos marcado tres objetivos en este cultivo:
1-hacer un cultivo seguro y no ser detectados👮♂️🥇
2-conseguir una cosecha en menos de 2 meses con éxito 🏇🥈
3-gastar la mínima cantidad de recursos posible con el máximo rendimiento posible🤑🌍⚡🥉

Likes
5
Share


@blasterw32
Follow
The last two weeks! I know I should wait one or two more weeks for harvesting, but unfortunately I will travel in 3 weeks and I have no option other than finishing everything up before I go.
This week events:
-Feeding on Day 73 , following the Flora Series Drain to Waste Chart (Ph 5.8)
-Started to lower the temperature to ~17 C during the night

Likes
11
Share


@Socal6pak
Follow
this grow has not been good. but its ok. all part of the process. leaves are not as green as i liked. i see leaf edges burned. so most likely just too much nute in soil? i did lost one. but its ok. she didn't do well from the beginning. maybe soil was just too hot and heavy?

Likes
3
Share

@Ninjabuds
Follow
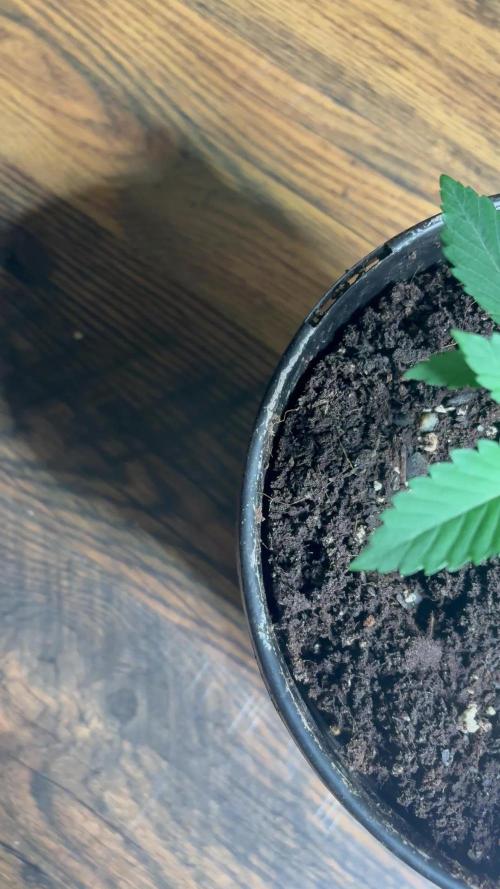
My lemon cherry Runtz is coming along nicely. It’s a strong plant from our the door. I think I transplanted my plants a little too early this time and caused a little slower growth this past week. They grew a decent amount but I can tell I did some root damage and I over watered at trasplant. Even with all my mistakes the plants still look great and healthy. Every plant from fastbuds so far has had the best resistance to stress. I’m excited to see this one come along


Likes
5
Share


@Lagriculteur420
Follow
During this first week of bloom, plant stretch less than i expect so maybe they can't fill the Space, but they look very healthy so i'm happy

Likes
14
Share


@BoboLacetti
Follow
I'm super happy and really looking forward to trying the Sherbelato. But I'll have to be patient for another 2 weeks


Likes
46
Share


@Wastent91
Follow
Ragazzi benvenuti!!! Questa settimana è andato tutto bene! La ragazza sta crescendo davvero bene,le foglie sono raddoppiate di dimensione ma soprattutto i fiori stanno apparendo da tutte le parti si stanno ingrassando bene e inizia a sentire un odore di spezie ! Non ho mai provato la varietà rutz ma tutti mi dicono che ha un gusto e una potenza formidabili! Mi aspetto una gran bella ragazza che produrrà un erba bella potente ! Un bel esperimento reso possibile grazie a Mars Hydro luce spettacolare e Sweet seeds che non si smentisce mai in fatto di genetica! Complimenti! Buon 420 a tutti!!
Likes
105
Share


@Natrona
Follow
Frostbanger Plants 1-6
Week 9 May 18– 24
FLOWER 5
Nutrients : 3 gal
GH Micro 20 ml
GH Gro 10 ml
GH Bloom 30ml
CalMag 15 ml
Recharge 10ml
Green sensation 15ml
Power buds 7.5 ml
5/18 PH 6.67, PPM 935, temp 68.5 1 ltr each
5/20 PH 6.67, PPM 1330, temp 68.5 2ltr each
5/23 PH 6.6, PPM 1570, temp 68.5 2ltr each
5/24 pics & vid
Since all 6 gals are getting frosty, I did some trichome pics. The statistics on Frostbanger indicate 50-day flower. Pics show mostly clear and milky.
There are a few with amber trichs and many orange pistils indicating maturation. At least 3 more weeks for maturity on these gals.
I continue manual control of the environment and using 3 circulating fans and the 4” exhaust vent from my 3x3.
I have the AC pushing air in and the exhaust pulling air out. This creates a neutral pressure tent environment-neither positive nor negative.
It looks like growth has stopped and plant height has been reached. Now is the time for buds to fatten and frost up. All 6 of them are short remaining less than 3 ft. They range from 15 to 31 inches. #4, 5 &6 are showing some fade, particularly #4.
Upon opening the tent, a melon smell comes off the buds if I get close, and more stickiness was observed during the process of defoliation. They are living up to the new strain’s name. #5 is the frostiest followed by #2. Wow week 3 of flower and that much frost already. Before FastBuds announced the strain name and characteristics, I was disappointed that FBA2502 could be an indica sleepy strain but the universe provides what you need at the time. The new strain profile indicates a whopping 29%THC with mainly sativa uplifting, euphoric, social effects with sweet fruity flavors which I love and enjoy. In addition, I recently bought a dap press and this strain is frosty and resinous. She will be great to press for live rosin.
FBA2502 is FROSTBANGER. Meet Frostbanger Auto, an autoflowering and Indica-leaning hybrid packing a staggeringly high THC content averaging 29%, making this one of the most potent strains on the market. It was created by Fast Buds through crossbreeding Gorilla Glue and Chemdawg, two equally iconic strains. Growers must know that these difficult-to-grow plants will pose specific challenges in terms of environmental control and nutrition, making them best suited for cultivators with some experience under their belt. The flowering cycle is short, averaging only 50 days, and yields are usually around 300g/m². The Frostbanger Auto flavor and aroma are both mouthwatering with a delightful combination of sweet, fruity, and flowery notes. The high is mainly Sativa-driven with uplifting and happiness-inducing effects that lead to euphoria and a general sense of well-being. You might feel sociable and talkative, but too spacey to say something. Following this surge of energy comes a deepening sense of relaxation, leaving you sedated and completely at ease with the world. Due to its potency and these long-lasting effects, medical patients hail Frostbanger Auto for treating chronic pain, stress, and even depression.
Measurements:
#1 15”
#2 20”
#3 17”
#4 30”
#5 31”
#6 24”
P.S I added a no churn ice cream recipe in week 4 of Natronas recipes. It is easy 3 ingredients. I bought Mango puree instead of fresh and reduced that to reduce water content. Try it. 😋
Your likes and comments are appreciated. Thanks for stopping by.
Growers love 💚🌿
💫Natrona💫
Likes
41
Share


@Basementganja
Follow
Flushed with 40 gallons of water. - should be dry in 5-7 days.
One week to go until harvest.
mmmmmmmmmmmmmmmmm.... frosty!
Likes
16
Share


@Prop207
Follow
General Hydroponic
10 GAL
20 ml MICRO
30 ml grow
10 ml bloom
15 ml calmag
Ph 6.0
Roots have re-established their feet into the tub water zone and have begun to take off again.
Showing more vigor then K2 atm, they caught up and make pass. Heavy LST of branches

Likes
4
Share


@Happygrowing
Follow
The frostiest of the 3 different cut strain that I have.
Smells like strawberry...
Its very interesting...
Produttive one...
I already love her🤣
Likes
15
Share


@38PLAN
Follow
Siamo all'8 settimana le piante hanno sviluppato fiori ben formati,ora dobbiamo avere pazienza ed aspettare che diventino ancora più grandi,la maggior parte dei pistilli é ancora bianca e le piante ancora verdi,questo significa in grandi linee che la pianta può ancora produrre,incredibile la pianta in fondo a sinistra ha quasi toccato il soffitto,un autofiorente di eccezionali dimensioni,ancora all'inizio della fioritura
Likes
7
Share


@OwlGang_Uk
Follow
Week 5 - Trimming And Low Stress Training - the Gorilla Glues are looking nice and healthy. I trimmed and LST 1 of the Gorilla Glue’s and just trimmed the other one for experimental purposes.