
Likes
Comments
Share


@Pungolian
Follow
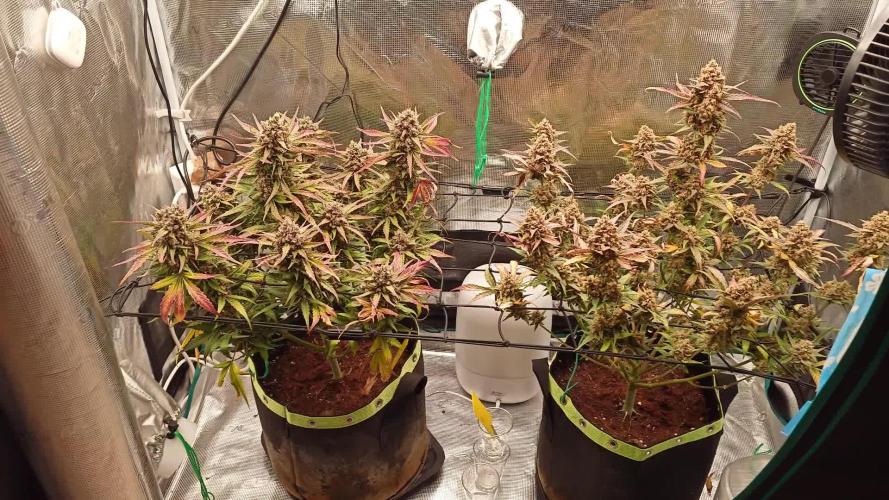
Letting mother nature do her thing, lol. Im learning a lot . Got my pots tied down to the deck and supported with other dirt pots and water jugs, lol. I wonder how big they would be if I planted them in the ground! Going to half to hire help come harvest time lol

Likes
7
Share


@Bluemels
Follow
Tag 30: Ich baue ein Netz ein um die beiden Pflanzen mehr in Form zu bringen, dabei ist leider ein Zweig abgebrochen.


Likes
12
Share


@DrGreenbutterThumb
Follow
This week was great the smell is very pungent, I've been giving the CO2 lights are (I believe) adequate over 200 true watts on 2 plants started with purpinator as well as adjusting the ph and dropping the temperature. And the added spectrum. Try to get to the Anthocyanins and adjust my colors
Likes
3
Share


@Giuliojuana
Follow
Sono contento la colto va bene qualche pianta inizia mostrare il sesso tra poco inizia la pre fioritura stanno allungando molto velocemente

Likes
58
Share


@AsNoriu
Follow
Day 74. One more victim of war against bud rot. Prevention needs sacrifices sometimes...
Day 78. Second was sacrificed for more space too ;)))
Day 84. First girl is Jared . Fantastic bud quality !!!
Day 88. I said fantastic quality about first one ??? ;))) That's till I touched second !!!
Purple phenotype is pure joy for eyes !!!
Happy Growing !!!

Likes
9
Share


@Naujas
Follow
whatever it is, it's a pity, but you can't fight with Nature :) as far as I can see from the drone flight, the girls are simply gone :D:D they are under water,.... it's a pity.... it rained a lot during the week, there is a river 300m away which flooded, here is the result: D I see this for the first time in 9 years .... well, nothing new automatic seeds, already thrown into the ground :) so I will wait for new girls :).


Likes
21
Share

@MadeInGermany
Follow
Flowering day 42
since time change
to 12/12 h .
Hey guys :-)
A lot happened this week :-).
The buds develop really nicely .
The scent wafts through the whole room when I open the tent 💚.
This week was poured 3 times with 1 l each (nutrients see table above) This week there was the maximum amount of fertilizer, which will be slowly reduced from next week :-) .
Have fun with the update and stay healthy 🙏🏻
👇🏼👇🏼👇🏼👇🏼👇🏼👇🏼👇🏼👇🏼👇🏼👇🏼👇🏼👇🏼
You can buy this Nutrients at :
https://greenbuzzliquids.com/en/shop/
With the discount code: Made_in_Germany you get a discount of 15% on all products from an order value of 100 euros.
👇🏼👇🏼👇🏼👇🏼👇🏼👇🏼👇🏼👇🏼👇🏼👇🏼👇🏼👇🏼
You can buy this strain at :
Clearwater Seeds
Water 💧 💧💧
Osmosis water mixed with normal water (24 hours stale that the chlorine evaporates) to 0.2 EC. Add Cal / Mag to 0.4 Ec Ph with Organic Ph - to 5.8 - 6.5
MadeInGermany
Likes
40
Share


@CampaCavallo
Follow
Benvenuti amici in questa nuova avventura Outdoor della CampaCavallo 💚
Le temperature esterne sono ancora un po troppo variabili e con minime sotto i 15ºC.
Iniziamo a far germinare un seme utilizzando Easy Start di Zamnesia 💙🗿👍🏻, inumidito da acqua e Voodoo Juice di Advanced Nutrients 🔝
TENT-X 🤖 controlla la situazione visto che le temperature minime outdoor, sono ancora troppo rigide.

Likes
18
Share


@Silverback_Guerilla
Follow
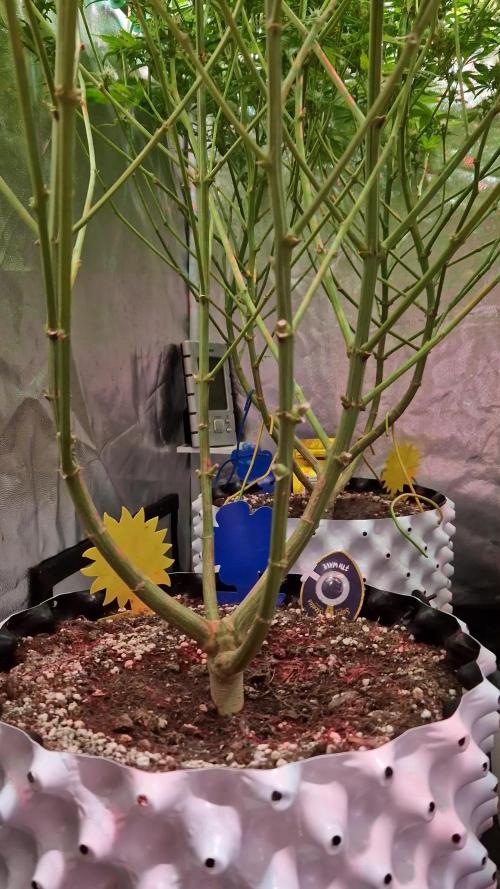
10/26:
All but one are flowering now, and most are stretching. There are a few shorter ones, thankfully, so they'll get moved up to the top of the closet in another day or two and I'll have a little more room for the big girls to spread out a little bit.
10/27:
I rearranged the garden a little bit today and checked whether they needed water or not. I foliar fed with Big Bloom and a little Tiger Bloom today.
I'm seeing signs of potassium deficiency on several of them.
10/28:
I watered everybody with about 1/4 gallon and included a little terpinator, cal-mag, bembe, and beastie bloomz.
I uploaded a couple of photos showing some weird curling of the newest growth...just an odd varietal trait I think because I've seen it before on my Candy Cane F2's.
10/29:
I rotated everybody on the edges and plucked some older, lower leaves. They are damn near totally dry, so flushing tomorrow.
10/30:
I decided not to flush based partly on how shitty the weather is right now...and partly because I'm seeing some N deficiency signs in several plants and really can't afford to put off feeding them again until they dry after a 3-gallon flush. So, instead, I thoroughly watered everybody with about 3/4 gallon including cal-mag, myco/tricho, beneficial bacteria, humic acid, bembe, and terpinator. I let them sit in their catchment trays long enough to soak all the run-off back up, so they are fairly well saturated now with things that should make the roots really happy. I've added another oscillating fan and got the hygrostat set to kick on the exhaust whenever the humidity reaches 55%, so it's pretty much staying on right now. Hopefully they are dried back out by Friday so I can give them a last good dose of N to help with their stretch. I'll also start going heavy with P and K, and increase terpenoid and flavonoid enhancers.
I'm gonna give Signal by True a try when I finish my current bottle of Terpinator. I just can't bring myself to keep paying over $60/gallon when I can get a gallon of Signal for under $40.
While watering today, I emptied the closet completely and had plants all over the place...my cats were in heaven..stalking each other under the jungle canopy.😺 It really does amaze me that I'm fitting all these plants into such a small space..😳
10/31:
I rotated the edge plants and checked their moisture level. I'll feed them tomorrow.
11/1:
I took everybody out of the closet and did a little defoliating. I fed everybody with about a half-gallon including all the good stuff.
Likes
7
Share


@bunlarbizimkomutanim
Follow
There was a visible attack this week. The temperature is between 25-27, the humidity varies between 60-65. There was a slow development due to excessive irrigation and I could not do LST due to the distance of the room to me. I am planning to fall leaves next week.

Likes
24
Share


@SMELLYBUDZ
Follow
Defoliation and supercrop a day before 24 hours of darkness. 12/12 following. Flip @ wee6 day1 from seed
Likes
61
Share


@Nebula420
Follow
Just a couple of hours since I returned from Africa, was there on volunteer work. I see a lot of comments written to me, I will answer everyone later) Happy New Year to all, love and peace all we need¦
Thanks to Seed Banks for amazing genetics, thank you for their great work, GD team for amazing project,
Thanks to everyone who follow my grow report, love u all, Peace!

Likes
2
Share


@I_Identify_As_A_Dan
Follow
Day 28
I was away for 5 days and wow the growth... I'm sold on the auto-pots 😂
Shes a nice in-between of bushy/stretchy structure.
No signs of preflowers yet.

Likes
4
Share


@Lazuli
Follow
So this plant grew during winter, i cant heat the room where the tent is so the only warmth was from my LEDs and dehumidifier, during summertime this strain finishes in around 10 weeks from seed, if u like strong smoke you should try her out
Likes
4
Share


@Stoney_Stark
Follow
Sorry I have been slacking on this diary, the plants look great. The 3WOK OG is nice and big with plenty of bud sights

Likes
10
Share

@Canna-Lytiker
Follow
Ihr seht schon, es hat sich etwas verändert. Ich habe den Kanal auf meinen neuen YouTube-Kanal umgestellt. Der Kanal soll die Tagebücher hier ergänzen. Also schaut gerne rein und lasst ein Abo da. 😇
https://www.youtube.com/@Canna-Lytiker420/videos


Likes
25
Share

@TrickzGrowz
Follow
Wird langsam richtig prall und dick die Lady. Obwohl Sie sehr viele Triebe hat, bilden sich echt dicke Buds.
