
Likes
Comments
Share

@nerdz
Follow
F15 to 21 Tuesday
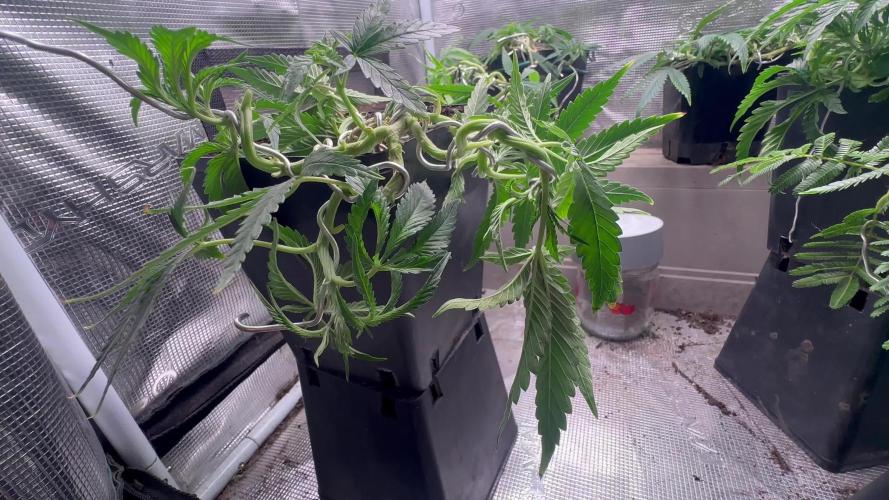
Big big big. Humidity was getting hard to handle especially during lights out so I had to do a mid stretch cleanup. I mostly did a lollipop to get air flowing through the plant. I didn't go too hard even though it looks like I did. I will do the last one in a week.
~1000ppm 3/4-full bloom @ ~5.8-5.9
Lights 100% @ 7-12"
25-26c / ~53rh

Likes
10
Share

@ibbzy
Follow
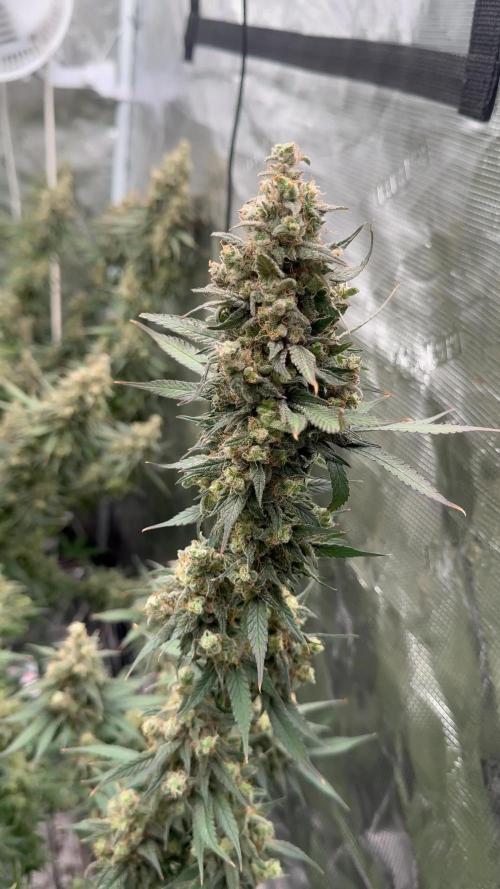
Day 56 of flower. She looks pretty much done, could chop now but will give it till day 60
She's just nicely densening up now

Likes
35
Share


@bypado_farm
Follow
Day 8:
Watered the plants 0.25L each plant with nuts
1 seedling was burn because of too much humidity. One seed already germinated ready to replace it.
Lights at 40%
Day 11:
Watered the plants 0.25L each plant with nuts

Likes
12
Share


@Piablo
Follow
Day 7-9:
Had a good environment overall, although the light was probably much too high. I didn't realise until quite late that it should have been 60cm above the seedling, and I had it around 120cm at first, and then 80cm. As a result the stem is a bit stringy.
Day 9:
I lowered the light to 60cm above the plant, and it won't go any lower. the recommended for this light is 30cm above the canopy, according to this very useful article: https://www.growweedeasy.com/how-far-grow-lights, but it's still in seedling stage and I'm guessing the plant will grow up a bit more, and I can always lower a little bit more. Also it's pretty damn hot, so I don't want to overdo it on the lights.
I've been keeping the water consistent and just topped up a little on recommended nutrients (more grow, a little micro, adding a little bloom as it comes closer to flowering). The reason for this is because I want to maintain the consistency of environment and monitor the plant for any signs of unwellness. Because Sativas are sensitive to nutrient burn, I'm being conservative in this respect.
The temperature with the light lowered is a steady 26 C, and I'm maintaining the humidity at around 70%. This is pretty good for this strain, as a sativa it likes higher temps and humidity. The water pH is around 5.9, also desirable.
I've also been wondering if the plant is getting enough CO2. Is it necessary to buy a measurement device and some CO2 bags?
Overall the plant seems very happy and is looking healthy.
Day 10:
cleaned the inside, added more grow, added more clay pellets since she looks a bit thin and stalky and needs extra support, and there were not many pellets present. Light distance is currently around 60cm. Though it won't go any lower with the straps, I will look at lowering it more with some extra rope as the ideal height will eventually be 30cm for this 250W HPS light. Added more Ph buffer yesterday evening and we're currently sitting around 5.7 ph. I was aiming for 5.8 but this is still acceptable. Temperature is around 25 - 26 C, humidity is around 70%, though I will begin lowering this as she grows. I will probably replace the water sometime this week. Upon further investigation I realised that my water levels were too high, and were possibly suffocating the stem. I reduced water levels by a few cm since I had previously been topping up without realising possible damage.
I feel like today is the day that this seedling is finally becoming a plant. She has grown some long roots already.
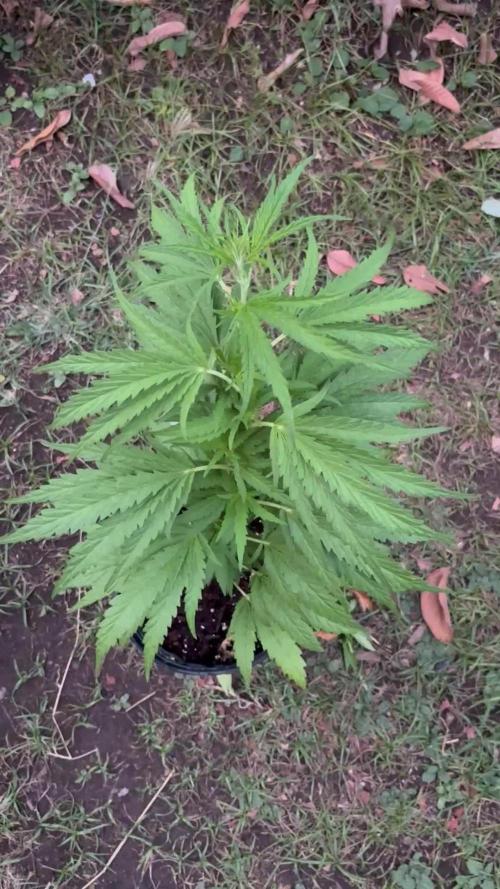
Day 11:
I further lowered the light to around 40cm using some extra string. It's not super ideal, but for now it's ok. The plant was falling over it's own weight so I added some extra pellets around it for support and it seems to work. I'm hoping she won't stretch as much now that the light is lowered. The inside fan is still on and on full power to build up extra stem strength and keep temperature down. I'm attempting to keep humidity around 60%, a little lower than before. The temperature is significantly higher with the light lowered, easily maintained by periodically opening the door and leaving in cool air from outside which runs just past the intake fan. I'm slightly concerned about the Monstera Deliciosa plant which is sitting just opposite and above the intake fan. Would this have any effects, positive or negative, on the grow? Google is coming back blank on this.


Likes
23
Share


@AntiGestrecktesGras
Follow
I think I didn’t use enough nutrients… leaf tips are little bit burnt, EC too high? I don’t measure my EC, only pH.


Likes
16
Share


@Naujas
Follow
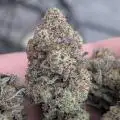
107 days!! Here is another great experience :) The girl has matured, 330 grams of wet, full of sticky, resinous shiny, pleasantly smelling flowers :) I think it will be about 90 dry :) although the girl is definitely not the biggest, but she looks great, the smell is also amazing :) I also got some sugar leaves from which I will make bubble hash, For me personally it is really beautiful and good growth, which I think will definitely be confirmed by the dried and cured flowers :) there will be a smoke review, as well as the total dry weight. good luck to everyone :).

Likes
5
Share


@Mr_nugs_lover_David
Follow
This amnesia pro has peformed amazing, both phenos #1 and #2 have produced beautiful hard dense colas, full of citric lemony terps, ideal to use for daytime, very nice cerebral buzz. Hope you guys have enjoyed my work! Peace 💚💛❤️👨🌾

Likes
19
Share


@JeyGanesha
Follow
Alla prima strawberry banana gli ho fatto il lavaggio radici, ancora una settimane più o meno e ci siamo gente😀👍💪💚💛
Non vedo l'ora di raccogliere perché sto rimanendo anche senza terapia🎺
Likes
5
Share


@EastCoastGrowShow
Follow
This week, the Diamond Handz by Square One Genetics got........well sticky. She is frosting up nicely and smells like sweet candy. I am surprised by the stacking on these main branches 😃. There is not much to do for her as she has received her last feed already. All that is needed is wellness checks and watering.....I do not mind being in the Tent as the smells are soooooooooo Damn good 😏. I also tend to pluck out any yellowing or dying leaves until the end of flower!

Processing
Likes
11
Share


@ganjaman24
Follow
They’re looking extremely healthy..gave em their first nute feed with the last watering seem to be doing fairly well..fimmed the GG and LST. Did not touch the unkown as it looks smaller to be the same age. Running GHE base line with few extra supplements.
****UPDATE****
Both are LST’d..might rethink the way I tie them. Going for a “coil” type look, we’ll see though. They’re looking great! Hoping for females!

Likes
Comments
Share


@DrGrow420
Follow
The plants have grown very fast this week, easily doubling in size. I moved them closer to the light to 90 cm from 110cm. Watering as needed and I am keeping the soil surface moist with light watering twice a day.
I have fed the plants twice this week. First with a half dosage humic + fulvic acids, microbial inoculant and Seagro. The second feeding was half dose Seagrow and Biobizz BioGrow with some CalMag and Silicon.
I am preparing a compost tea with some added kelp meal, insect frass and worm castings for the next feeding before I start LST.
Likes
Comments
Share


@loomerlope
Follow
All fine, stretch nearly done, DLI was increased to 30, fertilizer changed mid week.


Likes
6
Share


@chimera
Follow
Monkey Bomb is pushing past its 8 week flower time now with at least another 14 days of strong growth left, the resin build up on this strain is straight from its lineage and it shows very strong gassy smell and resin like glue . Great strain for the patient grower thank you @bombseeds

Likes
10
Share


@GingFreecss
Follow
Ho aggiunto 600watt led per questa settimana, la prossima saranno tolti.
Ho iniziato anche a diminuire le ore di luce da 12-12 a 11-13, toglierò 30 Min al giorno fino ad arrivare a 10-14
3° giorno della 4° settimana di fioritura
Ho dato 10ml di fosforo per pianta
Iniziano a gonfiare i calici e la produzione di resina si intensifica 🤤
Le amo
4° giorno 4° settimana fioritura
Tolte foglie prendi sole
Tirato un po' di più i rami per miglior esposizione alla luce e più passaggio aria
Grazie per l'attenzione stay tuned🤟🐵🤟

Likes
20
Share


@NoProbation4Weed
Follow
dry weight of buds after trimming = 93 gram and about 5 gram of Trim so 98g Total.
Actual plan was to leave the plant some more days but after seeing some Nanas developing inside the buds i decided to cut it at day 65 of flower.
great smell and cant wait to smoke the final product. All in all definetly a good strain for living soil.


Likes
12
Share


@2Stones1Bird
Follow
Checkout my Instagram @smallbudz to see the Small budget grow setup for indoor use, low watt, low heat, low noise, step by step.
17/02/2020 - Fed her 1.5l of 6.4PH water with 0,2ml of each: Cal Mag (Atami), Grow, Bloom and Max, and 0,5ml of each: Heaven, Alga-mic and Vera, noticed some run off, I use about 1/4 of the nutrient dosage on the chart, to achieve about 100/150PPM (500 scale).
She's starting to smell like smelly feet.
22/02/2020 - Last feed, gave her 1.5l of 6.5PH water with 0,2ml of each: Cal Mag (Atami), Grow, Bloom and Max, and 0,5ml of each: Heaven, Alga-mic and Vera, noticed some run off, I use about 1/4 of the nutrient dosage on the chart, to achieve about 100/150PPM (500 scale).
Processing
Likes
28
Share


@Elysian_gardens710
Follow
This week we had to go on a destination wedding and had to have friends house sit. Again 😔 I hate having to do that, but this time everything went very smoothly. We didnt lose any plants lol.
Before we left I was able to get #2 transplanted in a 7x7 nursery pot. Man was she ready too!
I've decided since I am only growing 2 Choc Mknt OGs that i will be training one(both high and low stress) and this plant(#2) I will be leaving completely alone to do her own thing 🤞
Watering has went smoothly this week. Both plants only wanting water once in this 7 day stretch. I think because the transplant soil was already very moist.
#1 has rooted and already started taking off from her transplant last week.
Tent update: Our ES300 by the green sunshine company arrived this week!!! I was able to get it I'll installed before leaving. So now in my Vivosun 2x4 tent I have 1 es300. I moved the viparspectra to my large flower tent. The Choc mint seem to absolutely love this light. I started it at 70% power(its a dimmable light fixture) and am slowly moving it up over the course of a week.
Day 12: my friend reported great growth on #2!! So she is rooted as well and doing good. Also, the heat in my 2x4 is in the low 80° getting up to 85° even 90°(for a few minutes) I'm mostly running Sativas which love the heat, but I have noticed Choc Mint OG prefers it a little cooler. Her top leaves are canoeing and curling a bit. Thanks for checking out my diary! Sorry this week was lacking a bit 🤷♂️ now that I'm home they're only gonna get better!
