
Likes
Comments
Share


@ButterfliesLittleFarm
Follow
Hello Diary,
Milky Way F1 deserves all the praise, well done to Royal Queen Seeds and their labs.
Milky Way F1 is the fourth F1 strain in the series and I can say firsthand that they are fast, have an excellent yield and the quality of the flowers is excellent.
The plant dried for about 20 days, turned upside down, after which I trimmed the flowers and placed them in the Curing Vault to ripen further.
The result is great, 72 g of dry flowers that are ideal for daily consumption.
I think I wrote everything I had about the Milky Way F1, if anyone has any more questions, feel free to write.
Thanks to everyone for their comments, to Grow Diaries for a great platform and to Royal Queen Seeds for years of support.

Processing
Likes
18
Share


@Barcelona_Farmers710
Follow
Esta semana apesar de tener temp Máxima de 28... se va recuperando bien de las podas, el led de TodoGrowled funciona perfectamente para sus 55w farmers!🍁

Likes
38
Share


@GreenHouseLab
Follow
Made the switch to the Nova and voila. Huge difference in overall health and should be rocking the pistils here in no time.
Merry Christmas to all,
GHL

Likes
3
Share


@Tashtegoo
Follow
9.7.
Smell changed from a mix of orange and maracuja to a whole multi vitamin juice kind of flavor over night.
Under the loupe I can spot the odd amberish trichome, maybe by mishandling , but most are milky or clear, still producing more fresh ones.
12.7.
A bunch of trichomes developing an amber hue.
Also the leaves are turning yellow now.
Harvest Window is open now, wanna see some more amber, but not too much. Mainly hoping for thicker buds.

Likes
4
Share


@KannaGrowing
Follow
Ya estamos en plena floración y con las luminarias a max potencia... Evidentemente el aire acondicionado también está trabajando durante la fase de encendido.
Flowa-Bloom es la estrella de los nutrientes a incorporar, pero todos son importantes... Así que sigo la tabla de fertilización de JUJU Royal al pie de la letra.
Eso si, primero humedezco bien el sustrato con agua, para aprovechar bien la solución con los nutrientes y que no filtre por las macetas textiles.
Riego cada cuatro días.


Likes
2
Share

@Bear_Grows_Green
Follow
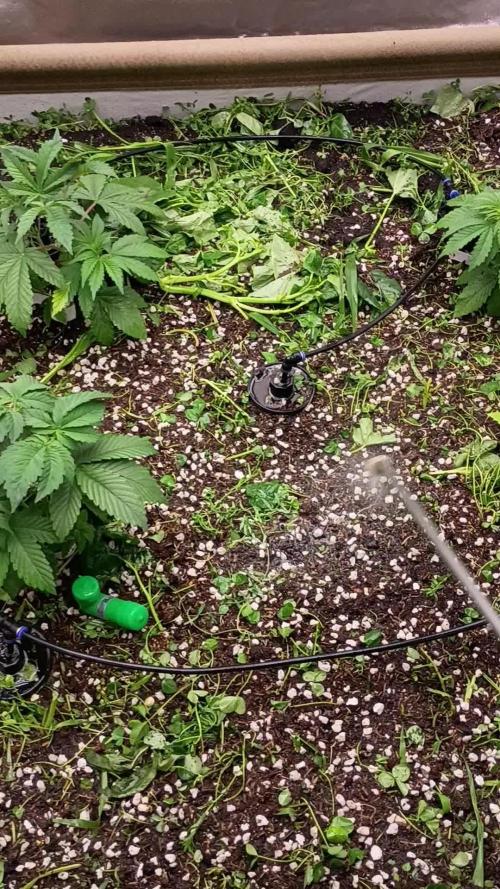
Might be a day early but I'm calling it the start of a new week. The ladies have been looking super unhappy last couple days determined they were root bound so got em put into their final home this morning. Chop and dropped cover crop put thin layer of mixture of BAD worm castings and Coast of Maine lobster compost and watered in with goodies. Set the ppfd to 300 and vpd closer to 1.0
Likes
2
Share


@Elguacho420
Follow
Muy Buenas a tod@s.... Tercera semana de estas runtz x layer cake, la verdad que era una variedad que quería plantar y tanbm probar la calidad del banco en este caso barneys farms... Se la ve bien, uniforme y de buen tamaño, buen tallo x el tiempo q tiene... Va creciendo muy bien... La semana q viene más, ya no les falta nada para flora, los días pasan rapido...💪🏻💪🏻💪🏻 Buenos humos para tod@s💨💨💨
😎💎⚕️
🇦🇷🤝🏻🇪🇦


Likes
6
Share


@Kendoda
Follow
The heads are starting to swell now , the lowers are looking undeveloped still. I might do a little defoliation to let in some more light next week.
I’ve noticed the first bit of change in a couple of the old lower fan leaves this week. At this stage I’m not too concerned. Buds are frosty, sticky and dank smelling.

Likes
13
Share


@Medmandan420
Follow
Sorry about late update
lots of stuff going on
great smelling flowers
far more advanced then the rest of the tent
Likes
2
Share


@PINUFLA
Follow
Día: 78
Riego: 1,5L x Pl.
- Agua
Día: 81
Riego: 1L x Pl.
- FinalFlush 2mlxL
Día: 83
Riego: 1L x Pl.
- Agua


Likes
12
Share


@Aleks555
Follow
Eternity Grow Cup 2025 – Plagron & Zamnesia
Runtz by Zamnesia Seeds – 51 days from seed and 22 days into flowering. 🌱
Our girl is growing beautifully! One of the colas shot up around 20 cm taller than the rest, so we had to bend it down. Thanks to LST and careful pruning of branches and leaves, she’s taken on a really interesting shape. We’re planning another round of leaf defoliation soon to give her even more space to thrive. 🌿
She’s loving the Plagron nutrients, and it really shows – she looks absolutely fantastic! 🙌💚

Likes
9
Share


@BB_UK
Follow
She is going to be huuuuuge! All branches and stems have risen up and are strengthening daily in order to produce big resin filled flowers! I love her progress as she climbed to the height of the purple punch and soon to stand taller! Can’t wait to have the final weeks approach! Thanks for stopping by buds and chuds 🤩😎💪🏽


Likes
Comments
Share


@agrippa
Follow
Started getting rather bushy very quickly.
Those big green fan leaves at the bottom were touching the soil, so I pruned them off to get some more node growth going.
Likes
37
Share


@Ferenc
Follow
Last couple of days... No watering from today, (Day 129) and the light will be switched off as well from tomorrow (Day 130) so I will harvest them
approx on Day 132
or 133 on the 18th week :)


Likes
Comments
Share


@PhinolaGreen
Follow
10. Woche
Sie gefällt mir soweit gut, auch wenn sie nicht Purplen sollte, finde ich die Pflanze sehr interessant von ihrer Wuchsarchitektur und Blütenentwicklung 😊

