




Likes
22
Share


@High_And_Hydro
Follow
Die letzte Woche ist angebrochen und sie bekommen ab jetzt nur noch reines Leitungswasser ohne Nährstoffe und das auch nur abends.
Morgens lasse ich das Wasser ab und lasse sie mit der Pfütze zurecht kommen, die noch drin bleibt, um etwas Trockenstress zu erzeugen.
Die Wasserpumpen mit den Aeroponik-Düsen sind bereits aus, aber die Airpumps laufen noch.
Ich warte noch ein wenig auf die Trichome, aber es wird vermutlich nicht mehr all zu lange dauern, bis ich sie ernte 😁👍
An Tag 78 habe ich angefangen zu ernten, wird wohl etwas dauern 😇
...
Tag 82... selbst die Schere hat zwischendurch versagt, aber davon lässt man sich ja nicht aufhalten. Es wird wohl noch ein paar Tage dauert, bis ich fertig bin.

Likes
12
Share


@CanadianFillmore
Follow
Harvest time for amnesia lemon haze. Intense lemon smell, tall stretchy girl with big sticky buds! While her height almost became an issue, she managed to finish with minimal light stress and just a few signs of foxtailing.
Will update in 7-10 days with initial smoke and dry weight.
Thanks for tuning in to this grow 👽🌳🔥💚
Update - 79 grams dried, minus a couple grams for the smoke test. Buds have a lemon smell and a lemon fruit flavor when smoked.
Likes
5
Share


@Johngrowbr
Follow
Sorryyyyy for didn’t tell you guys before, but I just switched to 20 liters pots size!!! It’s been since at the 4 week of veg

Likes
11
Share


@TgOgFaRms
Follow
🌿🌸 Week 4 Flowering Update! 🌸🌿
We have officially entered week 4 of the flowering phase, a crucial period where things can get a little nerve-wracking. However, I'm happy to share that everything is looking great so far! 🎉
First off, let me express my relief that I haven't encountered any hermaphroditism issues like some unfortunate growers have experienced. I've been extra vigilant in checking my plants for any signs of bananas or seeds, and thankfully, all is going smoothly on that front. Fingers crossed, and let's hope it stays that way. 🤞
Now, let's talk about the progress of these beauties. The plants are thriving, exhibiting vigorous growth and magnificent stretching. 🌱✨
Maintaining the well-being of my plants remains my top priority. They're displaying a healthy thirst, as each plant continues to drink around 2 liters of water every two days. I've been closely monitoring the pH level of the nutrient solution, which has been steady at 6.11. This ensures optimal nutrient uptake and keeps the plants in their prime condition. Moreover, the TDS range is consistently between 1050 and 1150, providing them with the ideal nutrient balance. ⚖️💧
Speaking of the plants, I must mention how amazing they smell! The aroma is becoming more intense with each passing day. Today, I conducted a smell test for the OG and Oreo strains. The OG emitted a super strong smell of OG/Skywalker, while the Oreo strain has a unique and captivating scent that is difficult to describe but absolutely amazing. I can't wait to smoke that one! Tomorrow, I'll do a smell test for the Queen strain as well. 🌿👃🔥
As we progress through this crucial stage, I'll continue to provide the best care possible to ensure a successful harvest. Today (Day 22) marks the last day of foliar feeding with Bud Factor X, an essential step to maximize THC development and quality. This phase demands attention to detail and careful observation. 👀🌿💦
That wraps up this week's update, fellow growers! Keep your fingers crossed for a smooth journey ahead, and may your own gardens thrive. 🤞🌿🌸
Happy growing, lads! 🌱💚


Likes
29
Share


@HighDran
Follow
Su crecimiento y rendimiento fueron muy satisfactorios,tiene un colocón alto y un sabor y aroma excepcional.2160


Likes
170
Share


@Master_weeda
Follow
Bonjour à tous les padawans et les maîtres jedis
Jour42 ma plante entre bien en floraison je pratique sur elle une defolliation pour permettre aux têtes de prendre la lumière
La floraison des plantes de cannabis
La plante de cannabis passe par différentes étapes de vie avant de parvenir à la récolte. Ces étapes sont : la germination, la pré-croissance, la croissance et la floraison.
Pour les autofloraisons il n'est pas nécessaire d'avoir de changer le cycle de lumière elle entre en floraison automatiquement voilà d'où elle tient son nom "d'autofloraison"
L'origine de l'auto-floraison vient de la sous-espèce "cannabis sativa ruderalis" , qui à l'origine produit de très faibles niveaux de THC. C'est en croisant cette variété de marijuana avec d'autres qui produisent des niveaux de THC plus élevés qu'à vu le jour ce magnifique compromis que sont les variétés auto-fleurissantes avec des taux de THC très satisfaisants. En parallèle, cela a permis d'améliorer la production de ces variétés, qui initialement étaient exceptionnellement basse.
Pour des résultats optimaux, en culture Outdoor (extérieur), je recommande que la germination des graines de marijuanaAuto-flo se fasse entre avril et août.
En culture Indoor(intérieur), la photopériode idéale que ce soit pour la croissance comme pour la floraison est de 20h de lumière. N'oubliez pas que ces graines ne sont pas tributaires de la photopériode pour passer en floraison.
Il est préférable d'utiliser des pots d'une capacité de 10 à 20L dès le début, étant donné que leur cycle de vie est réduit, les auto-flo n'ent pas besoin de plus de volume pour se développer. Vu sa petite taille (et la discrétion) elle fait l'objet d'un bon choix pour la culture de cannabis sur balcons.
La première variété de Lowryder auto-floraison a été créé à partir de cannabis indica sativa croisé avec des génétiques de cannabis sativa rudelaris par la banque de graines de marijuana "The Joint Doctor". Puis vinrent la White Dwarf de "Buddha Seeds", la Roadrunnerde "Dinafem", l' Auto Stoned d' "Autofem", la Speed Devil de "Sweet Seeds" , la Maxi Gom de "Grassomatic", la Flash, la Gnomo de Kannabiaet bien d'autres.
Jour42 defolliation (video)
Avant toute chose n'oublions pas de bien désinfecter ses outils et bien ce laver les mains.
Quesque la defolliation ?
LES CULTIVATEURS AMATEURS, PRENEZ GARDE, MAIS NE PRENEZ PAS PEUR
La défoliation consiste à retirer les feuilles des plants de cannabis en intérieur afin d'accroître le rendementfinal. Le cultivateur amateur doit faire preuve de vigilance lorsqu'il commence à appliquer cette technique de taille. Malgré le débat sans fin entre ceux qui prônent cette technique et ceux qui la dénigre, il n'y aucune raison pour qu'un amateur ne s'y essaie pas afin de voir si ça lui convient ou non.
COMMENT DÉFOLIER
Que vous tailliez les feuilles ou les branches des plants de cannabis, il vaut mieux utiliser un sécateur stérile qui est confortable en main. Arracher des feuilles à la main manque de finesse et engendre souvent par accident, l'arrachement des couches d'une tige en plus de la feuille. L'objectif principal de la défoliation est de permettre une meilleure pénétration de la lumière et de promouvoir la production de plus grosses têtes. Les feuilles éventails qui font de l'ombre doivent être retirées. Tailler la tige principale et/ou les pousses secondaires n'est pas de la défoliation.
La règle d'or lorsque vous donnez à vos plantes un rafraîchissement est de commencer avec les feuilles nourricières les plus grandes et les plus larges, en taillant du bas vers le haut. Il est important de retirer les feuilles stratégiquement et non pas au hasard. Pensez également qu'il vous faut limiter votre rafraîchissement à approximativement 10 à 20 % des feuilles totales de votre pied. Il est très facile de s'emporter durant la taille et de se retrouver avec des plantes chauves. Un excès de taille de feuilles empêchera la photosynthèse et paralysera vos plants.
QUAND FAUT-IL DÉFOLIER
Il est assez rare d'appliquer la défoliation comme seule technique pour obtenir un fort rendement. La taille des feuilles est généralement associée à d'autres méthodes de tailles et de palissage pour un meilleur rendement telles que le topping ou étêtage, le FIMming, le LST, le manifolding, le supercropping et le ScrOG. Les cultivateurs utilisant la méthode ScrOG auront besoin de retirer toutes les croissances inférieures ainsi que les feuilles et les tiges se trouvant sous le filet.
Les plants de cannabis peuvent être défoliés dès lors qu'ils sont passés de la phase de plantule vers la phase de croissance végétative. Cependant, il est recommandé aux cultivateurs amateurs de laisser aux plantes 1 à 2 semaines de croissance végétative avant de s'attaquer à la défoliation de celles-ci. De plus, certaines variétés sont plus sensibles à la taille que d'autres et de ce fait, seront plus stressées par la taille des feuilles. Surveillez minutieusement le comportement de vos plants après la taille. Une période de convalescence de minimum 3 à 7 jours avant de recommencer la défoliation est fortement recommandée pour éviter trop de stress aux plants. Les cultivateurs peuvent également défolier pendant la phase de floraison, ce qui permettra à l'énergie de la plante d'être concentrée vers la production de têtes tout en limitant l'ombre et l'excès d'humidité. Néanmoins, il est important de ne pas défolier trop tard sous peine de simplement blesser ses plants inutilement.
LES AVANTAGES DE LA DÉFOLIATION
Évidemment, l'avantage numéro un de la défoliation, c'est l'augmentation du potentiel de rendement de cette technique de taille pour tous types de cannabis allant de la photopériode aux variétés autofloraison. Ce n'est pas un secret que les fleurs qui reçoivent plus de lumières deviennent plus grandes et larges que celles dissimulées dans l'ombre des feuilles. De plus, retirer les feuilles intérieures des plants touffus aide à prévenir toutes menaces de moisissure. Les plants très feuillus avec un feuillage intérieur dense produiront une quantité importante de têtes pop-corn. Dans le pire des cas, les branches de têtes et les têtes qui sont denses succomberont au pourrissement.
Si vous observez des gouttes d'eau se former sur la surface des feuilles, il est grand temps de penser à faire de la défoliation. Libérer la zone inférieure et médiane des feuilles est un excellent moyen d'améliorer la circulation de l'air.
LES DÉSAVANTAGES DE LA DÉFOLIATION
Les plants de cannabis en intérieur bénéficient de la défoliation pour deux raisons. La première est parce qu'ils reçoivent la lumière d'une source stationnaire au-dessus d'eux, et la deuxième est parce que les conditions environnementales sont contrôlées par le cultivateur et non Mère Nature. Les plants d'extérieurs eux, n'y gagnent pas beaucoup, car les cas échéants se vérifient pour eux. Le soleil traverse le ciel, illuminant sur sa route, différentes portions de la plante de son lever à son coucher.
Les cultivateurs en extérieur n'ont pas besoin de manipuler les plantes afin qu'elles se développent en adoptant une structure plate puisque le soleil est infiniment plus puissant que n'importe quelle lampe de culture et qui plus est, il est toujours en mouvement. Tailler les feuilles des plants extérieurs les rend également plus vulnérables aux conditions humides et brise leurs barrières naturelles contres les nuisibles.
De nombreux cultivateurs d'intérieur peuvent, et malheureusement, c'est souvent le cas, réduire le rendement final à cause d'une défoliation faite au mauvais moment et/ou excessive. Tailler les plantules n'est pas conseillé et engendre souvent des plants nains. Scalper les plants matures est encore pire, et au lieu d'obtenir de longues branches de têtes, vous obtiendrez probablement encore moins de fleurs. De même, tailler des plants malades ou en mauvaise santé à n'importe quelle période de la croissance risque de paralyser la croissance plutôt que d'encourager la formation de fleurs denses.
Jour44 Arrosage une fois sur 2 topmax de biobizz
Jour46 arrosage avec de l'eau ph6.3 à laquelle j'ajoute 0.8g par litre d'eau de feeding enhancer greenhouse.
Jour47 léger arrosage.
Jour48 léger arrosage

Likes
8
Share


@Bryankush
Follow
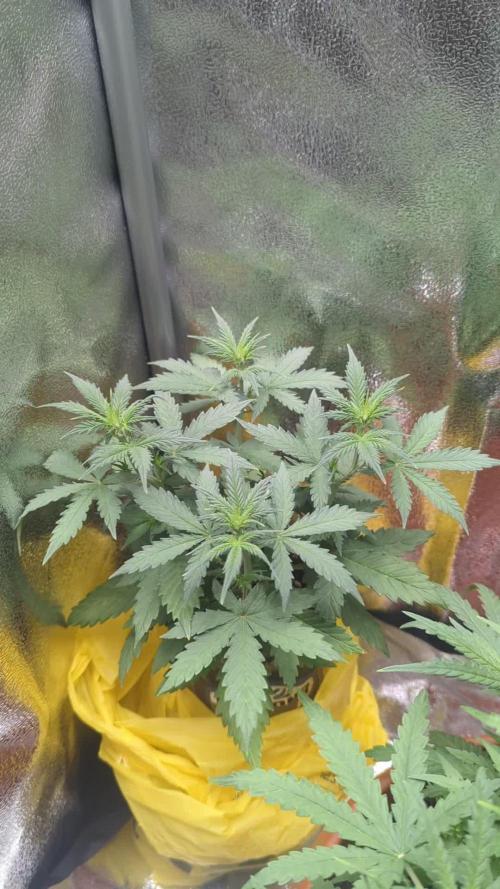
Giorno 1 tra 4 giorni effettuerò il taglio della parte superiore. annaffiata con 2L di acqua
Giorno 5 taglio parte superiore della pianta


Likes
Comments
Share

Likes
9
Share


@SSKNFbyHAZE
Follow
Throughout the week, I give compost tea, and fermented plant juice once each ^^
Hope you guys have a wonderful day today ^^v
*** Please Like, comment & share ***
Highly appreciated -----/-----<@
Likes
4
Share


@Ajgrowsroom
Follow
Every thing is looking great. I didn’t get rid of all the nats but I got most I’ve been bottom watering and been replacing the sticky pad every couple days and it’s been working well. Thank god my wife talked me into these pots at the dollar tree. I can’t wait to see what’s next
Likes
36
Share


@TheGreenLeopard
Follow
I had a close call with the Purple Berry Kush. I was setting up another timer and somehow, left them with no rest for 48 hours. I only noticed when the performance spread between two tents emerged.
Heat - light was too high- they looked wilted and tired
Indica is sensitive to too strong a light right, i saw what looked like the start of nitrogen deficiency, so i popped them into the 20l grow bags. gave them water no nutrient that day. then back in line as normal following day- full nutrient cycle. they,re back now
seedlings for the other diary looking strong and healthy. couple pics, nothing exciting, excuse the nutrient splash on the birthday cake :D- hope everyone is well out there.


Likes
25
Share


@JeyGanesha
Follow
Queste korngarden seeds mi stanno stupendo di giorno in giorno.complimenti..
Cresce a vista d'occhio.ho dovuto pure piegarla in testa sennò troppo alta veniva
Likes
27
Share


@BudXs
Follow
Setting up the garden of my dreams - Scroggernaut 2.0 "either yer scroggin er yer not"
Old grow was a 4x4 closet inside a garage. New grow will be a 8x10 room with a 4x8 and 2x4 in 2020, and adding at least another 4x4 in 2021. My son will be learning how to grow this year in a dedicated 2x4 space, soiless mix, hand water. The additional 4x8 will be in a dutch bucket recirculating system (Thanks to GreenMachine for the advice so far, coming for more). All tables will be custom designed and made by me.
Genetics will be a mix of Original Sensible Seeds (Bruce Banner #3) In house genetics (Slurricane ix) and some FastBuds testers
So far in 5 days I have built the structure, and completed most of the insulating. Wiring before I finish the walls to save some future headaches.
Lighting will be 3 x HLG 550 clones over a 4 x 10 foot area. This gives 36 LED watts per sqft, and the PAR rating on these lights is insane. Should be more than enough light. Thank you to XeenRecoil for the advice on Samsung LM301b and h diodes
Spend so far:
Materials = $405
Lights x 3 = $1650 (good deal - Yuanhui LED on Alibaba - Abby Zheng is the best)
Pump = $30 @ 70% off
Likes
7
Share

@DogDoctorOfficial
Follow
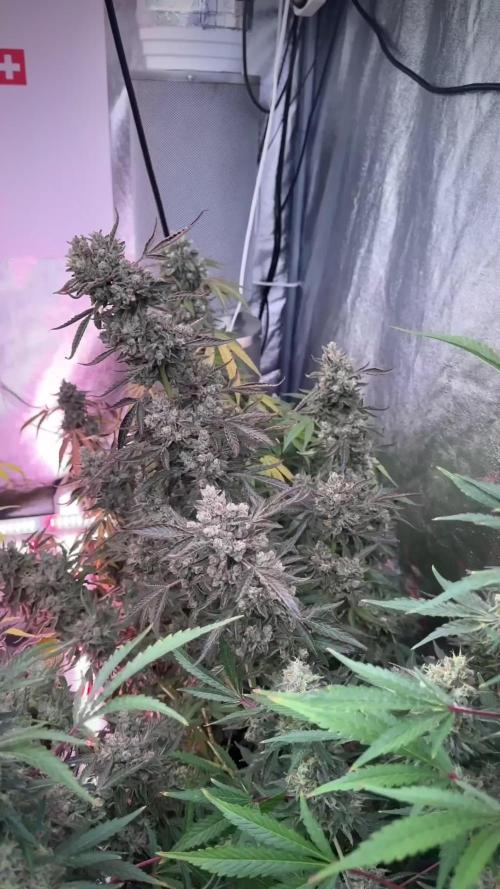
LSD — Week 13 From Seed | 12/12 From Seed, No Veg
Week 13 from seed, and this room is fully alive.
What started as a true 12/12 from seed run—no veg, no transplant games, no extended shaping, just straight into flower from the beginning—has now matured into exactly what this style is meant to show: natural structure, honest expression, and plants allowed to speak for themselves.
From day one, these LSD were asked to do one thing only: grow with intent.
No long vegetative period.
No oversized training sessions.
No forced bush structure.
No attempt to make them become something they were never meant to be.
Just seed, root, stretch, stack, mature.
And that is exactly why this room looks the way it does now.
⸻
Why They Look Like This
One of the most beautiful things about 12/12 from seed is that it reveals plant character early and honestly.
Without a long vegetative period, these plants never had the time—or the pressure—to build wide, heavily manipulated frameworks. Instead, they followed a more natural vertical rhythm: apical dominance stayed intact, main tops remained leading, and side branching developed in support rather than competition.
That is why this room carries that classic spear-shaped structure:
strong central leaders, supporting side branches, elegant vertical stacking, and that clean “natural Christmas tree” silhouette from top to bottom.
For many growers, this shape reads visually “sativa.”
Not because the cultivar suddenly became sativa-dominant, but because the growth pattern expresses more like one under this method: taller posture, longer frame, more pronounced central cola, cleaner lateral support, and less squat horizontal bulk.
Genetically, that is not the full story.
Structurally, though?
That is exactly what they are showing.
And they are showing it beautifully.
⸻
The Room Is Alive
At this stage, the room has changed.
This is no longer a room pushing for biomass.
This is no longer a room chasing stretch.
This is no longer a room trying to build flowers.
This is now a room finishing them.
And there is a difference.
Everything still breathes.
Everything still drinks.
Everything still moves.
But the energy has shifted.
The room feels quieter now. Heavier. More deliberate.
The metabolism has slowed, but it has not stopped. The plants are still active, still processing, still ripening, still making decisions. They are simply no longer spending energy on building mass the way they were before.
Now the focus is density.
Oil.
Maturation.
Expression.
Completion.
And you can see it everywhere.
In the fading leaves.
In the shifting greens.
In the swelling calyx.
In the resin weight.
In the smell.
In the silence.
This room is not slowing down.
It is finishing.
⸻
Why We Are No Longer Feeding Nutrients
At this stage, we are no longer feeding for growth.
The heavy work is done.
The plant has already built the frame.
It has already stacked the flowers.
It has already done the bulk of nutrient-driven expansion.
Now the goal is not to keep pushing.
Now the goal is to let the plant finish clean.
That is why we have moved away from active nutrient feeding and into a much softer finish: water, balance, and enzymes.
Not because the plant needs nothing.
Because the plant needs less.
Late flower is not the moment to keep forcing nitrogen, forcing bulk, or trying to squeeze one more week of artificial push into a plant that is already trying to mature.
At this point, more food often does not mean more flower.
It usually means more delay.
So now we reduce input, reduce excess, reduce waste, and let the plant focus on what matters most:
ripening what it already built.
⸻
Why Enzymes Still Matter
This late, enzymes are not here to “feed the plant.”
They are here to support the system around it.
That matters.
Enzymes help break down dead root material, leftover organic residue, and unused matter in the medium into simpler compounds the microbial life can continue processing.
That keeps the rhizosphere cleaner.
More stable.
More oxygenated.
Less stagnant.
In simple terms: enzymes help the root zone age gracefully.
And in late flower, that matters more than force-feeding ever will.
Especially in a run like this, where the medium is still alive, still active, and still worth preserving after harvest.
Because the goal is not just to finish the plant well.
The goal is to finish the soil well too.
What remains after harvest still matters.
That living medium still has value.
That biology still has work to do.
That soil still has another life ahead of it.
So we are not just finishing flowers.
We are finishing the cycle properly.
⸻
Trichomes, Calyx, and What Maturity Actually Looks Like
This is the stage where people often mistake “more pistils” for “more time” or “fading leaves” for “finished.”
Neither one tells the full story on its own.
Late flower maturity is not judged by one signal.
It is judged by the conversation between all of them.
And right now, that conversation is getting very interesting.
The calyx are swelling.
The flowers are tightening.
The resin heads are becoming heavier.
The pistils are changing, receding, darkening, and curling back.
The leaves are beginning to fade with purpose.
That does not mean they are done.
It means they are transitioning.
This is the window where the plant stops looking like it is building flowers and starts looking like it is sealing them.
That is a very different phase.
Calyx swelling means the flower is maturing inward.
Pistil change means reproductive signaling is slowing.
Trichome development means chemistry is shifting.
Fade means mobile reserves are being reallocated.
None of these alone call harvest.
Together, they begin the conversation.
And that conversation is clearly underway now.
⸻
PPFD, Light, and the Final Adjustment
This late, the job of light changes too.
Earlier, high PPFD was there to drive growth, stacking, and metabolic demand.
Now that demand is lower.
So light intensity comes down with it.
Not dramatically.
Not suddenly.
Just intelligently.
As plants approach the end, reducing PPFD helps lower unnecessary stress, reduce excess transpiration, and let the plant focus on ripening instead of defending itself from intensity it no longer needs.
Late flower is not about maximum push.
It is about controlled finish.
And just like nutrients, light now becomes less about force and more about guidance.
⸻
What to Expect Next
From here, do not expect explosive growth.
That part is over.
Do not expect dramatic new stacking.
Do not expect sudden weight jumps.
Do not expect fresh white explosions everywhere.
What to expect now is subtler.
Denser flowers.
Heavier resin.
Slower drinking.
More fade.
More aroma.
Less urgency.
More definition.
The next stage is not louder.
It is deeper.
This is where the plant sharpens.
This is where the room gets quieter.
This is where harvest starts introducing itself before it arrives.
Whether this is the final update before chop or simply the one that stands right beside it, one thing is certain:
we are close now.
And they know it.
⸻
Final Thoughts
This room has been a pleasure to walk through.
To the team at Zamnesia for the genetics.
To Plagron for helping feed the cycle.
To GrowDiaries for the platform.
To the old heads who have been here since day one.
To the new eyes just arriving.
To the growers, the learners, the lovers, the skeptics, the silent ones watching, the ones who support loudly, and the ones who just happened to land here by accident—
thank you.
For the time.
For the energy.
For the presence.
To everyone watching this room evolve in real time:
thank you for walking it with us.
More soon.📡 DELETED @ 1K Please stay tuned.we never quit https://www.youtube.com/@TheDogDoctorOfficial NEW 🙏 Thank you for your patience and continued support.
FOR DISCOUNT CODES AND MORE JUST FOLLOW THE LINK https://website.beacons.ai/dogdoctorofficial
📲 Don’t forget to Subscribe and follow me on Instagram and YouTube @DogDoctorOfficial for exclusive content, real-time updates, and behind-the-scenes magic. We’ve got so much more coming, including transplanting and all the amazing techniques that go along with it. You won’t want to miss it.
GrowDiaries Journal: https://growdiaries.com/grower/dogdoctorofficial
Instagram: https://www.instagram.com/dogdoctorofficial/
YouTube: https://www.youtube.com/@dogdoctorofficial Deleted by Youtube - https://www.youtube.com/@TheDogDoctorOfficial NEW
Vimeo : https://vimeo.com/dogdoctorofficial Under construction stay tuned ⸻
Explore the Gear that Powers My Grow
If you’re curious about the tech I’m using, check out these links:
🔆 Lighting & Environmental Control
• Future of Grow — Advanced LED lighting technology
https://www.futureofgrow.com/
DISCOUNT CODE: DOG20
• Lumiflora — Under-canopy LED lighting
https://lumiflorade.com/
• TrollMaster — Environmental controllers and automation gear (past collaboration)
⸻
Genetics
• Zamnesia Seeds — Genetics used in this project
https://www.zamnesia.com/
⸻
🌱 Soil, Substrates, Boosters & Root Support
• Plagron — Substrates, bio mixes, and supportive products
https://plagron.com/en/
⸻
🎒 Storage, Curing & Preservation
• Grove Bags — Curing and storage solutions
https://grovebags.com/
⸻
📸 Photography Equipment & Tools
(Not sponsors, but part of my creative toolkit)
• Sony A6700
• Sony full-frame macro lens + few more
• Stacking photography workflow - learning
• iPhone (for behind-the-scenes shots)
We’ve got much more coming as we move through the grow cycles. Trust me, you won’t want to miss the next steps, let’s push the boundaries of indoor horticulture together!
As always, this is shared for educational purposes, aiming to spread understanding and appreciation for this plant. Let’s celebrate it responsibly and continue to learn and grow together.
With true love comes happiness. Always believe in yourself, and always do things expecting nothing and with an open heart. Be a giver, and the universe will give back in ways you could never imagine.
💚 Growers love to all 💚
📸 P.S. – The Eye Behind the Lens
All photos in this diary (for now — except for the ones showing the camera, which I took with an iPhone) are taken with a Sony A6700 paired with a Sony full-frame macro lens and a few more.
Photography is part of the story — it’s how we share the fine textures, the glow, and the quiet details that words can’t always capture.
I’ve also started experimenting with photo stacking — a technique where multiple images, each taken at a slightly different focus point, are layered together to create one perfectly sharp image from front to back.
It’s not digital enhancement or AI; it’s pure photography — a way to reveal the plant’s beauty in microscopic depth, from trichome to petal.
You’ll even see a few shots of "ghost me" capturing the shots — camera, lens, setup — because every grow deserves not just to be cultivated, but documented like art.
FOR DISCOUNT CODES AND MORE JUST FOLLOW THE LINK https://website.beacons.ai/dogdoctorofficial
NEW DISCORD - Official Server Invite Link : https://discord.gg/ksjAkA5T74
Likes
28
Share


@MadeInGermany
Follow
Hey everyone ☺️
Both phenotypes are great 👍.
The leaves look like a nice sativa 😍.
Because of training I am still thinking about it because for some time now I have wanted to do one round completely without topping etc.
I will decide that in the next 1-3 weeks 😀.
Both were poured this week with 1.3 l.
I'm really excited about the coming week and until then I wish you all a lot of fun with the update 😃.
Stay healthy and let it grow 🍀🍀
You can buy this Strain at :
https://www.royalqueenseeds.de/feminisierte-hanfsamen/115-amnesia-haze.html
Type:
Amnesia Haze
☝️🏼
Genetics:
Original Amnesia Haze
👍
Vega lamp:
2 x Todogrow Led
Quantum Board 100 W
💡
Bloom Lamp :
2 x Todogrow Led
Cxb 3590 COB 3500 K 205W
💡💡☝️🏼
Soil :
Canna Coco Professional +
☝️🏼
Fertilizer:
Green House Powder Feeding
☝️🏼🌱
Water:
Osmosis water mixed with normal water (24 hours stale that the chlorine evaporates) to 0.2 EC. Add Cal / Mag to 0.4 Ec Ph with Organic Ph - to 5.5 - 5.8 .
