Likes
Comments
Share
@TOMI08
Follow
120.nap...de lehet hogy több😀😀 A lányok szépen meg nyúltak Volt egy kis tápanyag problémám de már jól vannak Elfelejtettem a rovarok ellen a múlthéten fújni és a kender moly is be fúrt a bubba slushba A jövő héten puskaport akarok adni a special kushnak
Likes
2
Share
@KUNST
Follow
Week F1: 28/03/2025 – 03/04/2025 28/03 – Light switch completed. 1L nutes. Moderate defoliation to expose bud sites. 30/03 – 1L nutes. Topped 4 main stems. Minor defoliation. 01/04 – 1L nutes. LST via net. Heavy stretching observed. 03/04 – 2L nutes. Upping water schedule to 1L every other day. I've included a video for this week, cannot wait to see how the flowering process looks!
Likes
10
Share
Nothing has realy happened since I cropped the royal cream....It is just hanging. Decided to do a dry trim so that it takes longer to dry due to the fact I am having to just use my cupboard so the humidity is pretty low. Leaving the leaves on just means It takes longer to dry. I am going to crop the Easy Bud in the next few days when the mood takes me. I had 4 left over R. Cream seeds left over because I informed them that. bought 2x 3 packs and only 2 seeds germinated so they sent me another packet which is REALLY good of them and the sort of thing that means I would definitely use Royal Queen Seeds again, for sure! The trich's are basically all cloudy with a few clear. I cant see any amber but my loupe is a ridiculously cheap Chinese piece of crap. I will invest in a microscope camera so I can hook it up to my phone or MacBook. It is way too hard to keep everything steady In order to see what is popping with my sexy trichomes. Obviously feeding has stopped for about a week now. I forgot to change it In the diary last week so will try and correct that now.. I know it is not strictly relevant but I had to go somewhere earlier and took a video because I was able o walk in the middle of a main road in my town which Is usually packed full of cars, especially at the time I was walking on it. It is a time that makes me even more glad I grow my own. I really need to buy the bigger tent, lights and re-locate to the bigger, more subtle cupboard (not the one i am using to dry my weed in the video I posted) and then I will be able to effectively ScrOG the 2 or 3 plants I have, in order to maximise yield so I can be totally self sufficient with regards to my cannabis medicine. UPDATE - MONDAY I just realised I have made a proper idiots mistake an missed out on some much tastier buds because of it. OK, so I got paid today, so I though I would treat myself to some of them cheap COB chips I used for my last grow because hey were super cheap and actually really effective considering the price. I ordered 2x 100w 6000k veg spectrum chips with a solderless connection for my power. I also ordered one of these heatsink + reflector. https://www.amazon.co.uk/gp/product/B01MT824NP/ref=ppx_yo_dt_b_asin_title_o01_s00?ie=UTF8&psc=1 My thinking was that I have a spare heatsink here that the old citizen CLU-048 is attached to so I was going to fit one of the chips into that and the other into the heatsink and fan I bought. This hought process lead me to go ad retrieve the old citizen LED and I thought I would try it. Still didn't work, then suddenly I thought it could be a simple blown fuse so I changed it aaaannnnd.....still doesn't work. doh! I started to remove the COB holder and COB from the heatsink (it was just glued to it using thermal compound) and when I laid it on the table I decided to test the driver without the COB holder on the tiny off chance it might work...nope I then realised maybe I got the + and - the wrong way round, tried again and boom works perfectly. The connection from the holder to the cob had bent slightly off contact. Really annoying that this whole time I could have doubled my photons to the plant, however, really nice that I don't have to spend a load more money on lighting in order to upgrade into the new room. So all I have to do now is spend money on a pre-drilled heatsink and a new metal COB holder for the citizen.
Likes
3
Share
@Rangaku
Follow
Orange cookies is a beast , wow she’s huge taking up half the tent and striding into stretch I’m gonna have to lollipop this one pretty hard or I’ll run out of room this one outside would be a behemoth. Love these dutchfem specials, very solid
Likes
5
Share
Annnnnnndddddddd we're done. Eight weeks in flower and I might have let her go too far. Many amber trichomes, but that's mainly on the tops of the upper buds (tops of the tops, hehe).
Likes
21
Share
@darb35
Follow
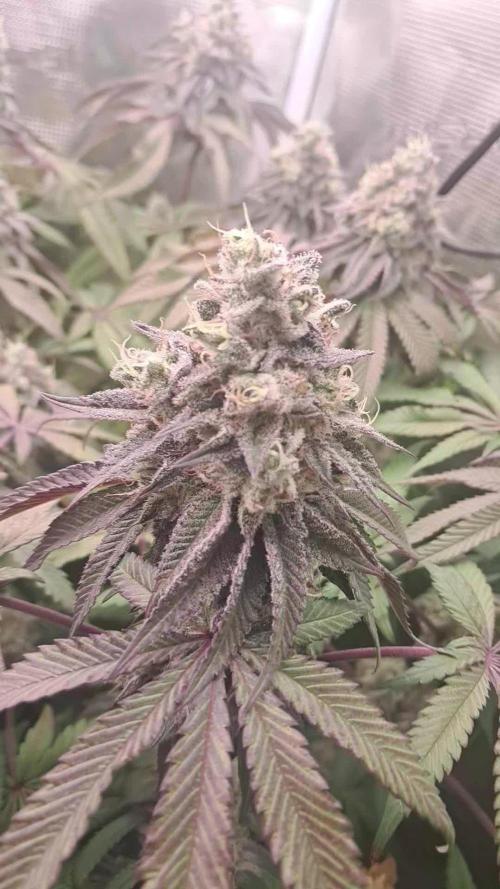
Day 36 - the girls seem to be happy, and are growing a bit different One of them is flowring a bit faster and also starting to turn purple, the other is a bit slower but looks much more healthy.
Likes
5
Share
@Pechu420
Follow
The buds are fat, making the branches lose strength, they have considerable resin. It smells like tropical mango with a stench in the background. It is a long-lasting sativa but I stopped providing magnesium and other nutrients before so as not to affect the flavor after harvesting, it could last a few more weeks, but I believe it will be harvested soon. If it gets weak, I will do some extraction. I stoeppd feeding at all now. For a pot of just 3.7 liters (1 gal), it is very well evolved and grown.
Likes
12
Share
@Crimm
Follow
3 of the 4 plants didn't do much stretching at all. I'm excited to compare the harvest between all of them too see which yields more. The one plant that did stretch seems like it will take a little bit longer than the others to be ready, but I am not sure. Had I known they wouldn't have stretched much I would have considered some light defoliation to increase light pen but this will be a nice experiment. As of 11/23 the plants have stopped doing any vertical growing and I can tell the buds are starting to fatten up a bit and getting frosty. I am leaving the tent open now 24/7 to help control the humidity, trade-off is I can smell the plants from my office two stories up. The sent is very fresh and fruity so it's not so bad. We will see how my family feels when they visit for Thanksgiving 😆
Likes
12
Share
Hi growmies😉 Here we are day 91/42 after flip of zake! End of week 6 ... They are fatting up fat nugs everywhere ..really strong smell... We can say there are 2 phenos kush mints... and the other is permanent marker pheno super sweet chemical pungent 👌.. really frosty.. I ve notice last week the plant are getting dark green ... this new bloom nuts from biobizz with juju marley has to much N then the other that i used to use.. so im not using anymore ...one week more with bud candy and overdrive and we start flushing until the end ... See u next week...
Likes
6
Share
Week 3 Update — Transplant & Early Veg Development Date: 11/12–11/17 Strain: Fast Diesel (IZI.Farm) Medium: Fox Farm Happy Frog + Gaia Green Amendments Light: Mammoth Nova Sun 950W Grower: Stoney Stark / Little Lilly Farms Light & Environment Fixture: Mammoth Nova Sun Series 950W Settings: 50% total | 100% cool | 40% warm | 0% IR | 0% UV Previous PPFD: ~300 µmol/m²/s Light Adjustment (11/17): Lowered 6", increasing canopy PPFD to ~435 µmol/m²/s Temperature: 83°F Humidity: lowered to 65% RH Three phenos continue showing strong vegetative growth, while one runt remains smaller but healthy with no signs of stress or deficiency. A minor leaf-curling issue caused by airflow has been corrected. Considering relocating the driver outside the tent to help mitigate heat as the grow transitions toward flower. Transplant Details (11/12 — Day 21) All four plants were transplanted into 5-gallon pots. Soil Blend & Purpose Gaia Green 2-8-4: Supports root development and provides early phosphorus and potassium for the transition into flower. Gaia Green 4-4-4: Balanced nutrient source maintaining steady vegetative growth. Worm Castings (20%): Supplies organic nitrogen, microbial activity, and improved soil moisture retention. Glacial Rock Dust: Provides trace minerals and silica for stronger structure. Mykos: Mycorrhizae applied to the root ball to promote efficient nutrient uptake and early root expansion. Watering & Nutrient Breakdown Initial Watering (2 gal RO) ½ gallon per plant, pH 6.4 Silicium (1 ml)-Improves cell wall strength and plant stress resistance. Helps stabilize growth during and after transplant. CalMag (4 ml)-Replaces the calcium and magnesium absent in RO water and supports new growth development. Ruby Fulvic (10 ml)-Improves nutrient movement, chelation, and trace mineral uptake in the freshly amended soil. Pure Zym (8 ml)-Breaks down organic material and dead roots, converting them into available nutrients and keeping the rhizosphere clean. Rhyzium (2 ml)-Promotes rapid root establishment by adding beneficial microbes. Recharge (1 tsp)-Provides a strong microbial inoculation that enhances nutrient cycling and soil vitality. Feeding Log 11/15 — Light Microbial Feed 1 gal RO | pH 6.4 | 250 ppm Silicium (1 ml): Continued cell-wall support. CalMag (2 ml): Maintains Ca/Mg levels during early veg. Ruby Fulvic (5 ml): Increases nutrient uptake efficiency. Pure Zym (4 ml): Supports enzymatic root-zone activity. Photosynthesis Plus (6 ml): Adds beneficial microbes that enhance carbon metabolism and overall plant vitality. This mild feed kept the microbial community active while roots colonized the pot. 11/17 — Early Veg Support Feed 2 gal RO (½ gal each) | pH 6.4 | 250 ppm Silicium (1 ml): Helps support structural integrity as light intensity increases. CalMag (4 ml): Ensures steady Ca/Mg availability under higher PPFD conditions. Ruby Fulvic (10 ml): Maximizes micronutrient uptake and transport. Rhyzium (2 ml): Continues promoting root spread throughout the 5-gallon pots. Growth Notes & Plans All four plants have adjusted well to their new containers. Three phenos are vigorous; one remains a smaller but healthy runt. Increased PPFD from 300 to 435 has improved leaf posture, node spacing, and overall vegetative growth. Humidity reduced to 65% to match increasing canopy density and airflow needs. I tied down branches on 3 of the 4 plants on 11/20 to open their structure and prepare them for the upcoming stretch. The smallest pheno—the runt—was left untouched to continue growing vertically. It’s still healthy, just not meeting the overall standard of the garden. I’m giving it one more week to show improvement before deciding whether it stays in the run or gets culled. Flip Decision After monitoring growth, root establishment, and canopy development, the decision has been made to flip to flower on 11/26. This will give the plants enough time to fully settle into their 5-gallon pots while still maintaining a 4–5 week vegetative cycle.
Likes
6
Share
Day 32-26/08/22 these 3 baby’s are a dream growing good and healthy will start giving the bloom nutes this week can’t wait to smoke them 😂 still got about 4 weeks to go!!!
Likes
25
Share
Jour42 defolliation and LST Jour45 defolliation Jour47 arrosage avec de l'eau ph6.3 à laquelle j'ajoute 1ml par litre d'eau de topmax biobizz La plante entre maintenant en floraison c'est donc le début du stretch Explication en anglais (Stretch explanations more) EXPOSURE TO LIGHT One of the main culprits in abnormal stretching of cannabis plants is the lack of light. Plants that are too far from an adequate light source will respond by accelerating stem growth in order to get closer to the lamp themselves. Especially when there are many other plants. A lack of lighting can easily cause overcrowding in a growing chamber, reducing the steady progression of your crop and the distance ratio between your bulbs and your plants. To address this problem, be sure to provide enough light to your plants to prevent stem growth. At the same time, you should not position your lights too close to your plants either since this would also result in an over-stretching of the stems and in some cases, the loss of your crop. In addition to the distance between the light source and the plant, the type of light you will use also affects the size of the stretching of your crop. The orange and red lights encourage stretching and result in thinner, larger stems. And conversely, blue light stimulates a growth of thicker stems and a smaller size. When a species is ready to enter the vegetative phase and undergo its most drastic stretching period, metal halide lamps can be used to deter far too long stems. THE HEAT Heat is another essential element that can determine the stretch size of your plants during vegetation. Temperatures above 27 degrees push the stems to lengthen more and more and will propel the potential of sativas to push as high as possible. Heat lamps that are positioned too close to plants create an intolerable environment that will grow large, soft plants that will potentially wobble until they fall and lose flowers in its fall. OTHER CAUSES OF STRETCHING There are multiple variables that can lead to the stretching of plants beyond what could normally be expected of the plant. Environmental stressors resulting from transplantation (when a plant passes from one pot to another) can cause the plant to return to shock. This will eventually trigger a reaction causing a stretch. Cannabis plants that are not grown in decent conditions or do not receive enough nutrients will respond in a variety of ways and this includes stretching. Crops that are not spaced far enough apart are likely to stretch to sting the light to other plants. Due to extreme proximity, the plants will fight among themselves to reach the light, forcing them to expand as much as possible throughout the crop. HOW TO CONTROL STRETCHING DURING FLOWERING Stretching during flowering, you guessed it, takes place when you move your plants from the vegetation stage to the flowering stage. This is a completely normal reaction, as your plants are preparing to bear the weight of their heads. Stretching of a plant at the beginning of flowering varies widely; some plants can double in height while others grow only a few centimetres. There are, however, two main variables that can give you at least an idea of how your plants are stretching during flowering, and how much. Here are these two variables: Variety: Genetics has the greatest impact on the size of your plant. In general, sativa varieties stretch more than indicas and tend to develop long, slender stems. Light: Some lights, such as HPS, are more likely to encourage stretching. In addition, great distances between your canopy and your lights will cause the plants to stretch as they try to get closer to the light source. Stretching during flowering usually lasts the first two weeks of the phase. To minimize stretching, keep your lights between 10 (for CFL) and 30 centimetres (for HID) of your canopy. Finally, choose indica varieties if you have a smaller growing space. HOW TO AVOID STRETCHING In many cases, you can expect your cannabis plants to stretch during the flowering phase. Keeping that in mind helps to make a plan in case your species ends up growing much more than you could have imagined. If the information is available, get information on the standard size of your species and compare it to the size of your growing space taking into account the necessary distances between the bulbs and the plants. TRAFFIC While outdoor crop operations benefit from natural air to naturally limit stretching, indoor crops must assume the maintenance of air circulation within a confined space. Basic ventilation is enough to help the cannabis stems strengthen and become thicker rather than too high. In this way, the plants continue to grow vigorously without reaching heights and at the same time, your tolerance ceiling. MANUAL INTERVENTION For growers who want to get their hands dirty, there are physical procedures that can be done to reduce stretching. Similar to the natural effect that the wind has on cannabis plants, manually bending the leaves and stems will cause tiny cracks in the plant's tissues that will cause the plant to focus on regenerating its wounds instead of its vertical growth. THE TOPPING Topping is a form of manual intervention on cannabis to influence its performance, shape or size. In essence, topping is a process in which a new node is cut, growing from the plant to reduce its size and create a "v"-shaped notch that will eventually form two heads. Topping may be an effective measure to combat stretching, but it is important not to do so when the flowering phase begins. In most cases, an abnormal stretch of cannabis plants will not completely destroy your crop. In fact, stretching can indeed help increase your performance. For growers with a growing operation large enough to contain tall plants, stretching can increase the total yield of a species with more vertical space for head formation. In both cases, stretching can easily be planned in advance and there are multiple solutions to help you with this problem which is all too common. May the force be with you 💪
Likes
Comments
Share
Processing
Likes
8
Share
Here's the outdoor update on the SFV, still standing tall at 6 feet and 4 inches at week 12 with the cali days stretched from 12 hr flowering to still 14hr sunlight days she's still going through some late blooming but no deficiencys the leaves 🍃 nor on the stems, there looking great and green. 25 gal pot I gave her 4 gallons of fresh water must needed on these long hot days in cali. If my anyone see anything that would help with this grow it would be greatly appreciated. Have a great day growing today and everyday. 👨‍🌾
Likes
4
Share
@Milky_way
Follow
Start week.10 blooming Full Green Sensation now! And will looking…
Likes
20
Share
@Rob96
Follow
Still doing really well this one, buds look amazing and the smell is really really pungent. Really pleased with the topping on this one, tops all over and all really good strong tops. Around 3 weeks left to go so last week for nutes and will be flushing at end of this week, getting ready for harvest now really really excited to see this once all done.
Likes
9
Share
Day 1 of week 4. Decided to do some LST on her. First time using dry amendments for Nutes and I must say I definitely recommend. Added them to the soil before I planted her and she’s shown no signs of deficiency.
Likes
24
Share
14 day dry | Curing in Grove bags, filled 7 QP bags & got 56g of keif out the trim bin from only 2 plants! More pictures coming! STAY FROSTY GROWMIES
Processing
Likes
5
Share
@Ensign420
Follow
Week 02 Introduction This week has been a bit of a struggle. Had my first experience dealing with slime and brown algae. But I think adding enzymes and increasing the beneficial bacteria helped to fix the issue. Also experienced nutrient burn for the first time. My nutrient solution strength got as high as 671 PPMs. So backed it down to about 430 PPMs during the end-of-week reservoir change. Also cut Hydroguard (expired?), CaliMagic, and Superthrive from this grow. Now she's still stunted, but is starting to recover. Hopefully... [START OF WEEK 02] Day 01 - Monday - 08/10/20 - Total Days: 008 ----------------------------------- - [0830]: Still looks a bit yellow. But getting larger! --- Solution strength was at 248 PPMs. --- Just topped off with a bit of distilled water --- PH went up to 6.1 so PH'd down to 5.8 --- Ran the top feed for a bit to wet the hydroton. - [2130]: She's looking even more yellow now. --- Even the new leaves are really yellow. --- Decided to add more base nutes. --- Added 4ml of Sensi A --- Added 4ml of Sensi B --- Now at about --- Solution Strength went up to 304 PPM. --- PH was at 6, --- Also raised the water level a bit more. --- I really hope it's a nutrient deficiency and not an over-watering issue. --- Please live! Day 02 - Tuesday - 08/11/20 - Total Days: 009 ----------------------------------- - [0830]: Looking less droopy. But still yellow. --- Decided to do a reservoir change. --- 4.5gal of distilled water --- 8ml of Sensi Grow A --- 8ml of Sensi Grow B --- 8ml of Voodoo Juice --- 4ml of B-52 --- 4ml of CaliMagic --- 4ml of Hydroguard --- 4 drops of Superthrive --- PH'd down to 5.8 --- Solution strength: 302 PPM --- Since I didn't want to risk over-watering the rockwool, I did not to do a top feed, may do one tonight after the sleep cycle (lights are still set to go off at 10am and back on at 4pm). --- As I was doing a reservoir change, I noticed that the tubes and bucket were a bit slimy. Didn't really stink or anything. Is this normal? Maybe due to the Hydroguard and Voodoo Juice? --- I hope she gets better soon! - [2215]: Getting larger! But still yellow. --- Also can see a root growing through the net pot! Tiny little thing but it's there! Will have to start dropping water once more appear. --- After looking over a few DWC diaries using AN nutes, seems like my solution strength is still too low. Most around this stage average around 500 PPMs with about 4ml per gallon. --- Top fed for a minute to wet the top of the hydroton. --- Solution strength went down to 263 PPM. --- Added 8ml more of Sensi A --- Added 8ml more of Sensi B --- Now base nutes are at 16ml for 4.5 gal of water. --- PPMs went up to 411. --- Still lower than 500 PPMs, but that's okay. --- PH was at 6. Not sure if I should adjust PH using AN nutes. So going to not ajdust unless PH goes above 6.1. Day 03 - Wednesday - 08/12/20 - Total Days: 010 ----------------------------------- - [0830]: Looks like more root growth! --- She still looks yellow. But leaves are perky. --- PH was at 6.2 so lowered down to 5.8. --- Solution strength was at 394 PPMs --- Since roots are still growing, I decide to lower the water level a bit. Now water level is a bit below the net pot. - [2200]: Root is getting longer! --- Slime is returning. Not sure why. --- Solution strength: 357 PPMs --- PH: 6.1 --- Decided to add an enzyme along with more beneficial bacteria to hopefully cure the slime. --- Added 16ml of Sensizym --- Added 5ml of Hydroguard --- Added 8ml of Voodoo Juice --- New solution strength: 430 PPMs --- New PH: 6.1 --- Top fed for a minute. --- This slimy residue is really freaking me out! I hope the added enzymes will help eliminate the slime. --- Going to do a full reservoir sterilization/nutrient change over the weekend. Please survive until then girl! Day 04 - Thursday - 08/13/20 - Total Days: 011 ----------------------------------- - [0930]: I think the enzymes worked! There is little to no slime now! --- Although I think the root was also dissolved in the process. It's now just a little stub sticking just below the net pot. The enzyme is also suppose to dissolved dead roots too but guess that root was too weak? Not sure what happened there. But I think the slime is cured! --- Solution strength went down to 395 PPMs. Decided to add more base nutrients. --- Added 8ml of Sensi A --- Added 8ml of Sensi B --- Added 4ml of B-52 --- Solution strength went up to 598 PPMs. --- PH was at 6.1 --- As long as the PH is between 5.5 and 6.3, I'm not going to use PH Up or Down. But still will monitor PH levels. - [1715]: Checked up on her after her nap and shes looking alive but stunted. But no slime! --- Decided to add some sugars to help maintain the enzymes and beneficial bacteria. --- Solution strength was at 587 PPMs. --- PH was at 6.2 --- Added 8ml of Bud Candy --- Solution strength went up to 671 PPMs. --- PH also went up to 6.3 --- Lowered water level a bit to hopefully promote more root growth. --- Top fed for a minute. --- She is getting bigger, but still looks yellow. Day 05 - Friday - 08/14/20 - Total Days: 012 ----------------------------------- - [0915]: Leaves look a little burnt on the tips. Still no slime. --- Going to back off on the PPMs to hopefully fix the nutrient toxicity. --- Solution strength was at 632 PPMs --- PH was at 6.3 --- Added/Removed water until PPMs were at 536. --- PH was still at 6.3 --- Raised water up a bit, then top fed for a minute. - [2200]: Looking better. Still yellow though. --- Solution strength: 514 PPMs --- PH: 6.5 --- Added PH down. --- New solution strength: 518 PPMs --- New PH: 5.2 --- PH was kind of high. So decided to PH down. Had to use quite a bit to bring it down. But eventually got it to drop down to 5.3. A little low, but so far, the PH has always gone up so wanted to start it really low. --- Ran the top feed for a minute to re-saturate the top of the hydroton. Day 06 - Saturday - 08/15/20 - Total Days: 013 ----------------------------------- - [0830]: She looks stunted. leaves are still yellow. --- Solution strength: 514 PPMs --- PH: 5.6 --- Top fed for a minute. --- Not sure what to do at this point. Going to do another reservoir change soon. Hoping she lives until then. - [2145]: Looking pretty much the same. --- A bit of slime has returned. Since I've been diluting the nutrient solution, the enzyme ratio has dropped. So I guess this is expected. --- Also noticed that slime build up was on the air-stones. Never really checked the stones so not sure how long that has been there. Looks brown too, which can't be good. --- Going to do an H202 sterilization of the system (minus the net pot) tomorrow so did not add anything. --- Lowered the water level to below the net pot. --- Then top fed for a minute. Day 07 - Sunday - 08/16/20 - Total Days: 014 ----------------------------------- - [0900]: STERILIZATION DAY! --- Decided to skip today's night cycle for a deep clean. --- I'm hoping that skipping a night cycle won't be too stressful. --- Temporarily moved her to a new bucket. --- Used about a half of gallon of straight distilled water to flush out the net pot. --- Drained the system and wiped up all the brown sludge. Also removed the air stones and cleaned up all the goo. --- Filled the system with 2 gallons of distilled water and at least 30ml of food grade hydrogen peroxide (35% strength). --- Yea its a lot, but since I'm not going to sterilize the system overnight, I went with a really high doseage. Basically I kept adding until I started to see little bubbles start to form. --- Then I ran the water pump. - [0915]: Boiled the air stones in tap water for about 10 min. Then reconnected them to the airlines. --- I let the air stones and hose soak in the sterilization solution for about 5 minutes so the peroxide can absorb into the stones. Then ran the air stone to help mix and agitate the solution. --- Occasionally, I'd repeat the process of turning the air pump off for a few minutes to let the stones soak. - [1000]: Covered the top two row of holes of the net pot with some aluminum tape. Hopefully this solves the light leaking in through the hydroton. - [1200]: Used an old toothbrush and scrubbed the pump clean. Then drained the system. --- Refilled with more distilled water and peroxide. Again added a lot. --- Ran system again to sterilize even more. - [1530]: Drained the system and refilled with distilled water to rinse. --- Ran the system for a few minutes, then drained and rinsed again. --- Did this a few more times over about an hour. - [1630]: Added 4 gallons of fresh distilled water. --- Added 15ml Sensi Grow A --- Added 15ml Sensi Grow B --- Added 12ml of B-52 --- Added 16ml of Voodoo Juice --- Added 16ml Sensizym --- Solution strength was at 430 PPMs --- PH was at 5.6 --- I was going to add Hydroguard, but I think the bottle is expired. Since 2017 or 2018!? I think Hydroguard is good for up to 2 years from the date on the bottle or 6 months after opening. So not going to use from now on. I wonder if this could have contributed to the slime build up. --- Also removed the CaliMagic and Superthrive too. Going to only use AN products to eliminate the chance of incompatible nutrients. --- Placed her back in the bucket and top fed for a minute. --- Here's hoping for the best. Going to let it ride until morning! Please feel better! [END OF WEEK 02]
Likes
13
Share
@pltnm9
Follow
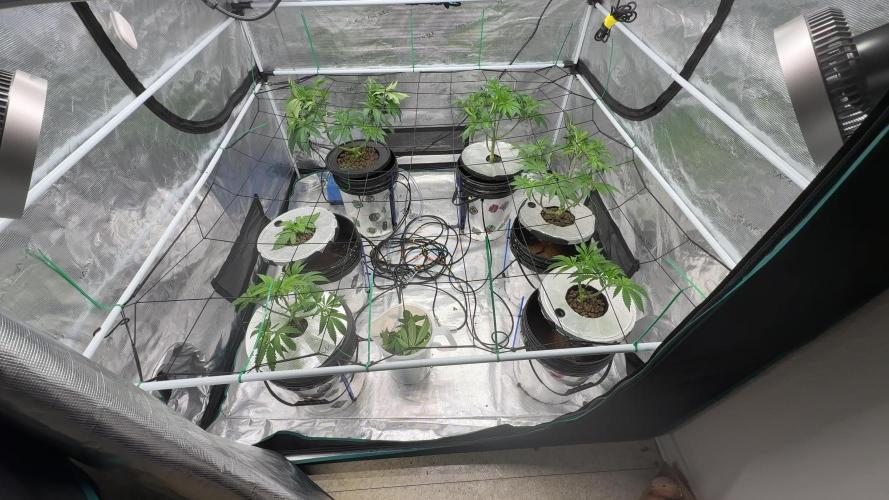
Week 7 started nice and easy. Added a new pump to my catch basin for water extraction. Plants are still stretching and flowers are stacking. I’m going to have to rearrange the tent a little to give these girls some space. The smell is pure lemons I can’t wait! I also realized I have 5 fans in my tent to control temp and humidity…hahaha